In this tutorial, we’re going to use Toontrack’s EZDrummer to add an organic flair to your house tracks.
Anyone can program drums. But there’s a skill to programming and creating a human feel. In this tutorial, we’re going to show you some options using Toontrack’s EZDrummer on how to do it.
Don’t let the old joke fool you. What do you call someone who hangs out with musicians? … A drummer…
It’s far, far from the truth! Get the drums right and the rest should fall into place. Groove is king and EZDrummer is well set up to provide royal rhythm.
We’ll take a rather boring and unfinished groove:
…and breathe life into it, giving us a really organic feel and a loose, groovy pocket:
In order to elevate this pedestrian drum-machine feeling loop, we’ll use four simple techniques.
Let’s get straight into it and, as ever, click on any image to enlarge!
Step 1: Steal a Drummer’s Groove
Maybe the easiest way to add some vibe is to change the actual groove of your drum sequence. In our session, we start with a straightforward beat in Ableton Live’s Drum Rack.
Here’s how it sounds:
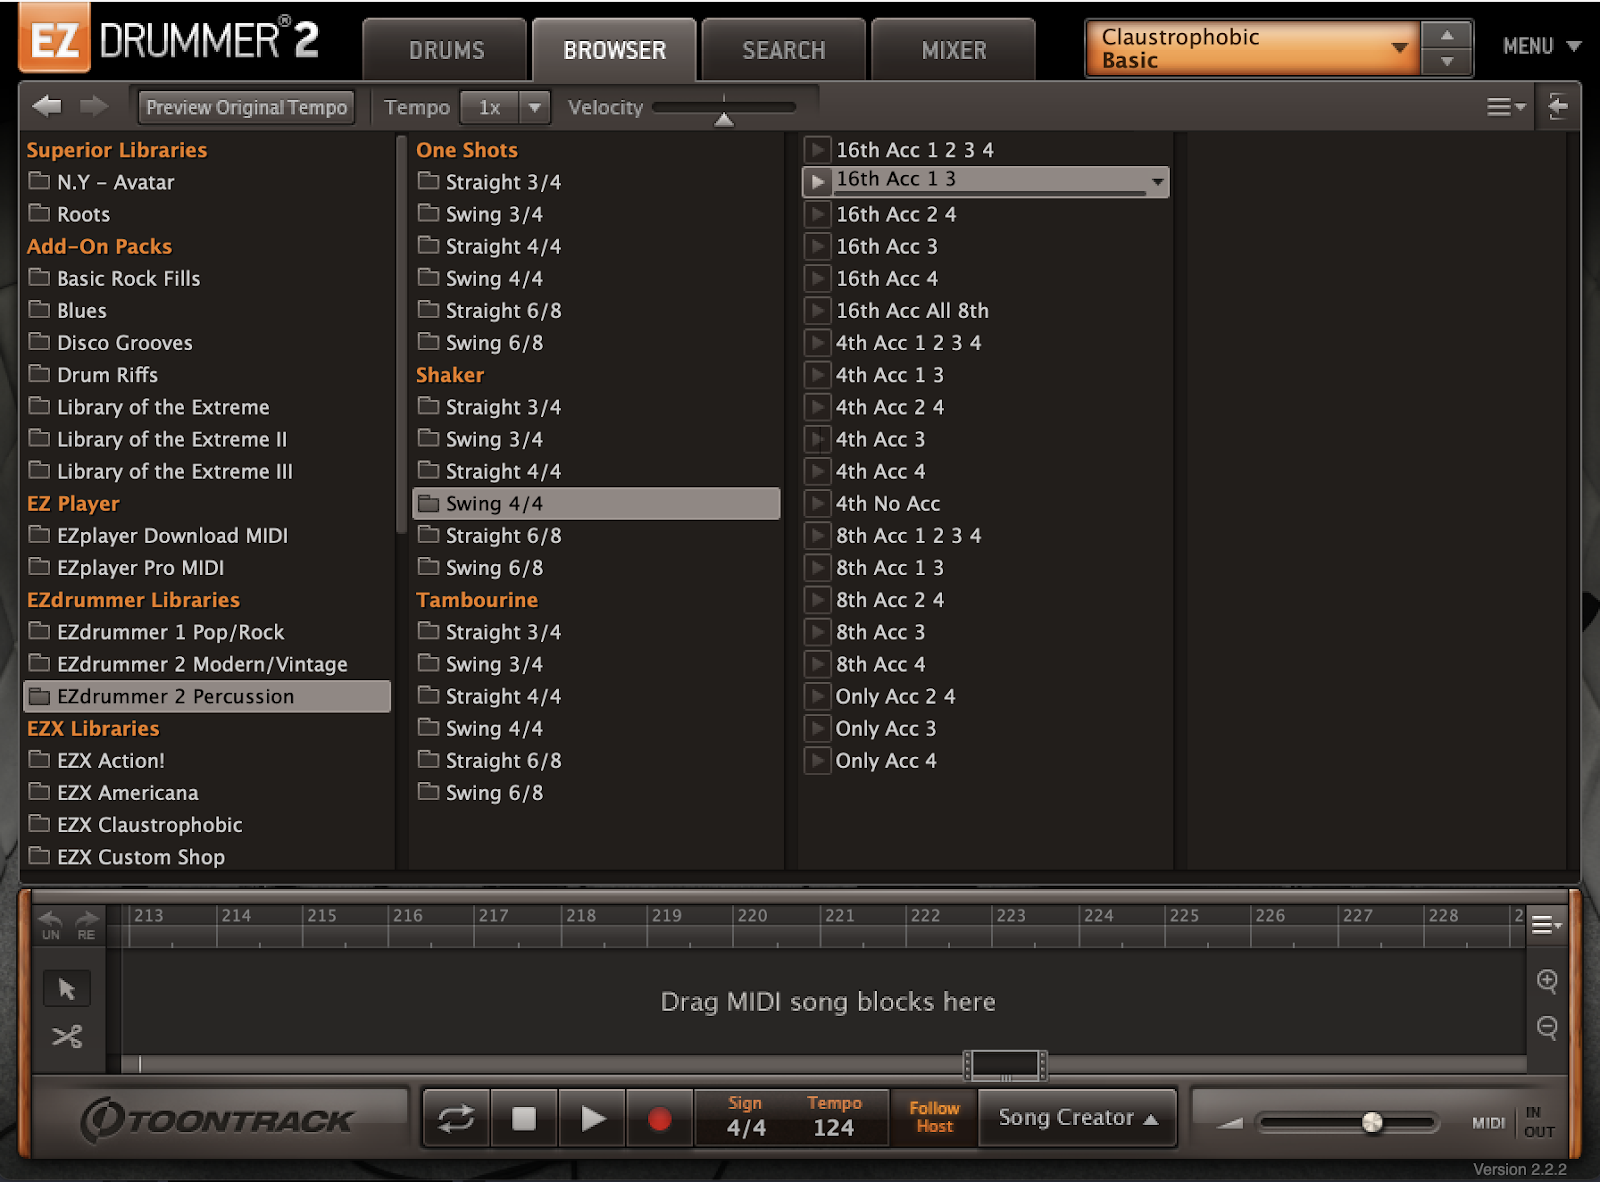
We’re going to use the MIDI library in Toontrack’s EZDrummer to find an interesting groove that’s a bit more interesting and organic than your standard MPC swing.
This works because EZDrummer’s MIDI loops are taken from recorded performances of great session drummers.
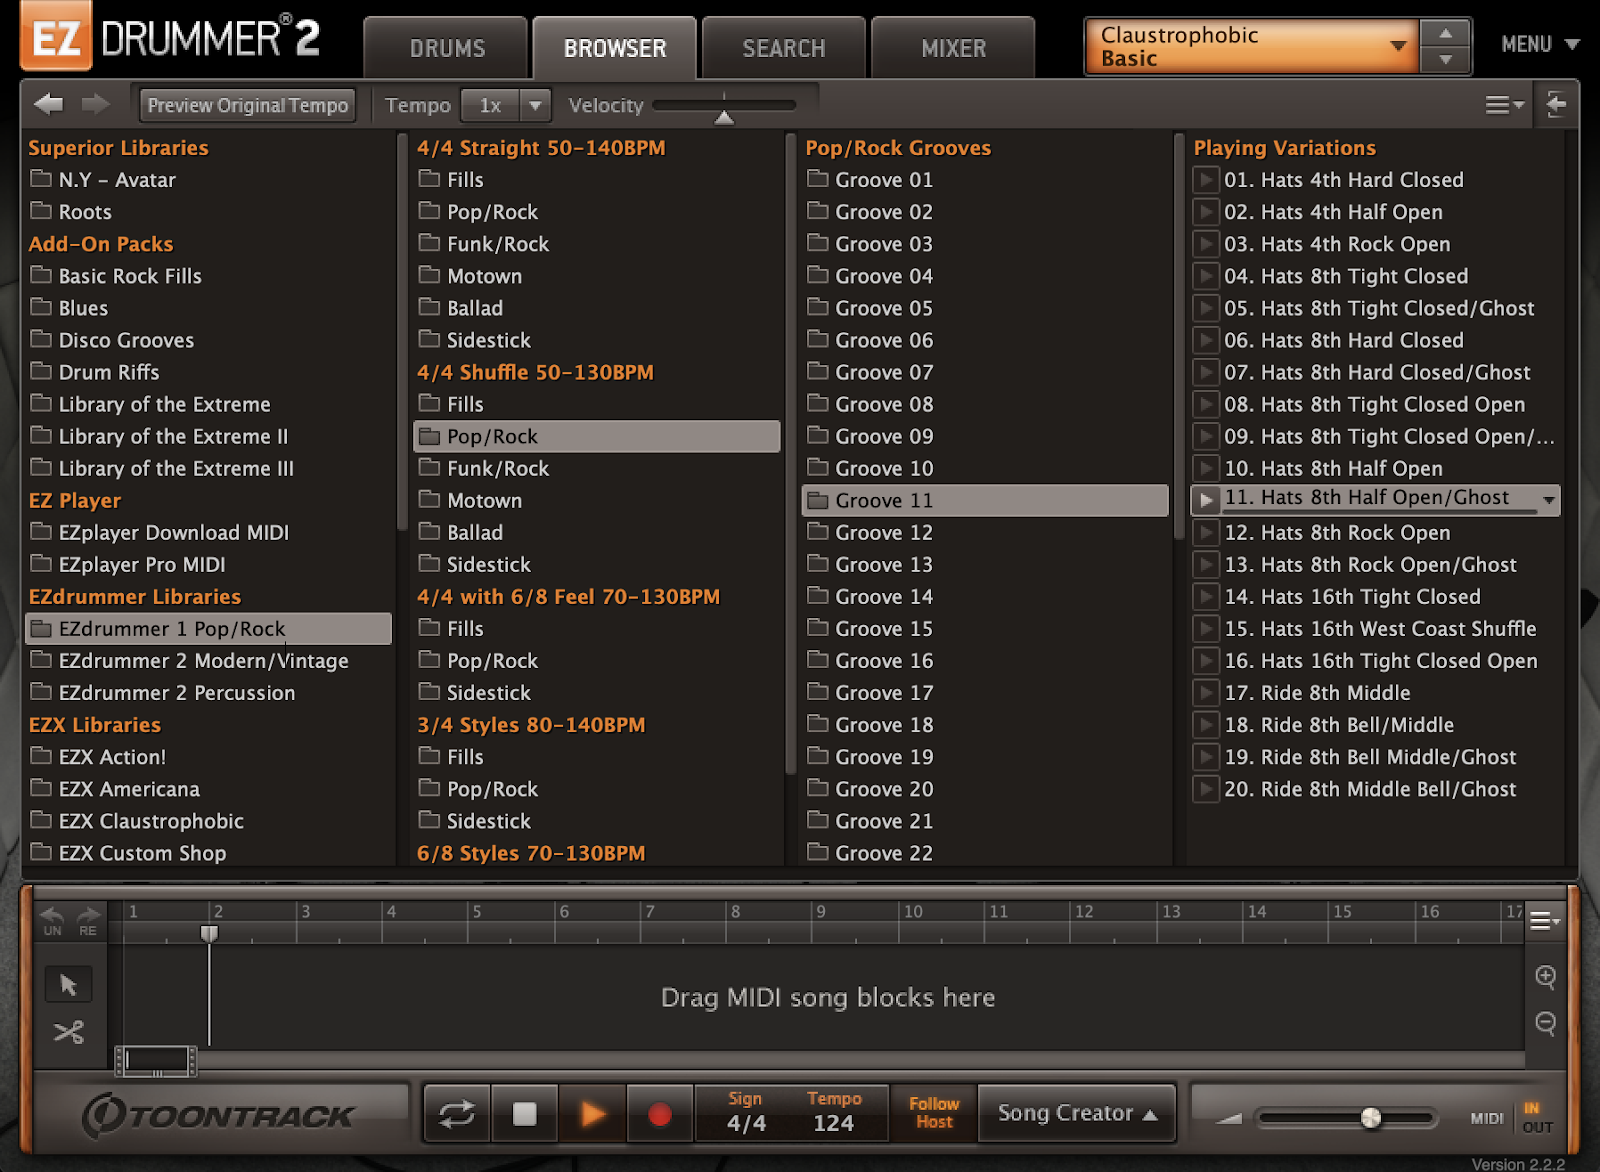
For starters let’s put an instance of EZDrummer onto a new instrument track and open up the instrument’s MIDI browser. We’re looking for a groove that has the feel, some push and pull, something… interesting.
Cracking open one of Toontrack’s EZX Expansions (Pop/Rock to be exact) I found a groove that on its own doesn’t sound like it would work in anything techno or house. But it has a pocket that’s really interesting and appealing.
Here’s how it sounds:
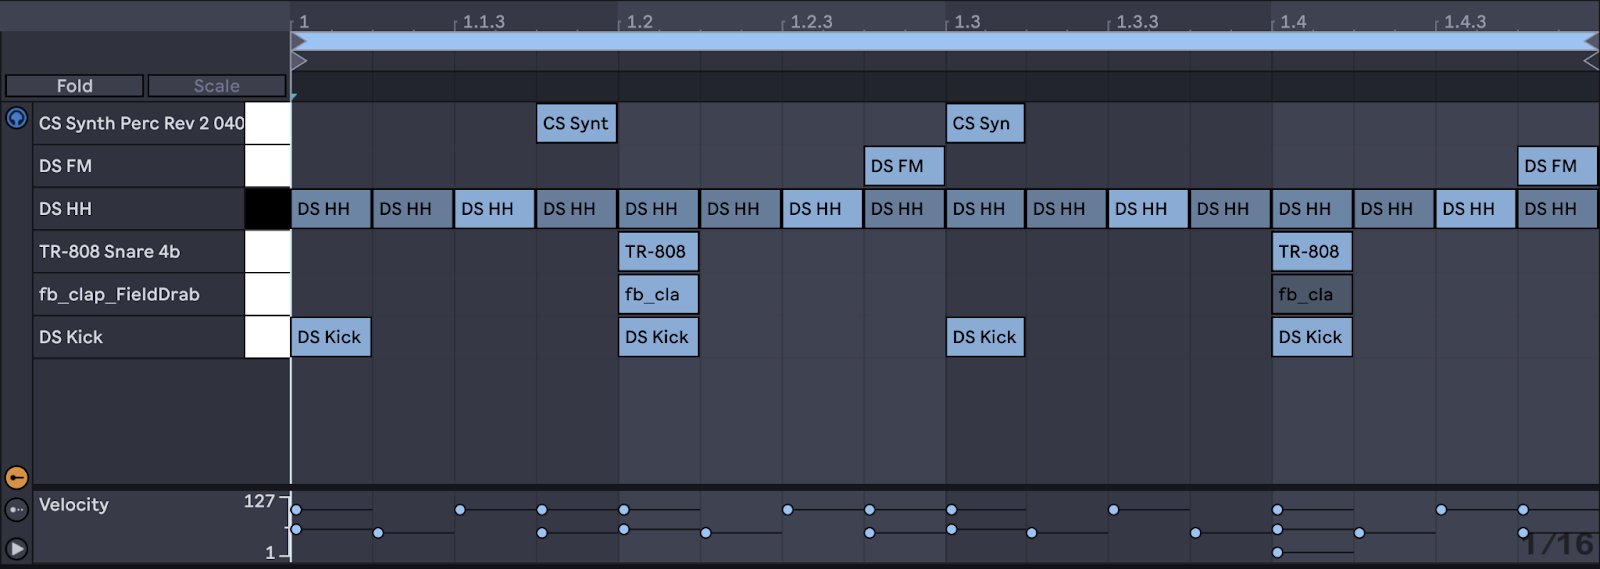
So I’ve clicked and dragged that MIDI loop to a clip in Live’s session view and I’m not going to use the audio; instead, I’m going to extract the groove and apply it to my electronic drums.
I simply right click on the clip and select “Extract Groove.” Now the “feel” from that clip is available in my groove pool, which will pop up underneath Live’s browser when I extract the groove.
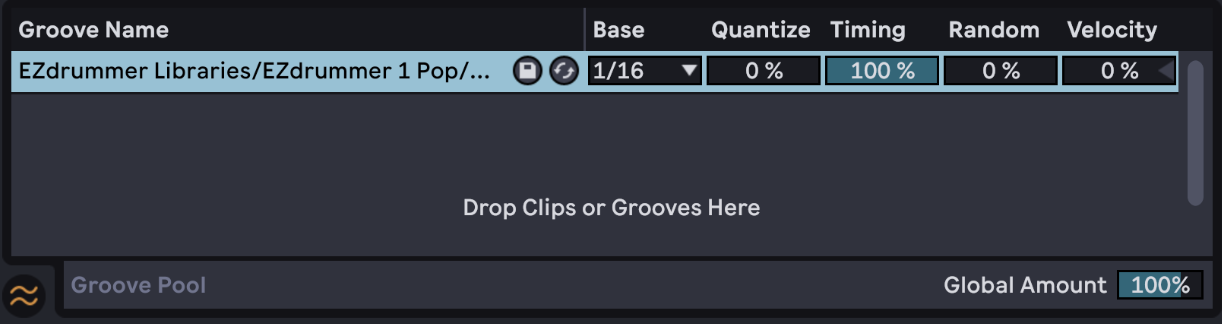
By clicking and dragging that groove onto the MIDI clip that controls my electronic drums, I get an infusion of vibe, and my very straight robotic pocket turns much more interesting.
Let’s listen again to the clip before adding the groove:
…and after with the groove applied:
Swinging is winning!
Step 2: Synths Gated by Percussion
Another fun trick you can play with audio from real musicians is using it to trigger your cold, sterile hardware. So we’ll want to take a metallic, pulsating synth hit and make it feel a bit more unpredictable, cultivating a version of the feel of Jon Hopkins’ 2013 track “Open Eye Signal.”
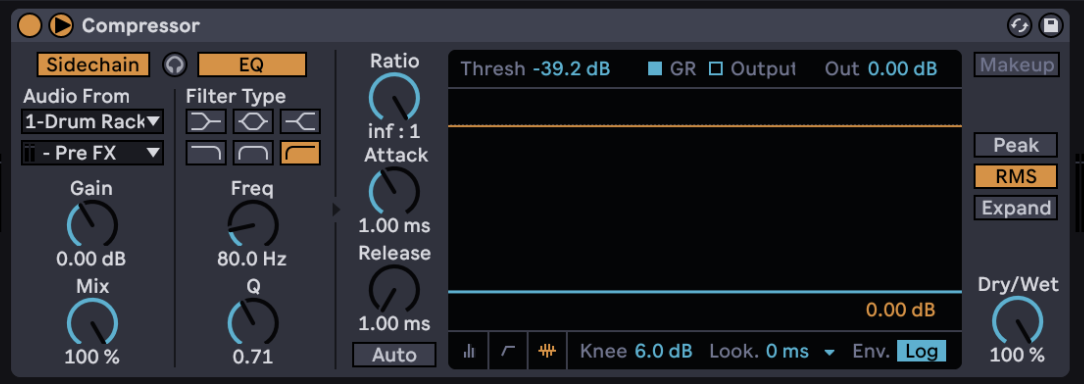
Important Note: All our synth tracks on this session will be grouped and processed using a compressor that’s side-chained to the kick, an almost ubiquitous practice in electronic music. In Ableton Live, accomplish this by creating an instrument track and, while it’s selected, use Command+G to create a group. Place a compressor device on the new group track and expand the device by clicking on the triangle on the top left to reveal the sidechain menu. Select the kick drum from your drum rack in the “Audio From” dropdown and make your settings match what you see here:
On our first instrument track, we’ll start with a synth patch – just a preset from MaxForCats’ “Pallas” that shows some promise.
Here’s how that sounds:
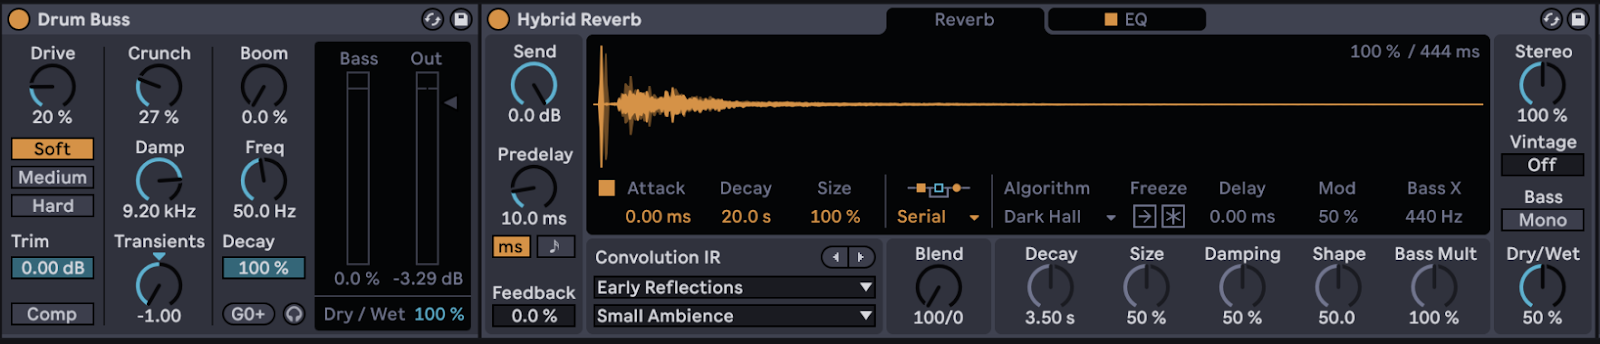
…then we’ll throw on a few effects. I’ll throw on a Drum Bus plugin at its default settings, followed by an instance of Hybrid Reverb at its default settings, followed by an instance of Live’s Multiband Dynamics processor using the famed OTT preset set to about 50 per cent wet, followed by an Echo plugin at roughly the default settings and an EQ to emphasize the highs.
Here’s how that sounds:

But I’m still lacking that weird, organic, slightly unpredictable element. So at the beginning of the signal chain, I’m going to add a gate effect. I’m going to activate the “Sidechain” control and select my EZDrummer track from earlier as the sidechain. Then I’ll bring the threshold down some so that I’m only opening the gate at the peak of the drum hits.
For a little extra unpredictability, I’ll add an LFO device and map it to the gate’s threshold to give it a slight undulating characteristic.

Now, what started as a garden variety synth hit has become some kind of drum-triggered subterranean monster, and I think that’s a good thing.
Here’s how it sounds:
Step 3: Vocode it
Say you want a higher element to the mix that has some rhythm and some harmony to it.
Something like this:
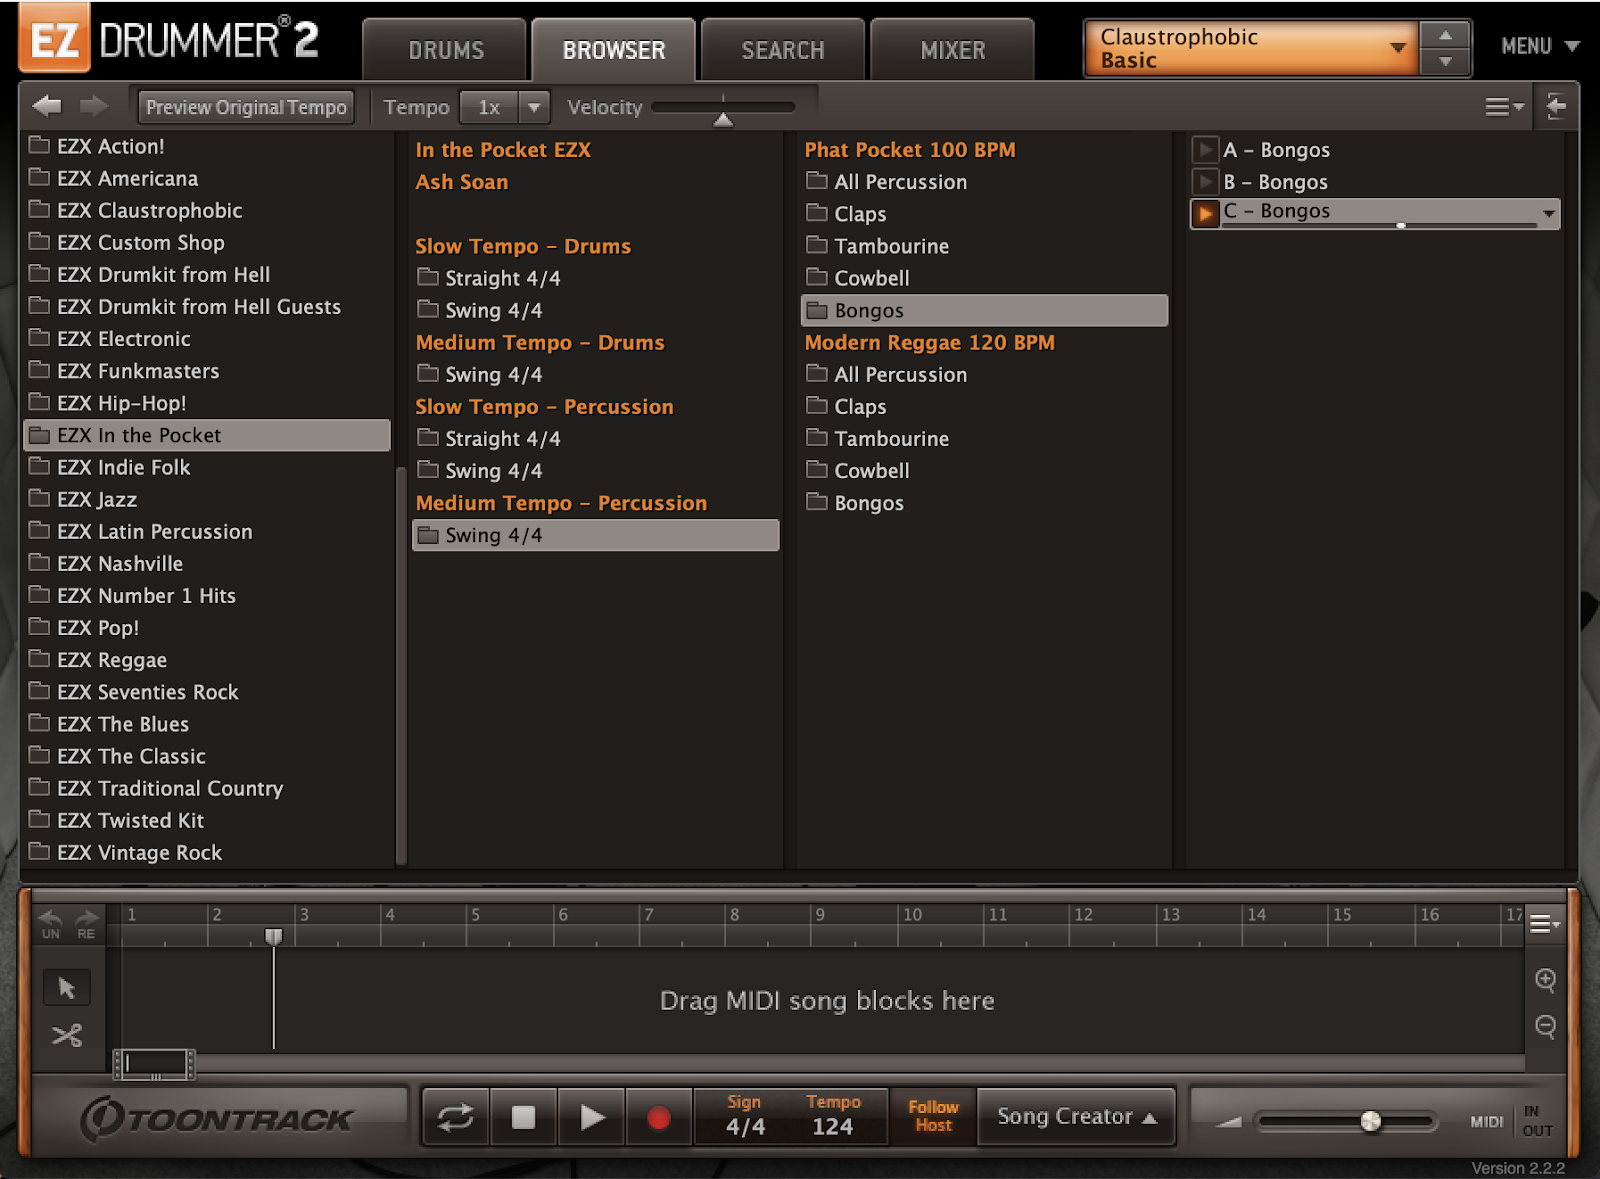
You can’t really get there without some organic percussion. Let’s build this sound. We start by creating a new instrument track and a new instance of EZDrummer. Using the loops we find in the MIDI library for the In The Pocket EZX, we can bring this into a MIDI clip.
It sounds like this:
And on a totally different track, we’re going to pull up a pad from MaxForCats’ “Pallas” though a pad from any softsynth will do as long as it has a lot of interesting tone and harmonics to work with.
It sounds like this:
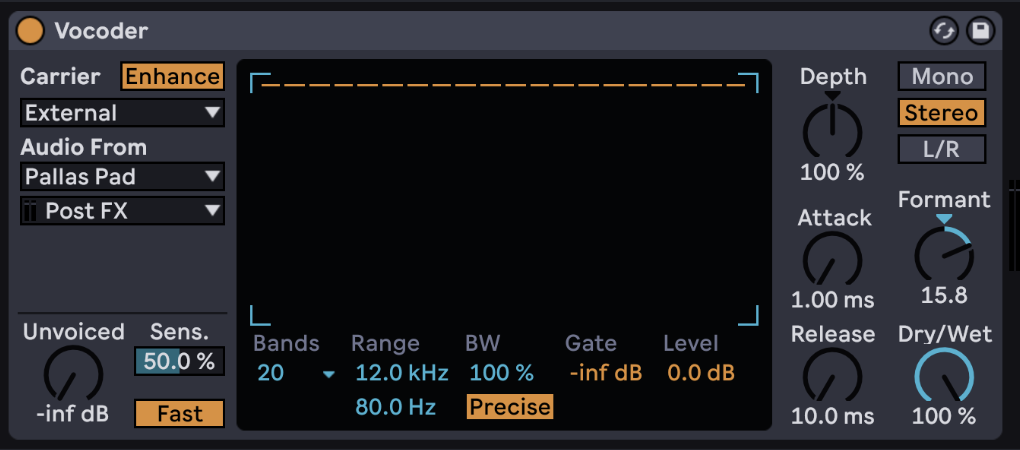
Mute the pad track because we’re not going to use its raw audio in the mix. Instead, we’ll add a Vocoder effect to our EZDrummer track, and we’ll select our pad sound as the carrier.
Now we’ve got something like this:
Then we’ll bring in a Delay with nothing fancy in the settings, our old friend the OTT, and a hybrid reverb to add some space and interest. We can work with that.
It sounds like this:
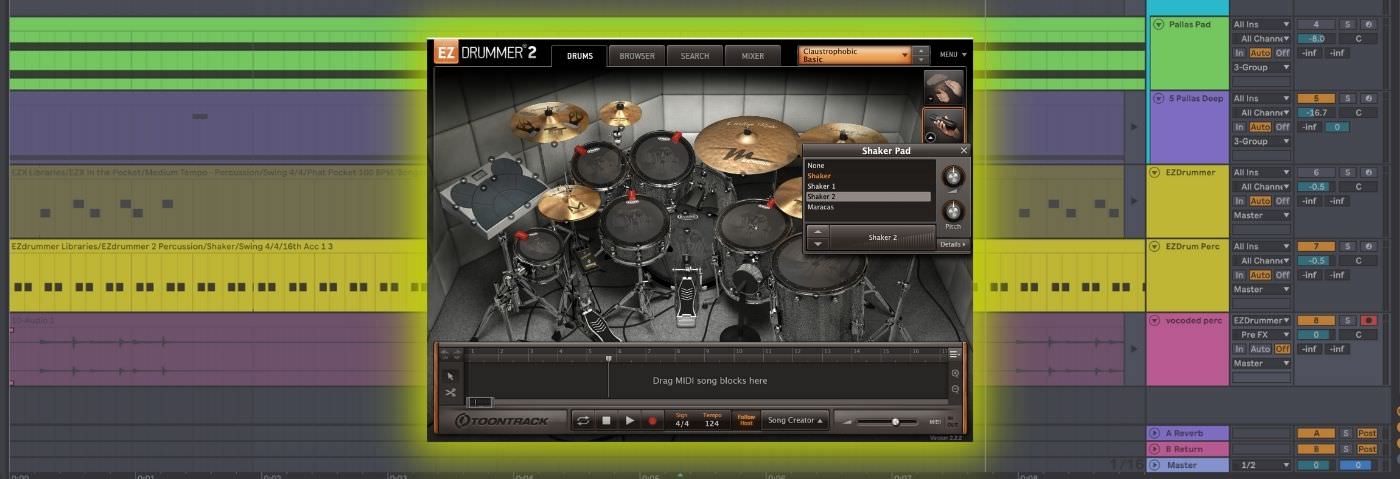
Step 4: Add a Shaker
Open another instance of EZDrummer. In the factory library, select the following loop:
Then click on the “Drums” tab, click on the little arrow on the shaker pad, and select “Shaker 2” for your shaker sound.
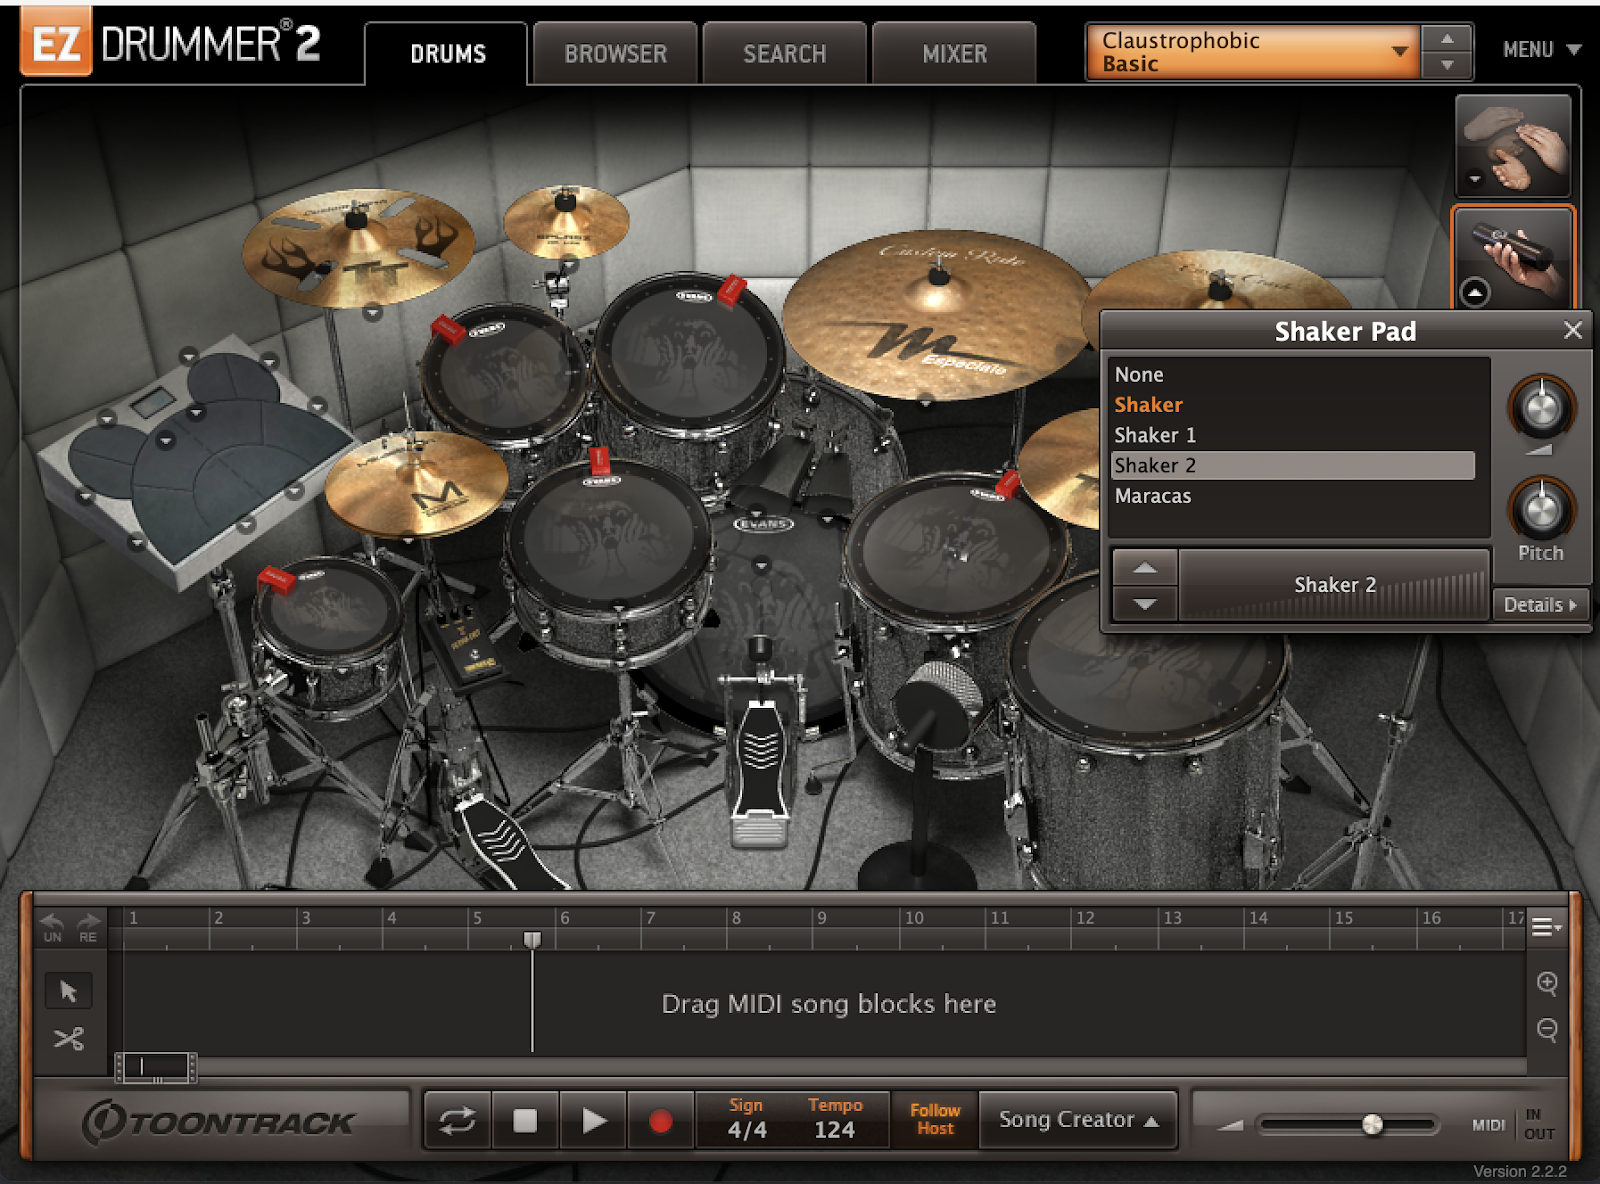
That’s it. It sounds like this:
Sometimes it’s the simple things. The shaker, with its loose rhythmic pocket, plays well with the other elements and gives us something that seems to live and breathe.
The final product:
Though we’ve explored four ways to bring acoustic percussion into your electronic composition hopefully, your gears are turning with different ways to use live percussion in new and dynamic ways.
You could use an envelope follower to trigger a synthesizer’s cutoff with a breakbeat. You could use Live’s Spectral Resonator or Spectral Time audio effects to turn a percussion loop into something otherworldly. We hope you’re inspired to try something new.
While You’re Here…
If you like this article you might enjoy our book The Secrets of Dance Music Production. It is available from the Attack store!
New customer? Use code ATTACK10WELCOME at checkout for a 10% discount!
