u-he are makers of award-winning software synthesisers and effects including Diva, Repro-1, Zebra2, Hive, Bazille, Presswerk and Satin.
Visit U-he
Technique » Synth Secrets »
Lo-Fi Synth Lead
This channel is sponsored by

We show you how to make a gritty lo-fi analogue synth lead in the style of Mac DeMarco.
There’s just something so appealing about lo-fi. Maybe it’s the inherent nostalgia in the fuzzed-out tones. Or perhaps it’s the softness of the sound. Whatever the reason, whether you’re working entirely in the genre or just want to add a bit of character to an otherwise clean production, lo-fi techniques can be a quick way to create a mood.
In today’s Synth Secrets, we’re looking at how to craft a Mac DeMarco-style lo-fi synth lead in the style of his 2014 song, ‘Chamber Of Reflection’. The slacker rock poster boy is fond of vintage polyphonic synthesizers, effects and reel-to-reel tape recorders, so we’ll employ all of these tricks in our quest for a lo-fi synth sound.
Here’s what we’re going for:
Step 1: Oscillators
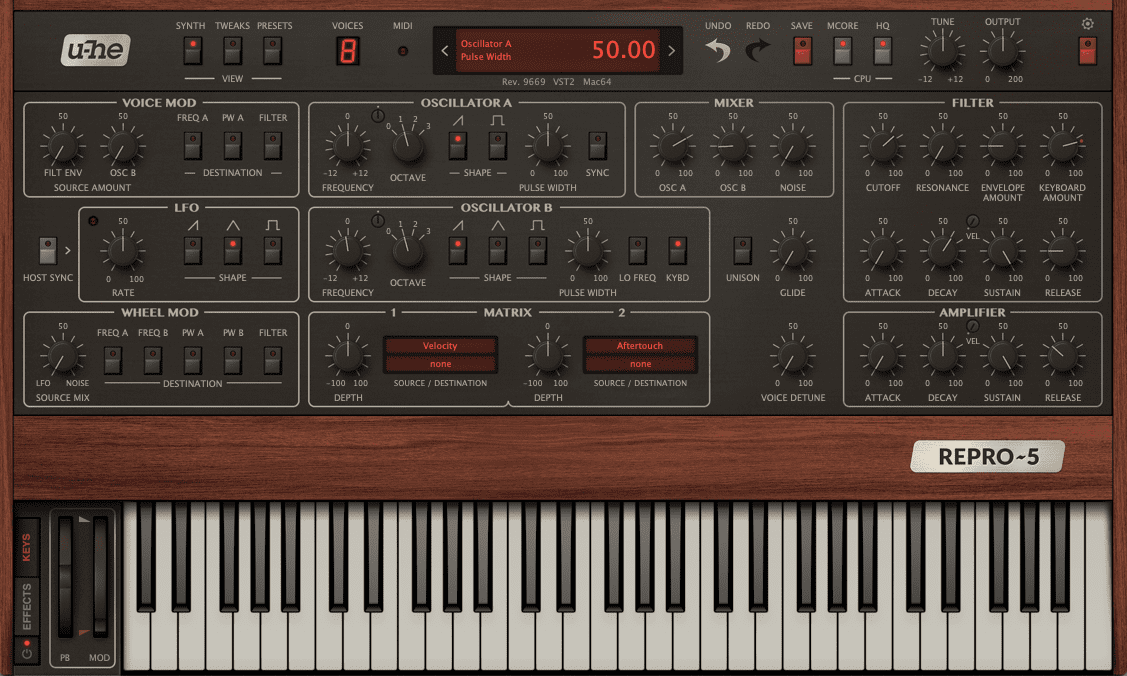
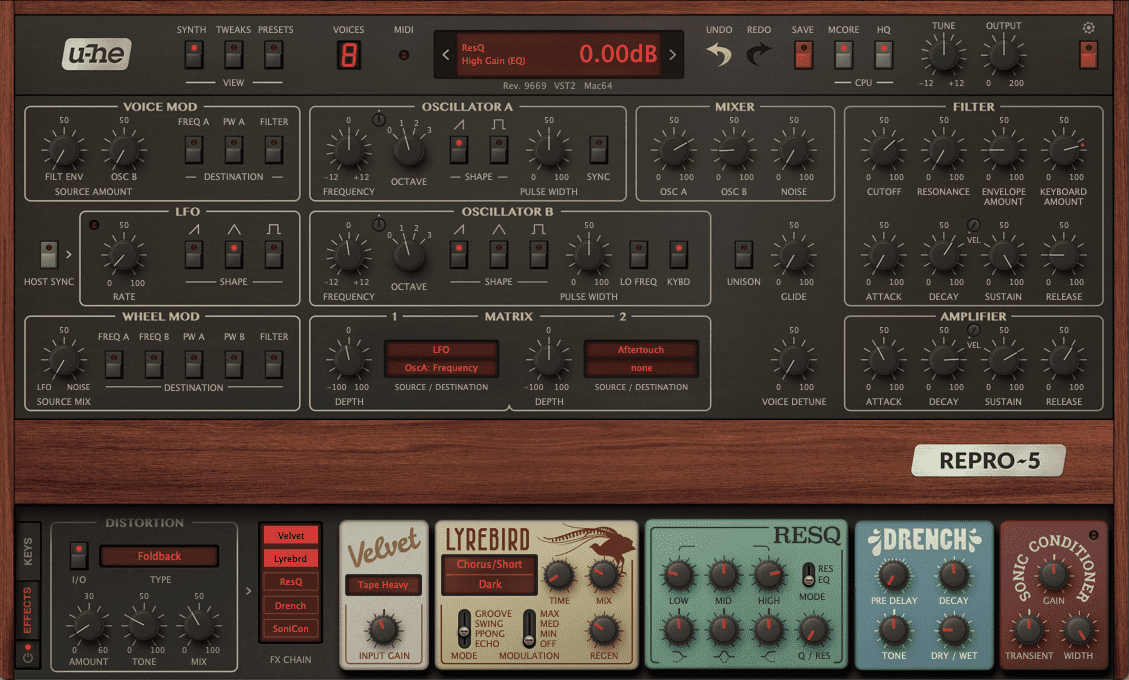
Start by placing a polyphonic virtual analogue soft synth on a MIDI track. We’re using U-he’s Repro-5, an emulation of Sequential Circuits’ Prophet-5, a favourite of DeMarco (and pretty much everyone else on the planet). Start with an initialized patch.
We want a sawtooth lead. Both oscillators are set to saw already, so we’re sorted. In fact, all we need to do in the oscillator section is slightly detune Oscillator B for some pitch variation. Also, in the Mixer section, turn down Oscillator B to around 20.00. It’s just going to play a supporting role.
Here’s our progress so far.
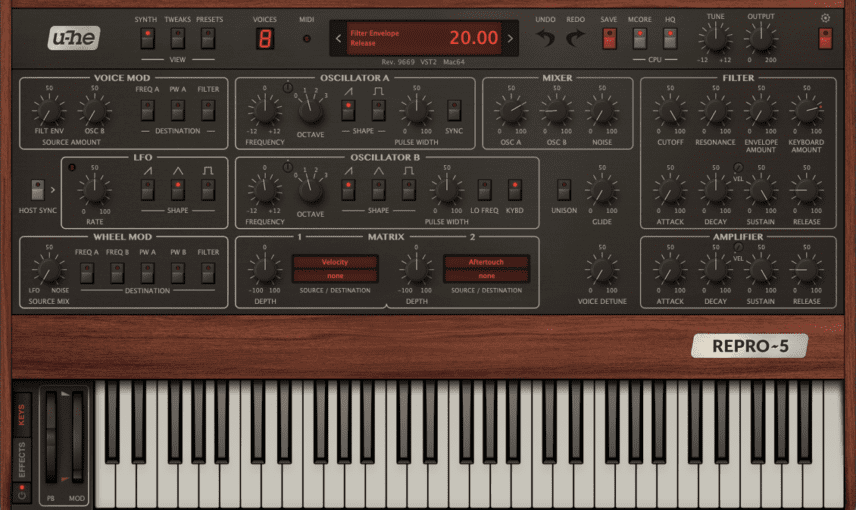
Step 2: Filter
Next, let’s make some adjustments in the Filter section. Turn down the Cutoff to around 65. It’s already sounding a bit more lo-fi. Involving the filter’s envelope will help shape things. Leave the Attack at 0, increase Decay to 60, reduce Sustain to a similar amount as the Decay, and bring up Release to around 35. Lastly, bring up the Envelope Amount in the Filter section to 20.
Step 3: Envelope
It admittedly doesn’t sound very different yet so let’s adjust the amplitude envelope. We don’t need such a sharp attack so bring that amount up to 40. Next, increase Decay to 80, reduce Sustain to 70, and extend Release out to 60.
Step 4: LFO
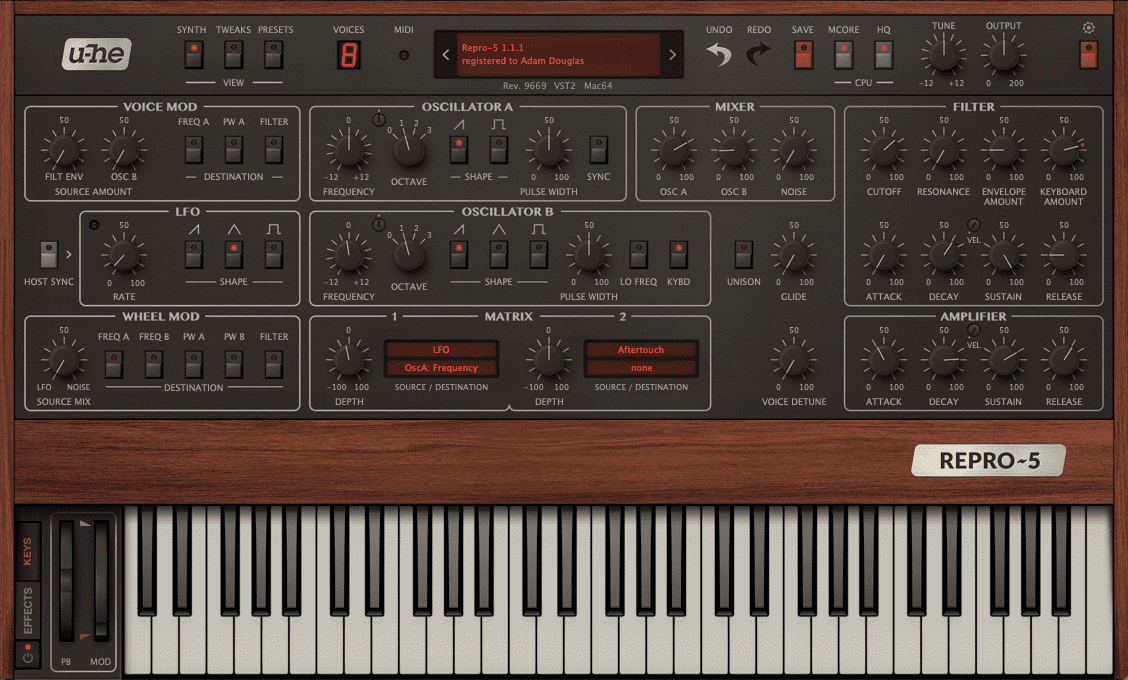
A big part of the lo-fi synth sound is unstable pitch. We can achieve this woozy feel by modulating the pitch of oscillator A with the LFO. In the Matrix, in slot 1, set the source as LFO. For the destination, drag from the destination slot to the Frequency dial in Oscillator A’s section. Turn the Depth knob slightly to the negative side. Next, reduce the LFO’s rate to around 3. This gives us a slowly oscillating pitch warble.
Top Tip: Increase the LFO’s speed for more of a vibrato effect.
Step 5: Onboard Effects
That’s our synthesis portion of the sound finished. Next, let’s get effects involved.
First, click on the Effects tab at the bottom left of the front panel to reveal the stompboxes. Let’s add a little distortion to dirty it up. Click the I/O button to turn it on and change the Type to Foldback. Increase Amount to 5dB, reduce Tone to 30 to darken it up a bit and adjust the Mix amount to taste.
Next, turn on Velvet and Lyrebird in the FX Chain. On Velvet, set it to Tape Heavy with an Input Gain of -3.5dB. That’s really increasing the presence. Let’s add chorus to this with Lyrebird. Choose the Chorus/Short type and Dark. We’ve gone for a rather short Time setting, a Mix amount that favours the dry signal, and a Regen of around 30.
That’s made a big difference.
Step 6: EQ and Delay
Let’s keep adding effects. We want a really soaked sound.
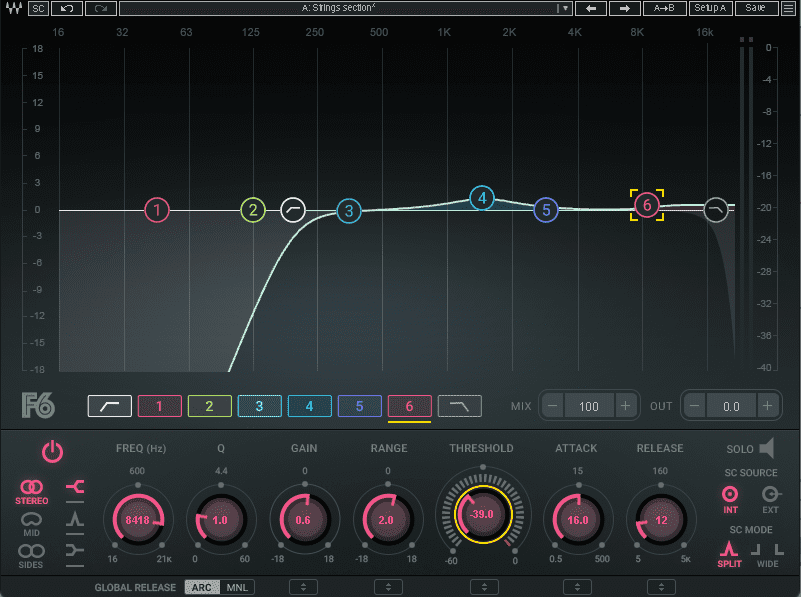
Next is EQ to clean up the low end and boost the mids a touch. We call up Waves’ F6 and highpass the lows at around 350Hz so it doesn’t clash with any bass sounds we may want to add. A boost at 1450Hz helps it stand out in the mix. Finally, we boost the highs a little at 8500Hz. This isn’t strictly necessary but as we’re going to throw a tape emulator on next, we want to give our highs a fighting chance.
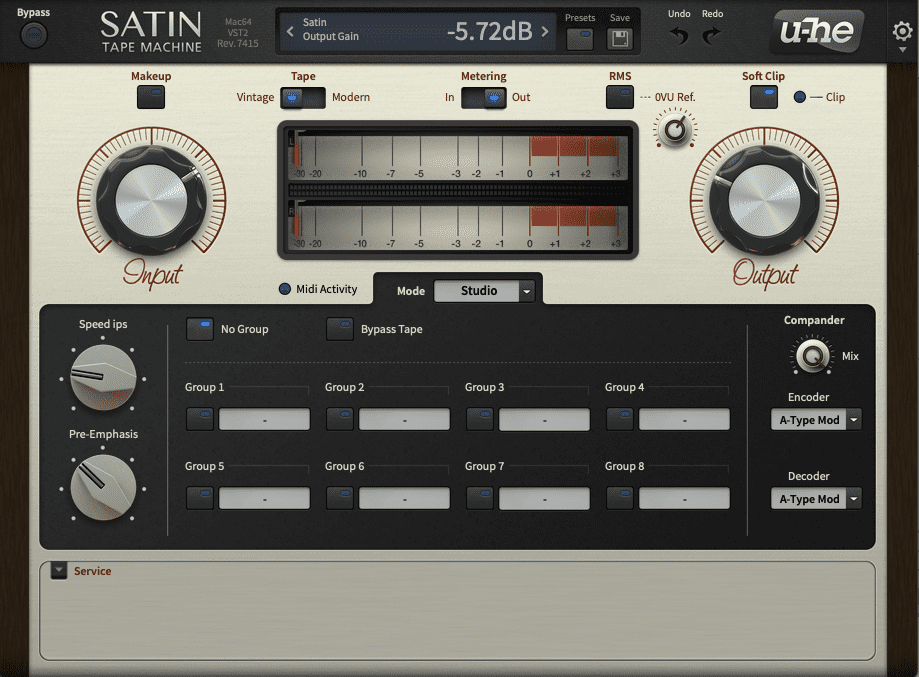
A great way to give any sound a lo-fi flavour is with tape emulation. We’re using u-he’s Satin to saturate the input and roll off some highs with a slow speed setting. Around 7ips (inches per second) is nice and muddy.
Step 7: Send Effects
We’re almost done. It’s time to add the finishing touches with send effects.
On the first send, add a reverb. We’ve chosen Waves H-Reverb. We’re using a suitably long and dark reverb to add plenty of character.
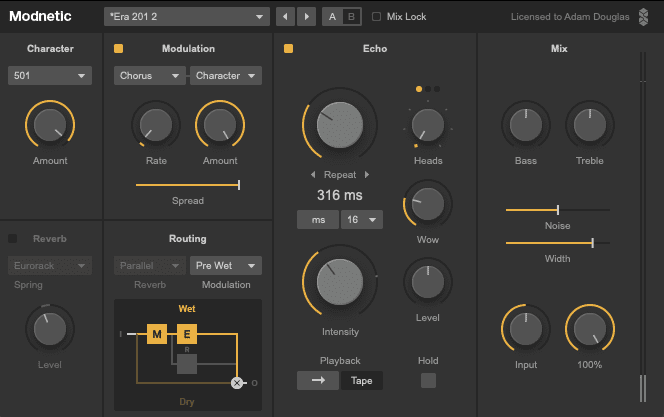
On the second send, we want a tape echo-style delay. Surreal Machines’ Modnetic does a great impersonation of the Roland RE-201 Space Echo, which is great for dub. We set the Character to 501, Modulation to a wide and slow chorus, with an echo at 315ms with a good amount of Intensity (feedback). Don’t forget the Wow to give it an unstable quality. Finally, we crank up the Noise and increase the Width to push the effect out into the sides.

Here’s the final result with drums, bass and organ. We have another u-he Satin on the bus acting like mix glue as well as Kush Audio’s Omega 458A for further saturation.
*Attack Magazine is supported by its audience. When you purchase through links on our site, we may earn an affiliate commission. Learn more.
Synth Secrets is sponsored by
u-he are makers of award-winning software synthesisers and effects including Diva, Repro-1, Zebra2, Hive, Bazille, Presswerk and Satin.
Download the demos and try them for yourself at www.u-he.com