In this Beat Dissected, we use Oblivion Sound Lab’s Hex Drum to create a beat like Marvin Gaye’s groundbreaking ‘Sexual Healing’.
In 1982, Marvin Gaye released ‘Sexual Healing’. With its sparse arrangement, Jupiter-8 sounds and TR-808 rhythm, it changed the sound of soul, transforming it from the band sound of the 1970s to something sleeker and more electronic. We’re going to use Oblivion Sound Lab’s Hex Drum to create an analogue drum machine-based soul beat in the style of Gaye’s game-changer.
Hex Drum is based on the Simmons SDS electronic drum set of the 1980s. With its hexagonal-shaped drums, it was as distinctive looking as it was sounding. The centre of the Simmons was the drum brain, essentially an analogue drum synthesizer. There was no sequencer though; sounds were triggered by hitting the hexagonal pads or by firing them off from external sequencers or other drum machines.
Although it’s not an 808, Hex Drum has an extremely flexible drum synthesis engine with seven instruments, allowing us to craft our own custom percussion sounds. We’ll use it to shape our sounds and then program in the rhythm with MIDI.
Spec
Tempo
94 BPMSwing
52%Sounds
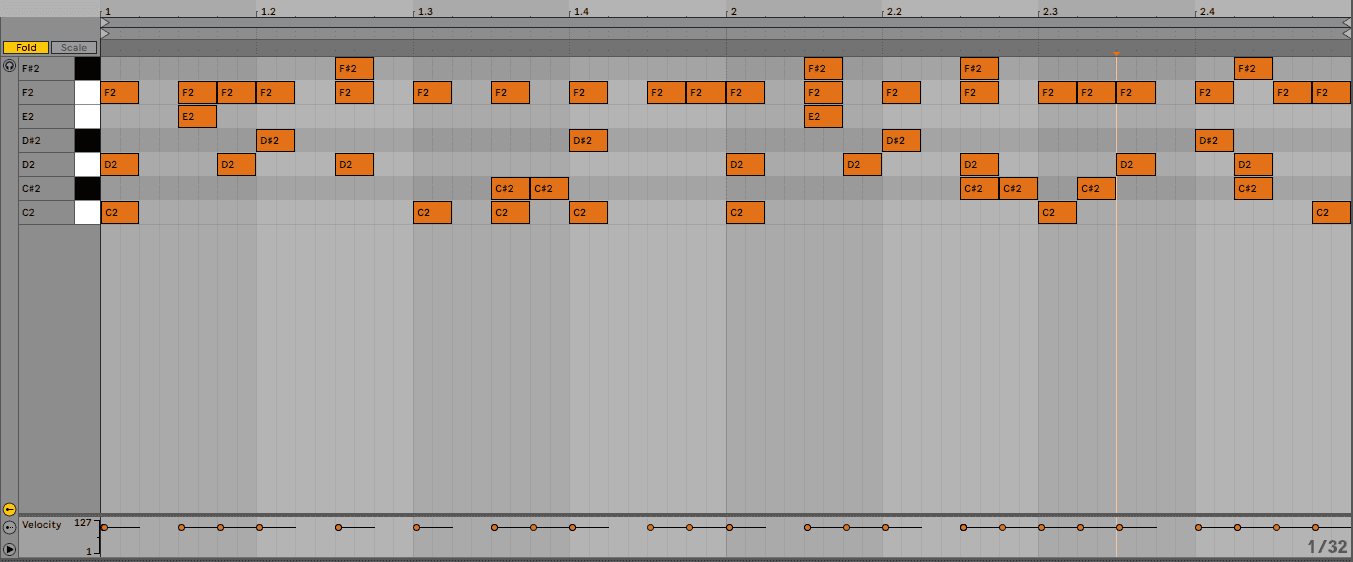
Oblivion Sound Lab Hex DrumBeat Dissected is a regular series in which we deconstruct drum patterns, showing you how to program them in any DAW. Just copy our grid in your own software to recreate the loop. The objective is to analyze drum programming techniques, not to recreate the artist’s beats exactly. As always, click any image to see a larger version.
Here’s our finished beat complete with Roland Cloud Jupiter-8 chords and bass.
Let’s get it on.
Step 1: Set Up And Routing
Let’s get Hex Drum all routed up first so we can process each drum sound individually. We’re using Ableton Live. If you have a different DAW, please see your DAW’s manual for how to do the routing.
First, create a 94bpm project. Next, add an instance of the plugin on a MIDI channel and make sure it’s set to the initialized preset. Next, click the cog in the upper right corner to reveal the settings panel. Change Multi-Channel Output to On. (Note that you can also change your MIDI trigger notes here as well. We changed ours to starting with C2 as it’s easier for our MIDI controller.)
Next, we’ll set up the audio channels for the drum sounds. We’re using all seven, so create seven new audio channels. Change the Audio In setting to Hex Drum and then in the drop-down menu below, choose the appropriate Hex Drum voice. Lastly, set the Monitor to In. Do this for all the channels. Now when you press the appropriate keys, you should hear each sound through its own audio channel.
Step 2: Kick
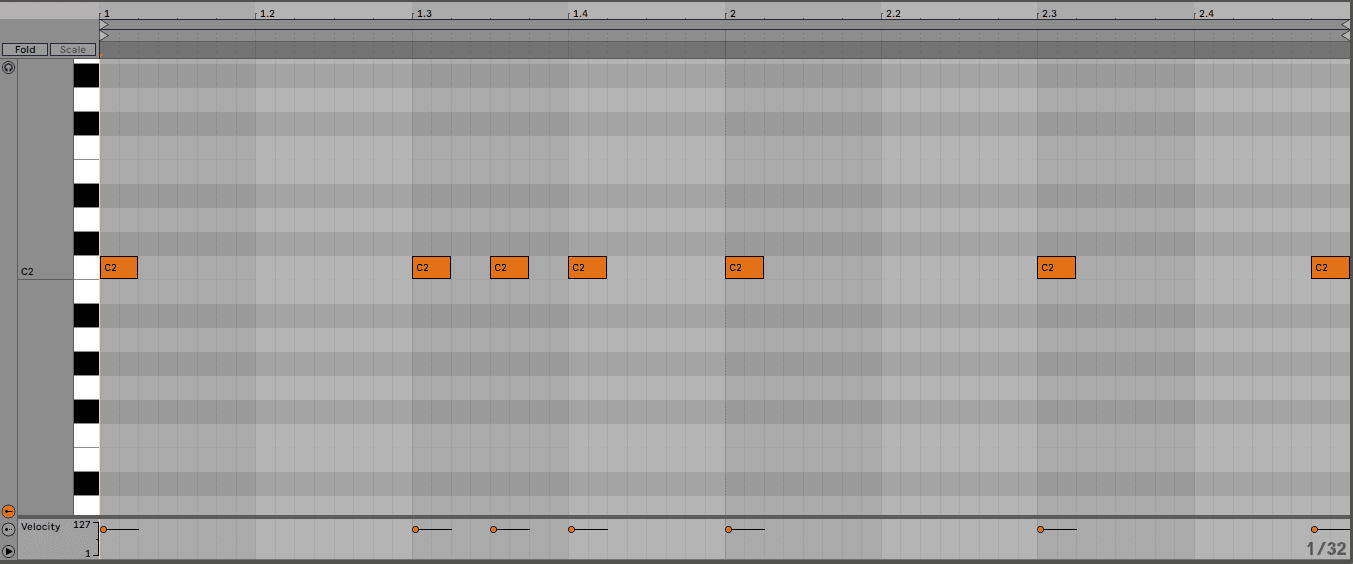
Let’s create our kick first. Duplicate the pattern as shown in the image across two bars. The rhythm for ‘Sexual Healing’ is unusual in that it doesn’t emphasize every beat like disco or funk. It has a looser, almost reggae vibe. You can vary the velocity for a more human played feel, although we’ve kept it flat to mimic a drum machine.
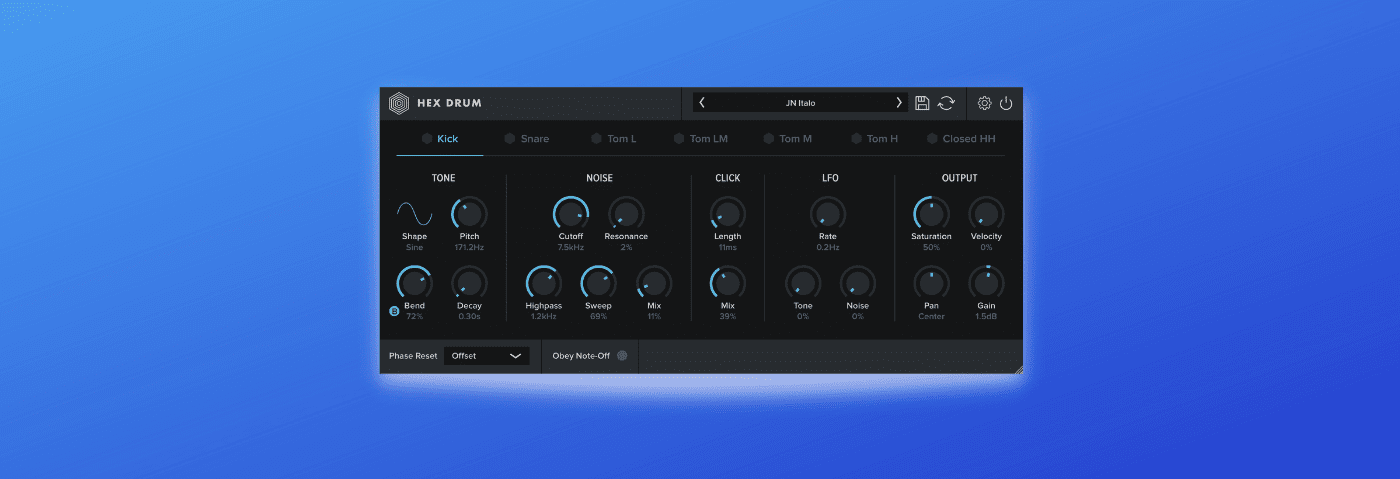
The initialized kick has a very Simmons sound. Let’s tweak the parameters to get it closer to an 808. In the Tone section, change the Shape to Sine, bring the Bend down to 15% or so and up the decay to around 0.6 seconds. Let’s change the Pitch to 73.4Hz as well. ‘Sexual Healing’ is in C minor so we’re going to tune all of our pitched percussion sounds to C (or as close as possible). You can put a tuner plugin on the audio channel to double-check. We don’t need any noise at all, so bring the Mix down to 0%. The click is a little strong too, so reduce the Length to 18ms and the Mix to 40%. Adjust the Saturation and Gain as you see fit.
We’ve also added a groove to our piano roll to give it a swing setting of 16th notes at 52%. It’s true that the original 808 didn’t have swing controls. However, because of its circuitry, its natural timing was looser than a modern DAW. We can approximate this by adding a slight amount of swing. If you prefer a more robotic, electro-style groove, you can leave it out.
Here’s our kick:
Step 3: Snare
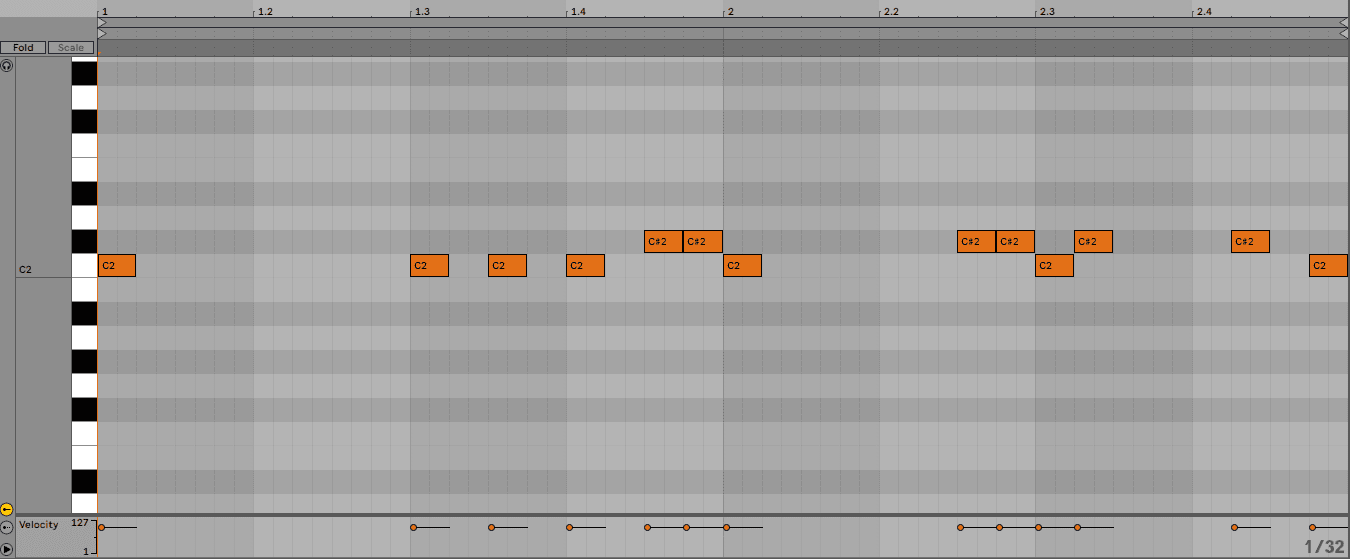
Unlike in most beats in popular music, the snare acts more like a hi-hat here, providing rhythm rather than accentuating the backbeat. Replicate the snare pattern in the image below onto your piano roll. Make sure to use the note just above the kick.
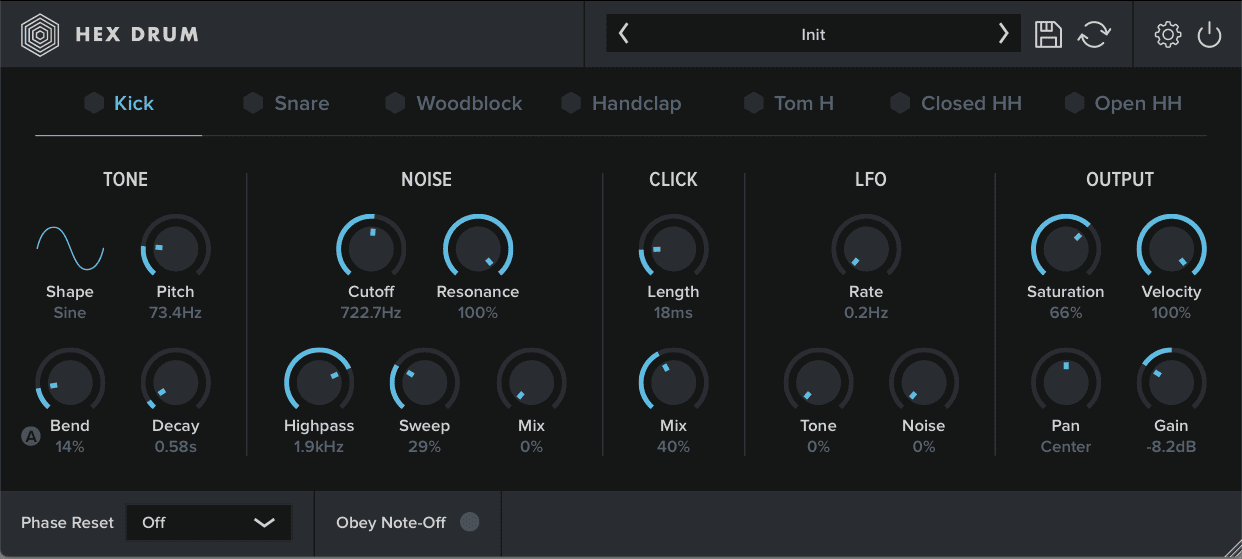
Let’s next use Hex Drum’s synthesis capabilities to craft a snappy, 808-like snare. Click on the Snare label to change the instrument. Under Tone, change the Shape to a sinewave, bend to 50%, Decay to 0.2 seconds, and change the Pitch to 191Hz. Now that the snare body is taken care of, let’s tackle the rattle portion next. Under the Noise section, bring up Mix to 80%. The other parameters can stay the same. One of the hallmarks of analogue drum machines is that the sound changes a tiny bit every time. We can replicate this with the LFO. Bring up the Noise amount to around 10%. As before, adjust Saturation and Gain as required.
Here’s our snare in isolation:
And with the kick:

Step 4: Woodblock (Clave)
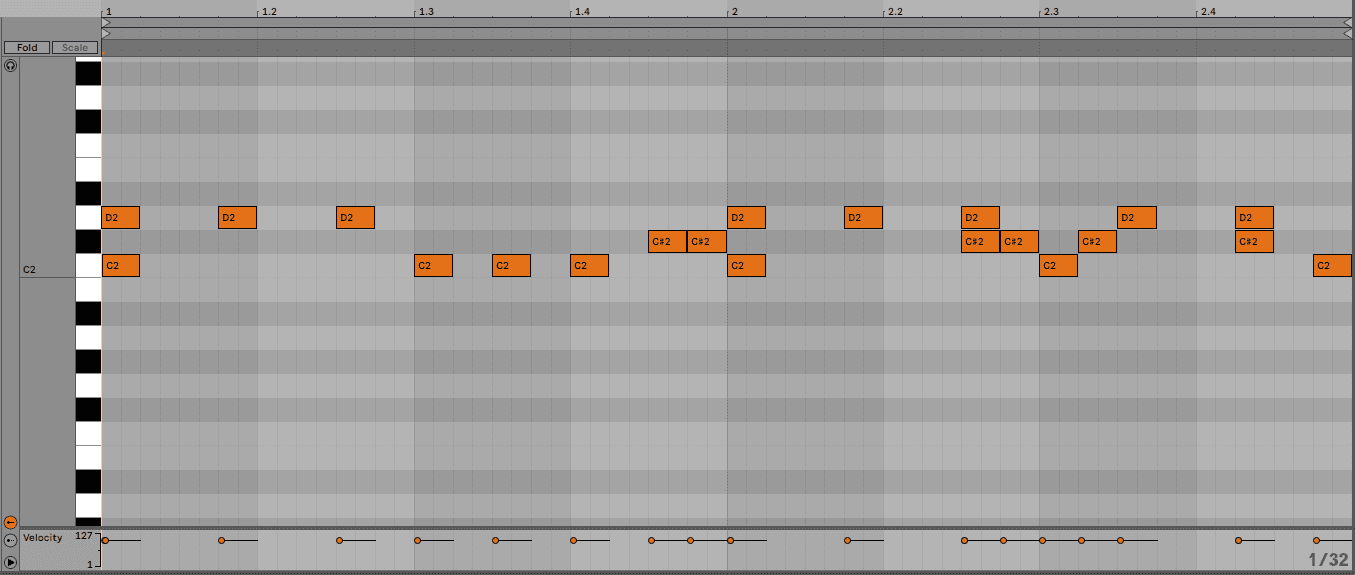
‘Sexual Healing’ uses the clave sound on the 808. There’s no clave setting on Hex Drum but there is a woodblock, so we’ll call it that instead. Click on the third instrument (labelled Tom L), right-click on it, and choose Woodblock from the Label menu. Next, copy the third pattern up from the bottom (D2 on the image).
Our initialized preset has given us a low tom to start with. We need to do some drastic tone shaping to turn this into a woodblock. Again, change the Shape to a sinewave, decrease Bend all the way to 0%, bring Decay down to 0.13 seconds, and change the Pitch to 2.4kHz. We don’t need any noise so lower the Mix to 0%. Let’s lessen the impact of the click as well. Change the Length to 23ms and the Mix to 18%. Finally, play around with the Saturation and Gain until it sounds good to you. We like the panning where it is, although if you’d like the freedom to change that later in the mixing stage, set it to the centre and make your pan adjustments on your DAW’s mixer.
The finished woodblock:
And our progress so far:

Step 5: Handclap
‘Sexual Healing’ uniquely only has claps once a bar, rather than on positions 2 and 4, as you’d expect. We’re going to program ours more traditionally as we like that strong, backbeat foundation, but if you want to be more authentic, go ahead and ignore the second clap in each bar.
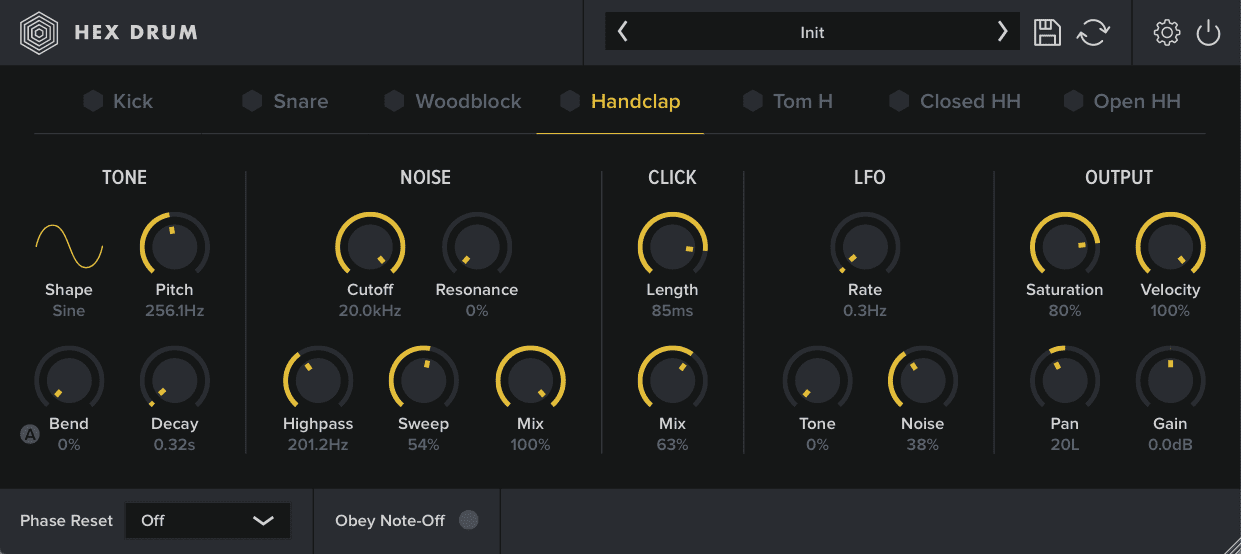
Again, we’ve got a tom where we don’t need one. First, change the label to Handclap on instrument four. Next, under the Tone section, make the Shape into a sinewave. You can ignore most of the Tone section as the claps are all about white noise. However, you do need to adjust the overall Decay to around 0.3 seconds. In the Noise section, open the Cutoff to 20khz to make it nice and bright but drop Resonance to 0%. Lower the Highpass to 201Hz to let more lows through, raise the Sweep to 55% and bring the Mix to 100%. As with the snare, use the LFO to add movement by increasing the Noise amount to 38%.
Here’s our claps:
And our full beat so far:

Step 6: High Tom
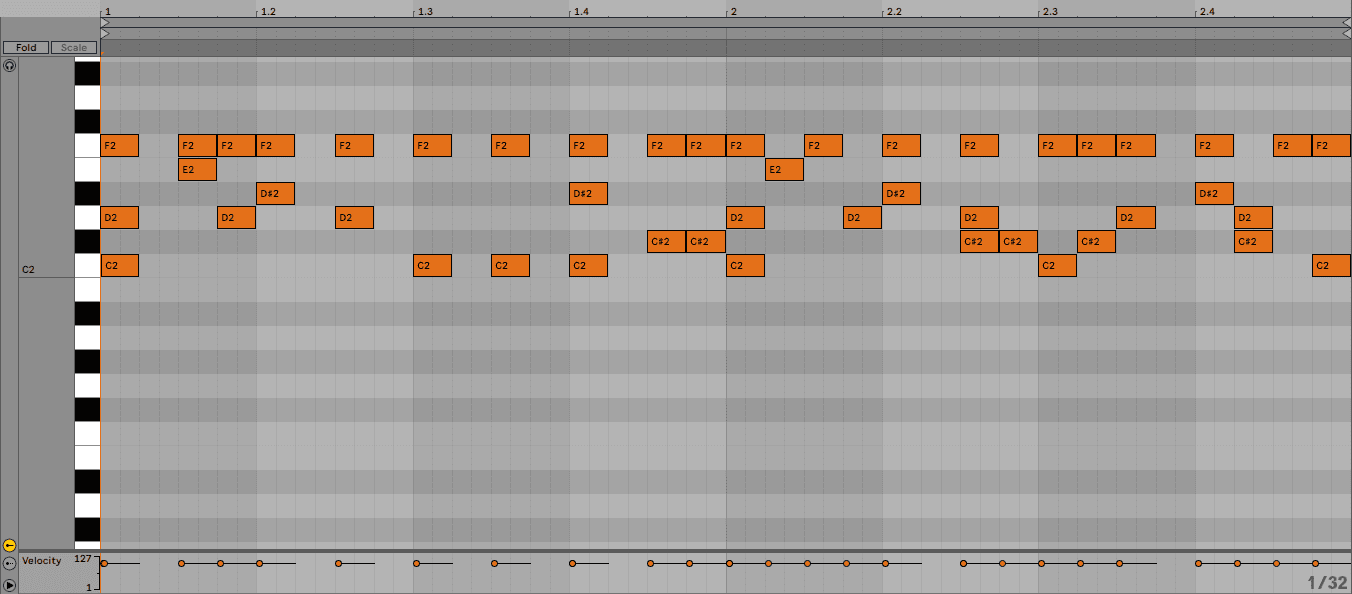
The high tom (or Tom H as it’s called in Hex Drum) is pretty simple, in both pattern programming and synthesis. There are only two notes across the two bars.
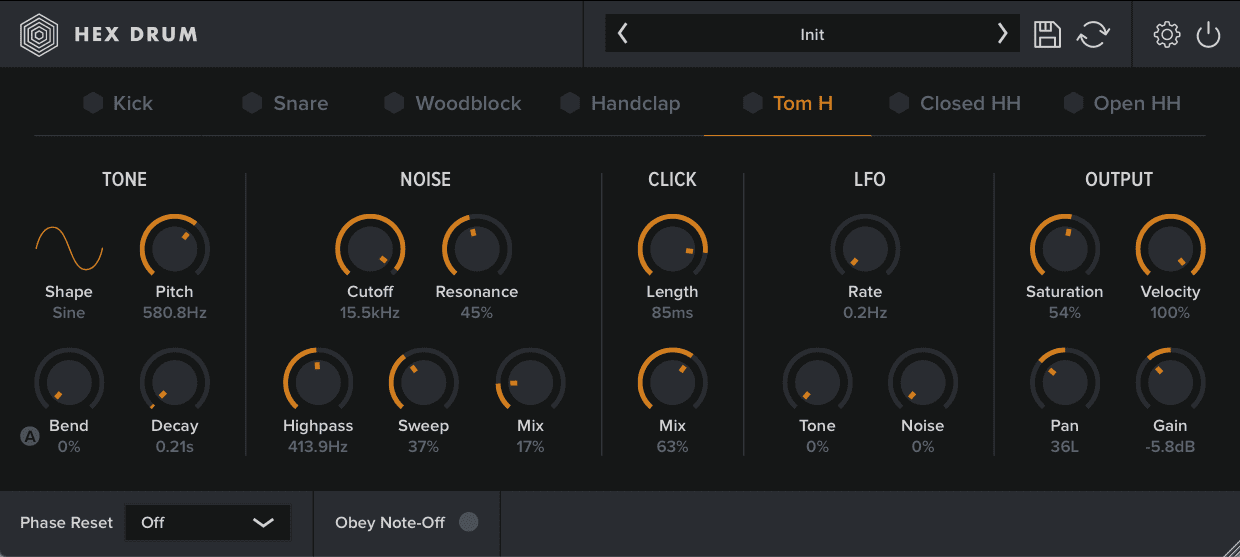
As for synthesis, first change the Wave to Sine, take the bend all the way down, decrease Decay to .20 seconds, and bring up the Pitch to 580.0Hz to bring it in tune with the song. In the Noise section, lower the Cutoff a touch and bring the Mix down to 17% so we don’t hear too much of it (808 toms are mostly body). Adjust Gain and Saturation as you like.
The toms:
And with all the drum sounds so far:

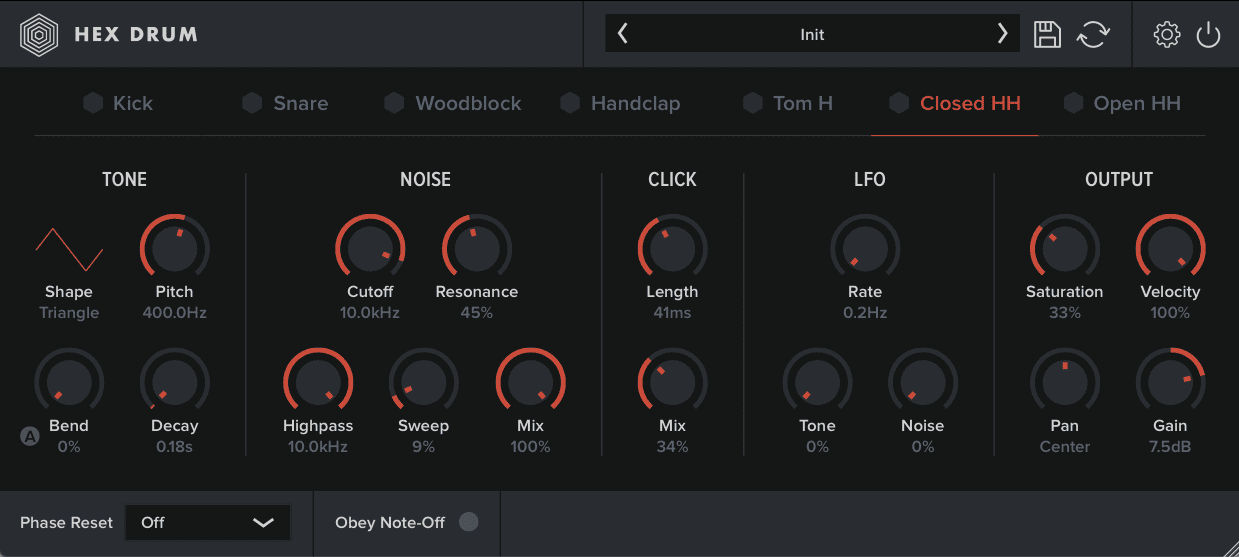
Step 7: Closed Hi-Hats
The closed hi-hats (called Closed HH in hex Drum) are pretty straightforward. Copy the below pattern into your DAW.
For the synthesis portion, it sounds pretty good as is, although you can always adjust the decay settings to fit your track.
Closed hi-hats alone:
And with other percussion:
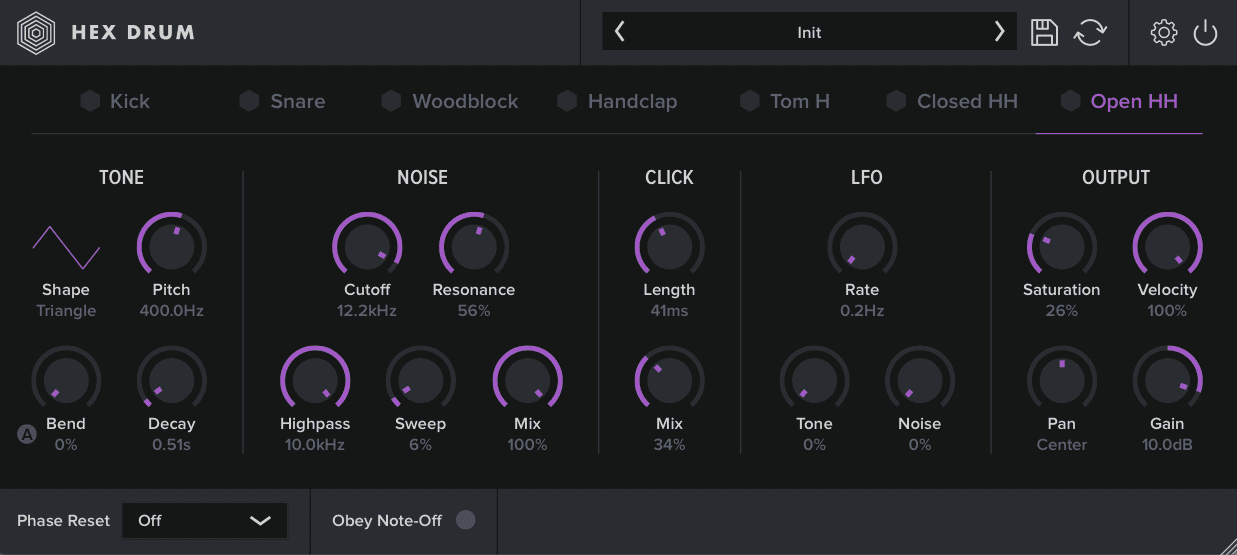
Step 8: Open Hi-Hats
Finally, program in the open hi-hat (Open HH) pattern.
In terms of synthesis, the initialized open hi-hat is good straight out of the box, although we increased the Resonance a bit to give it more bite. We also upped the saturation for presence.
The open hi-hat pattern:
Our beat with all the percussive elements:
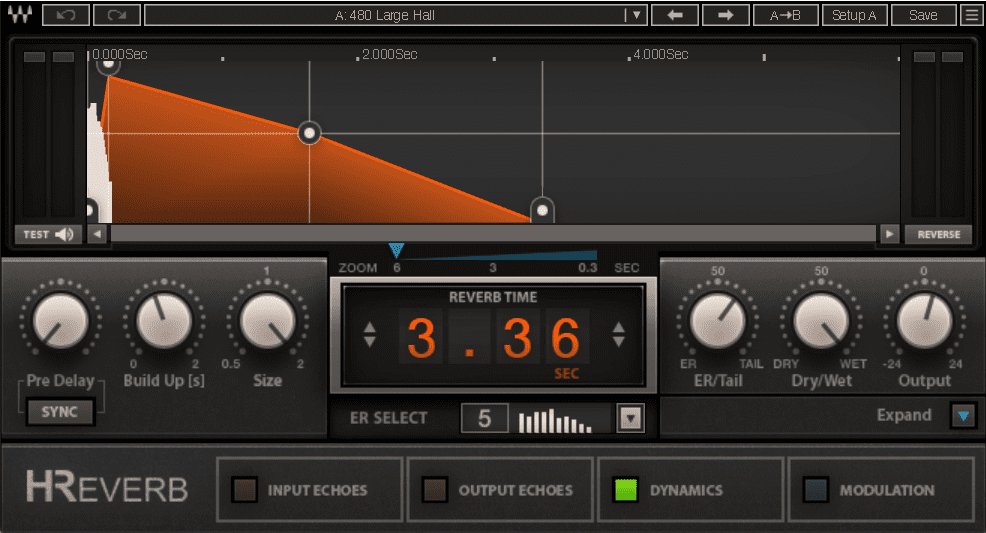
Step 9: Processing
Finally, let’s do a little processing to polish up our beat. First, we delete Live’s stock Reverb from Send A and replace it with Waves’ H-Reverb running the 480 Large Hall preset. This gives us that ‘80s digital reverb vibe. Send plenty of the individual sounds to the reverb to give it an expensive-sounding professional studio sheen.
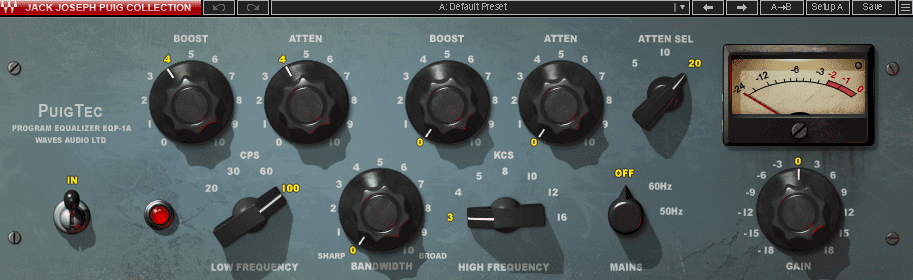
Next, we add Waves’ PuigTec EQ to the kick channel and do the Pultech bump trick, boosting and attenuating at 100Hz for extra oomph.
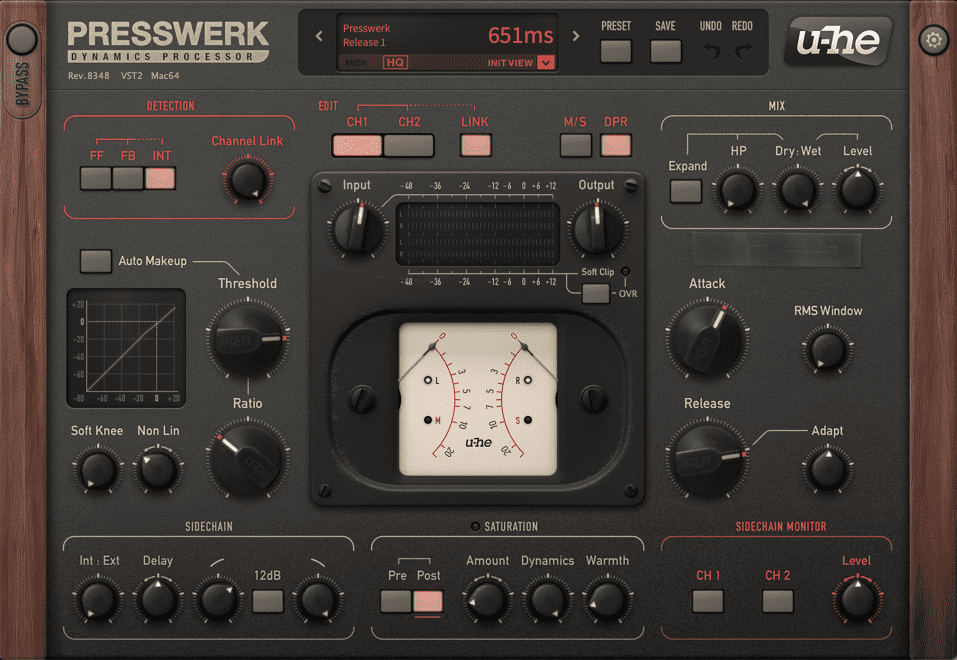
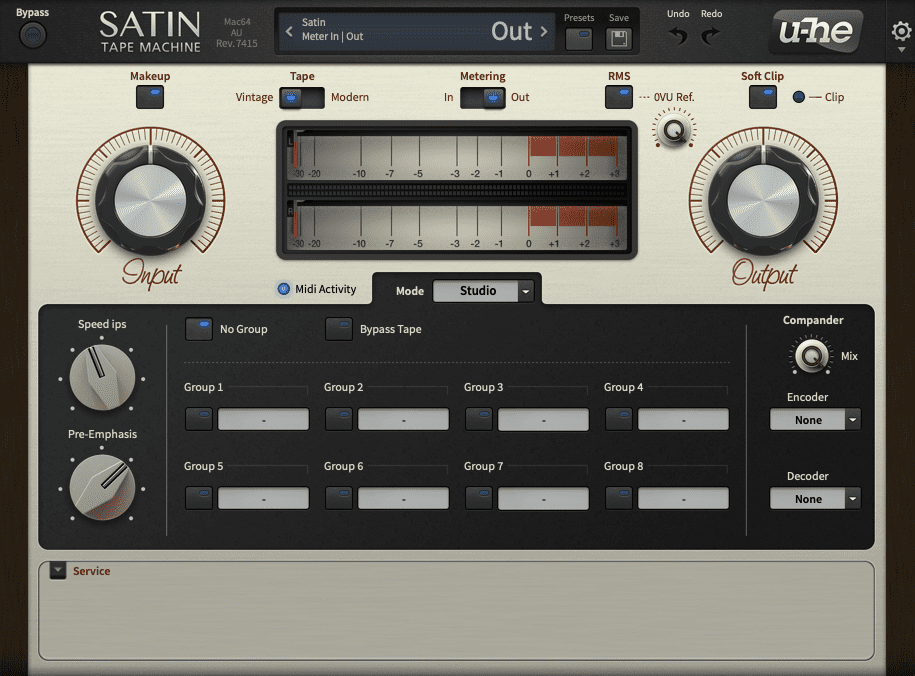
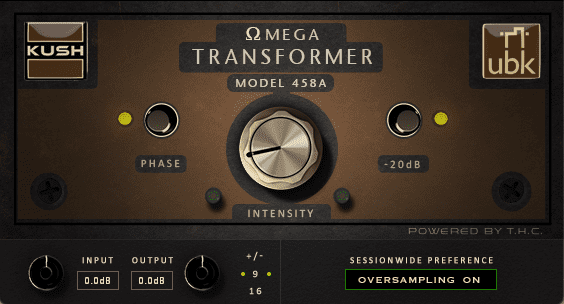
Finally, we group all the drum sounds onto one bus and add u-he’s Presswerk compressor and Satin tape emulation to glue it together. On the master bus, we add an instance of Kush’s Omega 458A for saturation and Brainworx’s Shadow Hills Mastering Compressor for some final polish.
Here’s our complete beat:
And with added instrumentation:
*Attack Magazine is supported by its audience. When you purchase through links on our site, we may earn an affiliate commission. Learn more.