
Loosen up the neck muscles as we’re going to make a head-nodding boom bap beat reminiscent of the classic 90s hip hop sound. To do this, we’re going to use Toontrack’s EZDrummer, EZMix2 and EZKeys to go back in time.
Boom bap describes the sound of the greatest hip-hop beats of the ‘90s. Nas, Mobb Deep, and Jay Z are some of the names best associated with the sound. However, dig a bit deeper and make sure to listen to producers like The Alchemist, Pete Rock or 9th Wonder. The list is long!
The sound combined sampled records with drum samplers. Crate diving is therefore an essential skill of the producer of boom bap beats. But what about those of us without a deep vinyl collection who want to get that vibe? Well, we can create our own music to sample.
What we’re going to do right now is use Toontrack’s suite of “EZ” virtual instruments to create our own samples and get the boom bap vibe, something akin to the Nas/DJ Premier sound of the early ‘90s, without having to spend a lifetime scouring record stores for rare vinyl. Layered with a handful of choice samples from Ableton’s “Chop and Swing” pack, included in Live Suite, we get an authentic vintage hip hop vibe.
Here’s what we’re making today:
N.B Click any image to enlarge.
Step 1: Session Setup & Kick / Snare
Set the tempo to 85. We’ll be using a 16th note swing in the vicinity of 60%.
If you’re an Ableton user, create a new instrument track with a 2 measure MIDI loop and grab the groove “Swing MPC3000 16ths 61” from the browser and apply it to the loop.
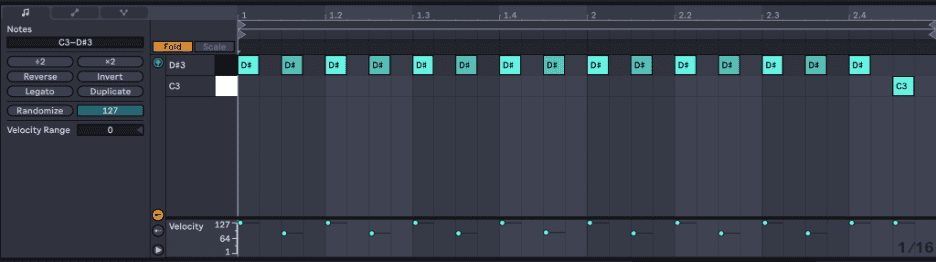
Add a Drum Rack to the track, placing “Kick Sweet” and “Snare Hard Body” from the Chop and Swing pack onto two of the pads, and draw your MIDI in like so.
Then add an instance of Ableton’s Drum Buss audio effect, set the “Damp” parameter to 2.5 KHz to tame the high end, and you should have something that sounds like this:

Step 2: Bring In Organic Drums
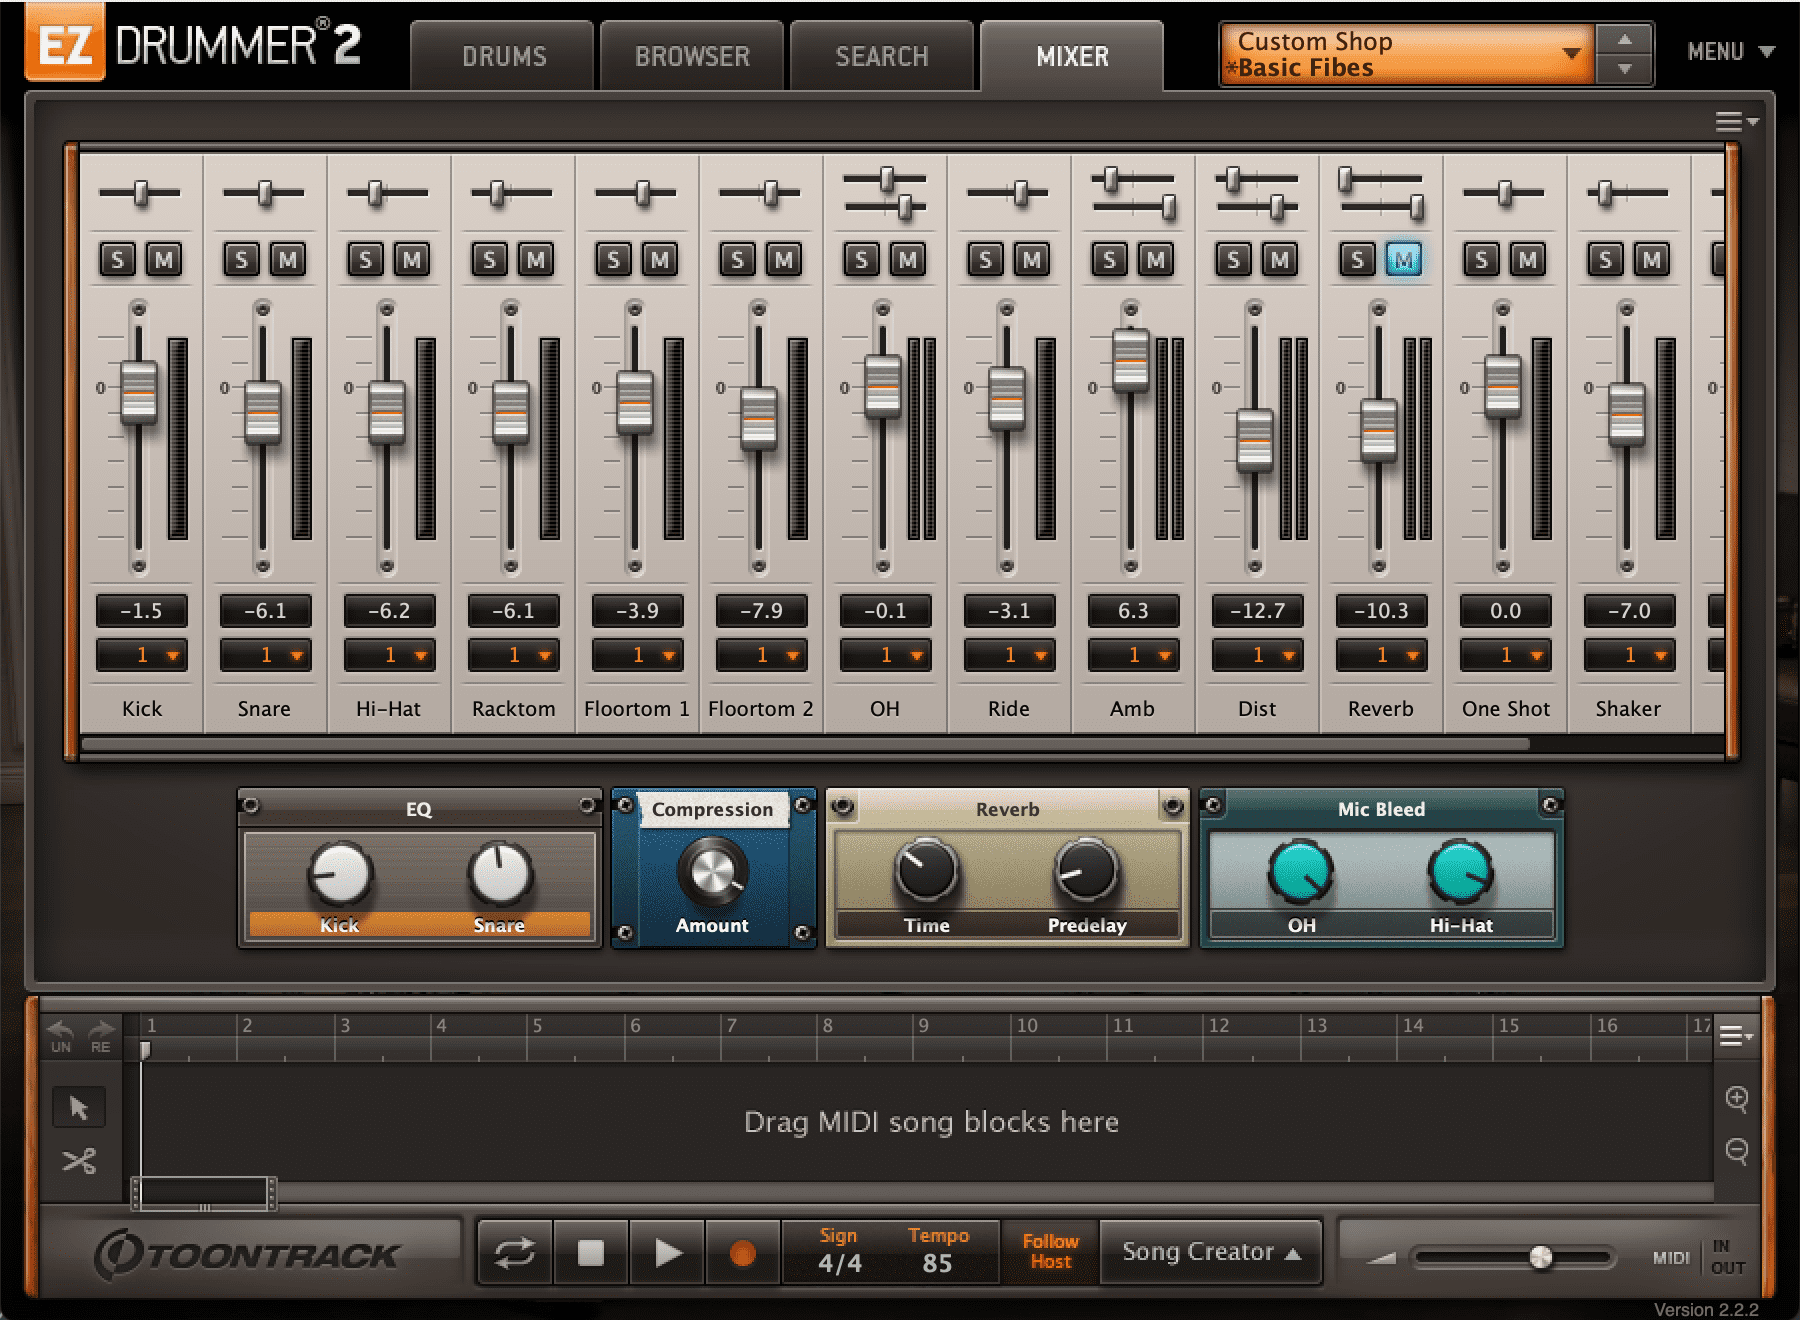
Next, create a MIDI track and add an instance of Toontrack’s EZDrummer. We’ll be using the Custom Shop EZX expansion pack, specifically the “Basic Fibes” kit.
Call up the kit and crank up the “Compression” knob found at the bottom of the interface, mute the channel labeled “Reverb,” and adjust levels until you have something that looks like this:
Then of course, it’s MIDI time. Create a two-bar loop, drop the “Swing MPC 3000 16ths 61” groove you previously used from the groove pool and onto the clip. Then draw in MIDI to look a little something like this

Here’s our progress so far:
Step 3: “Samplify” The Organic drums – Part 1
Ultimately we’re going to use the organic drums as a subtle layer behind the hard-hitting samples we used in Step 1.
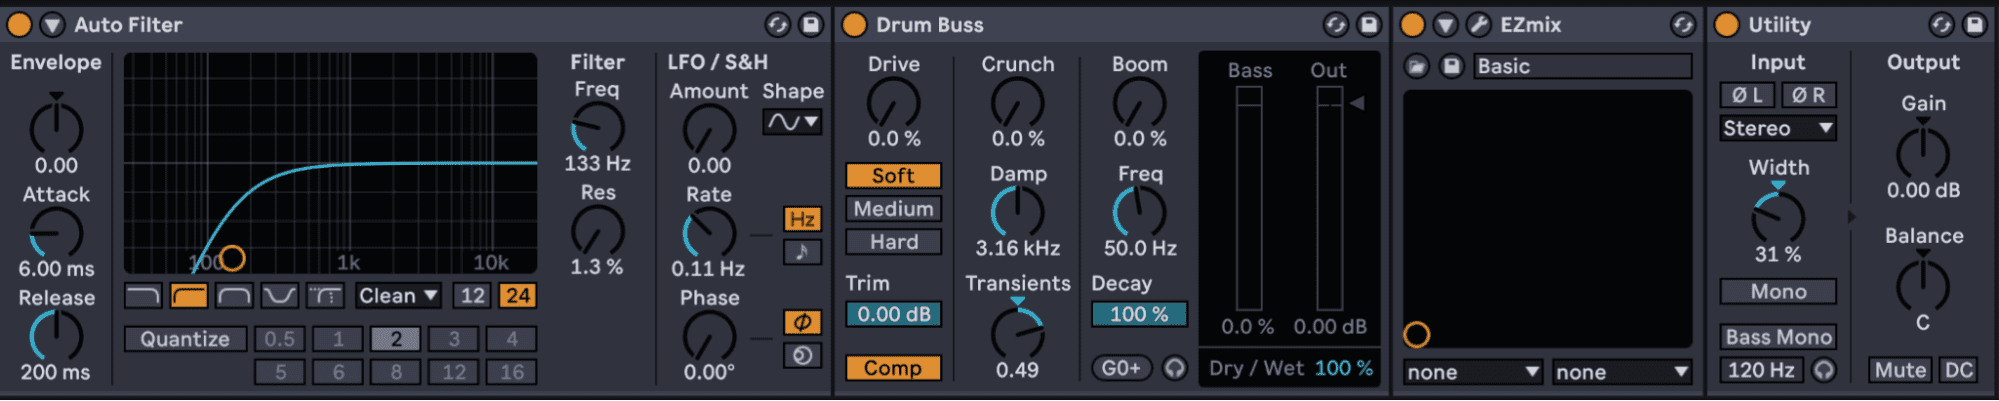
To that end, we’re going to add a chain of effects, starting with an auto filter to roll off the lows, an instance of Drum Buss to glue things together, an instance of EZMix2 to add vinyl vibe, and finally, a Utility device to collapse the stereo image a bit and make things hit hard down the center.
Copy the settings below on the Ableton devices, then we’ll take a closer look at the EZMix2 settings.
EZMix2 is exactly what it sounds like; an easy way to shape your mix, and between the stock presets and the multitude of presets available in inexpensive EZMix2 packs, you’ve got just about any sound you could want at your fingertips.
We’re going to use the Tube Vinyl preset from the Lo-Fi preset pack on this one
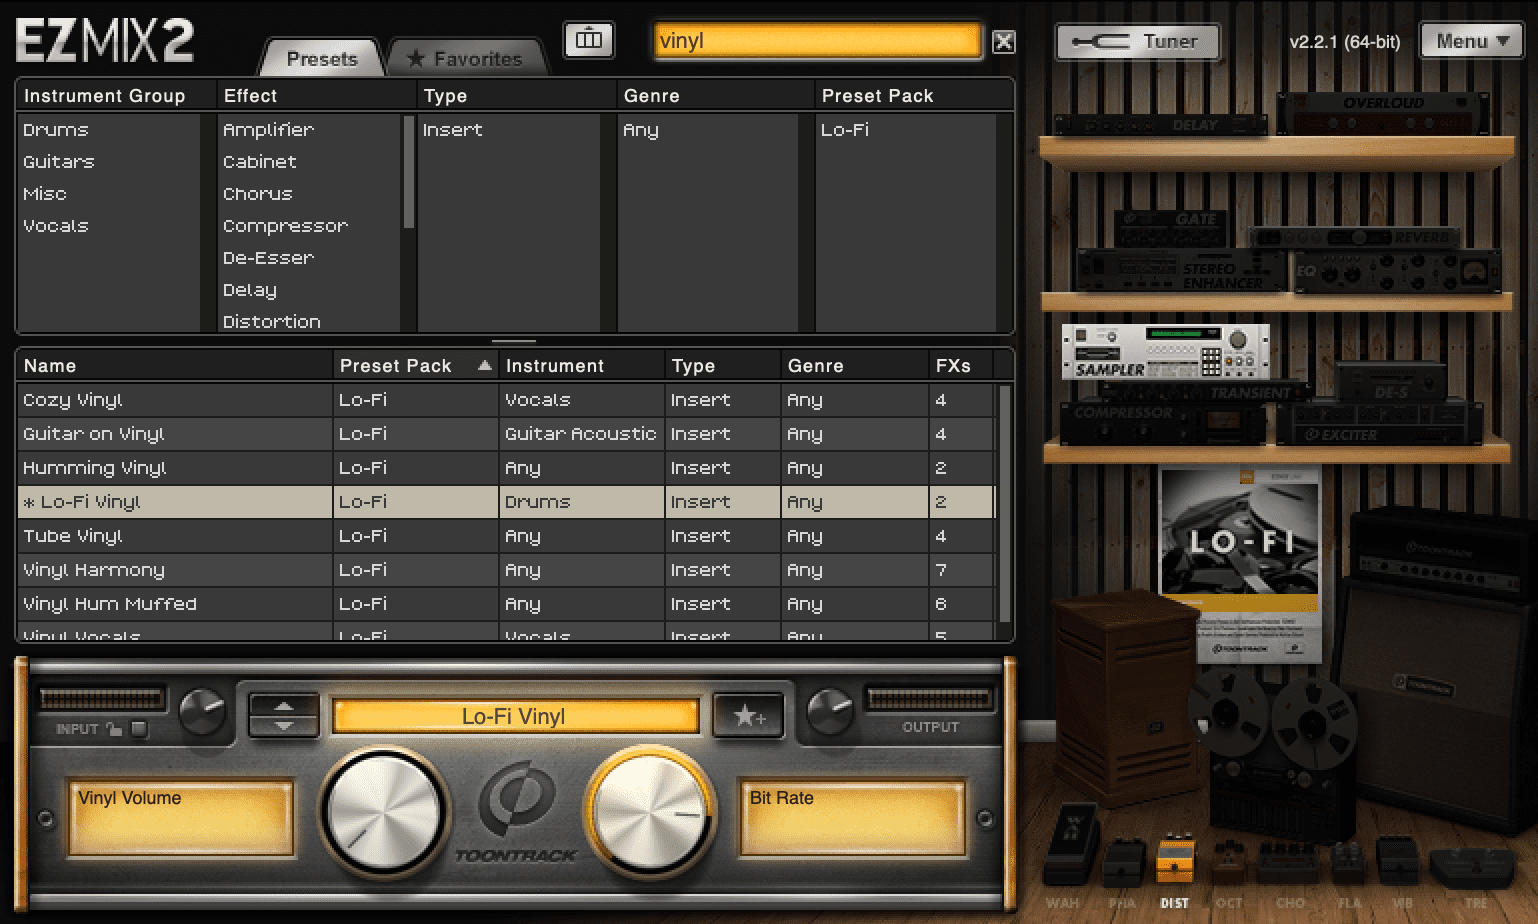
There are only two knobs to adjust. Make them look like this, and your groove should end up sounding like this:
It’s sounding a lot more like something you’d sample from a record at this point. But we’re not quite there yet.
One thing that makes a sample sound like a sample is that it usually isn’t played back at precisely its original tempo. It’s usually sped up or slowed down a bit on the turntable you’re sampling from, and as a result the pitch shifts a bit.
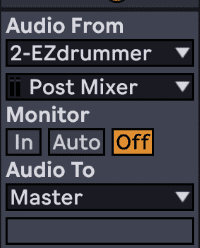
To replicate this effect, we’ll turn the project tempo down to 70 BPM for a moment, create a new audio track, set that track’s input to the output of EZDrummer2, arm the track, and record the loop as an audio file. Your I/O on the new audio track should look like this:
Once you’ve recorded your loop, trim it to 2 bars, make sure that your warp mode is set to “Re-Pitch,” and turn the project tempo back up to 85. It should sound a little something like this
Now pull that channel’s fader down drastically – about 18 dB – and layer it in with the bare bones kick/snare track from Step 1.
Here’s our progress so far:
Step 4: Got to Have More Hi-Hats
The drums are almost there but let’s add one more hi-hat layer to finish it up.
Doing something simple with a different tone and a slightly different pocket will complement the organic loop we just created and add a bit of complexity and looseness to the groove.
We’ll use the “In The Pocket” EZX, specifically “The Low Lo-Fi” kit with a really simple 8th note groove seen below.
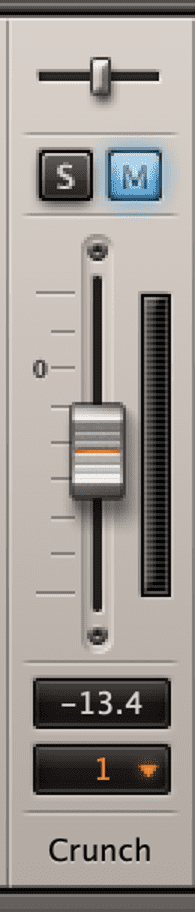
Let’s leave all of EZDrummer’s settings untouched besides muting the “Crunch” channel in the mixer tab. It’s a little too crunchy for this one
A little bit of dust courtesy of EZMix’s Tube Vinyl preset as configured below gives us just the sound we want to finish off the drum groove.

GIve those hats some gain now. About 5 dB extra sounds about right. You can add that in the Ableton mixer.
Here’s our progress so far:
Step 5: Add Piano Keys
A great beat comes with a great keyboard lick. A piano, a Rhodes, a Clav… something cool.
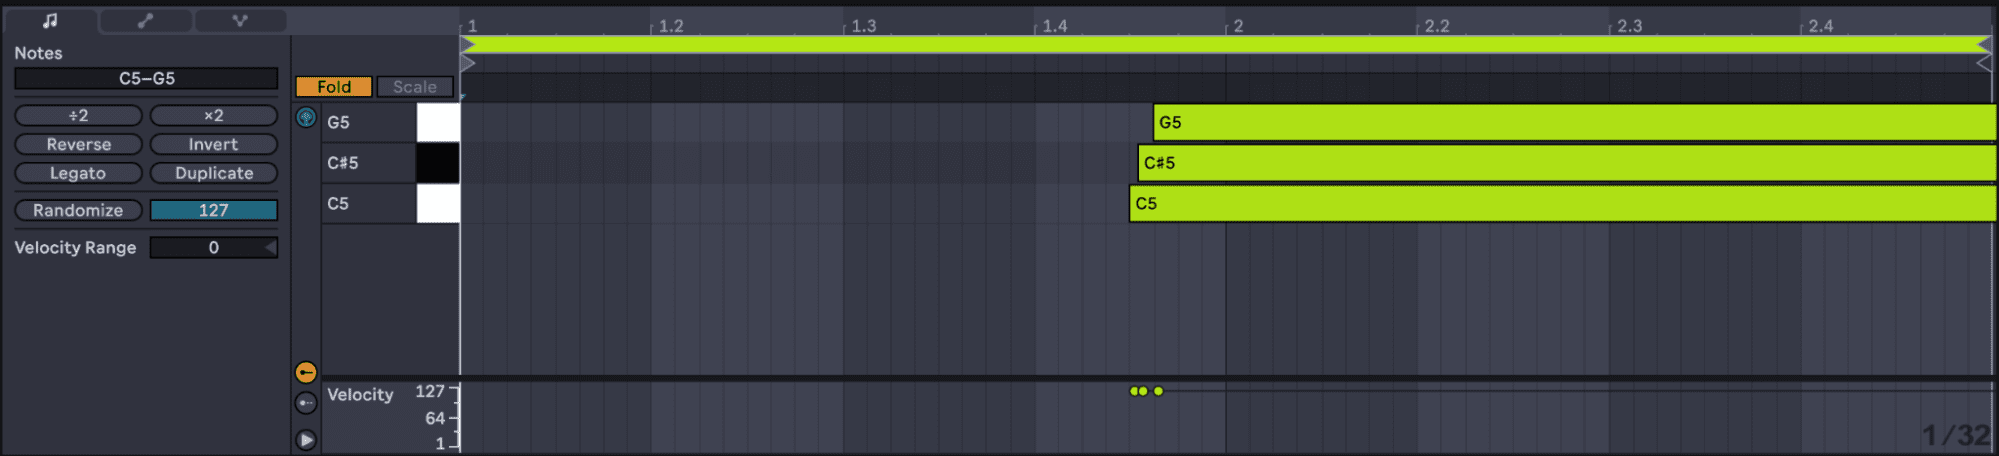
In this case we’ll use EZKeys, specifically the Studio Grand pack. Drop an instance of EZKeys onto a fresh MIDI track, and use the default “Standard” preset in the Studio Grand library. No need to alter any parameters on the instrument.
Just draw in your MIDI like so (or play something in using your controller), and make sure not to snap it to the grid. If you want it to sound real, gritty, and sampled, you have to let the pocket be a little loose.
It’s important to note that we have not dropped any kind of groove onto this MIDI clip. Just drawing it in, a bit off-grid, gets us where we want to be.
Then we’ll add effects. Start with another instance of EZMix and the Lo-Fi Vinyl preset from the Lo-Fi library. Move the knobs like so:
Then add an EQ Eight and pull out the lows, followed by a Drum Buss with the parameters in the positions you see (note that “Comp” is enabled).

Pull this track’s fader down about 24 dB.
Here’s our progress so far:
Step 6: I Got A Fever And The Only Prescription Is More Keys
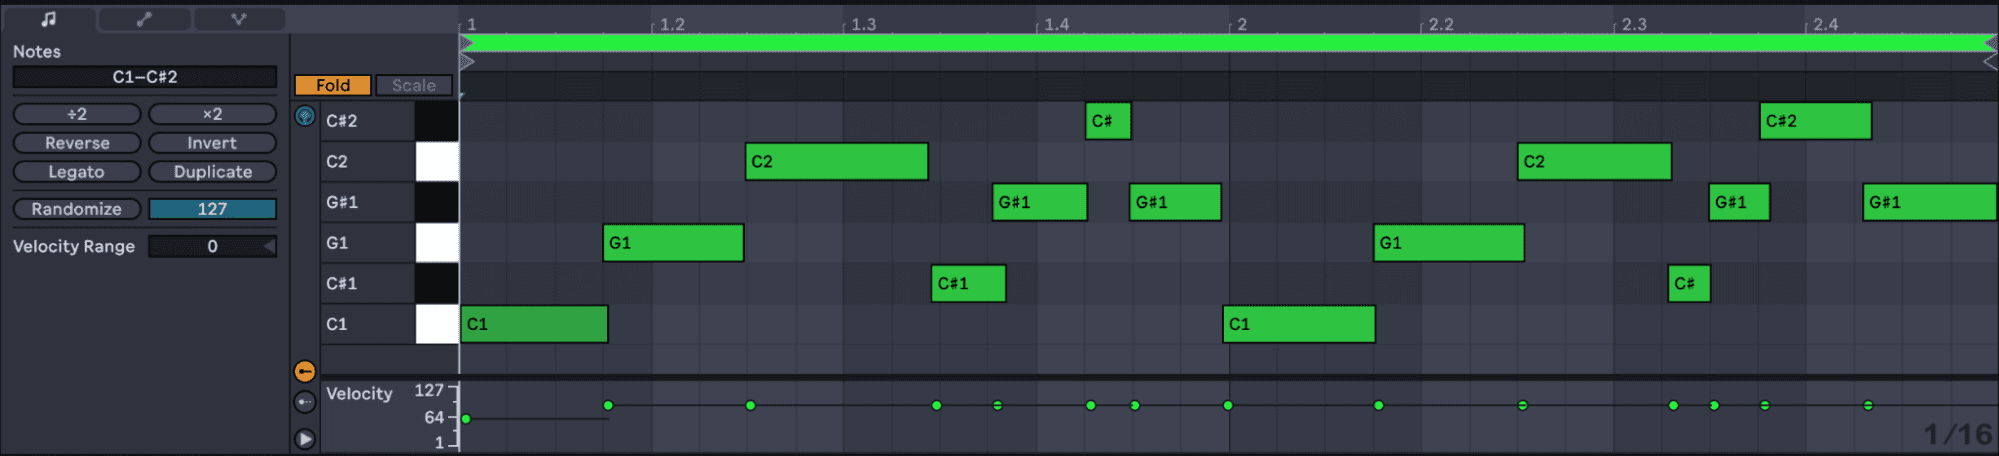
We need something to carry the beat along. A simple melody on a clavinet should do the trick. Create another MIDI track and drop in the Tempo Wah Clav preset from the Chop and Swing pack. Draw your MIDI like so:
We’re going to slam it through a boatload of tone shaping effects to make it sound just right. These are all standard Ableton effects – get them looking something like this, and note the instance of EZMix in the chain, we’ll examine its parameters next.

Once again in EZMix we’ll ply the Lo-Fi vinyl preset as seen below. Pull the channel’s fader down by about 18 dB. This gets us to where we want to go.

Here’s our progress so far:
Step 7: Add Bass to Taste
Add another MIDI track. This time, add the Upright Ambient Bass preset from Ableton’s core library. We’re going to double the clav part, so copy the MIDI from the clav track, but then move things around just a bit, off grid. Make it feel a bit organic.

Add the audio effects below and make sure your parameters match.

Can you guess which EZMix preset we’ll use on this one? If you said “Lo-Fi Vinyl,” you won the grand prize!

Pull this channel’s fader down by about 9 dB. Here’s our progress so far:
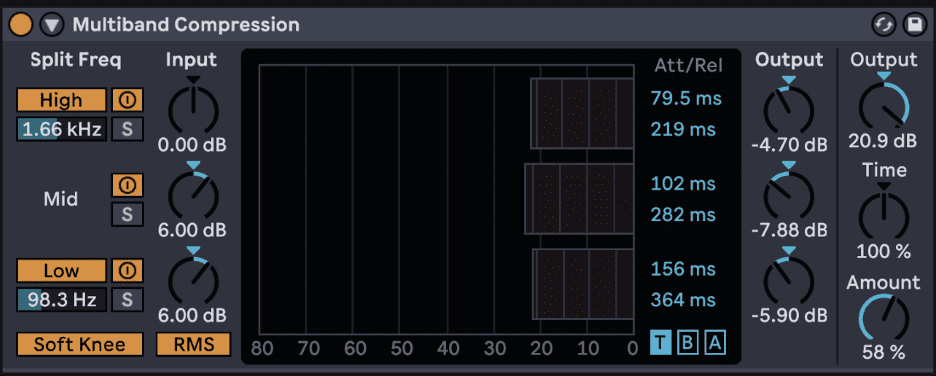
Step 8: Group Processing
I want to glue the keyboard and bass parts together a bit as if they were pulled off the same record.
To make that happen, I’ll group those tracks by selecting them all and hitting Command+G, and on the new group track that’s been created I’ll drop the “Multiband Compression” preset on, from Ableton’s core library, and modify it a bit to taste. Copy the parameters below.
Here’s our progress so far:
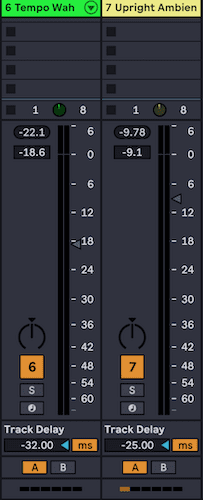
Step 9: Timing Tweaks
This is all pretty good but there’s something about the Clav preset and the bass preset that makes the notes hit a bit late.
One way you can correct this in Ableton Live is by using Track Delay. In order to see your Track Delay controls, you’ve first got to visit the toggle buttons on the lower right-hand side of your mixer in session view and click the button marked “D.” For “delay.” Makes sense, yeah?

Then you can set your track delay to a positive value on a track to delay it a bit, or by a negative value to pull it up ahead. I’m going to set the value on my Tempo Wah track to -32, and on my bass track to -25.
After that, it’s just a matter of throwing a limiter on my master bus to avoid any clipping, and we’re off to the races.
Here’s our final result once more:
*Attack Magazine is supported by its audience. When you purchase through links on our site, we may earn an affiliate commission. Learn more.