In the latest Beat Dissected, we use LinnDrum samples to add character to an organic house beat.
Beat Dissected is a regular series in which we deconstruct drum patterns, showing you how to program them in any DAW. Just copy our grid in your own software to recreate the loop.
Pull the project from Blend below to download the samples.
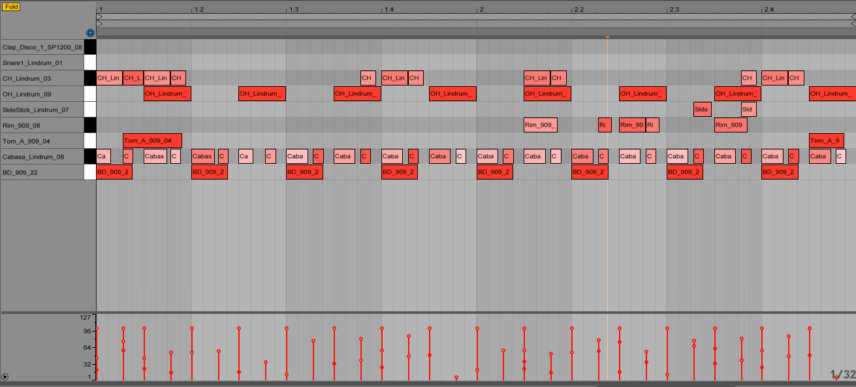
In this instalment of Beat Dissected we’ll be creating this organic house beat:
Spec
Tempo
122-126BPMSwing
CustomSounds
Linndrum and 909 samplesStep 1
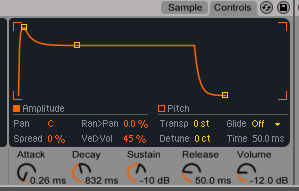
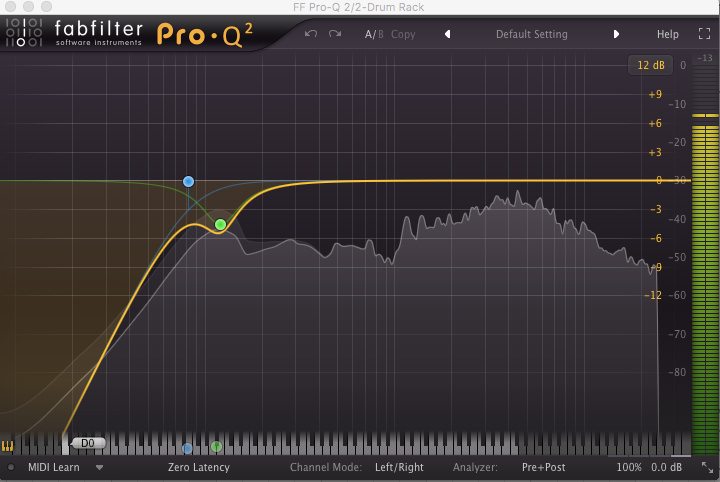
We begin by loading a 909 kick drum sample from the Samples From Mars TR-909 From Mars pack into a cell in our Drum Rack. Programming a two-bar four-on-the-floor pattern, we also tweak the envelope, taking down the sustain for a shorter hit which leaves plenty of space for a big bass sound.
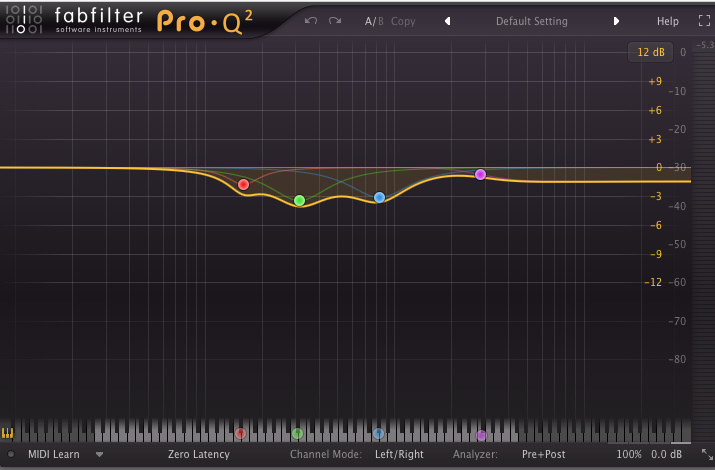
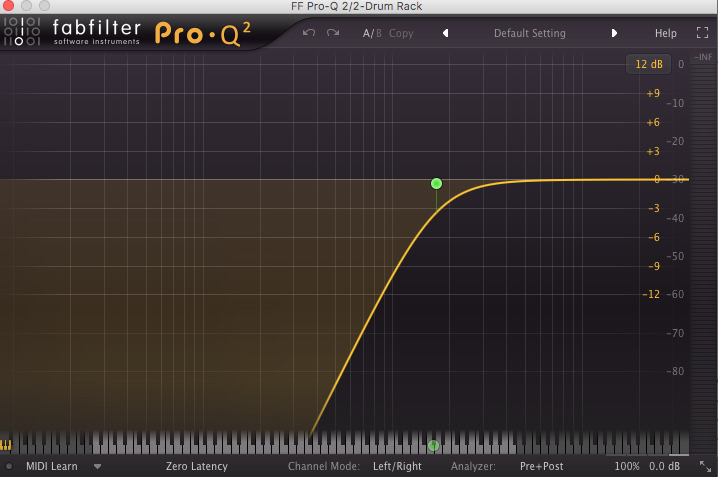
We then load an EQ on the bass drum, scoop out some of the mids and dip some of the highs with a shelf, taming the more aggressive part of the drum whilst also reducing the transient a little.

Step 2
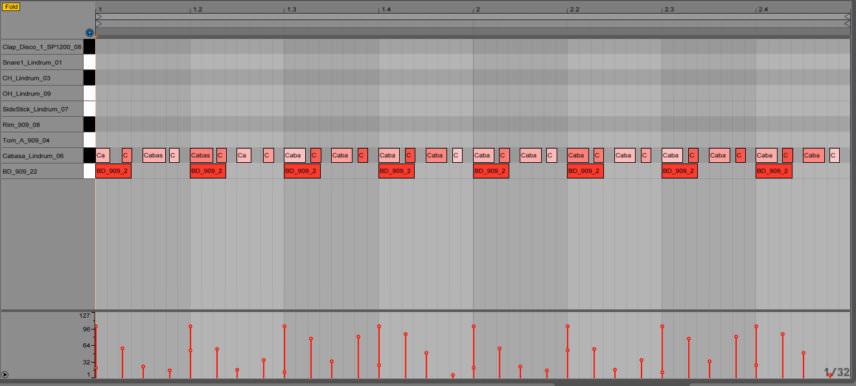
Next we load a LinnDrum cabasa sample and, using a MIDI controller, record some hits in live. Although we have to do some editing with the hits post recording, we’ve captured a very loose performance with plenty of dynamics. This will give our beat a more organic, human feel.
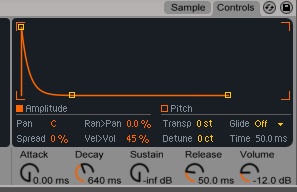
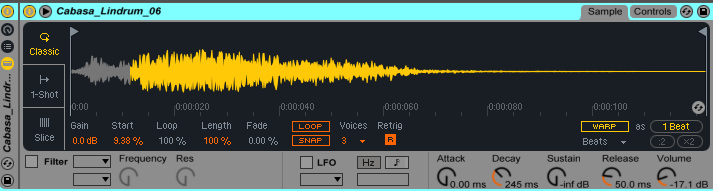
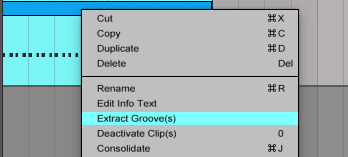
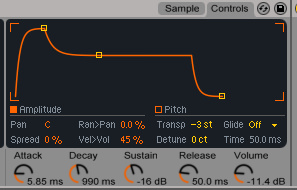
We edit the sample in Simpler, taking off some of the start of the sound to give the effect of a faster attack transient. We also take down the sustain for a tighter feel. We then copy our 16th hits to a separate MIDI channel, and extract the groove. This can be used as the groove template for the rest of the hits.
Step 3
Next we add a few percussion hits in the form of a 909 tom and rimshot and a LinnDrum side stick hit.
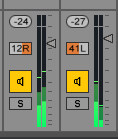
We tweak the envelope of our tom sample, taking off a tiny amount of attack to soften the transient. Then we add an EQ, sweeping off any extreme high and low frequencies to emphasise the core frequencies of the sound without taking up too much space in the mix.
We use the rimshot to add some syncopated hits in the second bar of the loop, again record them in live for a more organic feel, and adding similar EQ as with the tom.
The side stick sound plays a couple of loose hits around the rimshot. We then quantise these percussion hits to the custom groove we’ve created.

Step 4
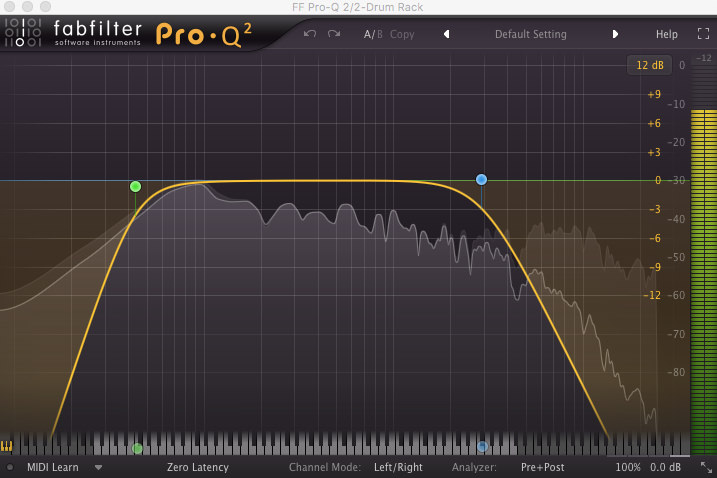
Next, we add some hi-hats to add some more energy to the groove. We begin with a LinnDrum open hat, programming hits on the off beats. We back the Attack right off, and then add an EQ sweeping away all but the very high frequencies. This gives more space for other hits – with it being such a busy beat, we need to be careful not to over crowd the mid range.
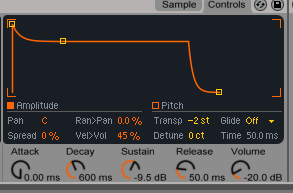
Next we add a LinnDrumm closed hat, programming some shuffly syncopated hits here and there. We pan the closed hat to the left slightly, and the open hat to the right, to give the beat more space and a wider stereo image.
Step 5
Next up, a snare and clap combo for the upbeat. We begin with a LinnDrum snare, which we EQ to take out the low frequencies and also dip the main body of the snare, taming the ‘thwack’ a little so there’s less of a frequency clash with the bass drum.
We then add a disco-style clap, again adding hits on the upbeat, but we also do a bit of manual adjustment, placing the hits a tiny amount before the snare. We also vary the timing for each hit, creating a live and organic feel.

Step 6
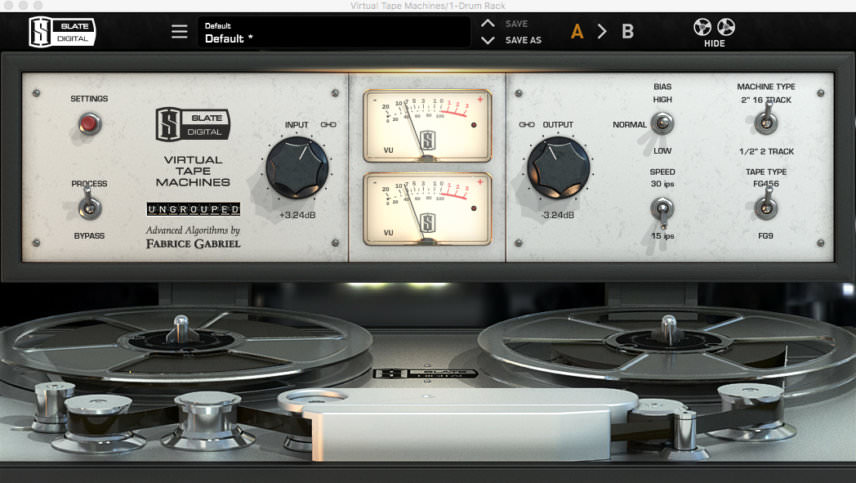
The final step is to add some group processing. We begin with Slate Digital’s VTM for some tape saturation. Driving the input +3dB, we also change the speed to 15ips and the tape type to FG467 for a deeper and more vibey sound.
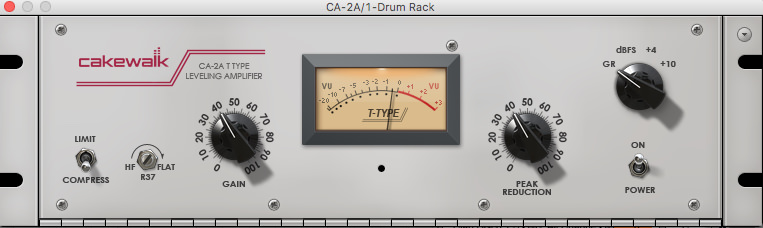
We then add Cakewalk’s CA–2A/1 compressor to level off some of the peaks in the loop, only compressing by 1-2dB.
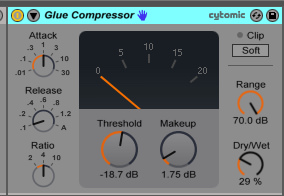
Finally we add Ableton’s own Glue compressor, compressing by 4-5dB with the wet-dry balance set appropriately for a parallel compression effect in order to help the sounds gel together.