
You’ve recorded vocals but where do you go from there? We show you how to mix vocals with dynamics, saturation, and polish into a vocal group in a single plugin.
Vocal processing can be kind of a challenge, especially when it’s not something you do very often. It’s not as easy as slapping on a single plugin, tweaking a few parameters, and bouncing out. Or is it?
Thanks to the rise of all-in-one processing plugins, it’s never been easier to get a polished vocal sound without too much fuss or muss. UltraVox, a vocal processing plugin from Leapwing, is one such plugin. It offers a number of parameters to help improve vocal presence while leaving much of the head-scratching details under the hood.
Now, let’s use Leapwing’s UltraVox to take a vocal group from raw to release-ready.
We’ll be using a track sung by songwriter Britney Young and produced by engineer and producer Cassius Clifford.
We’ll go from this:
To this:
N.B: We recommend following along with headphones or studio monitors as some of these results can be subtle. Remember, this is about final polish, not broad changes. As ever, click any image to see a larger version.
A Quick Overview Of UltraVox
UltraVox is a vocal processing plugin. It’s meant to act as a one-stop-shop for a variety of vocal polishing needs, from compression to sweetening. It can’t do everything though. To get the most out of it, you’ll still need to do some initial clean-up and tweaking. Think of it as the final coat of varnish on a piece of furniture that’s already been cut, shaped and sanded.
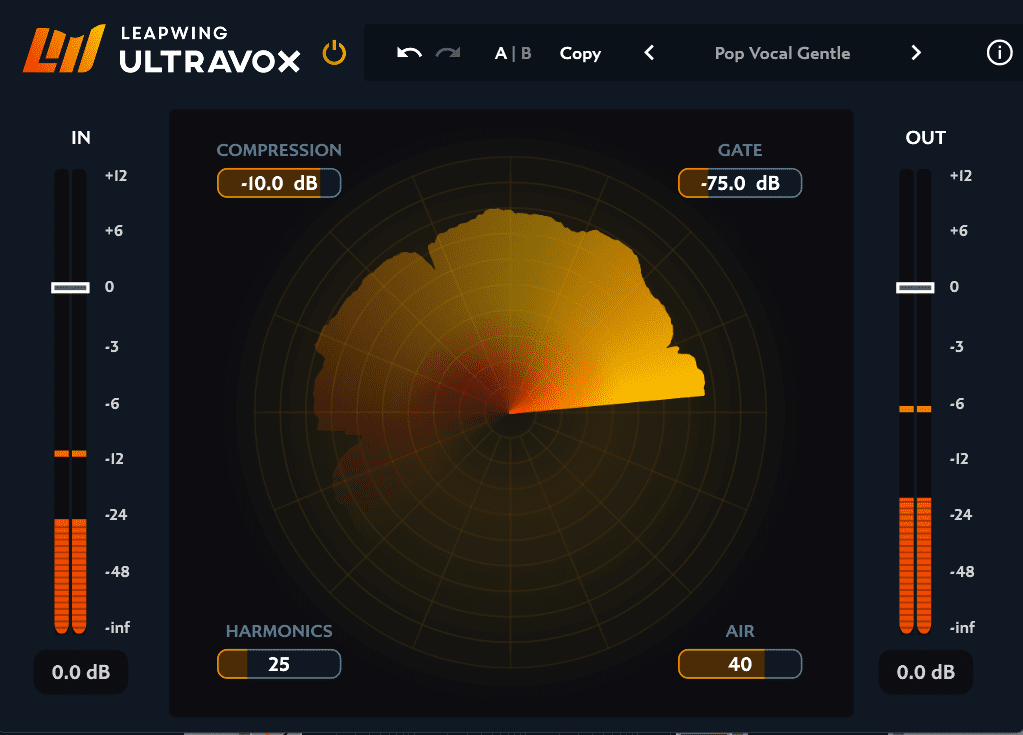
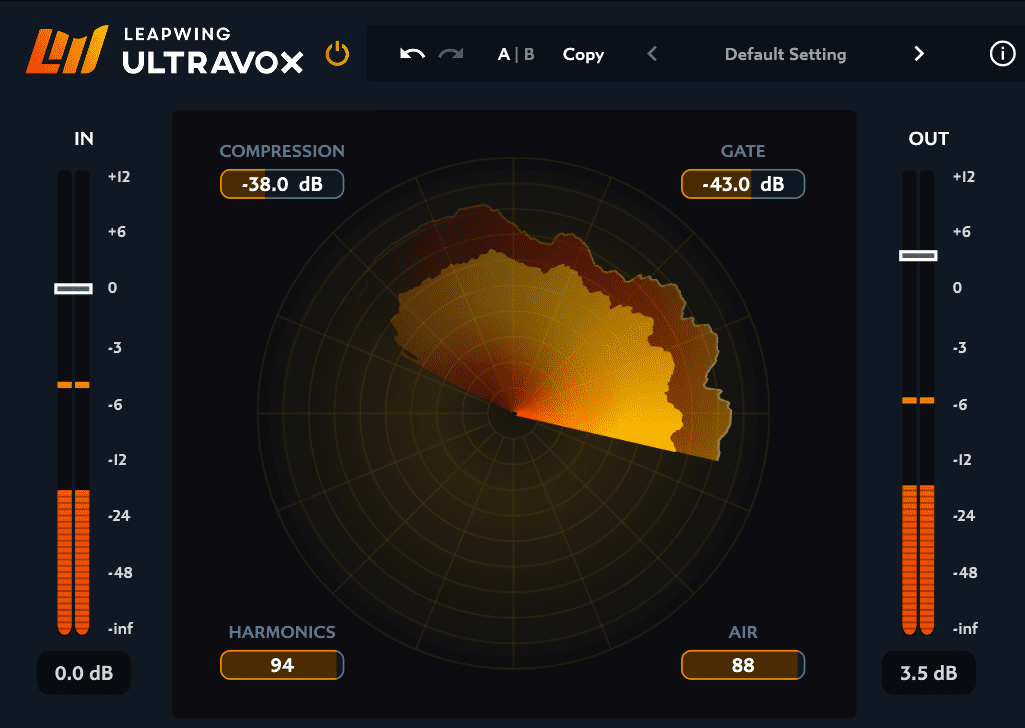
UltraVox is fairly easy to use. The main part of the plugin is dominated by a circular view of the incoming signal. It looks something like a sonar map on an old submarine. Aside from looking cool, it shows you the shape of the waveform as well as gain reduction from compression and gating.
Each ring on the display represents -10dBFS (decibel full scale) of reduction, with the centre point being -100dBFS and the outer ring 0dbFS. Gain reduction is represented by a second, alternately coloured waveform below the first.
There are four sliders, one for each parameter. Moving clockwise from the top left, there’s Compression, Gate, Air and Harmonics. Move the slider to adjust the parameter. Each one reacts a little differently but it’s fairly straightforward. We’ll get into the specifics of what each parameter is doing in the body of the tutorial.
Lastly, there’s an input gain control on the left of the plugin and output gain on the right for gain staging.
Step 1: Organization
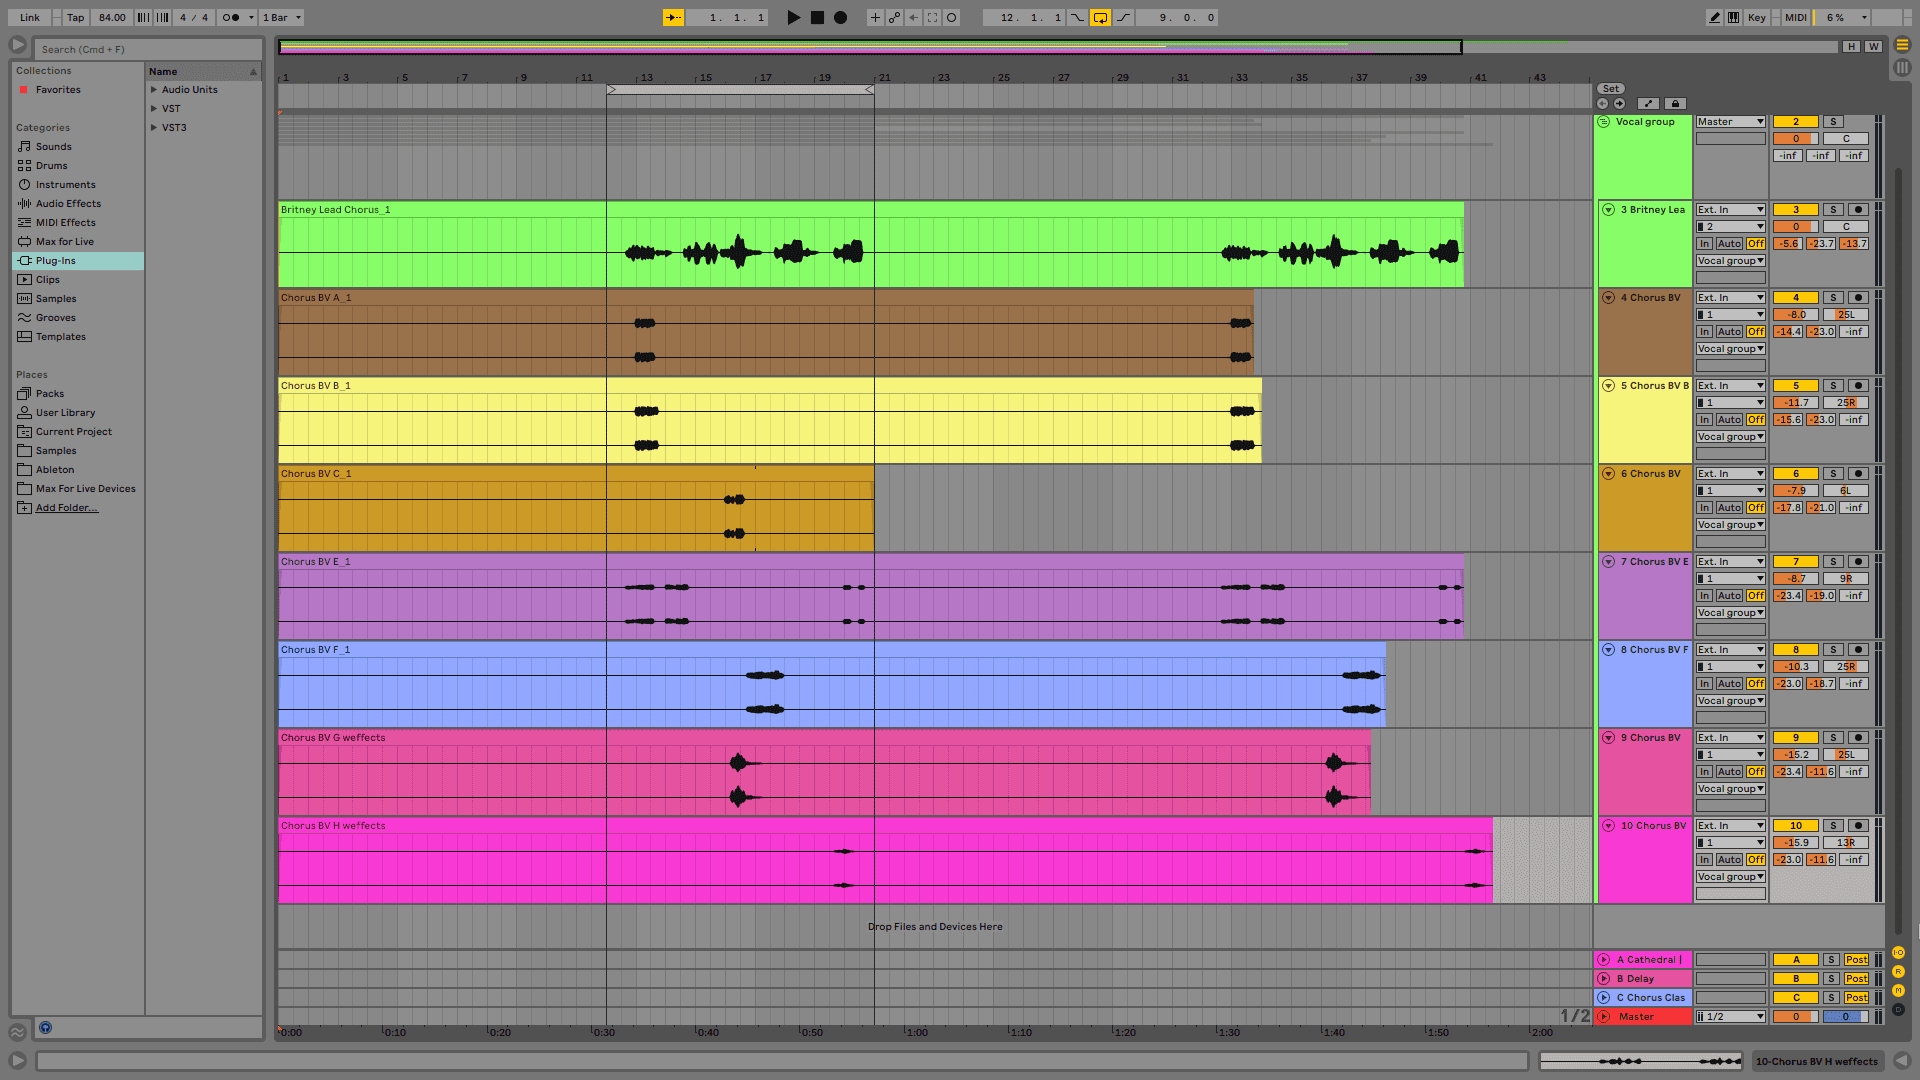
Our song arrived in two main parts, an instrumental version and vocal stems, for mixing. We have the main vocal plus a number of backing vocal stems, including two with pre-recorded effects.
After laying everything out and placing all the vocals onto a single group, we need to set levels and pan. The main vocal should be the loudest – after all, it’s the main focus of the track. the backing vocals are just that, backing. They’re meant to support the main vocal with additional harmonies and little extras.
Accordingly, we set their levels lower than the main. There’s no rule to this, we just do it by ear. Finally, we pan the backing vocals out to the sides, getting progressively wider to create a full sound stage.
Here are the vocals as loaded into the project:
And after volume and panning adjustments:
Step 2: EQ
For the next step, we noticed some low rumble in the raw vocal files so let’s use an EQ to clean up the signal a little. We also want to give it some gentle, wide boosts to help shape the tone. We don’t need to go too far as UltraVox will add its own harmonics through saturation as well as a high-frequency boost.
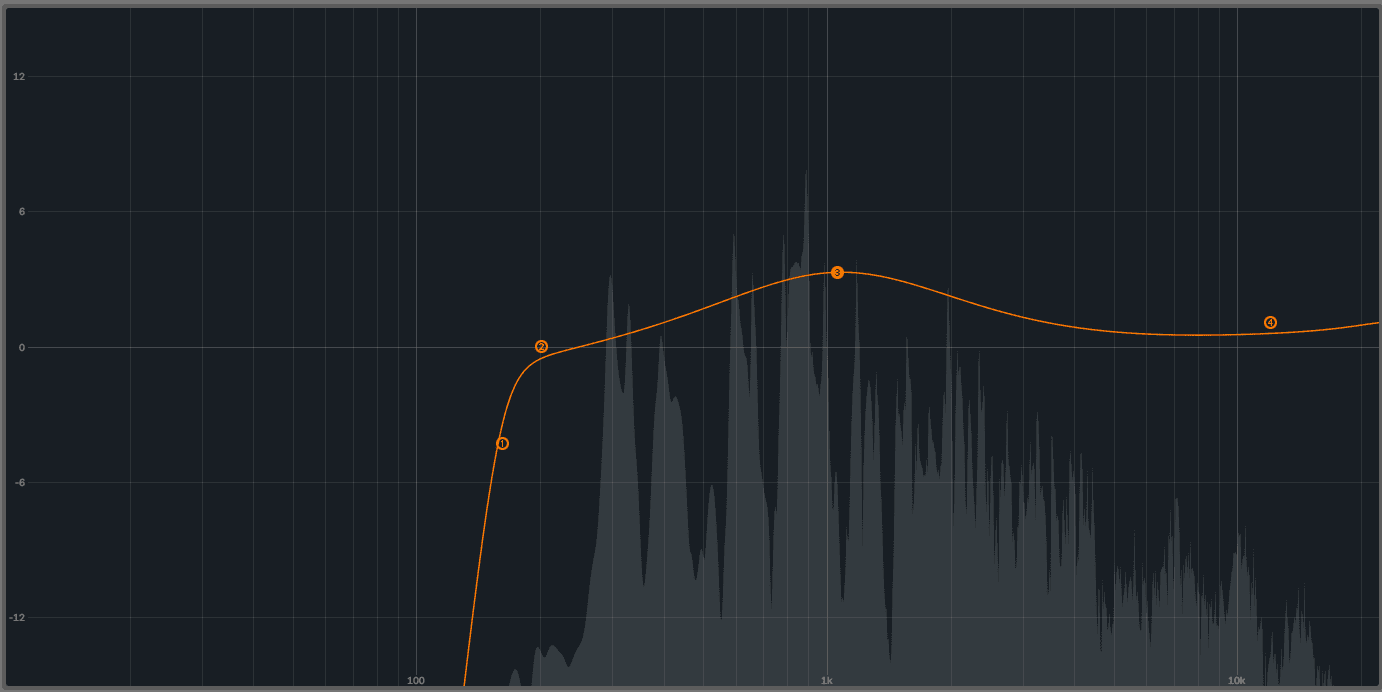
We install Live’s stock EQ Eight on the main vocal bus. The first thing we want to do is use a low shelf to remove any frequencies below 160Hz or so. This will tackle any rumble that the microphone picked up. If we don’t address this now it will get in the way of the compression in the next stage. We also give it a small boost of 3.35dB around 1kHz, to add a little presence.
Top Tip: If your backing vocals are feeling intrusive, use a low cut on the backing tracks to remove some of the highs and reduce their power in the mix.
Our vocals after EQ:
Step 3: Compression
It’s time to get UltraVox involved. We add it to the chain after the EQ, open it up and make sure it’s set to default.
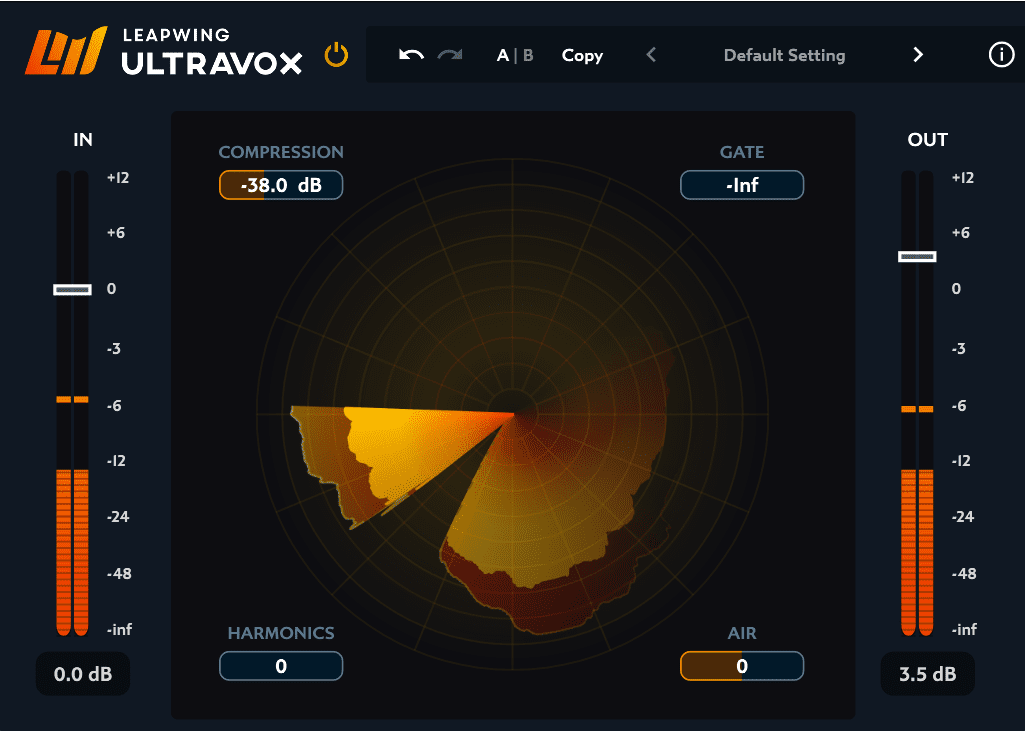
Let’s look at the Compressor parameter first. As with the other parameters, there’s a single slider to work with. This sets the threshold. Behind the scenes, the compressor changes depending on the audio it receives, with variable short attack (less than 2ms) and long release (more than 500ms) times.
All we have to do is lower the slider until the vocals sound even. We can use our eyes by watching the rotating animation but really, this is all about using our ears. We’ve gone with -38.0dB. This works across all the vocals, glueing them together and adding impact. We can clearly see the gain reduction happening in the sonar animation. Note that we’ve brought up the output to make up for the loss in overall volume.
The vocals now with UltraVox compression:
Step 4: Gating
For the next step, let’s use the Gate function to clean up any background noise or unnecessary breaths that may have been pulled up by the dynamics. Like the Compressor, UltraVox keeps the Gate’s technical stuff tucked away, but it has a medium-long attack of 350-800ms and a very short release time of less than 2ms, with the slider again setting a threshold.
We pull the slider to the right, listening as it progressively adds more gating. It’s a smooth gate (probably because of that languid attack time) so even at extremes, there’s no choppiness. Our vocal wasn’t in too bad of shape, thankfully, and the difference is subtle, but -43dB feels nice and clean.
Now with gating:

Step 5: Harmonics
Let’s add saturation next with the Harmonics slider. This brings in second and third-order harmonics to fill out the signal and give it more colour and presence. This time, the slider controls the wet/dry balance, with 0 indicating no harmonics and 100, maximum harmonics.
We experiment with the settings and compare the vocals in both solo, and with the rest of the track. It’s a subtle, warm effect – there’s no distortion happening here – so we go for a generous setting of 94. Think of this as adding analog warmth. It’s subtle but makes a difference overall.
With harmonics:

Step 6: Air
For the final stage, let’s add some high-end sheen with the Air parameter. This boosts (or cuts) frequencies focused around 12kHz with a custom curve to add “crispiness without harshness”, as it explains in the manual. We bring the slider up to 88. That’s given it some life in the upper frequencies.
With high-end boost:
Here’s the processed vocal in the context of a track with reverb and delay on the sends: