
In this article, we apply soothe2 to vinyl drum breaks in order to reduce harsh resonant frequencies before layering the breaks with punchier drum samples. This boosts the layering process and helps to achieve a better mix overall.
In recent months we’ve looked at soothe2’s features and applied the plug-in to mixes of various genres. As a quick recap, soothe2 is a resonance reducer that detects harsh frequencies across the spectrum. It reduces these frequencies in real-time, so you have control over how wide the cuts are, the attack, release times, depth and more.
The workflow of Oeksound’s popular resonance suppressor usually sees producers apply it to stems in a mix and select areas to smoothen via the EQ nodes. We also recently explored how to use soothe2 for sidechaining purposes.
In this tutorial, we will look specifically at how soothe2 can be applied during drum layering. One of the best ways to start any track is a drum break sample with a nice groove. This isn’t to say that you should just drag the break into your project and loop it! Instead, a good technique is to take the audio of the break and use Live’s ‘Convert Drums to MIDI’ feature to get the MIDI for the kick, snare and hi-hats.
This allows you to add high-quality samples to the most important hits of the break to achieve a much more powerful beat. For this to work effectively, however, you need to carve out the necessary space in the original drum break sample or there will be lots of frequency overlap. This is where the excellent soothe2 comes into its own.
Traditionally this is done with EQs. For example, cutting the low frequencies to make room for the new kick or reducing the airy high frequencies to make room for new hi-hats. Sidechain compression is also an option when you are trying to duck the drum break as the new kick and snare samples play.
We find these options quite extreme and that they reduce the quality and impact of the break. Soothe2 does a good job maintaining the original traits of the break while mainly reducing only the harsh resonances that could clash with the new samples.
Here are the two drum beats we’ll be programming using this technique. We’ve added musical elements for context:
N.B: We recommend following along with headphones or studio monitors as some of these results can be subtle. Remember, this is about final polish, not broad changes. As ever, click any image to see a larger version.
Converting Audio Drum Hits to MIDI
The first step is finding a good drum break. There are gazillions of break packs out there. Going back a decade Music Radar provided a list of free ones. Just grab one to taste and we can move on.
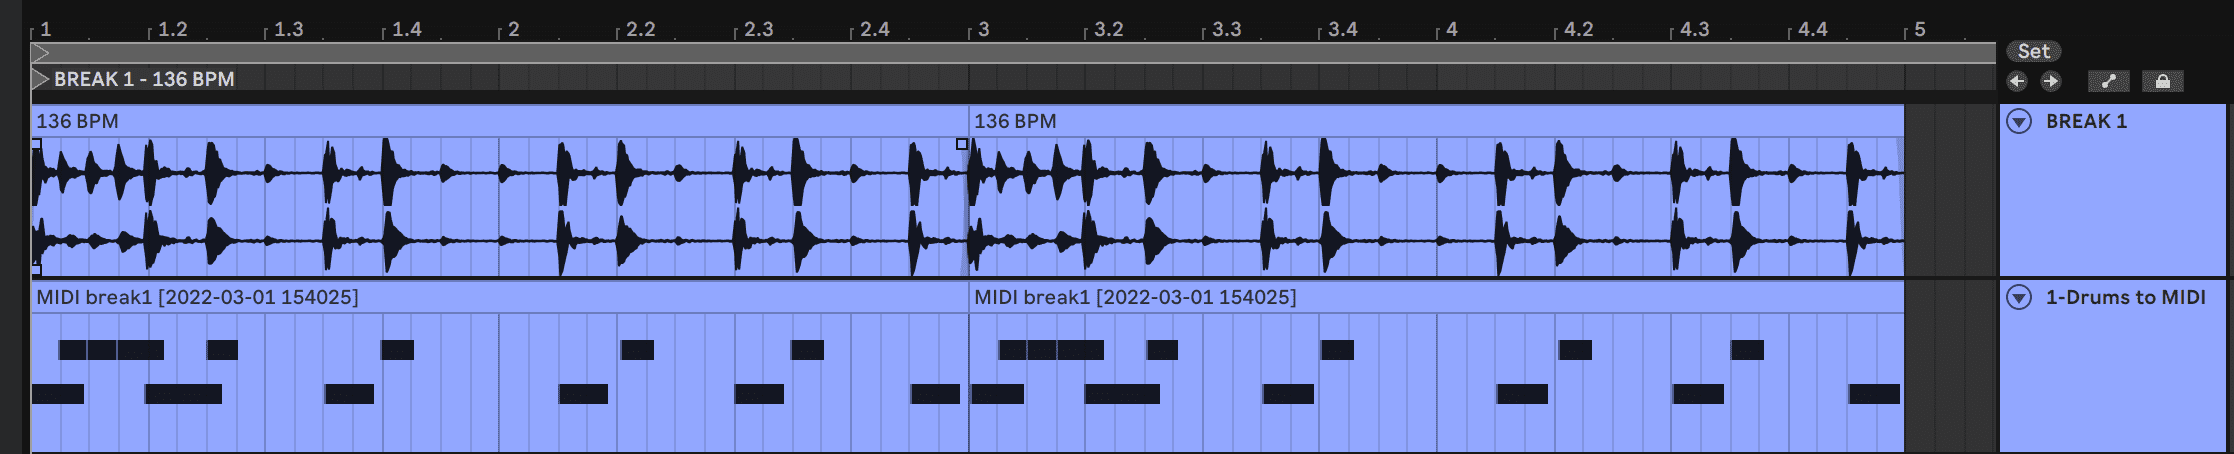
We’ll then bring it into Ableton and cut it up a bit to make the rhythm more original.
Here’s how our break sounds with no processing:
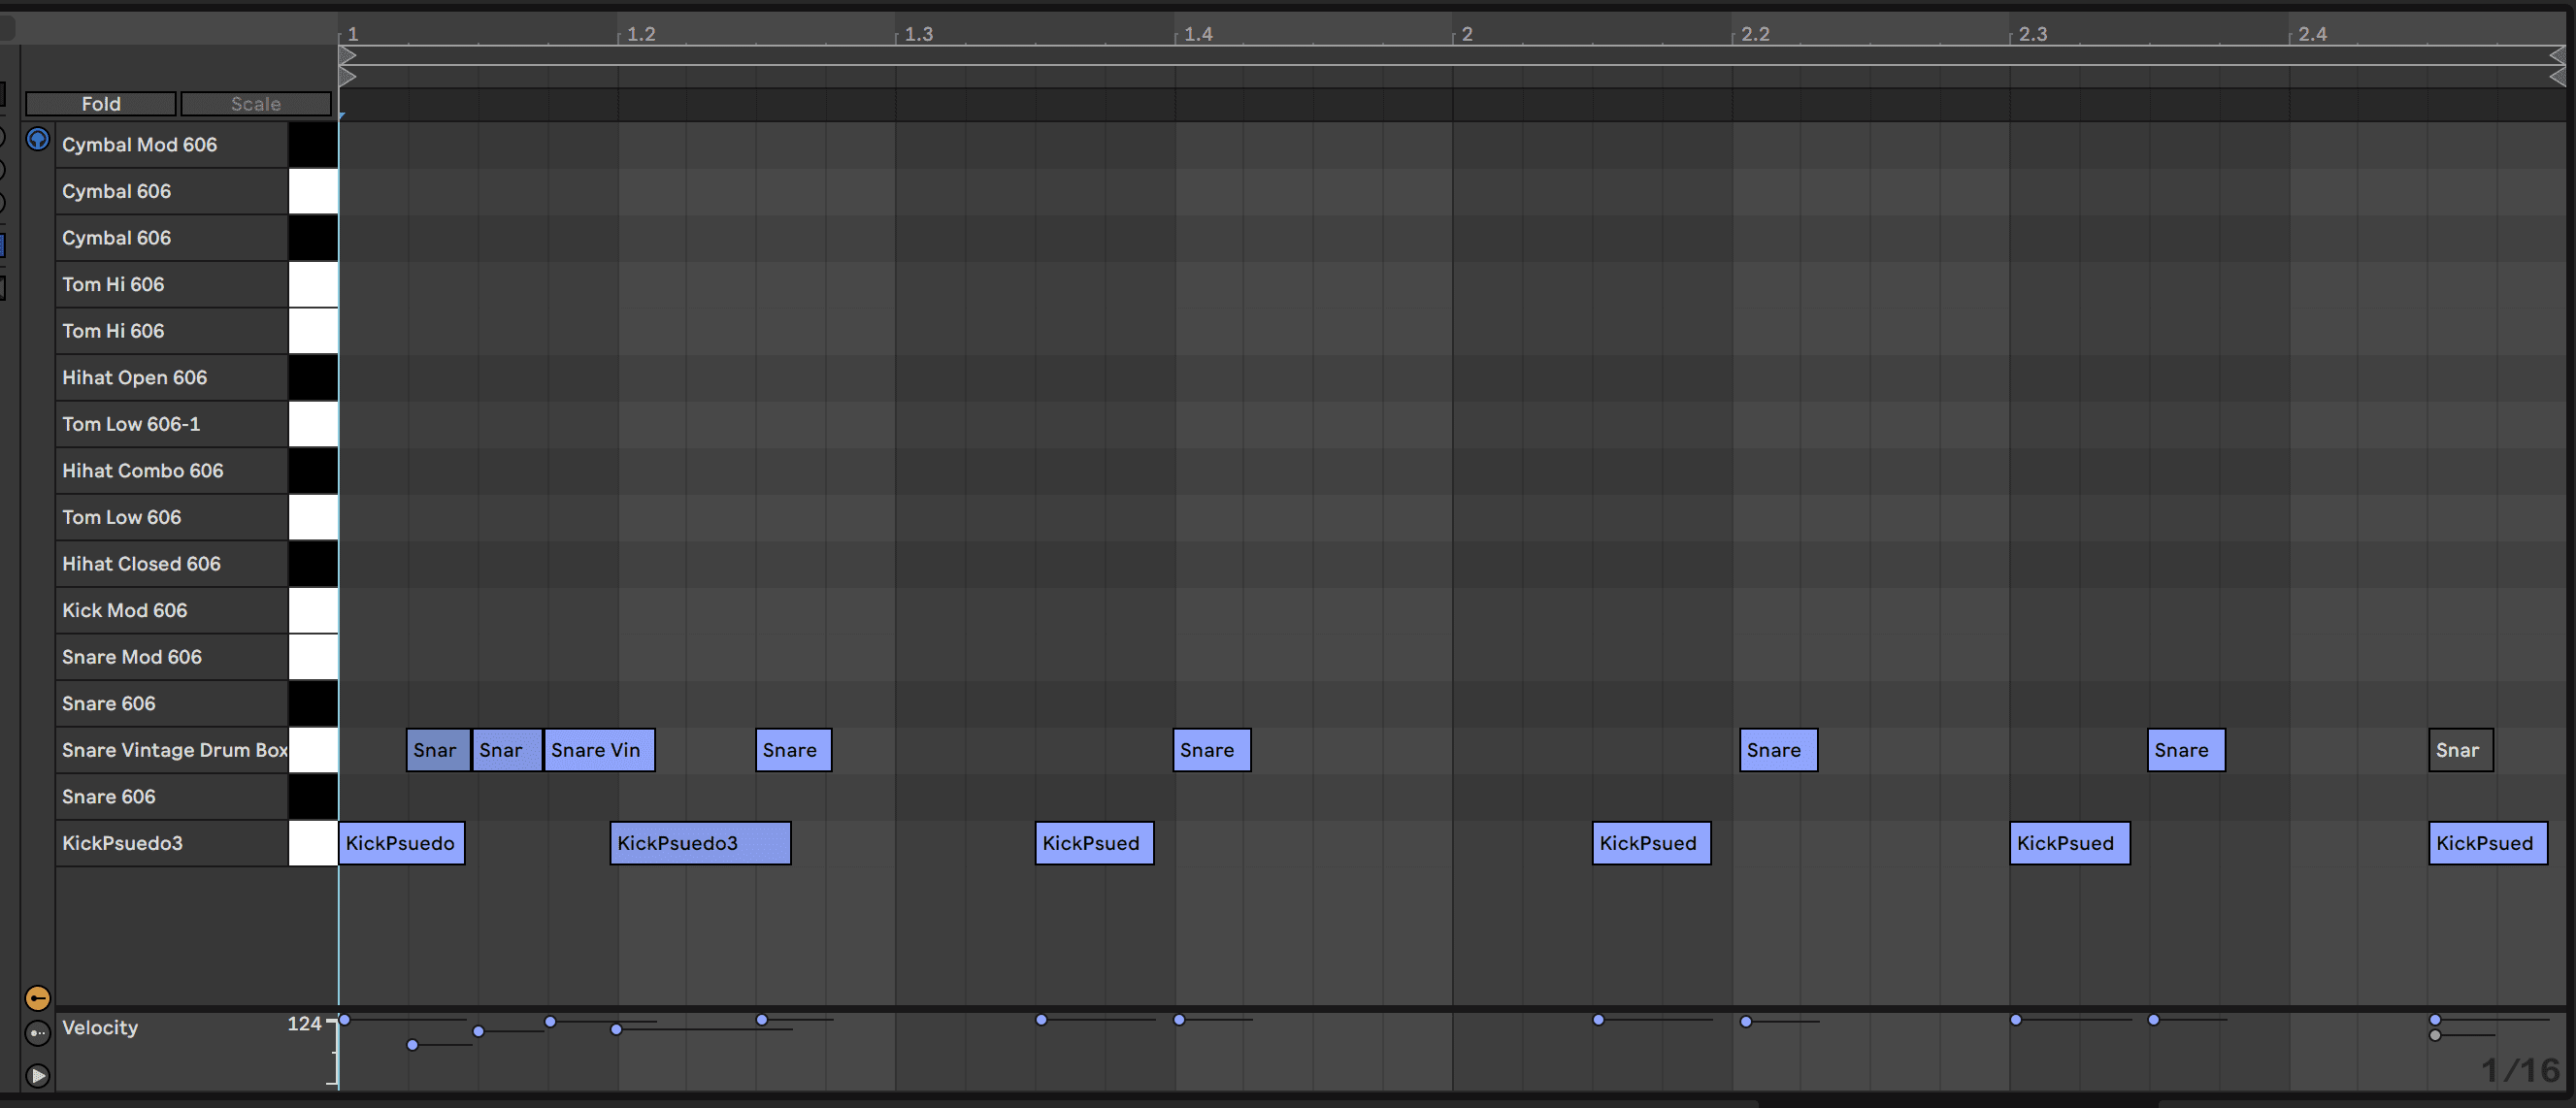
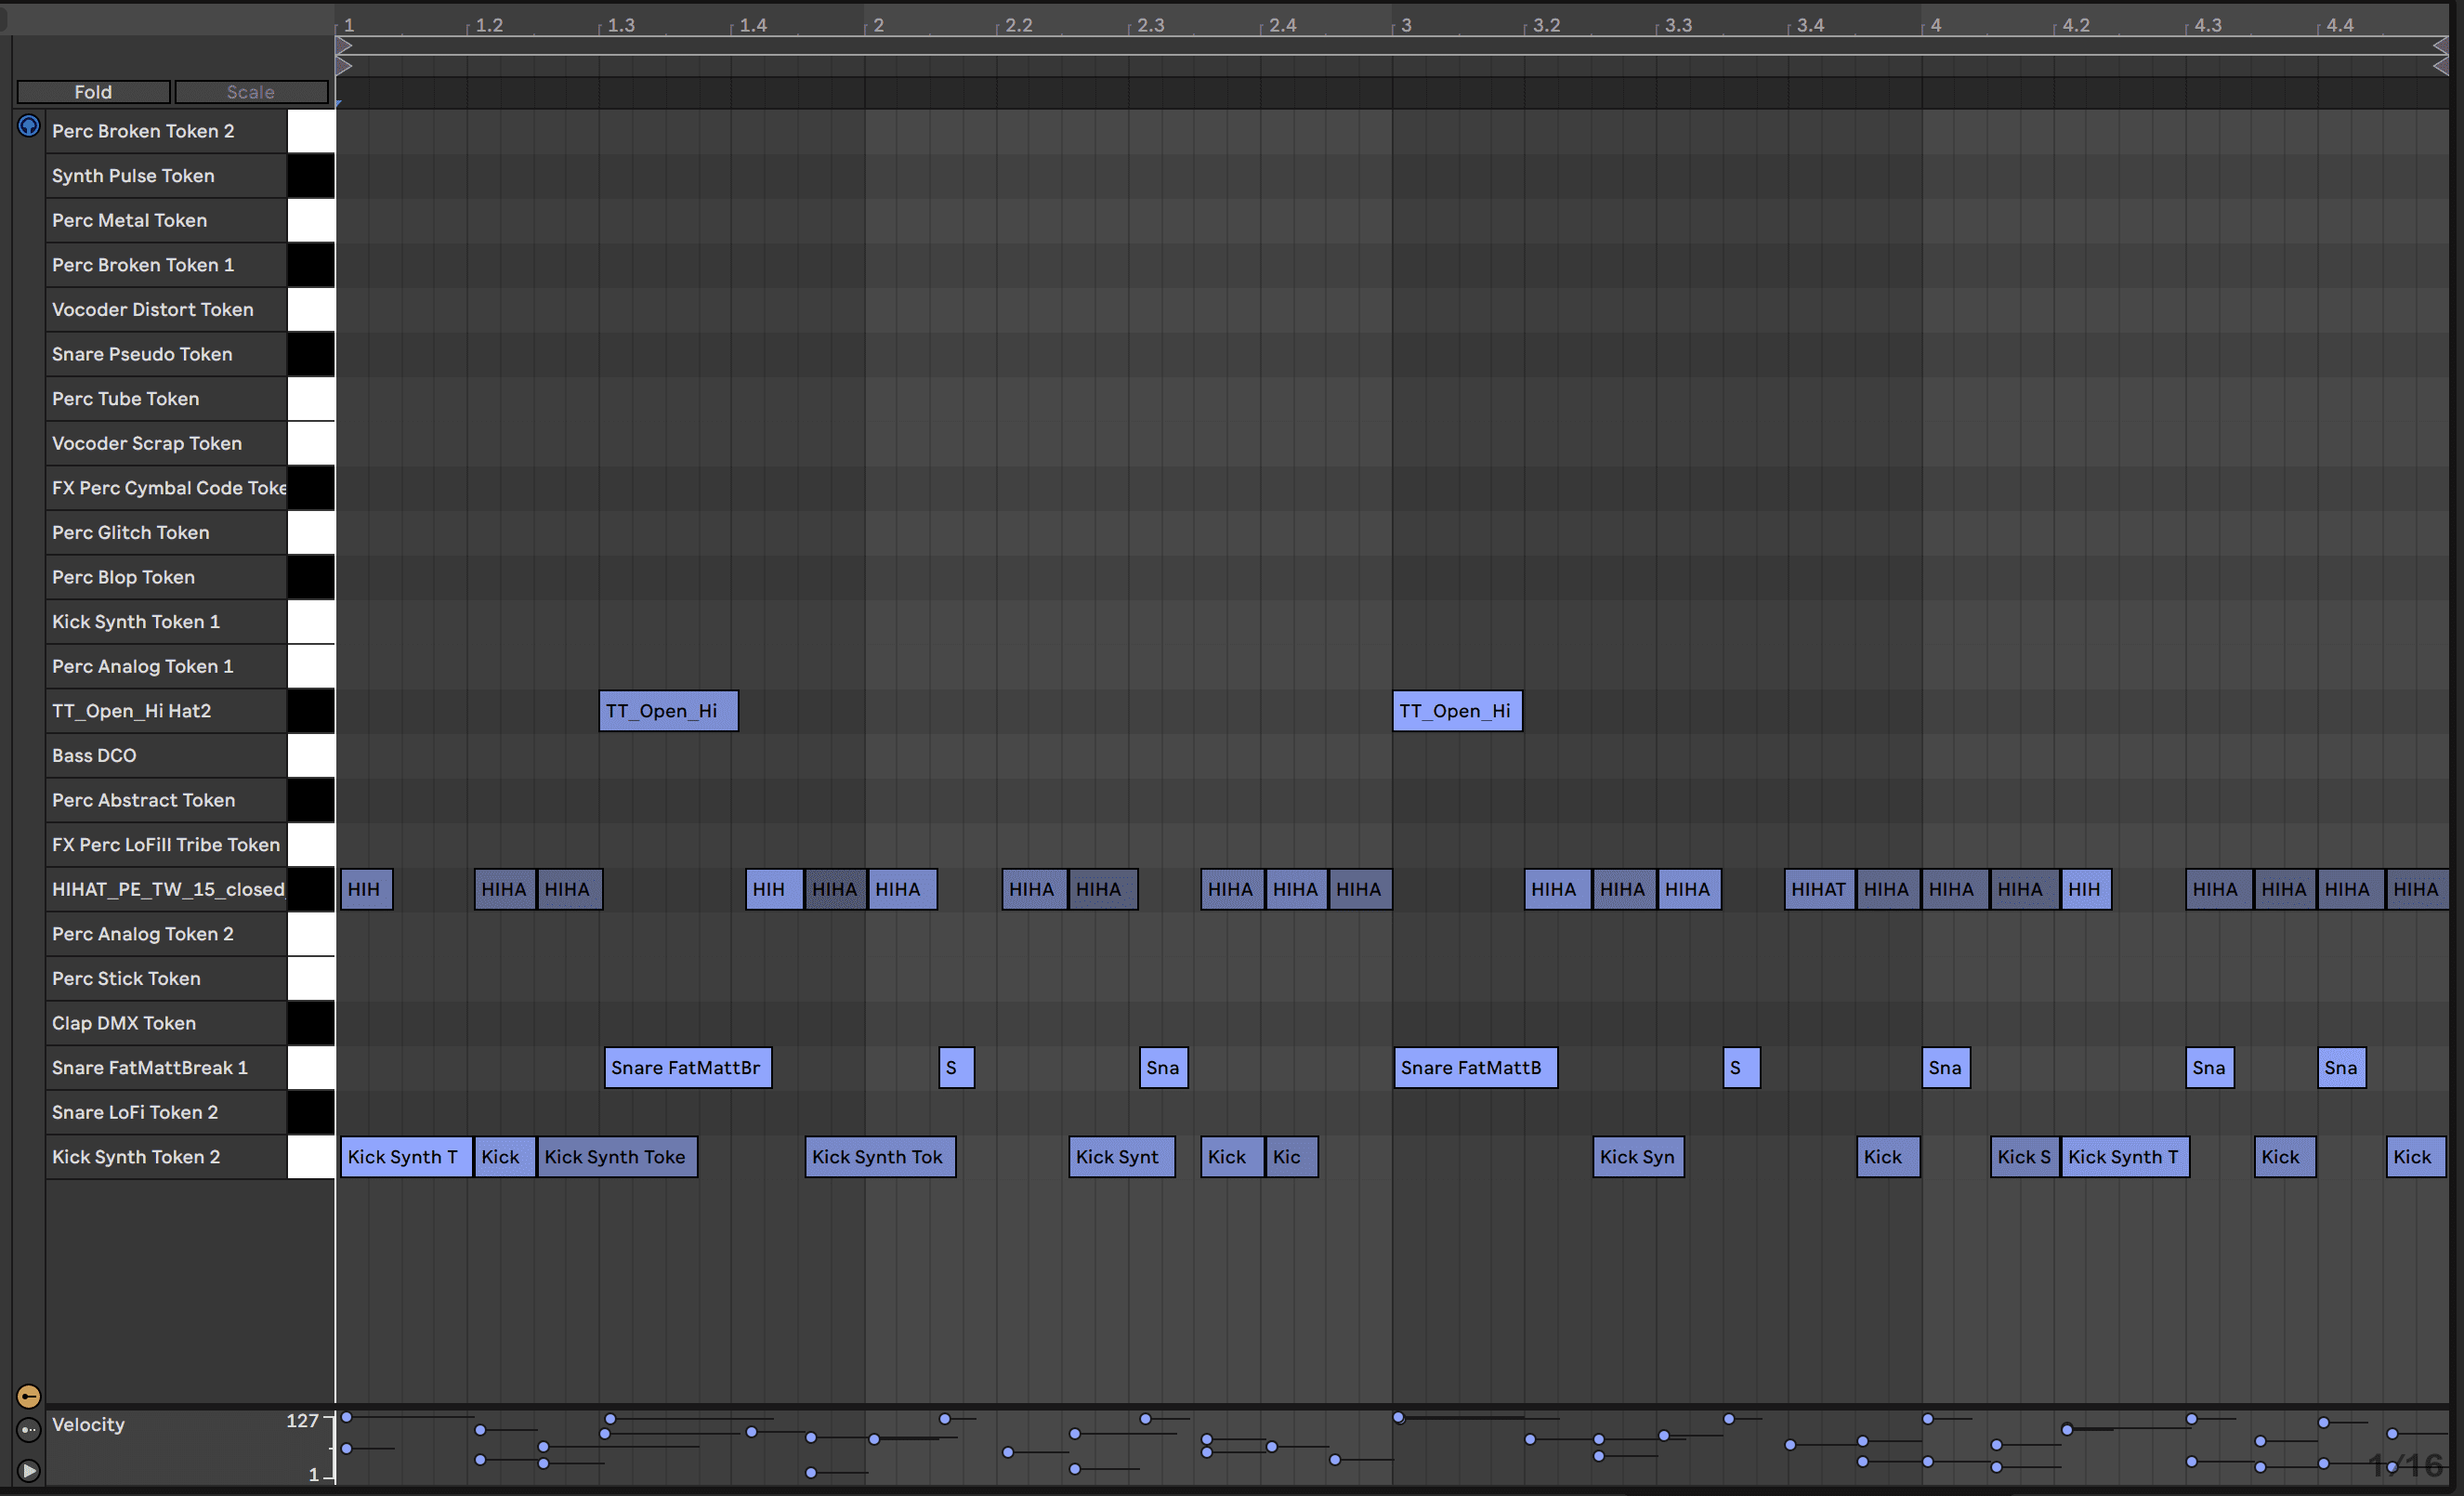
You can use Command/Ctrl+J to merge the cut up audio and then right-click to select ‘Convert Drums to New MIDI Track.’

This will create a new MIDI channel with a Drum Rack – the default is usually Live’s 606 Kit. The MIDI file will definitely require some cleanup, but it usually gets most hits right! Some common mistakes are kicks hitting at the same time as snares and velocity being too loud for certain hits. We’ll delete the hi-hat MIDI because we won’t use it in this first example.
The next step is going through your sample library and choosing impactful kick and snare samples. We’re going to use soothe2 to reduce the sub frequencies below 100 Hz and the snappy frequencies above 4k. As a result, it’s a good idea to choose a kick with some nice subby low end and a snare with a snappy transient.
Here’s our break layered with the new kick and snare samples:
Processing the Break With Soothe2
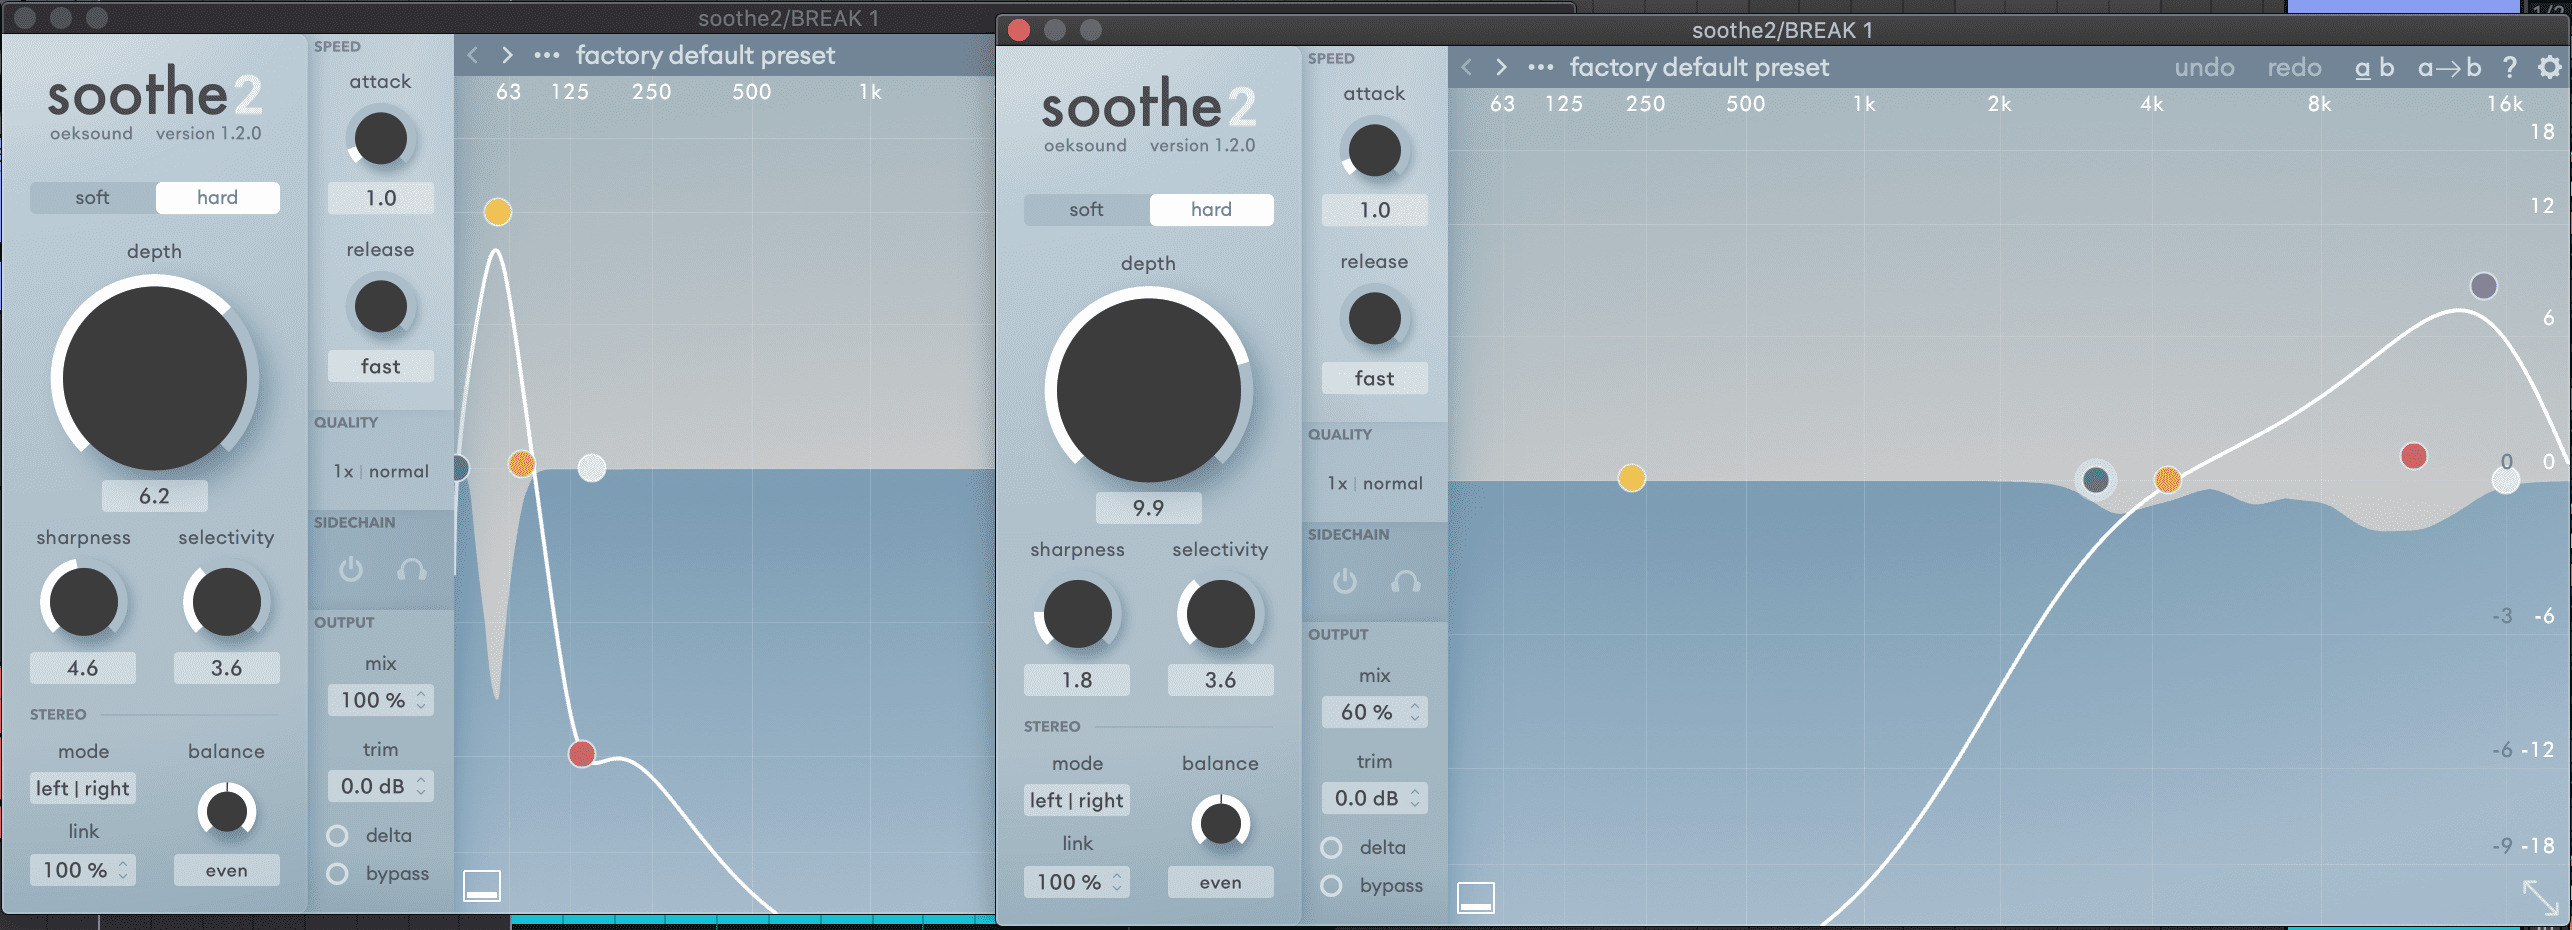
Now we’ll insert two instances of soothe2 on the drum break’s audio channel. We’re using two because in soothe2’s spectrum there are two nodes that allow you to completely isolate the area where the frequency reduction is occurring, but we need to set two distinct areas.
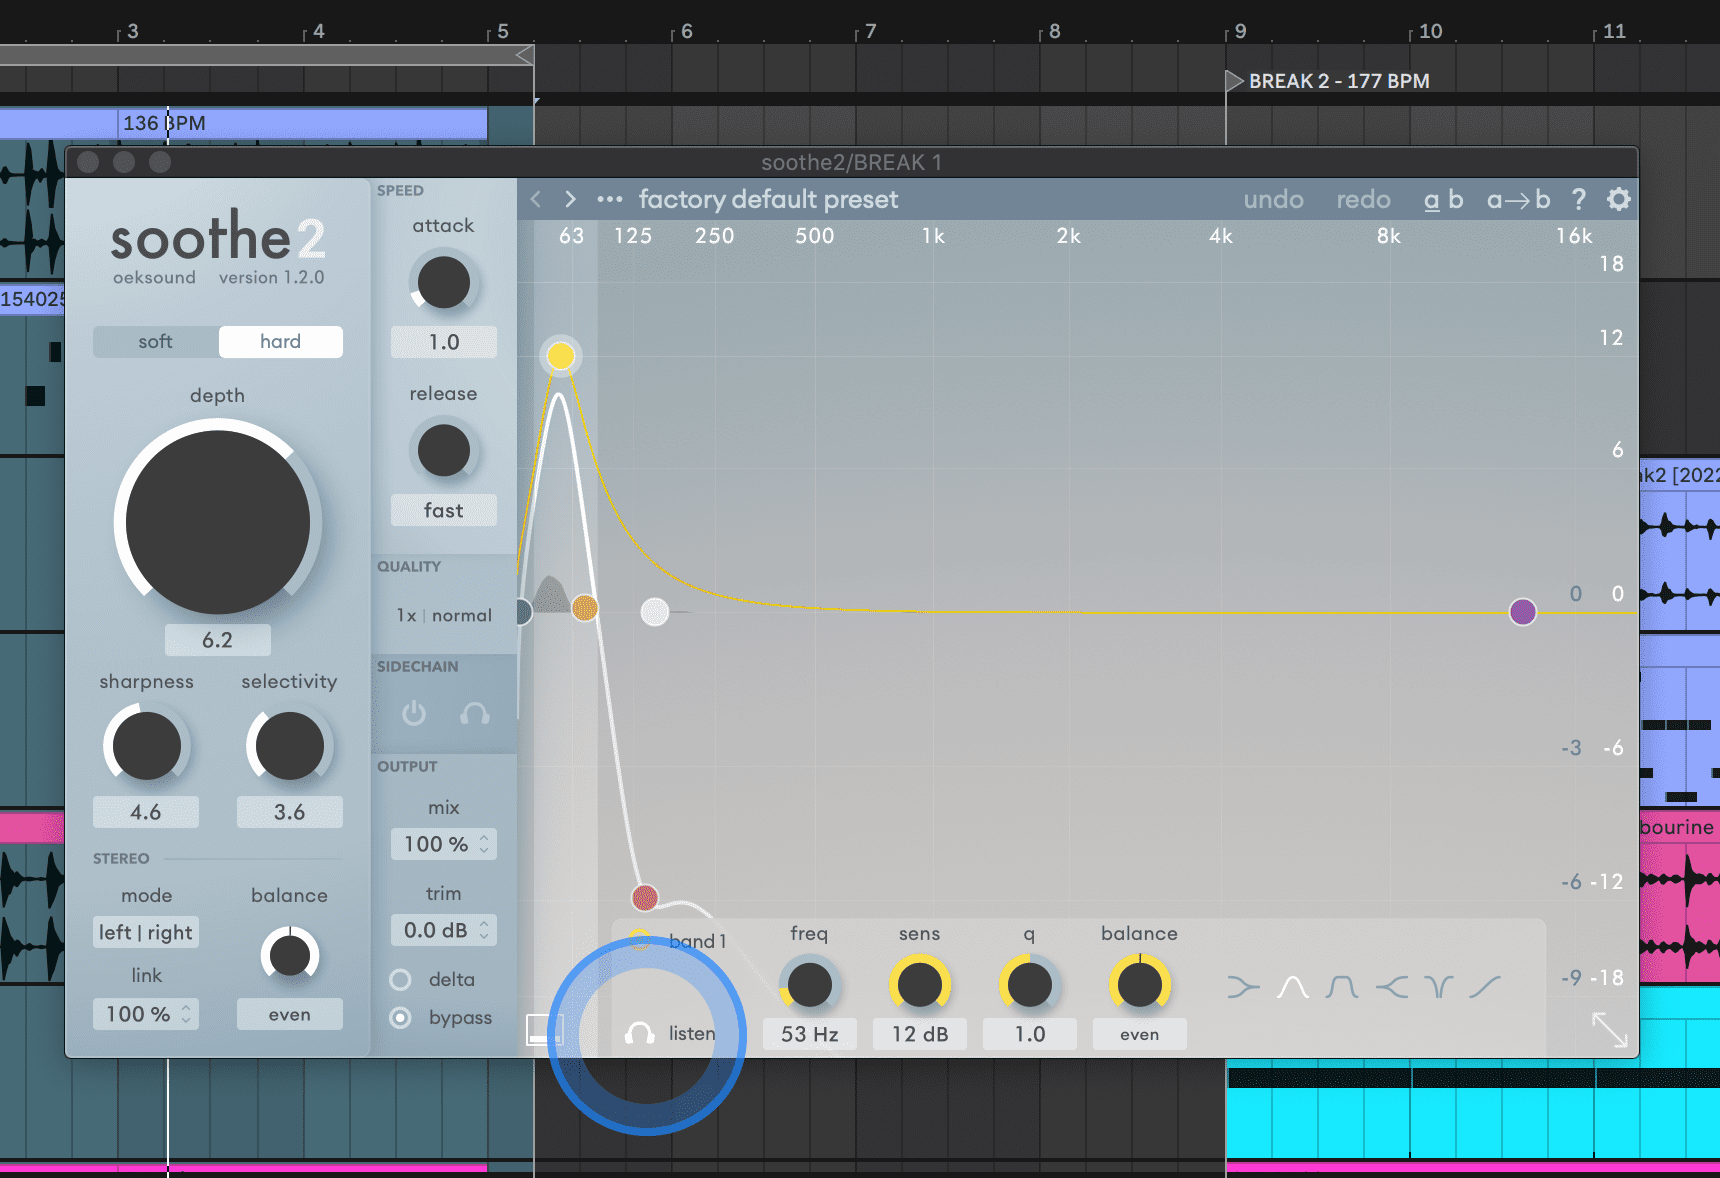
In one instance we’ll limit the area to the low end below 125 Hz. This is where any subby frequencies from the kick live.
In the second, we’ll set the area to above 4k with an emphasis on the airy frequencies around 14k. 4k is where you’ll find the high and snappy aspect of the snare. The shine and transients of the hi-hats live above 10k.

You can use soothe2’s nodes to increase focus on the exact frequencies where the kick, snare and hats are hitting. Each node has a ‘listen’ button that allows you to listen to the frequency content where the node is. This makes it easy to find the key areas on the spectrum for processing!
We have the algorithm set to hard in both instances with the depth also set fairly high. This will lead to gain reduction of around -6 to -7 db for the harsh frequencies. We’ll also draw the attack parameters down to their lowest values so that soothe2 catches the transients.
Here’s how the drum break sounds in solo with soothe2 active:
Here’s how it sounded before with no processing:
You can hear that the sub from the kick has disappeared and that both the hi-hats are darker. We’re going to add a new hi-hat pattern shortly to make up for this. The snare has also lost some of its high snap, but this will be compensated by our new snare sample.
Here’s how the break sounds with the MIDI samples and with soothe2 active:
Now that we have some room in the top end we can add in a hi-hat and percussion loop. Here’s how the beat sounds with this loop:
And here’s how it would sound with the instances of soothe2 bypassed on the drum break audio channel:
With no processing, you can hear a clear clash in the high frequencies of the drum break and the loop. Soothe2 prevents this and makes space for new elements.
Here’s the full beat with musical elements for context:
Using an EQ instead of soothe2
Just for experimentation, let’s try implementing similar frequency reductions on the drum break audio channel with an EQ instead of soothe2.
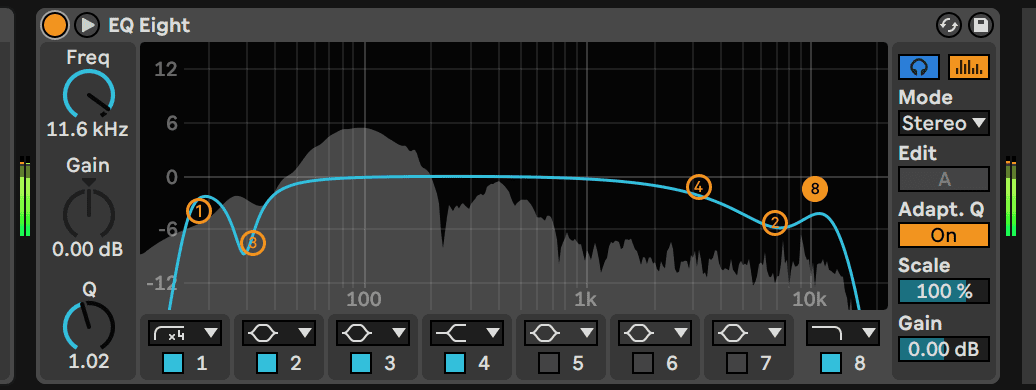
We’ll use Live’s EQ Eight for the task. Here’s how the break sounds with the EQ active:
And here’s how it sounds with soothe2 instead:
It’s easy to hear that the EQ makes the break sound boxier and reduces the overall quality. Soothe2’s processing on the other hand maintains the impact and punch. You can hear the difference even more with the sample layers playing as well!
Here’s the drum break with the EQ active and the sample hits playing:
Here’s the same with soothe2 used instead of the EQ:
The mix – and especially the top end – sounds much more coherent in the latter.
Example with a second break
Let’s now make another layered beat with soothe2, again, applied to the drum break sample.
Here’s our second break-in solo with no processing:
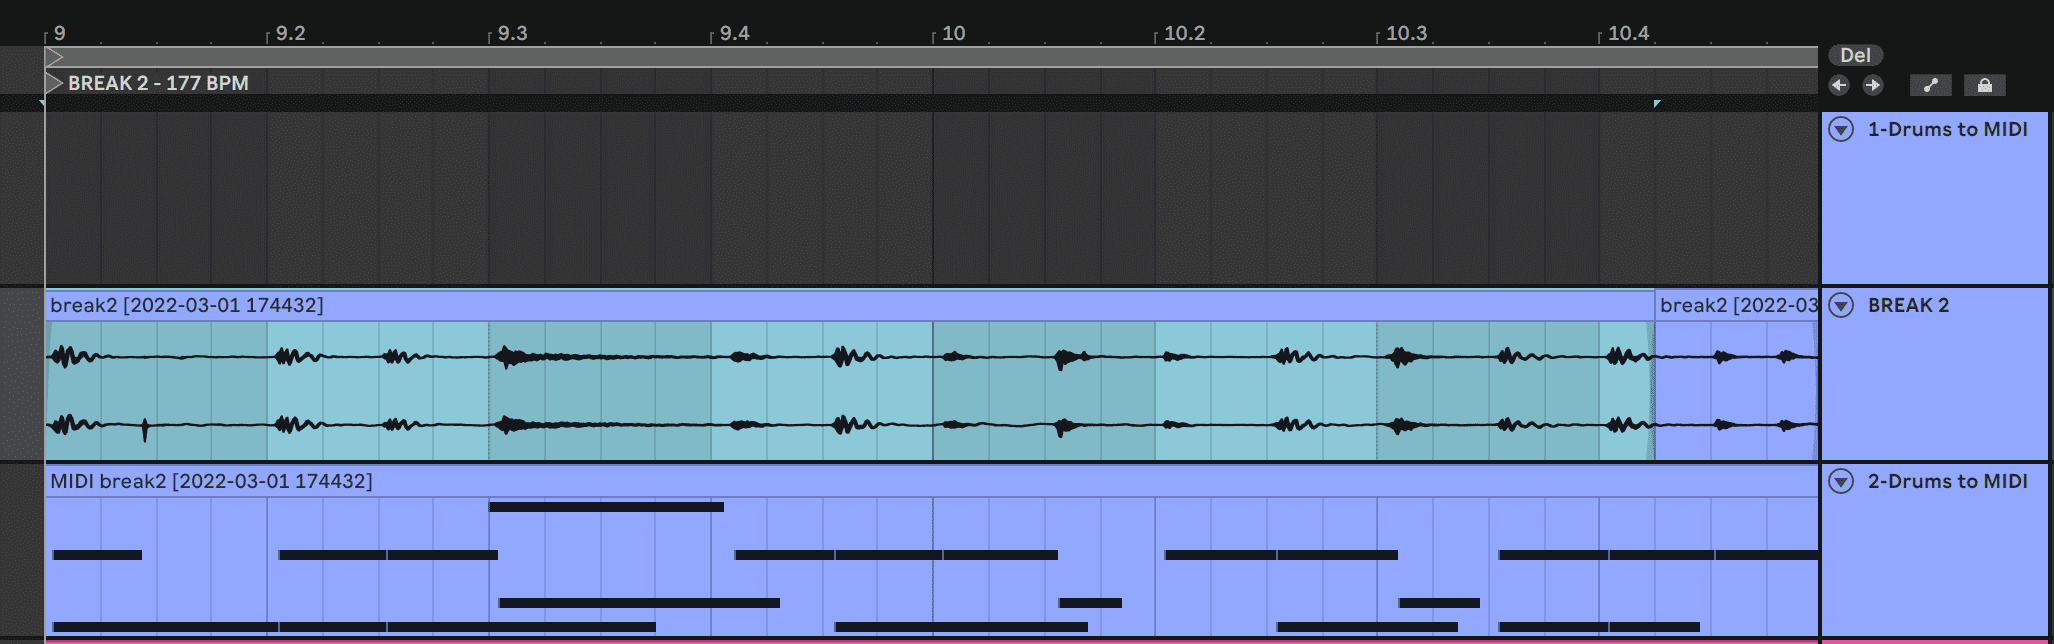
We’ll again use ‘Convert Drums to a New MIDI Track’ to get a MIDI file with the hits on another channel. This time we’ll keep the new hat hits as well.
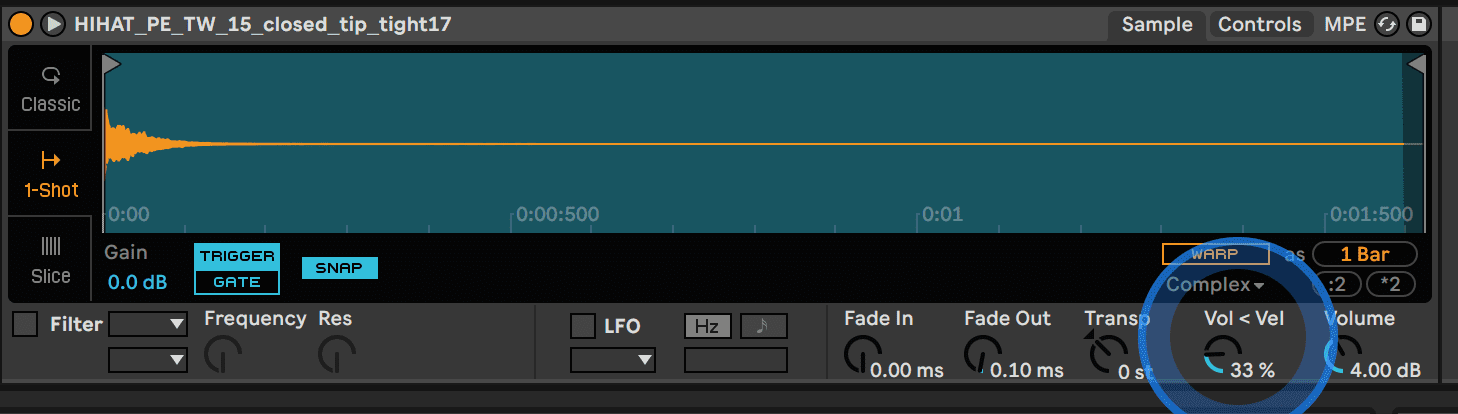
One issue with hats is that their velocity can be far too dynamic when converted to MIDI. It’s good practice to curb this by heading to the hat’s Simpler and turning down the Vol<Vel knob. This will reduce the effect that velocity has on the sample’s volume.
Here’s how the beat sounds with our new layered kick, snare and hat samples:
The new hi-hats and kicks are really clashing with the break’s hits. We’ll use our instances of soothe2 from before in order to leave room for the new samples. You can again use the ‘listen’ feature of the EQ nodes to detect where exactly you need to be reducing.
Here’s how the beat sounds with soothe2 active on the drum break:

The resonance reductions on both ends of the spectrum really tighten up the beat! We can also add in a new percussive loop like we did in the previous example. This time we opted for a tambourine loop.
Here’s the final beat:
And here it is with musical elements:
*Attack Magazine is supported by its audience. When you purchase through links on our site, we may earn an affiliate commission. Learn more.