In this article, we’re getting to grips with Oeksound’s Soothe2. We’ll apply it to individual stems and on our mix bus for a deep house track. Time to see just how much of a ‘soothe operator’ it is.
Few plug-ins have made a bigger splash than Oeksound’s Soothe2 in recent years. For many, it has become a must-have tool for many mixing and mastering. There are others however who find the results too subtle. The group typically find that the case when not working with acoustic or live-recorded instruments.
It shares qualities with dynamic EQ’s and multiband compressors but has defining differences. These are that Soothe2 works as a resonance reducer, detecting harsh frequencies in various parts of the spectrum and reducing them in real-time. It has a very straightforward workflow where you set the frequency areas, sensitivity and amount of reduction. Once set, the algorithm does the rest!
Oeksound released Soothe2 in January 2020. The second version introduced a new processing algorithm, as well as features like full frequency range operation (Soothe 1 was only limited to mid and high frequencies), mid/side processing, a sidechain input, lower CPU load and lower latency.
In this article, we’re using Soothe2 on the stems and mix bus of a deep house track to add clarity, balance and quality to the mix.
Here’s the full mix without Soothe2:
Here’s the full mix with Soothe2:
The results are subtle so we highly recommend listening on good headphones or studio monitors to hear the differences!
Soothe2 Features
To kick things off, let’s do a quick recap of the parameters. You can skip this section if you’re already familiar with Soothe2 or if you just want to hear the audio examples! Never hurts however to know your gear inside out.

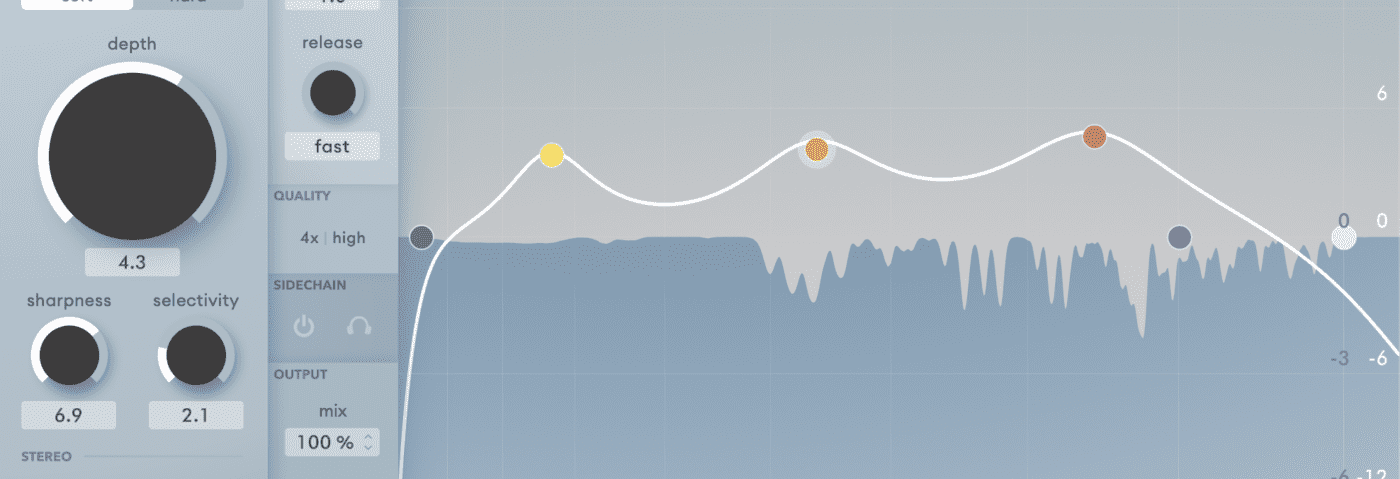
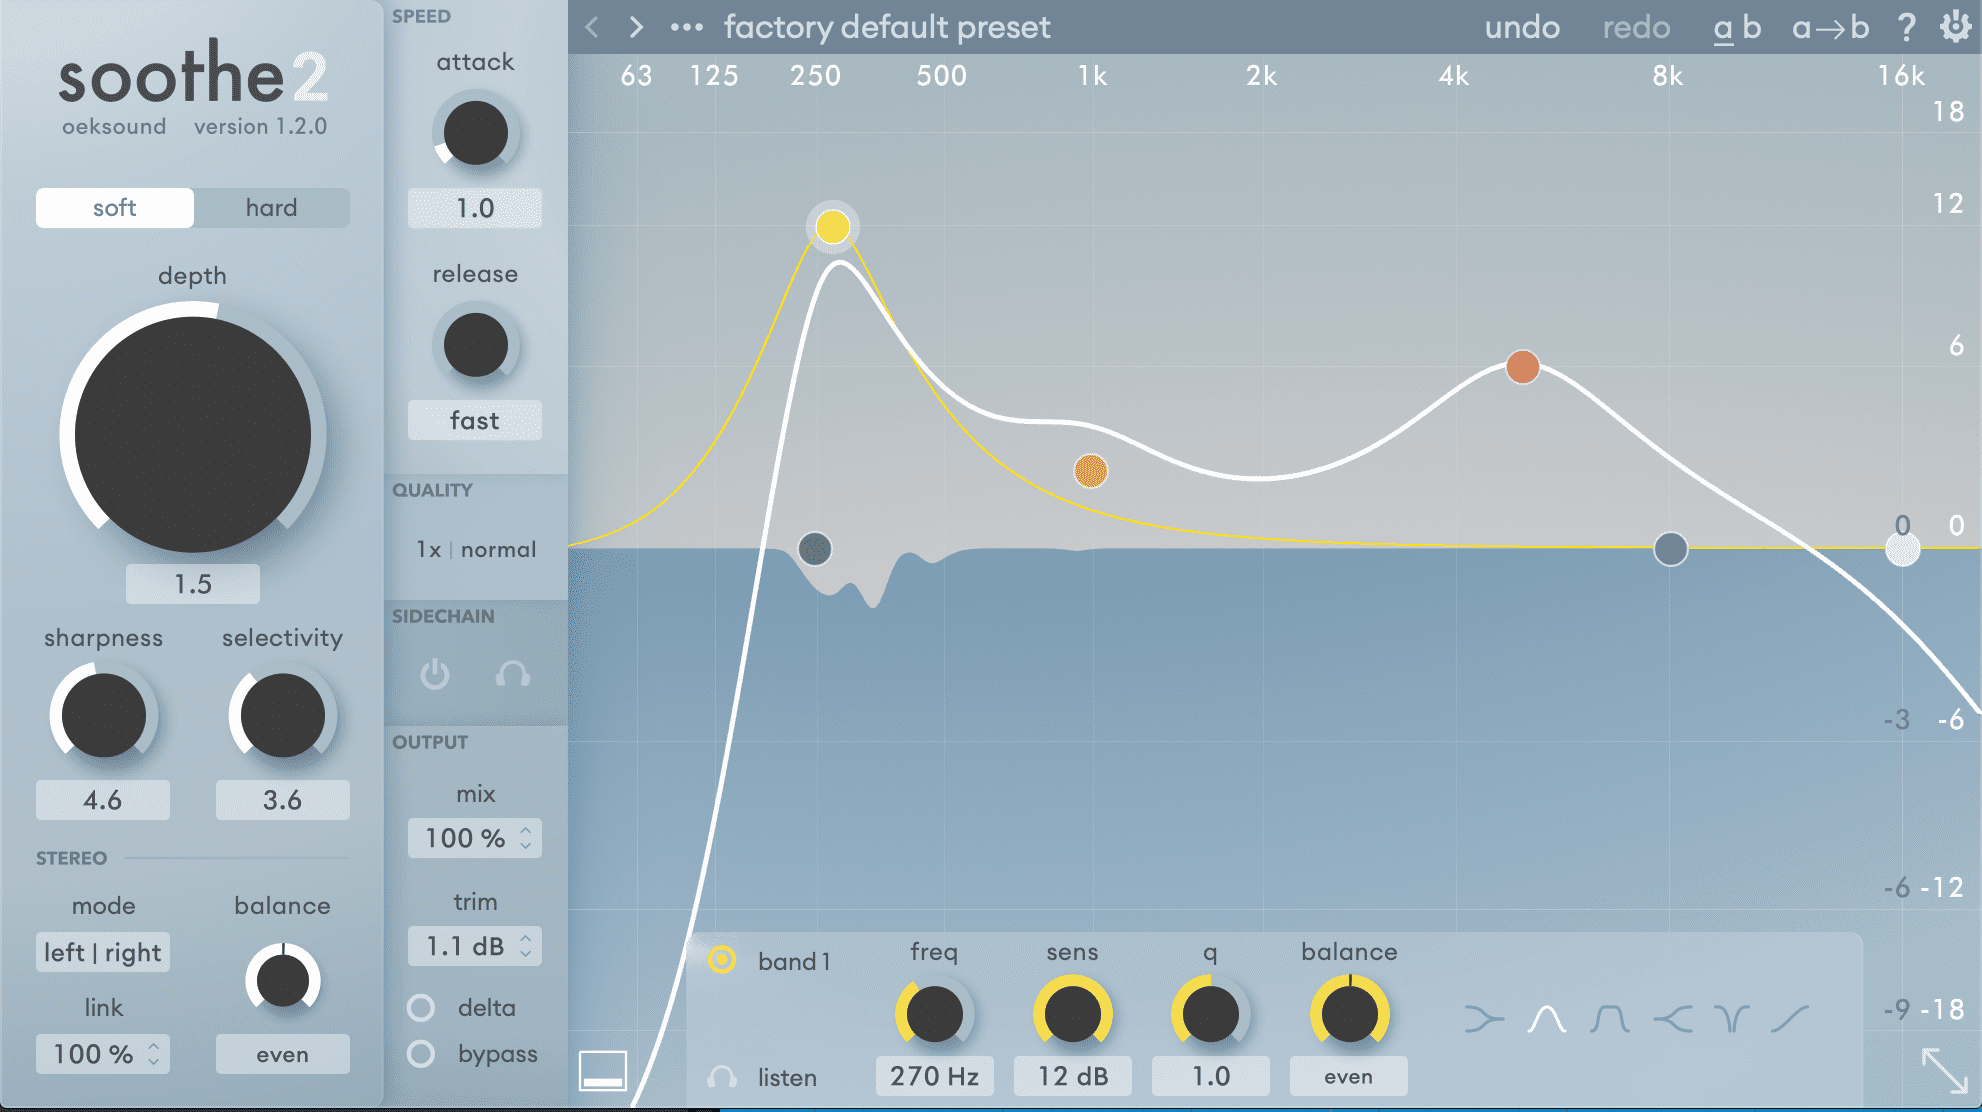
The main, and largest, parameter depth. This controls the overall amount of reduction. One way to use Soothe2 is to simply select a preset and tweak the Depth knob.
Sharpness works similar to width control that controls the Q of each EQ node. It has a smoothing effect, with lower settings leading to wider cuts where Soothe2 is detecting harsh frequencies.
Selectivity determines whether you want the plugin to look for frequency areas or specific frequencies. Lower sensitivity gives more obvious tonal shaping as it’s looking for a wider range of frequencies. For more subtle changes, higher sensitivity is the way to go.
Heading back to the top of the GUI, Soothe2 has two overall algorithms. These are soft and hard. Soft is the default and sounds more transparent, whereas hard introduces larger cuts, making it ideal for working with poorly recorded tracks.
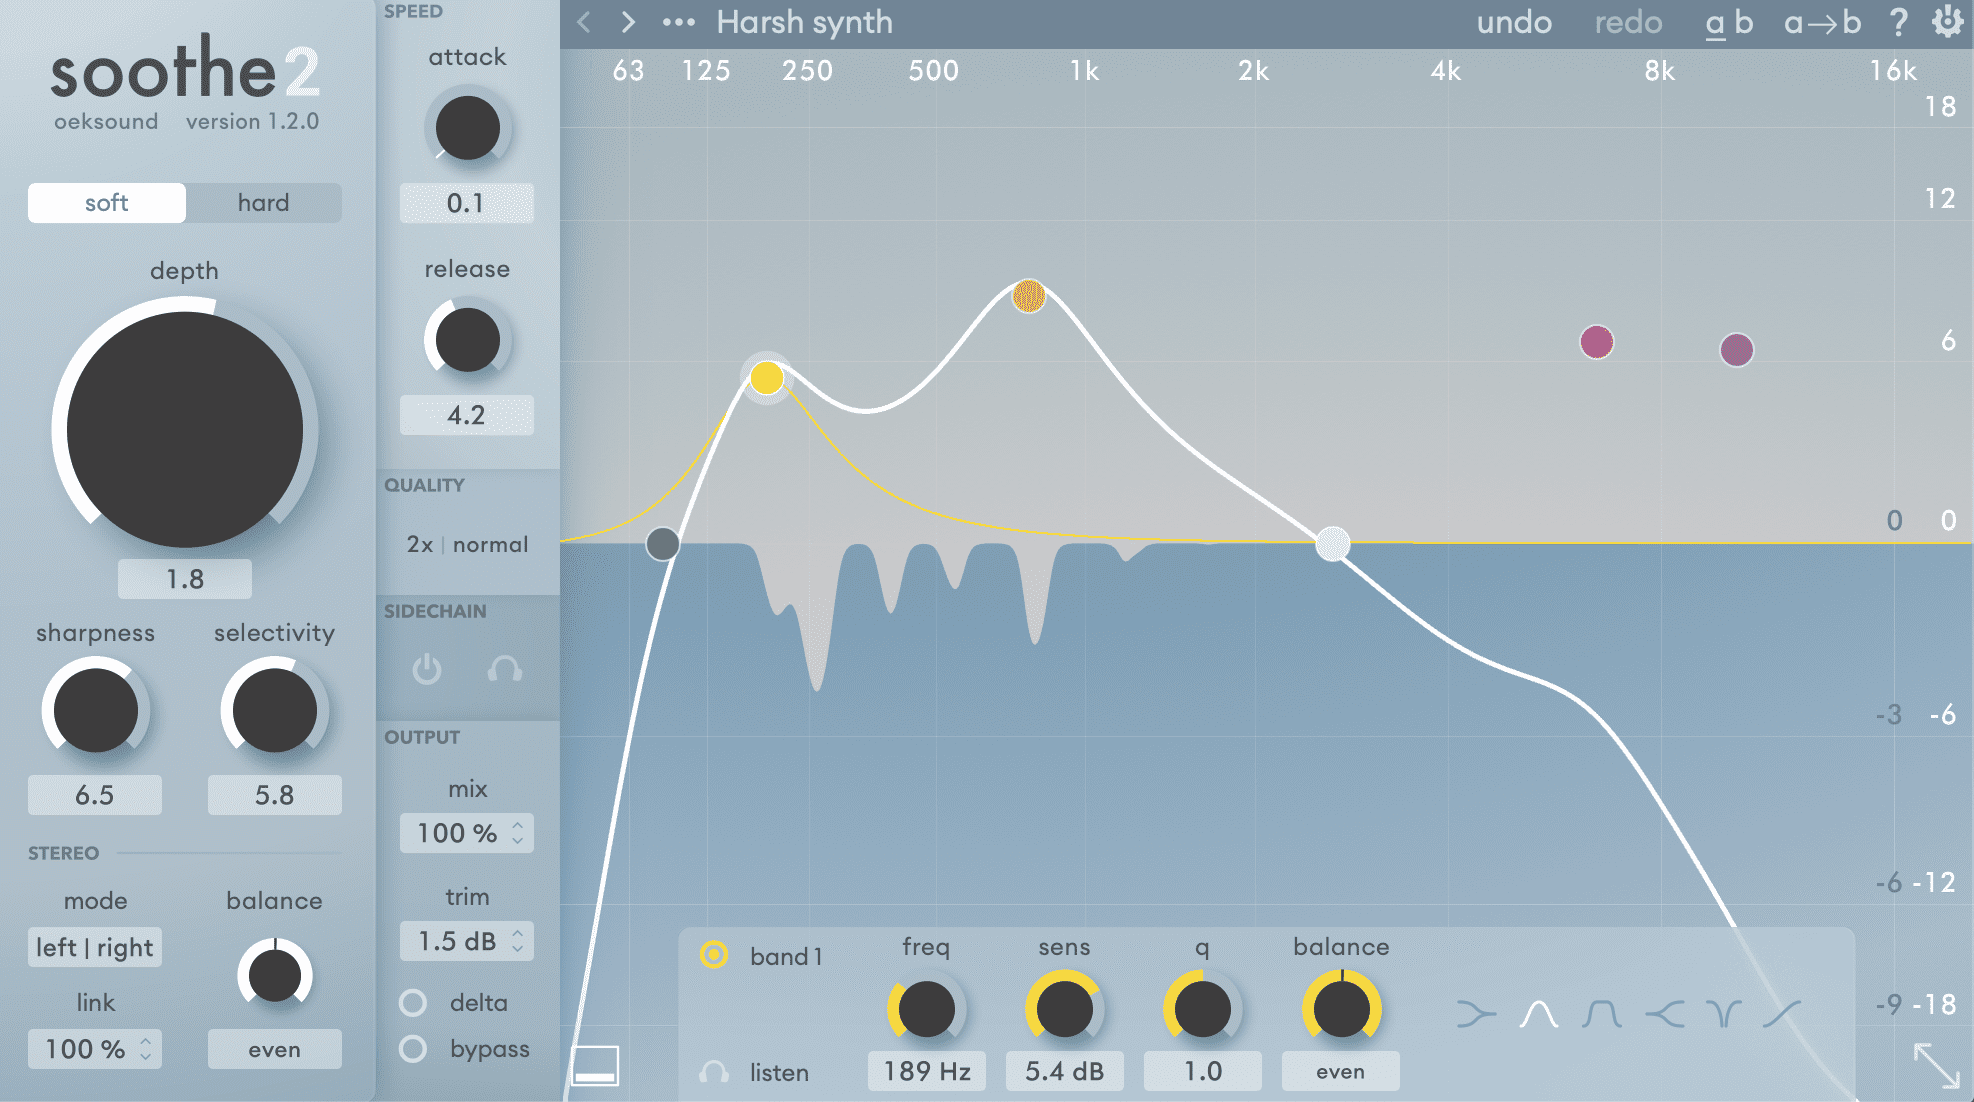
Looking at the spectrum and the nodes in colour, each node’s height adjusts the sensitivity of its band’s frequency range – not the volume. This window looks like an EQ so this can be confusing!
By increasing a node, we are asking the plugin to focus more on that area so you’ll get more cuts. The opposite happens if you reduce the node. There are also two filter nodes that you can use to prevent cuts from happening outside a specific range.
Each band also has a listen parameter. Toggling it allows you to solo the band you’re working with. This helps you to identify close what Soothe2 is doing.
The output section has a mix and trim level. Beneath those, is a delta button that flips the algorithm so you only hear the reduced resonances.
Lastly, there are also additional controls like oversampling and external sidechain inputs. We will focus more on these in a future article.
Using Soothe2 to Reduce Muddines In The Low-Mids
Soothe2 comes with many presets to help you get started so we’ll mainly be using these presets and then tweaking the Depth, Sharpness and Selectivity parameters while also moving around the sensitivity nodes. There will be a ‘Before Soothe2’ and ‘After Soothe2’ version of each stem and then we’ll apply the plug-in to the mix bus at the end.
PAD
Let’s begin with the pad stem.
The pad has lots of frequency content but its low-mid frequencies, around 150-300 Hz, are quite muddy and could cause problems when overall track volume is increased during mastering.
There’s also one specific chord that hits at 00:12 introduces a very resonant frequency in the lows.
To solve this, we used Soothe2’s Harsh Synth preset and set one of the nodes to focus on these specific frequencies, while also curbing some of the mids between 500 Hz and 1k.
The reduction in the lows comes with the additional benefit of giving the higher frequencies more presence.
Here it is before Sooth2 has been applied:
Here’s the same pad with Soothe2:
DRONE
The drone stem also has a similar issue as it has a continuous resonant low frequency.
We solo the band and find that this frequency is around 270 Hz. Let’s boost the node in this band and tweak the depth, sharpness and selectivity to taste.
For both the pad and the drone we increased the Trim by 1-2 db to compensate for the gain reduction.
Here’s the drone loop before Soothe2:
Here’s the drone loop with Soothe2 active:
Cleaning Up Sub Frequencies And Adding Punch
Soothe2 works wonders on kick and bass parts as it detects when there is too much sub in certain areas. Sure, clubbers will argue a dance floor can never have ‘too much sub’! However, it is advisable to turn up the volume after resonant sub frequencies have been cleaned up.
Furthermore, another benefit of reducing resonant sub frequencies is that it brings focus to the low-mids, introducing compression-style punch.
BASS LINE
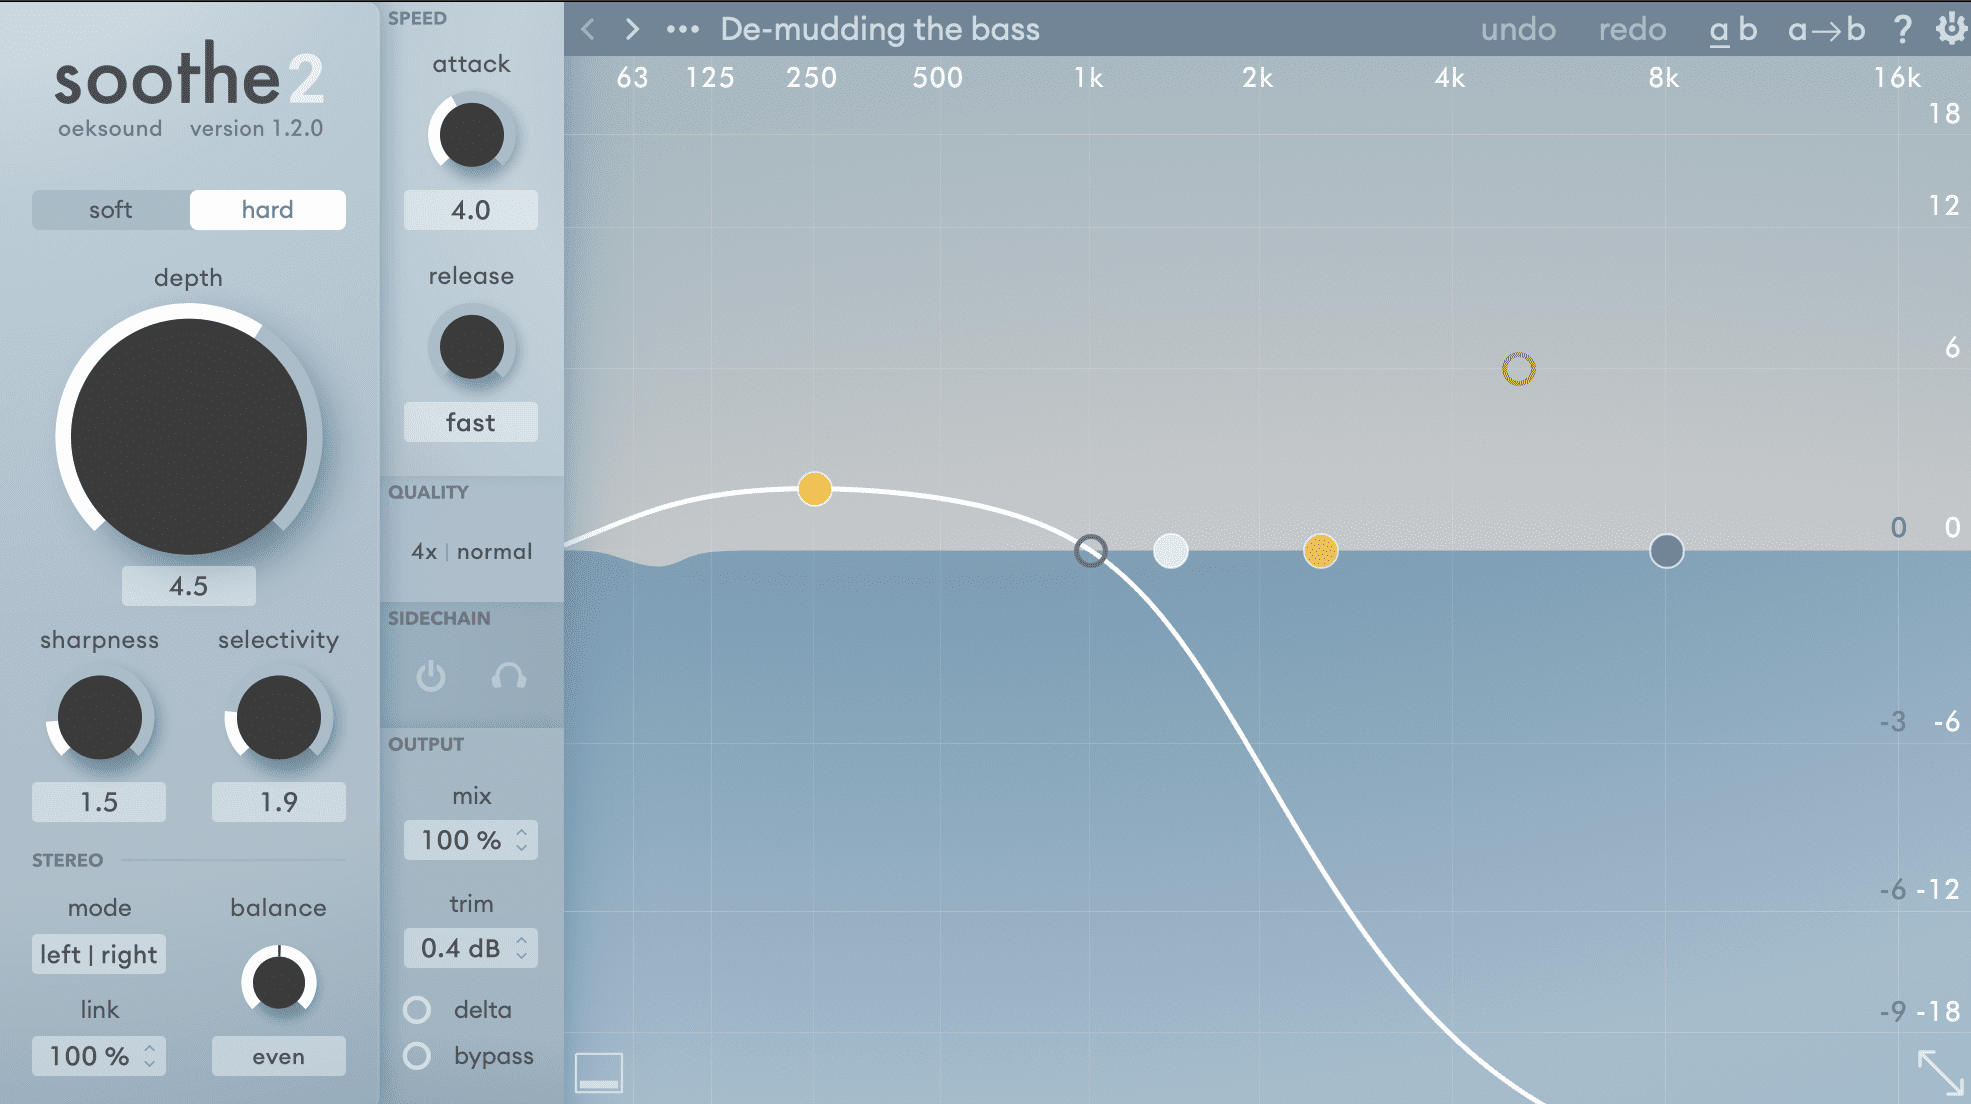
You should be able to identify that several of the lower notes are louder than others and this introduces more subs than necessary. Let’s use Soothe2’s ‘De-mudding The Bass’ preset to curb those resonant frequencies and to be sure we don’t have more subs than necessary.
Here’s the bass loop without Soothe2:
Here’s the bass with Soothe2:
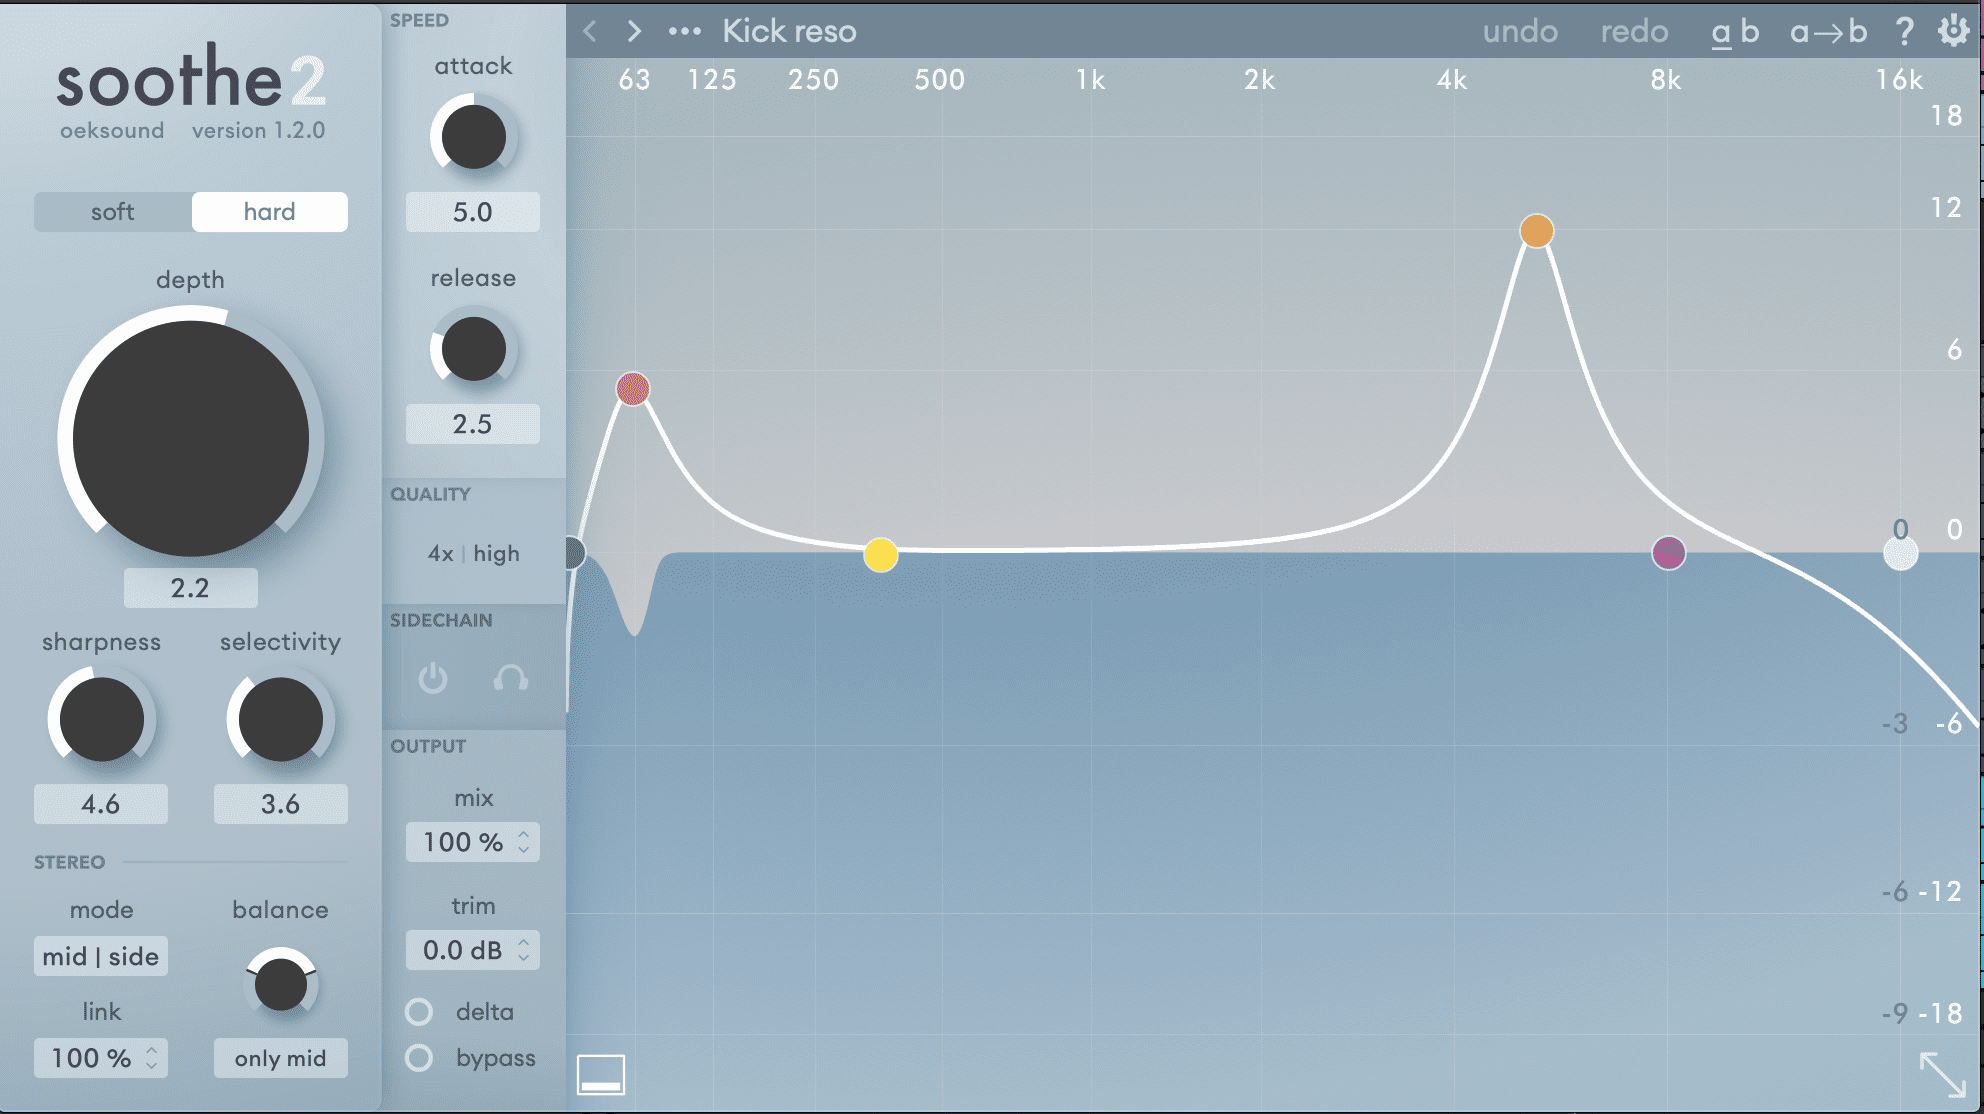
KICK
On the kick, we’re using the ‘Kick Reso’ preset. Its low node is raised above the sub frequencies below 70 Hz. With Soothe2 reducing these frequencies, the kick is cleaned up and comes through a little bit more punchy.
Here’s the kick without Soothe2:
Here’s the kick with Soothe2:
Using Soothe2 On The Drum Bus
The drums are fairly busy in this track. There is a lot of activity in the high frequencies with hat loops, claps and a drum break sample.
We can use Soothe2 to tame the high frequencies and create a subtle balance across all the parts
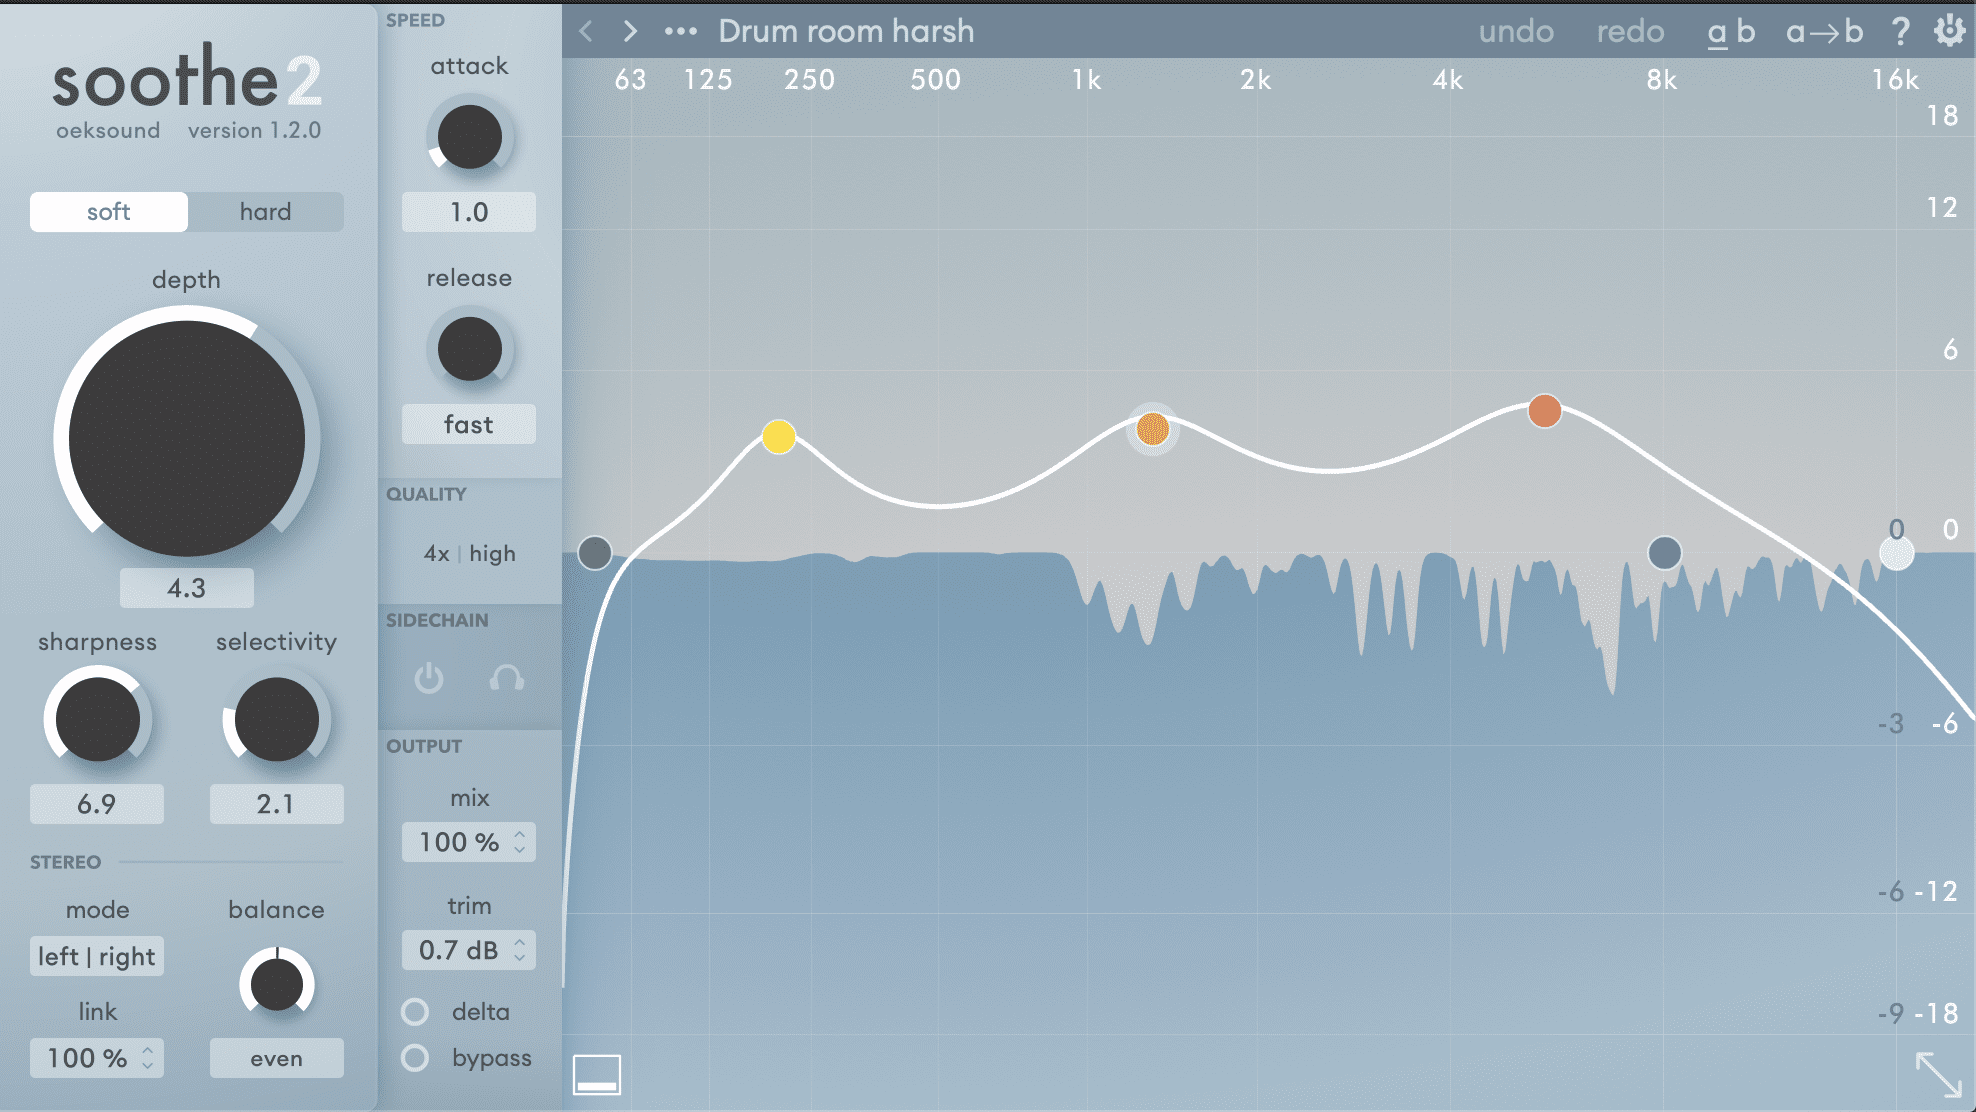
We used the Drum Room Harsh preset and set the nodes above areas where the drums have a lot of presence. The area of 6-12k is particularly important because lots of the drums’ high frequencies can build up in this region
In the below audio of the drums with Soothe2 activated you can especially hear how the plug-in is reducing the harshness of the off-beat hi-hat and the snares.
We’ve also had Soothe2 focus on some of the low-mids like in the pad and drone examples, just to make sure there’s no build-up of muddy frequencies.
You might be thinking that the changes are very subtle! You’re right! However, these details add quality to a mix which can take your track further when mastering.
Here’s the drum bus without Soothe2:
Here’s the drum bus with Soothe2:
Using Soothe2 On The Mix Bus
Soothe2’s workflow is similar to how we work with compressors. People will tend to use compressors on most (if not all) of the tracks in a mix and then apply further compression on the mix bus. We’ll do the same with Soothe2. We’ll add another instance to the mix bus having already applied it to the pad, drone, bass, kick and drum bus.
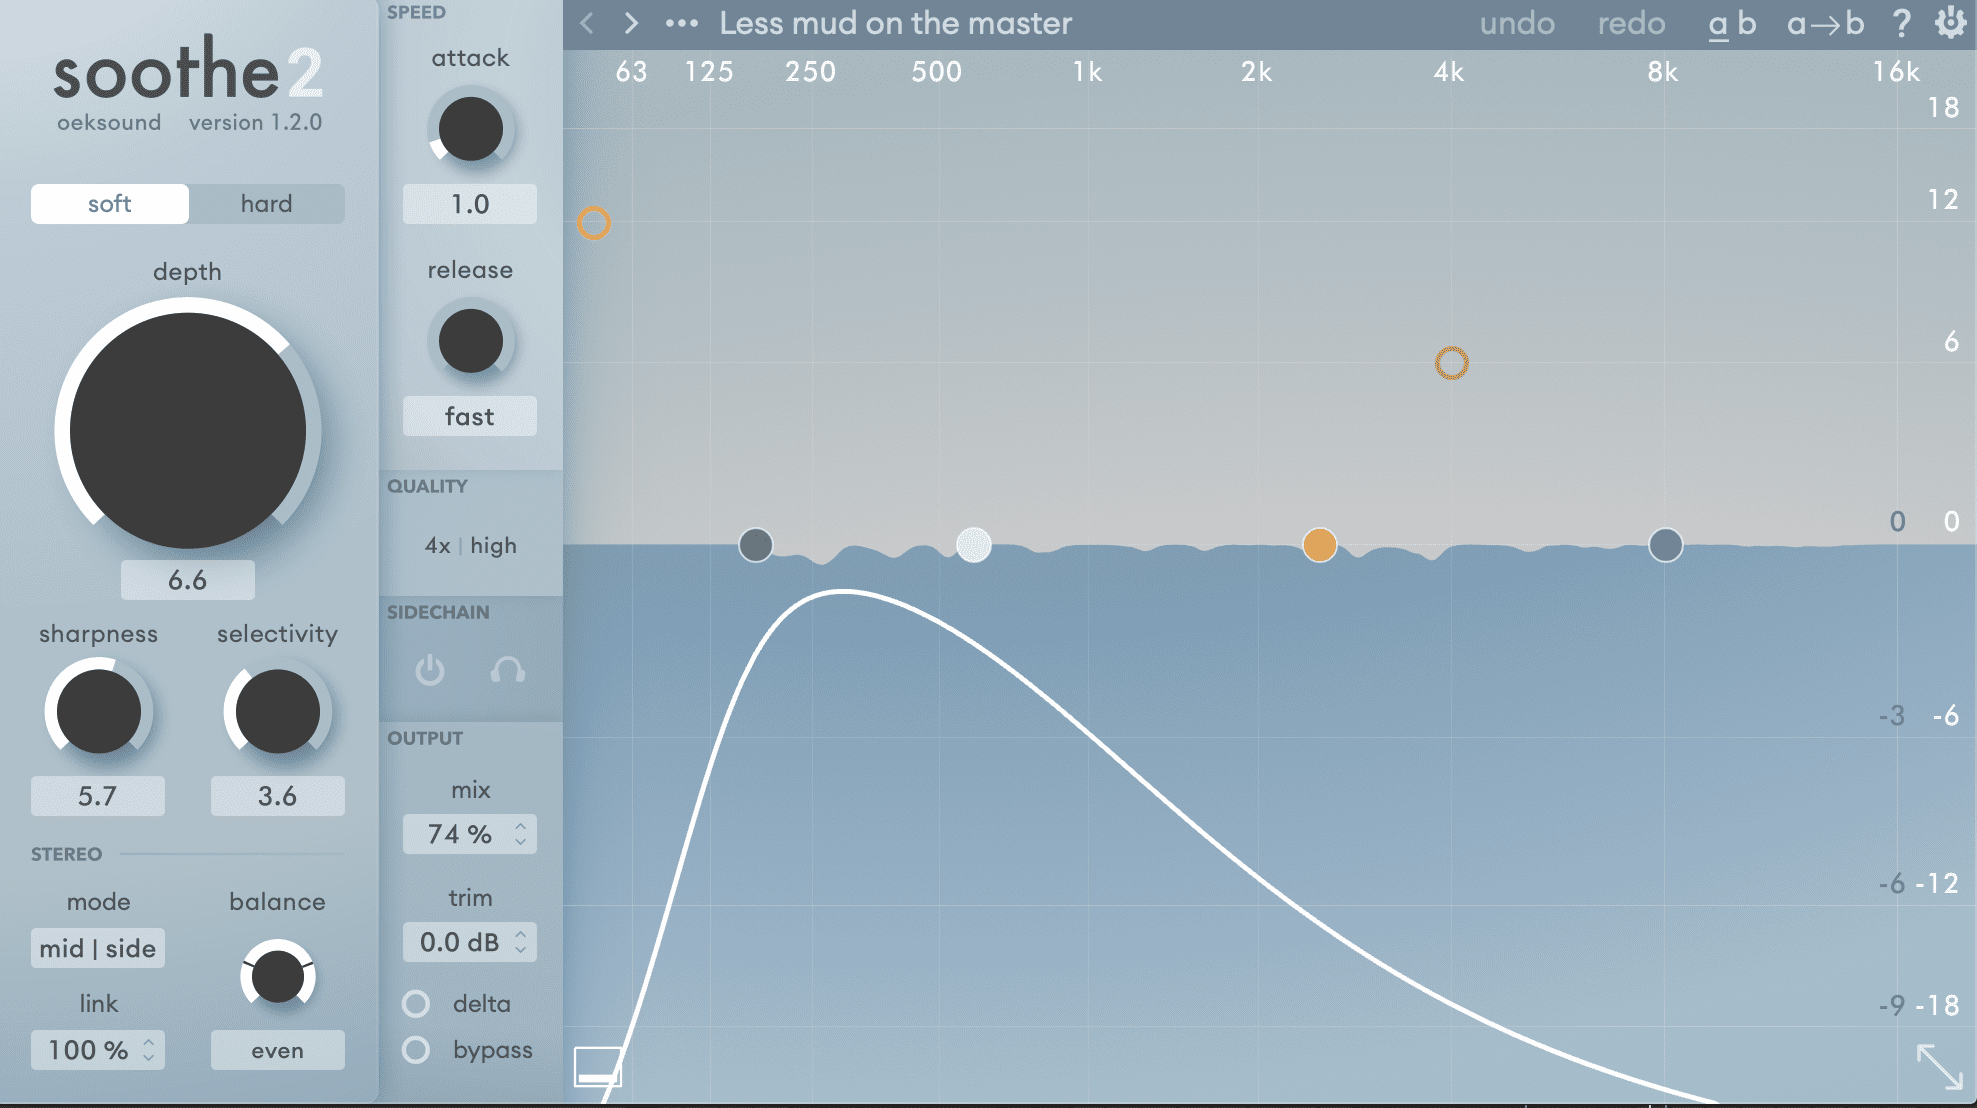
We’re using a very subtle preset called ‘Less Mud On The Master’ that very slightly reduces resonant frequencies across the whole spectrum. We like it on its default setting and don’t amend any parameters.
Comparing the two, without Soothe2, the subs of the kick and bass are more dominant and sometimes clash with each other. The highs are also quite harsh. This could create issues when the track’s volume is increased during mastering. The low-frequency build-up at 00:12 is also quite prominent when the pad hits the lower chord.
On the second version with Soothe2 applied it addresses these issues while adding clarity and balance across the spectrum. We’re going to look at this in more detail in future articles.
Here’s the mix bus without Soothe 2:
Here’s the mix bus with Soothe 2:
*Attack Magazine is supported by its audience. When you purchase through links on our site, we may earn an affiliate commission. Learn more.