
Using Waves’ free StudioRack plugin, we show you how to build a go-to kick mixing chain with compression, saturation, EQ and parallel processing.
We use similar or even the same sounds all the time, so why make a new custom plugin chain for every project? It’s much easier to create a chain template and then reuse it. It doesn’t have to be the only plugins you use – every song is different after all, but having a starting point can be a real time saver. It will also help to give your music a sense of sonic continuity across tracks.
Today, we’re going to use Waves’ parallel processing plugin host StudioRack to create a kick drum chain with compression, saturation and EQ. We’ll also make use of the plugin’s macros to create shortcuts for dialling in parameters quickly.
StudioRack is free. Head over to Waves and download it first. Note that StudioRack only hosts Waves plugins. If you’re not a Waves user, you can still use the ideas here to create a processing chain with your plugins of choice.
If you don’t want to build your own chain, go ahead and download the preset for the kick drum chain here and then drop it into your StudioRack presets folder. If you’re not sure where that is, read this.
We’ll use the chain to take our kick drum from this:
To this:
N.B: We recommend following along with headphones or studio monitors as some of these results can be subtle. As ever, click any image to see a larger version.
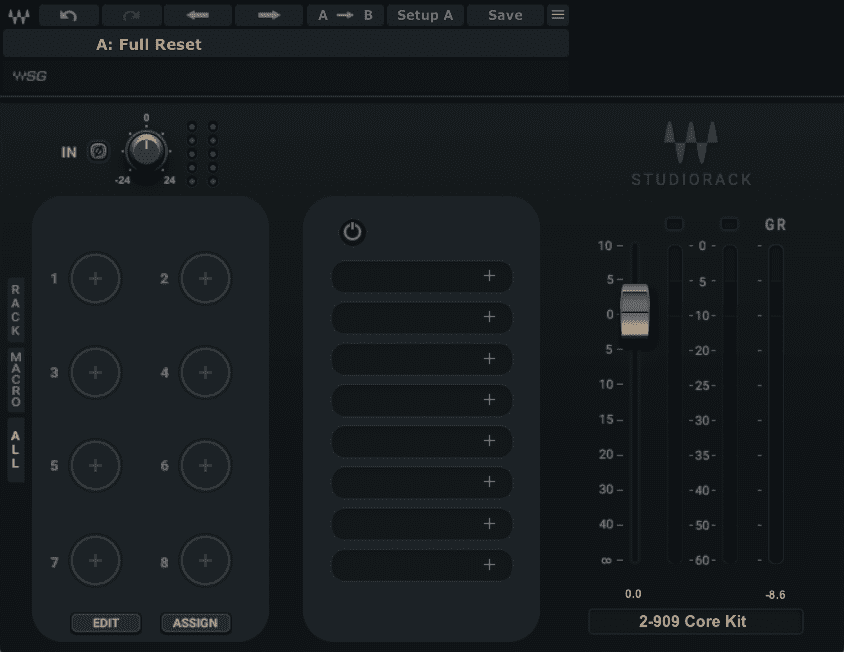
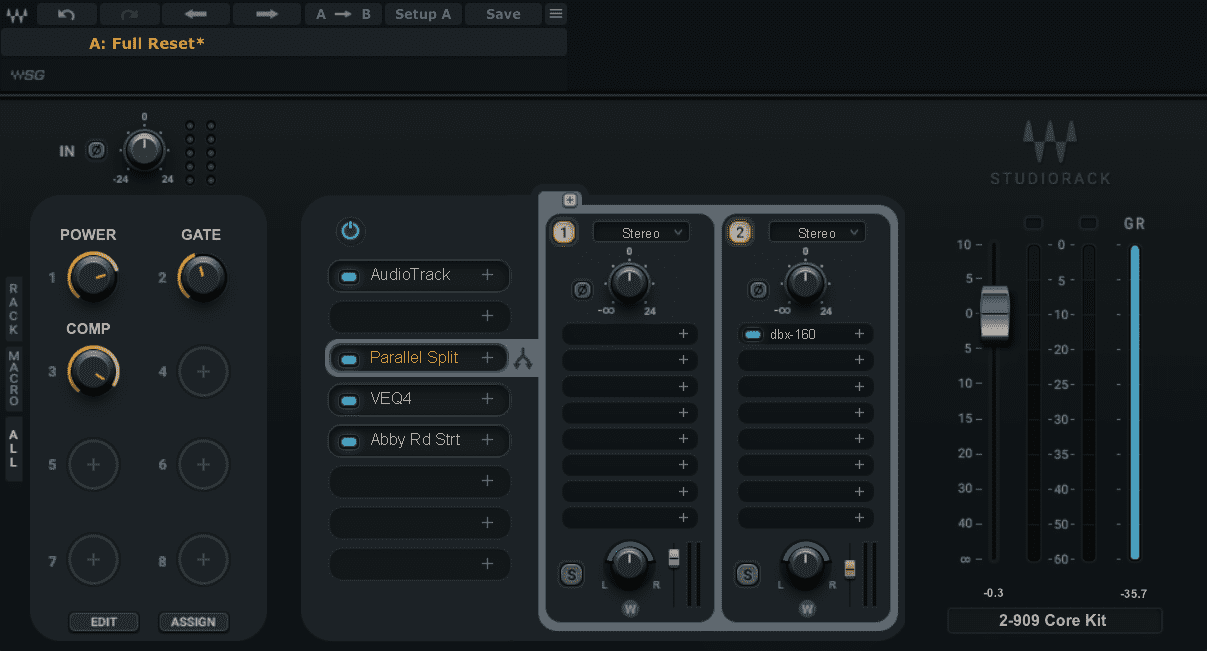
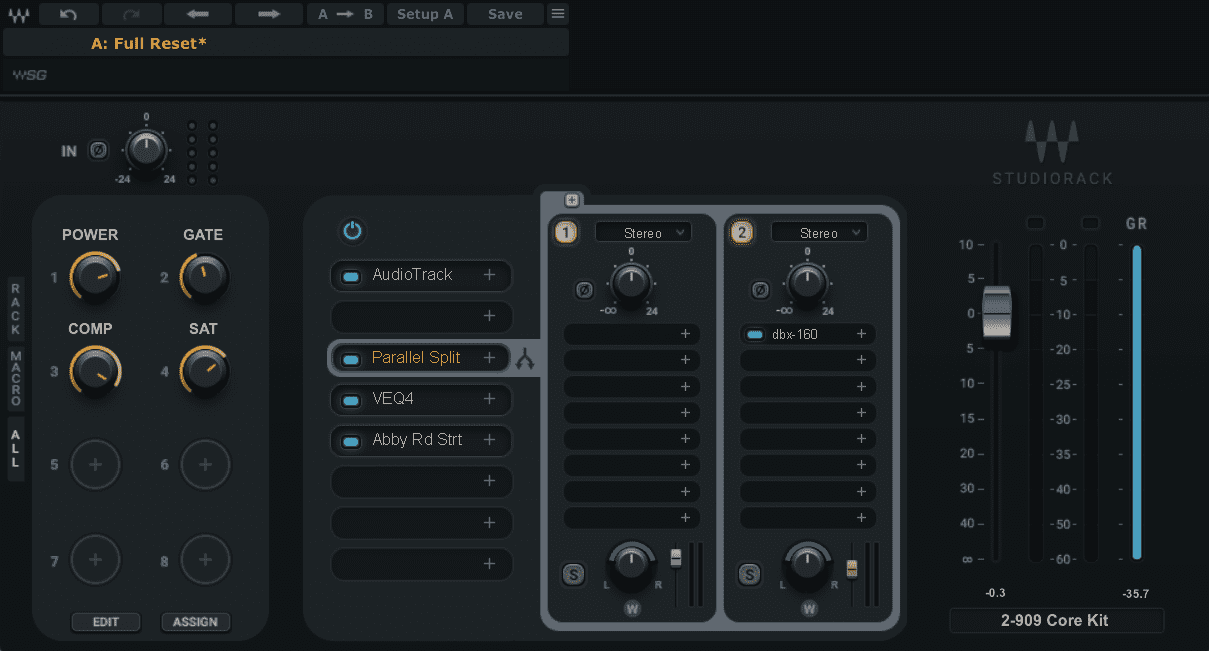
Step 1: StudioRack Setup
Place an instance of Waves StudioRack on the same channel as your kick drum. We’ve programmed a basic 4/4 kick using a stock Ableton Live 909 Drum Rack. Feel free to do any processing at the source. The coming signal chain will make anything sound bigger.
Here’s the kick drum as it sounds straight out of Drum Rack:
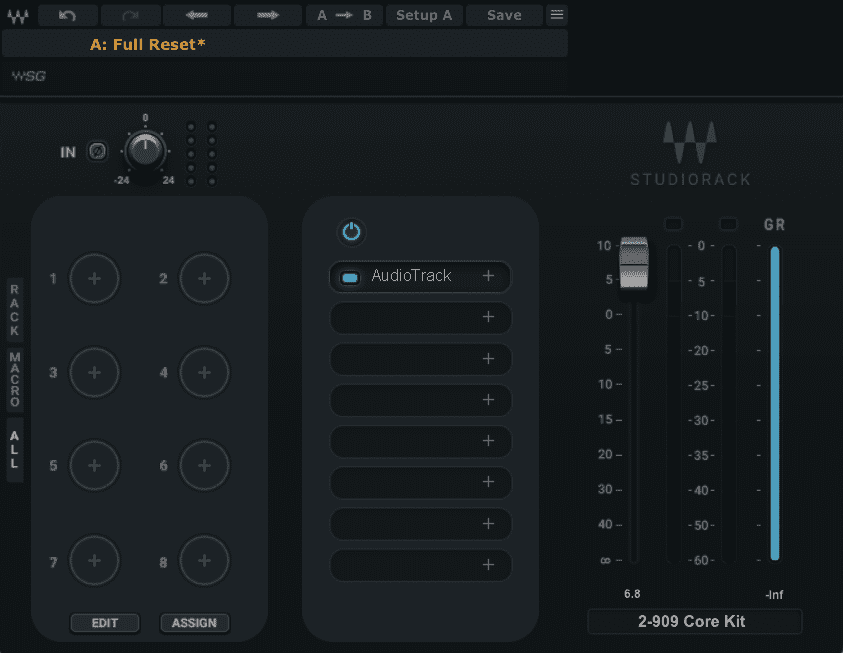
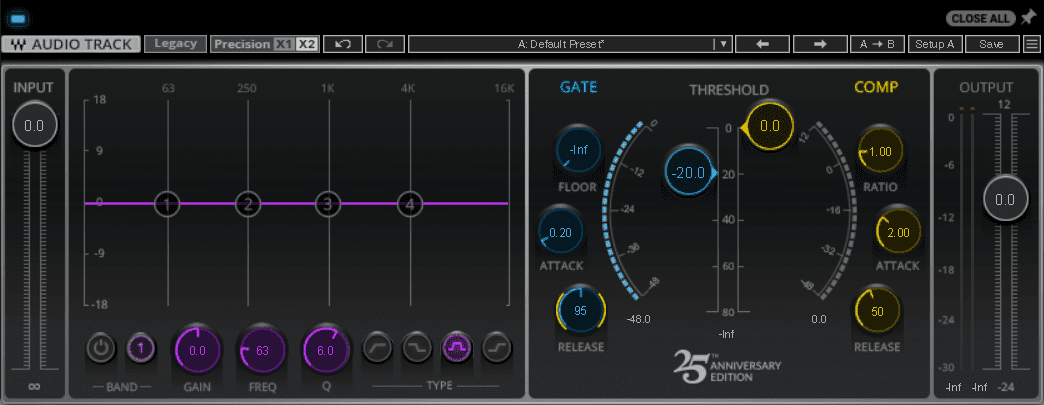
Step 2: Audio Track Gate
Let’s add a gate next. This will give us a handy way to control the length of the kick’s tail.
Click the top plugin slot in StudioRack and add Waves’ channel strip AudioTrack plugin. In the Gate section, bring the Threshold down to -20.0, set a fast Attack of 0.20 and a medium Release of 95.
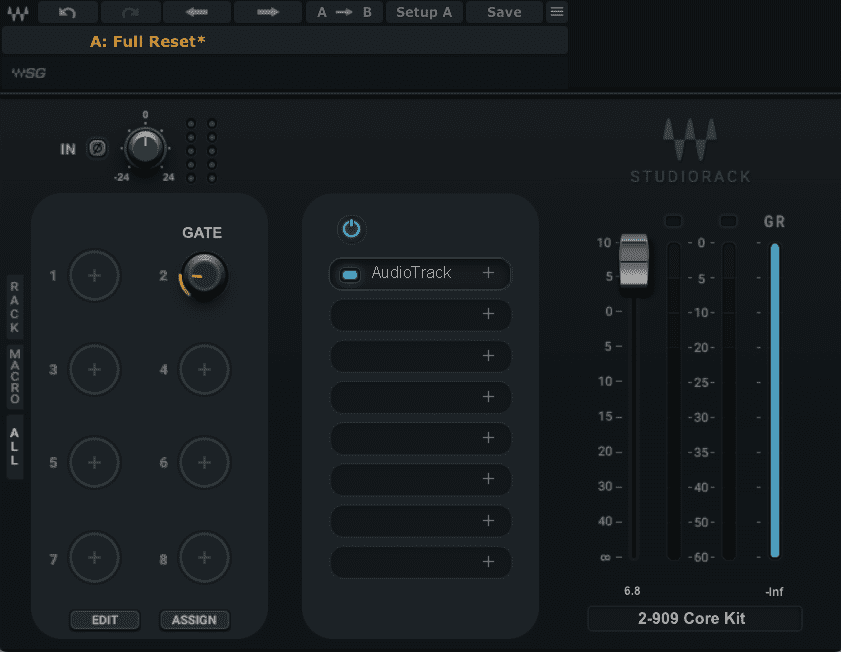
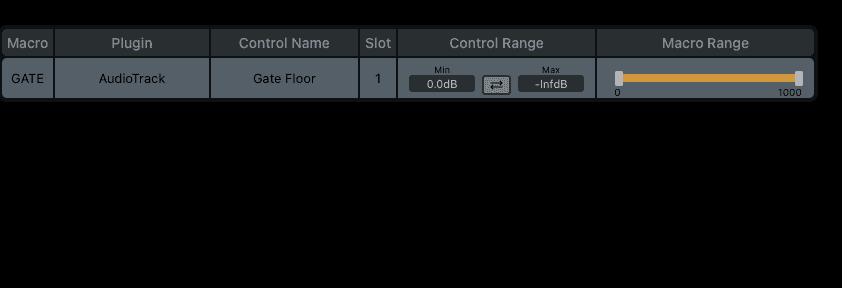
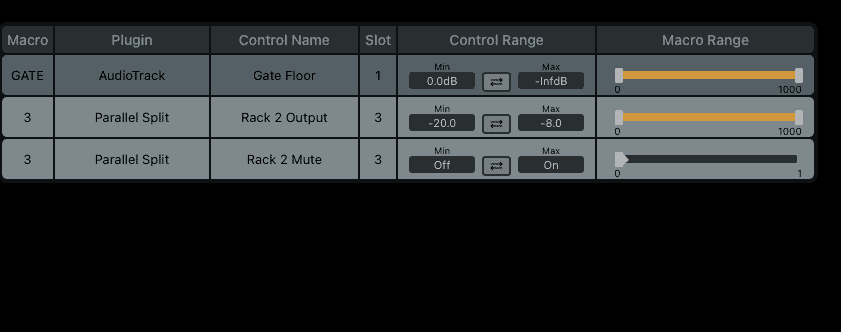
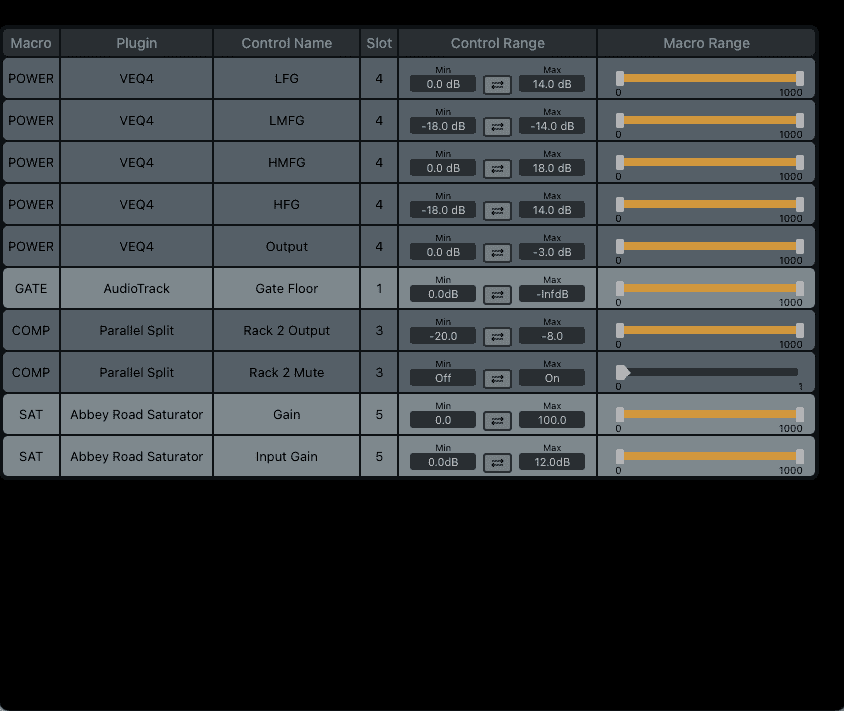
Next, let’s set up a macro to control this. On the StudioRack plugin, click on one of the empty macro slots. In the dropdown menu that appears, choose AudioTrack and then the Gate Floor parameter. Now, by turning the macro knob, we can control how much gate is applied. You can give the macro a custom name by double-clicking on the title above the knob.
There’s one last thing to do. Right now, gating is on when the knob is fully counterclockwise. We want this to be the opposite. Click the Edit button at the bottom and in the Control Range column, click the swap button so that Min is 0.00dB and Max is -InfdB.
Here’s the kick with medium gate applied:
Step 3: Parallel Split
Let’s add a split next so that we can introduce parallel compression.
It’s fairly easy to do. Click on one of the next slots down and choose Parallel Split. That will create a split point plus a second channel. Note that the two serial signals will both exit from and return to the main signal chain at this split point.
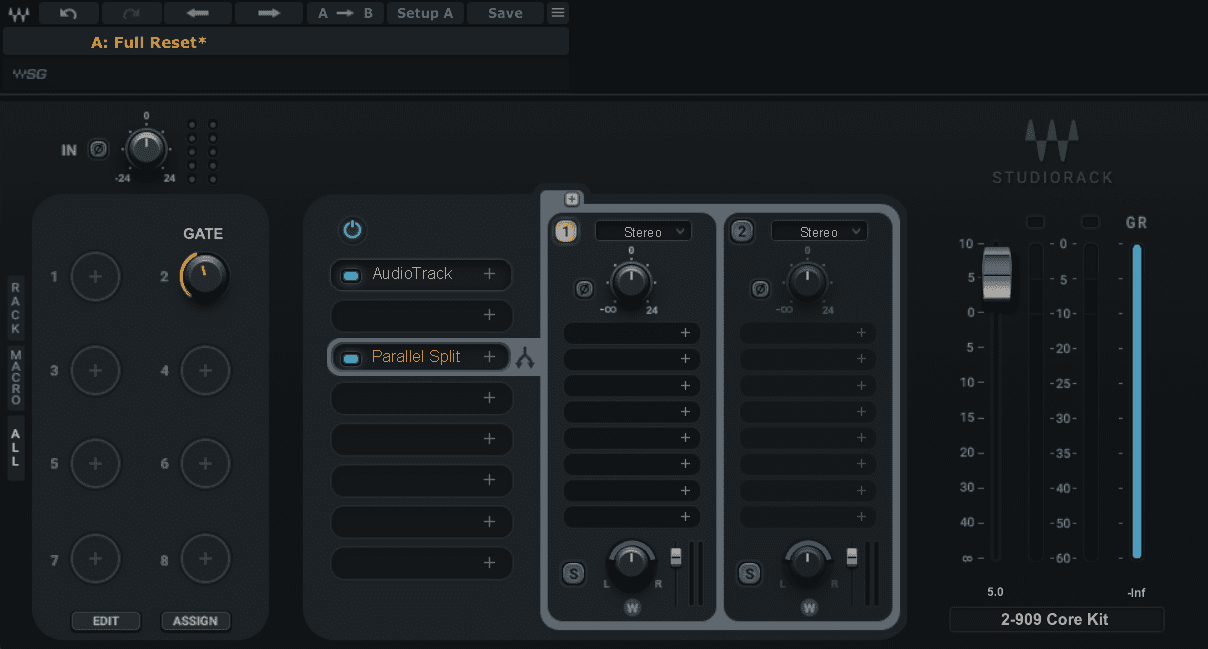
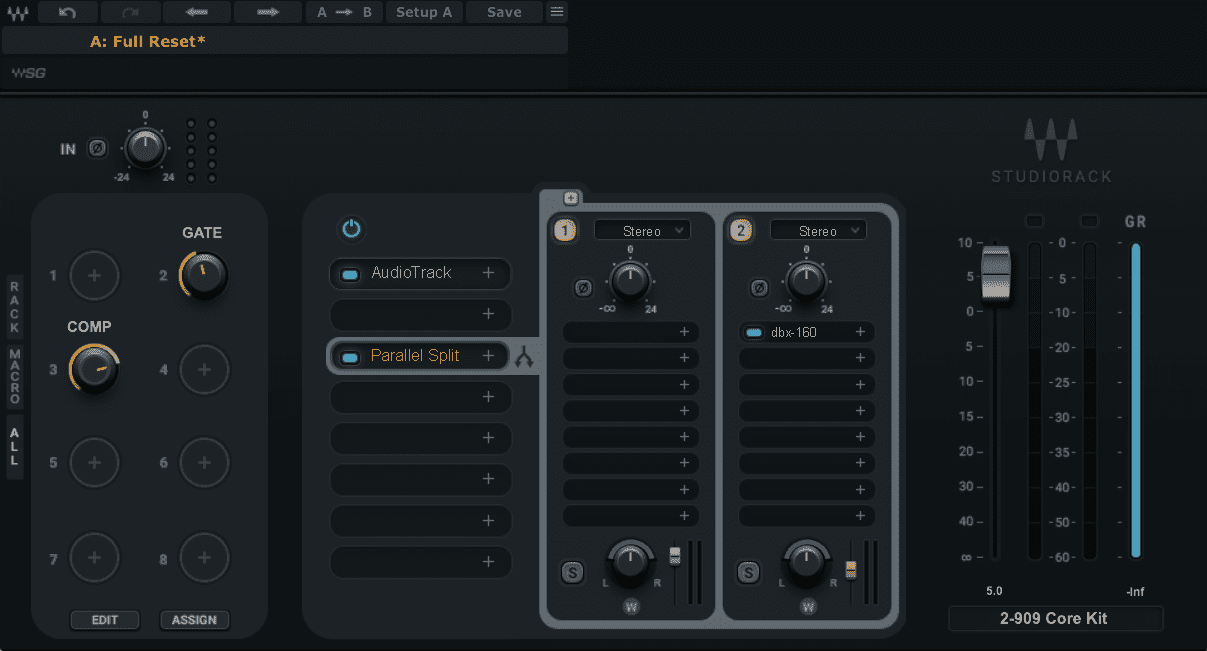
Step 4: dbx 160 Compressor
Let’s make Rack 1 the unprocessed line and Rack 2 the compressed one. Accordingly, we add Waves dbx 160 Compressor to the second rack. This compressor is known for its aggressive character and is often used on drums. We select the Bass Drum preset. Any future changes will need to be made in the compressor plugin itself, as the macro that we’re going to create will handle the amount of parallel compression.
Let’s set up that macro now. As before, click on an empty macro and choose Parallel Split -> Rack 2 Output. We’re going to add one more parameter. Right-click on the knob and then select Parallel Split -> Rack 2 Mute. Give the macro a name, for example, “COMP”.
Next, go into the Edit screen and set the Rack 2 Output Control Range from -20.0 Min to -8.0 Max. For Rack 2 Mute, swap Min and Max so it goes from Off to On, and reduce Macro Range from 0 to 1 by dragging the yellow slider all the way to the left. When fully left the COMP dial turns off compression. Turning it to the right adds more compression.
The kick with parallel compression:

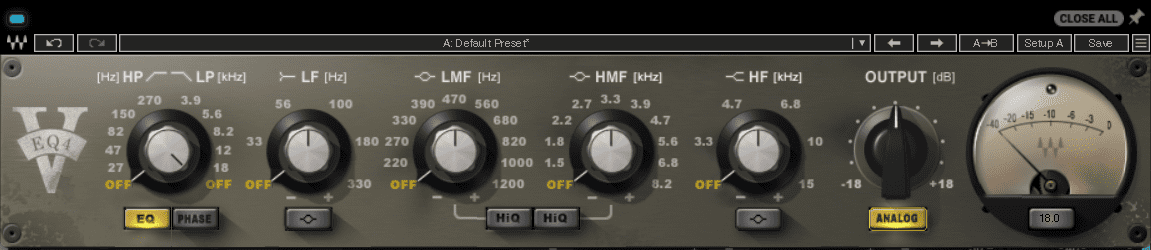
Step 5: V-EQ4
For the next step, let’s add a vintage-style EQ and a macro so that we can make changes across all the frequency bands at the same time. This will help our kick to sound larger than life.
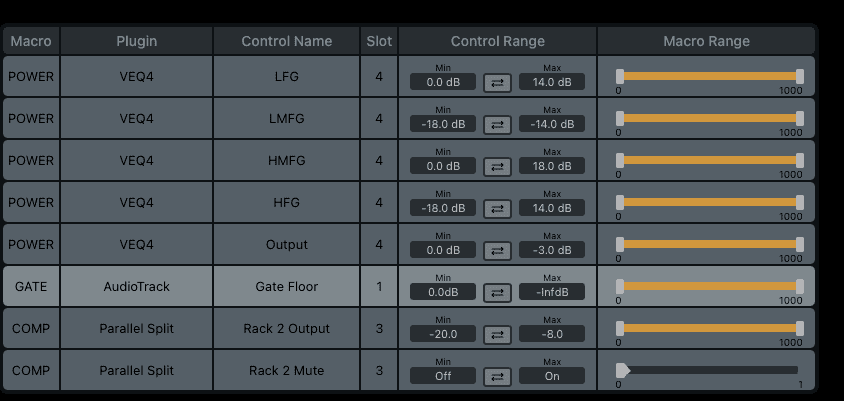
After the Parallel Split, add Waves V-EQ4. Next, create a new macro and add the LFG, LMFG, HMFG, and HFG parameters. Add the Output as well. We’ll set this to decrease as the frequencies boost to keep the signal from overloading. Give the macro a name.
Next, open the Edit page and input the following amounts:
- LFG: 0.0dB to 10.0dB
- LMFG: 0.0dB to -14.0dB
- HMFG: 0.0dB to 18.0dB
- HFG: 0.0dB to 14.0dB
- Output: 0.0dB to -3.0dB
The last thing to do is set the frequency points to boost or cut. This will depend on your track. As you turn up the macro, you’ll get boosts in the lows, mids and highs while getting cuts in the boxy low mids and the output.
The kick now with EQ:


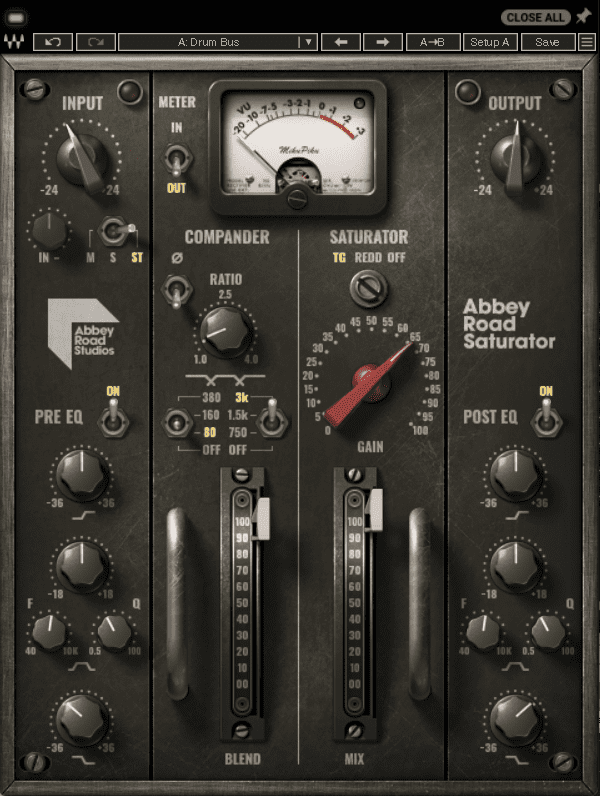
Step 6: Abbey Road Saturation
For the final stage, let’s add saturation. We select Abbey Road Saturator within StudioRack and dial in the Drum Bus preset.
The next step is the macro. Let’s make a macro to control both Input Gain and Saturator Gain. We click on the plus symbol on an empty macro and point it to Abbey Road Saturator -> Gain and then Input Gain. We also give the macro a name.
On the Edit page, we leave the Gain amounts alone, as it’s automatically set from zero to maximum gain. For Input Gain, we give it a range of 0.0dB to 12dB.
The kick with added saturation:
Here’s the kick in the context of a track with additional production and loops from the Splice pack, Driving Techno:
*Attack Magazine is supported by its audience. When you purchase through links on our site, we may earn an affiliate commission. Learn more.
While You’re Here…
If you like this article you might enjoy our book The Secrets of Dance Music Production. It is available from the Attack store!
New customer? Use code ATTACK10WELCOME at checkout for a 10% discount!
