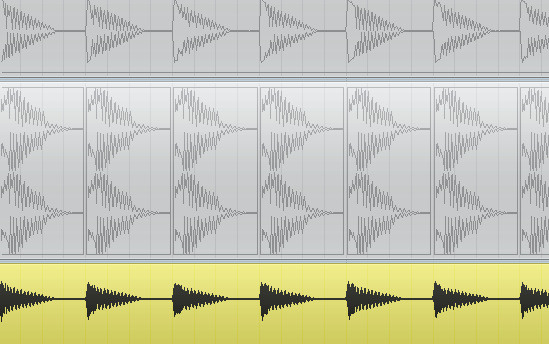
How do I create the perfect kick drum? It’s a question we’ve surely all asked at some point. Luckily Attack’s production expert Bruce Aisher is here to explain the principles of layering kick samples to create the ultimate blend.
As we saw in our walkthrough on clap and snare sounds, layering drum elements is a relatively easy and incredibly effective way to achieve the perfect percussion sound. It’s all too easy to find samples which are nearly right but don’t quite hit the spot in the context of your mix. Layering two or more samples together allows you to combine the best characteristics of each, creating the ideal custom sound to fit your track.
Kick drums, in particular, can benefit from layering in order to conjure up ‘the ultimate kick’, but a little more care is needed with low-frequency sounds in order to avoid some common potential pitfalls.
How Low Can You Go?
For our starting point, let’s take this kick sample with lots of low-end weight but very little midrange or higher frequency content:
We can try and boost the higher frequencies to add some ‘click’ and help the sound cut through the mix, but no amount of EQ seems to work. After all, EQ can’t boost something that isn’t there in the first place.
The obvious solution is to layer this low-end kick with a second sample to add some mid- and high-frequency weight. We’ve picked out this sample which should complement it nicely:
When deciding which kick samples to layer together, trial and error is the most sensible approach, but you can usually refine your options by thinking about the components of the sound you’re looking for.
All the usual descriptive terms can be useful in determining which samples are likely to be complementary. Does your kick lack low-end boom, low-mid body and weight or high-mid click? Does it have a very fast, percussive attack which could be reinforced by something slightly more mellow? Does it have a short tail which could be layered with a long boom?
Remember, too, that other sounds can also be layered with a kick sample if they add the desired characteristics. Hi-hats, white noise or rimshots, for example, can be used to add a click. Sub-bass tones can add that low-end boom.
Combining our two kick samples gives us this hybrid sound:
(Note that there are a few different ways of triggering two kick samples simultaneously. You could use multiple instances of a sampler plugin, each placed on its own track for individual processing. You could use one sampler plugin with multiple outputs. Here we’re working with samples placed directly onto audio tracks in Cubase simply because it makes the process a little easier to visualise in our screengrabs. You should pick whichever approach you find easiest.)
But what about those potential pitfalls we mentioned? Let’s take them one at a time…

04.26 PM
Thanks for sharing this. Is it common to use stereo kick samples? I always track my kicks out of my drum machine in mono.
04.34 PM
Hi Joel. Generally speaking, it’s best to keep lower frequencies in mono for a variety of reasons (we find it very difficult to perceive the stereo position of low frequencies and keeping low frequencies in mono allows you to use the full bandwidth of each stereo channel for maximum impact – very important for kicks).
Keeping your kicks in mono is definitely the safest approach, although there are cases where including some stereo information in the higher frequencies of the kick can also work well. Try experimenting with layering stereo sounds to add the ‘click’ on top of a mono kick, for example.
01.16 AM
that inverting phase thing is genious. thanks for the tip. i just tried it. wow!
05.35 PM
Hi, how to inverting phase in Ableto Live? tnx in advance
03.06 AM
Merzad,
Phase cancellation in Ableton Live can be found in the Utility plugin, which also features gain control, a mono-stereo mixer and the voice of god.
07.01 PM
i think in a club or in a crowd ,there will be no mono_stereo difference,someone answer me if i’am wrong,i’am just a trance listener
12.28 AM
This is great information for beginners in kick drum design and will save them alot of time and pain !
I am having trouble finding additional layers to add size, thickness, texture and character in the mids. For example, a classic TR707 top kick is brilliant for its punchy characteristics but even with various mix processing, it can still sound quite small and thin compared to modern layered kicks by top producers.
Where would you go from this point ? (sub and hi freq layer is done)