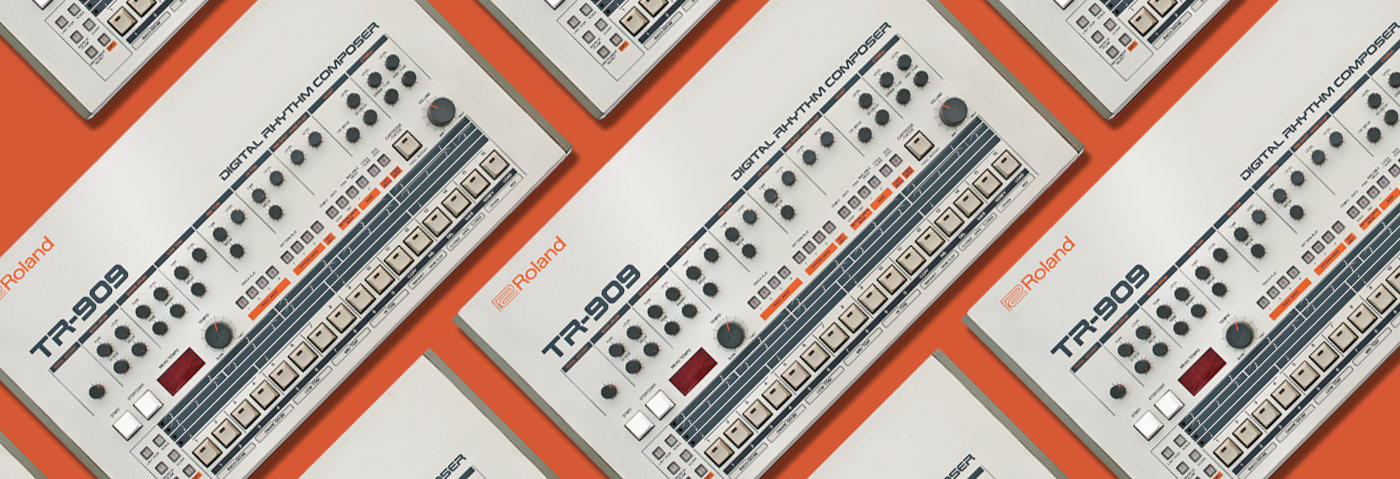
In the latest Beat Dissected, we create a beat using Roland TR-909 hits we’ve processed through a Revox B77 tape machine for some true analogue warmth.
Beat Dissected is a regular series in which we deconstruct drum patterns, showing you how to program them in any DAW. Just copy our grid in your own software to recreate the loop.
Here’s the beat we’re building today:
Spec
Tempo
120-125 BPMSwing
55-65%Sounds
909 Style Tape HitsStep 1
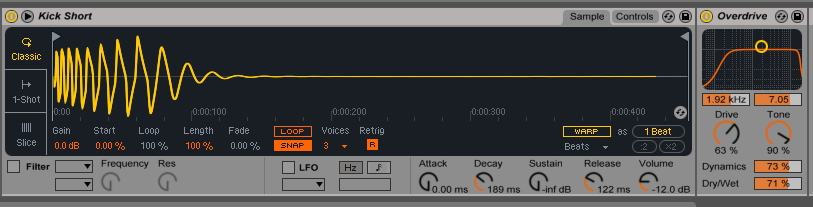
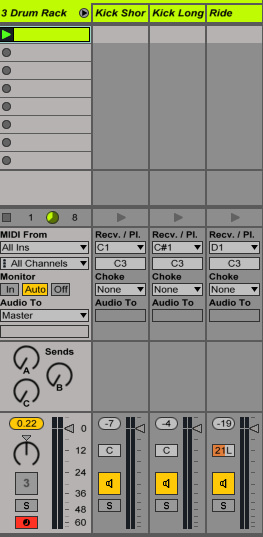
We begin by loading up Ableton’s Drum Rack and dragging our short kick sample into the rack. In Sampler, we change the sample mode to Classic, and tweak the envelope settings to minimum attack and sustain with medium decay and release. We then add an overdrive plugin, setting the controls as shown in the image below.
The envelope settings give this sample a nice snappy transient, with the overdrive providing some extra attitude. Taking down the sustain and shortening the decay in this way takes out all the thump from the kick, making space for the long kick we add in the next step.
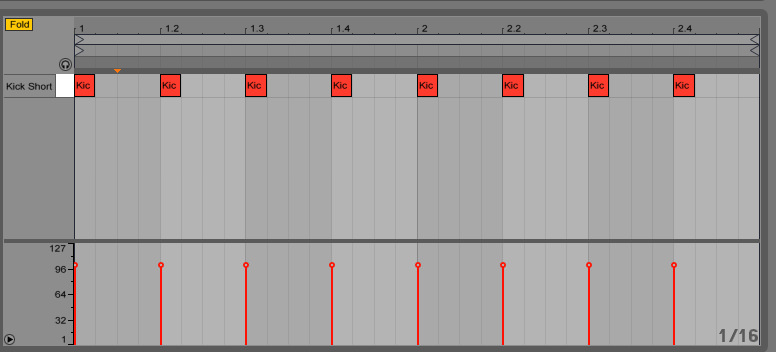
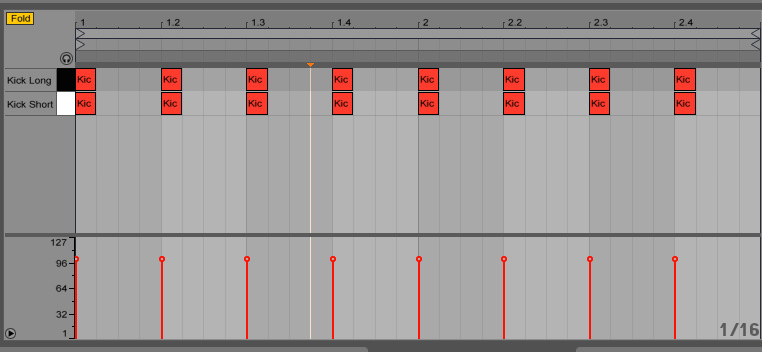
We then insert a MIDI clip and programme a basic four-to-the-floor rhythm for two bars, placing the short kick on every beat.
Step 2
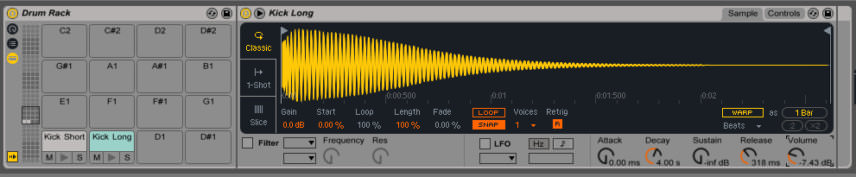
Next we add our long kick sample and program the same pattern. We switch the Sampler device to classic mode and take the number of voices down to 1. Due to the length of the sample we need to make sure the hits don’t overlap; limiting the voices means each new hit that plays will stop the playback of the previous one.
We tweak the envelope again, setting the attack and sustain to minimum, decay to 4 seconds and release 292 ms. The decay time you set here is subjective. If you plan to have a sub bass in your track then you’ll need to set a shorter decay time to create space, otherwise a longer decay time will provide the low end in your project. Here’s examples of how both sound:
Step 3
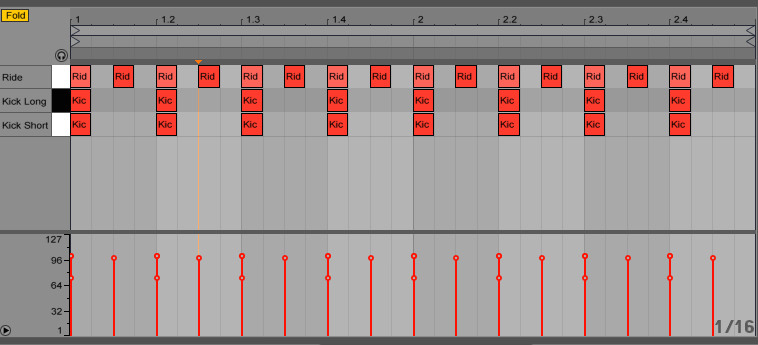
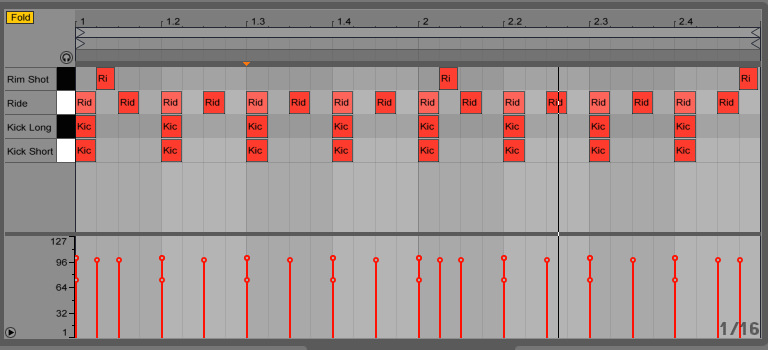
Now we add our ride sample, placing a ride on every 16th note. To add some dynamics to the rides, we turn down the velocity of all the hits that fall on the up and down beats. Once again we switch Sampler to classic mode and tweak the envelope settings, reducing the transient by backing off the attack to 9.49 ms, setting the decay to 300 ms, pushing the release right up to 60.0 s and taking the volume down to -21.9 dB.
We also set the number of voices to 1 as with the long kick, meaning each new ride hit will chop off the last, creating a cleaner rhythm.
We add an EQ to sweep off any low frequency and also pan the sound to the left slightly.

Step 4
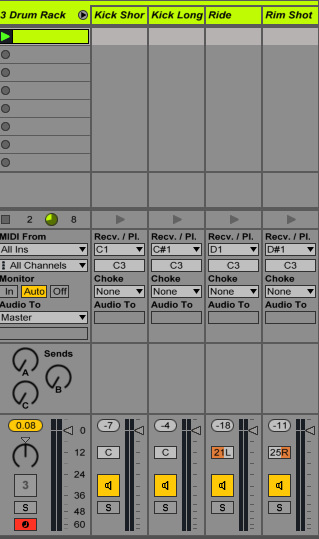
Now we add our rimshot, placing it in between the first beat and off beat. We also add one at very end of the two bars to lead us back into the loop.
In Sampler we turn the volume down to -15.4 dB and then add Ableton’s Saturator plugin, pushing the drive up to 14.9 dB. We change the saturation type to Medium Curve and pull down the output to -17.7 dB. After the Saturator we add EQ Eight, sweeping off any low frequency. We then pan the sound to the right slightly, working with the ride to enhance the stereo image of the beat.

Step 5
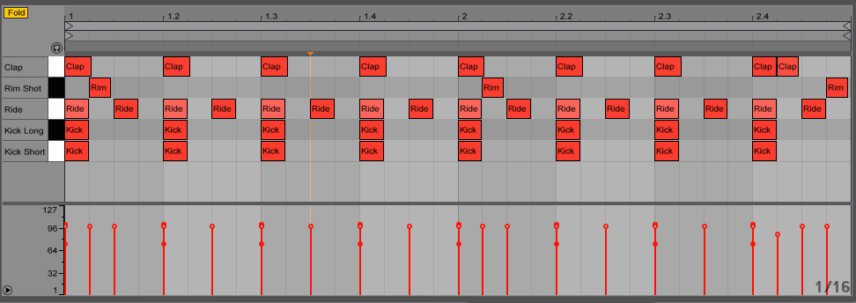
Next we add our clap sample, placing it on top of the kick, which adds a nice energy to the beat. We also place an extra clap with a slightly lower velocity at the end of the loop to add some contrast between the two bars.
In Sampler, we adjust the envelope settings as shown below before adding an EQ in order to sweep off any low frequencies and boost some high end using a high shelf filter.

Step 6
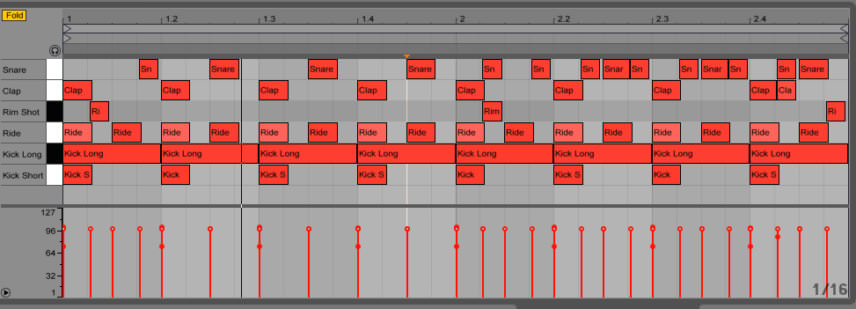
The final addition is our snare, programming quite a busy rhythm – this could act as way to add intensity to sections of the drums. From the Groove Pool, we set the swing to Ableton’s 16-25.agr groove preset, add a slightly looser feel to the snare.
EQ Eight is used once more, sweeping away any really low frequency and adding a slight boost in the higher mids, giving the snare a bit more presence.

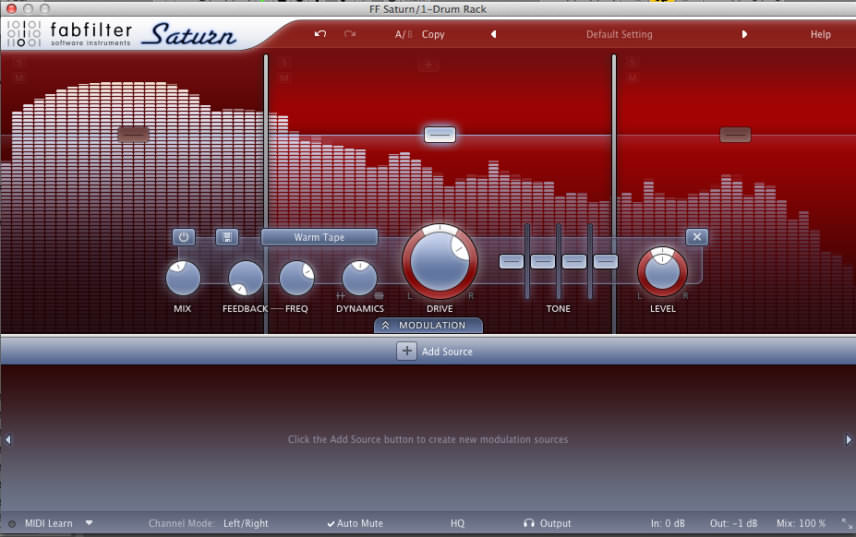
Step 7
Finally, we add some bus processing. FabFilter’s Saturn plugin is used for some multi-band distortion. Splitting the drum track into three frequency bands, we go easy on the lows, adding a tiny amount of drive and taking the mix right down, but for the mids and highs we set a moderate mix and drive.
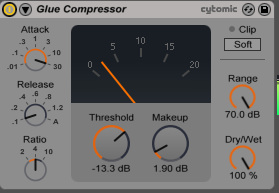
After Saturn, we add the Glue Compressor, setting a slow attack and fast release before tweaking the threshold control until we see 2-3 dB of compression on the meter. We adjust the makeup gain to remedy for loss of level.
The Saturn plugin adds a nice amount of warmth here, while the Glue Compressor helps gel the drums together, adding some punch at the same time.
03.55 PM
Nice.
Id like a tutorial on how to get the most out of FF Saturn in and of itself tbh, it’s quite a powerful plugin.
01.40 AM
Glad to see the dissections continue. Been a while.
11.21 PM
https://uploads.disquscdn.com/images/011beea838dff3208edfb00c09c96633e1be8daf684501adb6105f0530e53a72.png This keeps happening to me… 🙁
09.39 PM
Perfect!
11.42 AM
Sorry about this Lenny. Please email attack[at]attackmagazine.com and we can look into this.
Tom- Admin
11.43 AM
Good idea Plyphon, we will see what we can do!
Tom- Admin