In the latest Beat Dissected, we construct an electro-tinged house beat using Roland TR-808 samples.
Beat Dissected is a regular series in which we deconstruct drum patterns, showing you how to program them in any DAW. Just copy our grid in your own software to recreate the loop.
In this Beat Dissected we’ll be building this 808 house beat, using a kit from Samples From Mars’ SP-1200 From Mars pack and WaveDNA’s Liquid Rhythm to provide the intuitive programming. Pull the project from Blend below to download the samples.
Step 1
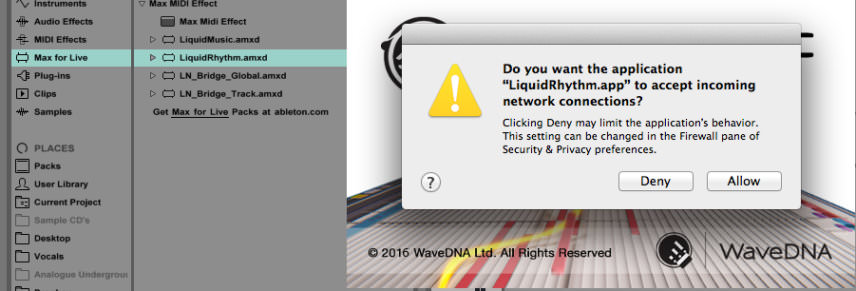
We begin by loading a new Ableton project. Create a MIDI track and then load Liquid Rhythm’s Max For Live MIDI effect. You will then be asked if you want the application “LiquidRhythm.app” to accept incoming network connections. Hit Allow to set up a connection between Live and Liquid Rhythm so they work intelligently in tandem
Once we have our Max for Live Liquid Rhythm app loaded, we then load a Drum Rack onto the same MIDI channel, and load our 808 kit. These samples have been taken from the Samples From Mars SP-1200 From Mars sample pack.
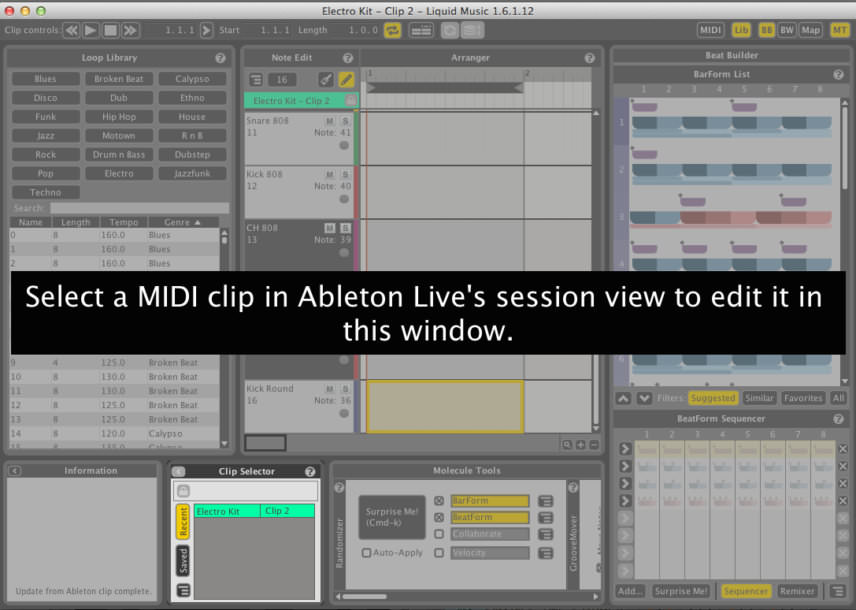
If you switch back to the Liquid Rhythm app you’ll see a screen asking to select a MIDI clip in Ableton’s session view to begin editing. In Ableton, we create an empty MIDI clip in session view by right-clicking on the channel and selecting Insert MIDI Clip.

Step 2
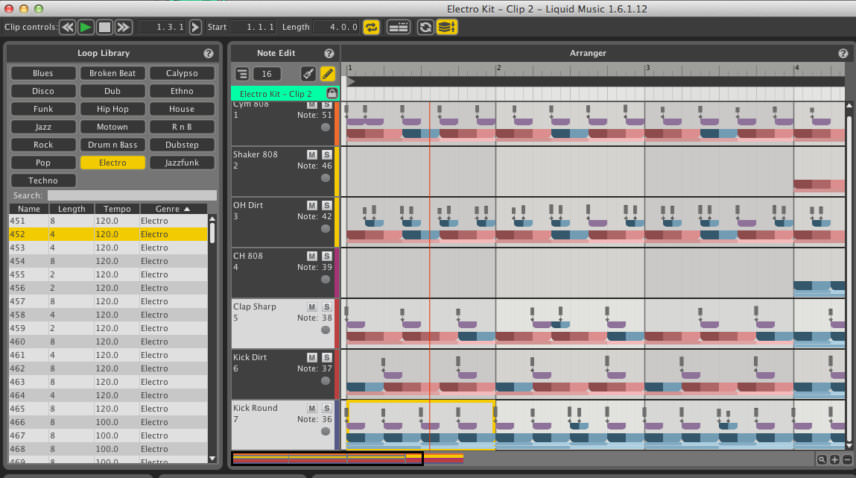
Now we’re ready to use Liquid Rhythm to trigger our 808 kit. There are a number of ways we can build beats and rhythms with Liquid Rhythm but one of the quickest ways to get some ideas down is to use the Loop Library on the left hand side of the plugin. Each genre has a number of different beat templates, and the beauty of using the Max for Live device means we can use these templates to trigger our 808 kit (you should see your drum rack samples listed in the Arranger section of Liquid Rhythm).
You can load a loop by double-clicking on the Loop in the list. Browsing through some of the loops in the electro category, we can hear these rhythms are working well with our 808 drum sounds. We double-click on loop 452 to load it in. There’s some really nice interplay between the open hat and cymbals, and the kick and clap have a nice pattern.
Step 3
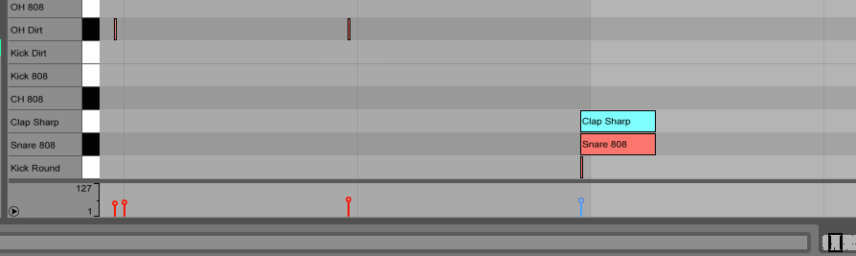
We could do with making a couple of tweaks here and there to improve the feel of this beat. For starters we need to swap ‘Kick Dirt’ on the Drum Rack, as at the moment we have two kicks playing. One plays on every beat (‘Kick Round’) which is fine, but Kick Dirt is playing a snare pattern on every upbeat and is clashing quite badly. We drag Snare 808 to where Kick Dirt is, which swaps them over. It would also sound better if there was a clap on every upbeat, following the snare. We do this on the upbeats at the start of every two bars, and we also remove the clap that is on the downbeat of bar one.
Step 4
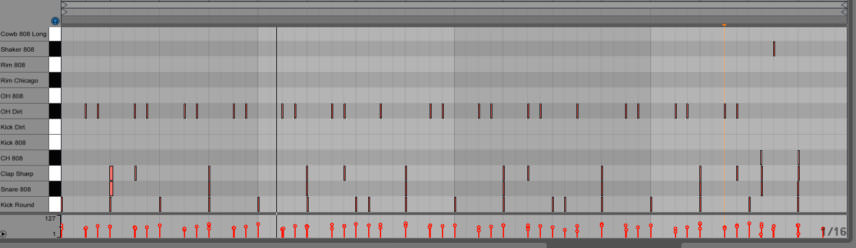
There are a couple of hits of the ‘CH 808’ closed hat at the end of the four bars which sound slightly out of place, so we delete those. We also add an extra kick in the off beat at the end of the four bars to provide a subtle fill to transition back into the next section.
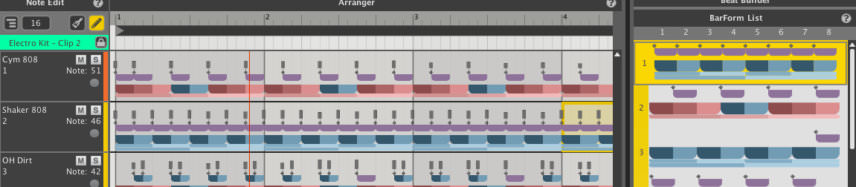
We now switch back to the Liquid Rhythm app to add some extra elements to our beat. On the right of the app we can see the BarForm list. This offers a series of different rhythms we can use for individual sounds. We select the one representing 16th notes and drag it onto the first bar section for the ‘Shaker 808’ hit. We repeat this for the other three bars.
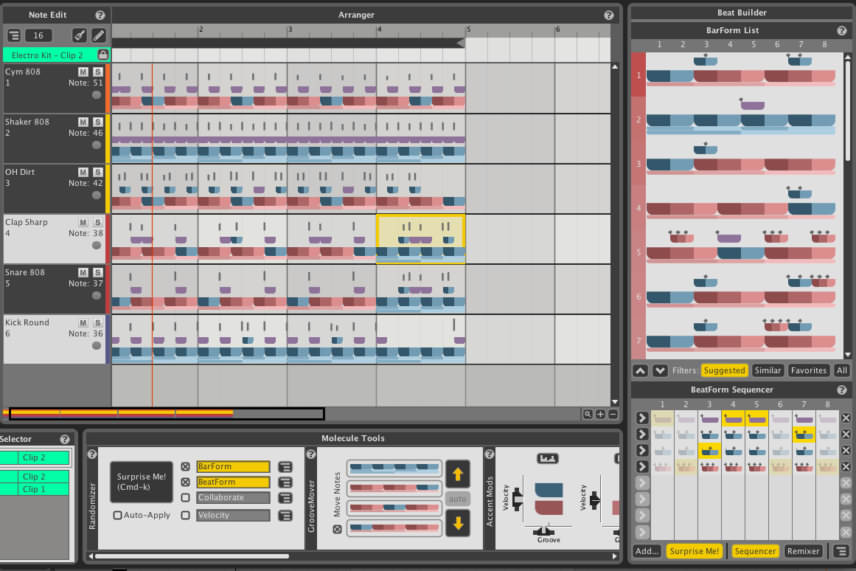
We also highlight the last bar of the snare and using the Beatform Sequencer in the bottom right of Liquid Rhythm we select the Surprise Me button, which randomises the hits. We press it a couple of times until it creates a nice snare fill for us to use for the final bar of this beat. We copy over this pattern to our clap by holding down the option key while clicking and dragging it to the clap.
Step 5
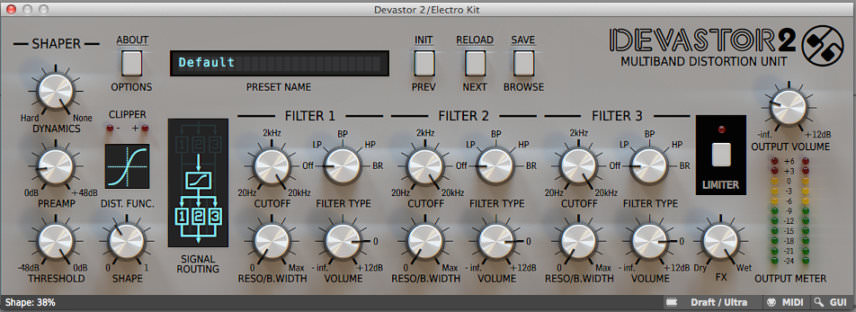
Finally, we apply some group processing to add some more bite to the drums. We add D16’s Devastor 2 plugin, keeping the default state we turn up the preamp setting to +8.5 dB to engage thedistortion, and then we turn up the shape control to 38%, which introduces some clipping. We make sure we tweak the output volume so we’re not introducing any gain to the signal.
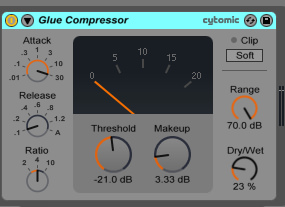
We then add Ableton’s Glue Compressor, applying some snap compression with a slow attack and fast release. We pull the threshold down to apply 10 dB of gain reduction, then dial back the dry/wet control to 23% for some parallel compression, which introduces a bit more punch to the transients and also tames some of the slightly loose and trashy tail end of the hits brought out by the distortion. Again we tweak the make-up gain so we’re not introducing any significant level change.
11.20 PM
I can never get these files to download anymore since you host the projects through Blend. I get an error message of ‘There was an error pulling this project.’ https://uploads.disquscdn.com/images/011beea838dff3208edfb00c09c96633e1be8daf684501adb6105f0530e53a72.png