
Is it possible to mix a song using just Waves’ Music Maker Access subscription service? We find out.
Plugin subscription services are a way to get access to a number of high-quality plugins without having to pay for them all at once. In this tutorial, we’ll be using one such service to mix a breaks track.
Waves offer three subscription service tiers. We’ll be using the most popular, the Gold Plus package priced at $9.99 per month. It features 42 plugins from the Gold Bundle as well as two additional plugins. We’ll be using it exclusively in this mix to see what it can do.

Today’s song is a breaks-influenced track. We’ve separated it into stems and will be mixing the kick, percussion, bass, and melody, we’ll also be addressing the drum and master busses. We’re using Ableton Live but the ideas can be applied to any DAW.
We’ll go from this promising start of a breaks track:
To this finished version:
N.B: We recommend following along with headphones or studio monitors as some of these results can be subtle. As ever, click any image to see a larger version.
Step 1: Kick
The kick (along with the rest of the percussion) came from Native Instruments’ Maschine. It’s an acoustic kick sample and while we like the overall sound it could be a little beefier. We also don’t need so much detail in the upper frequencies. Let’s use some plugins to get it in shape.
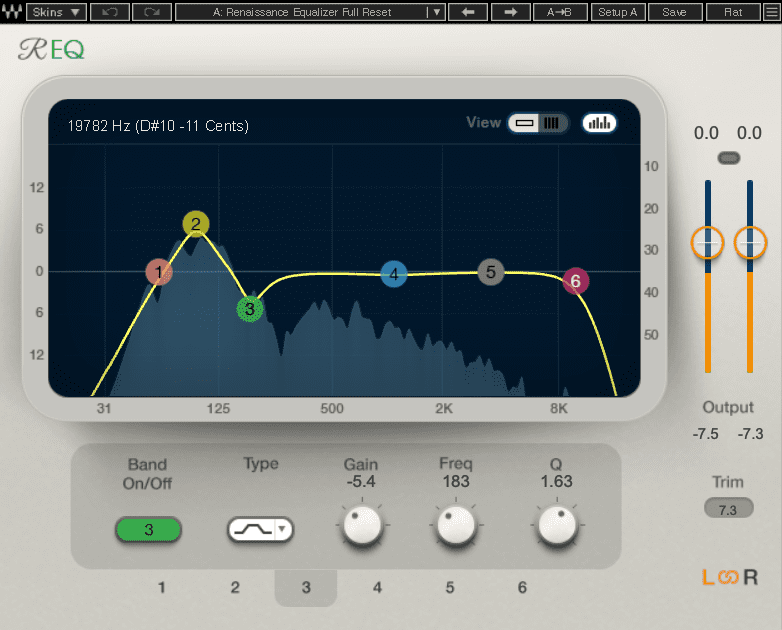
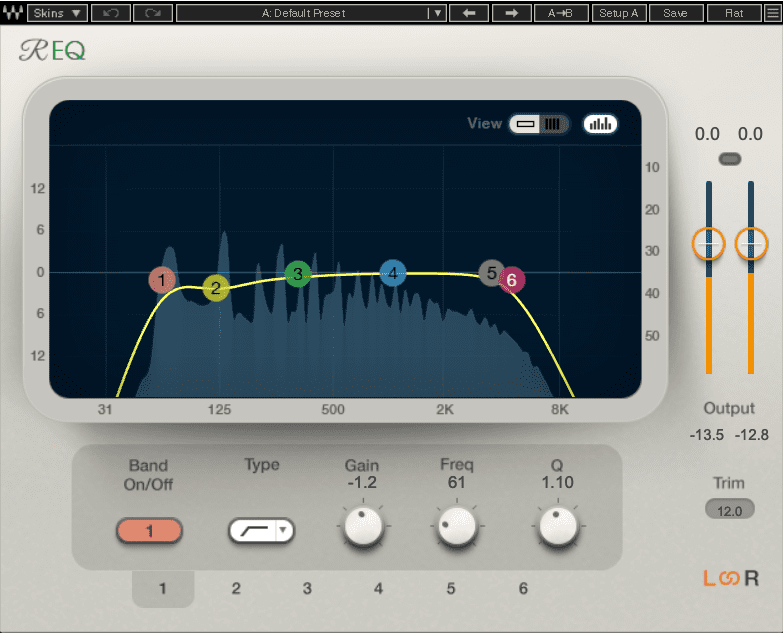
The first step utilises the Renaissance Equalizer to bring out the bass in the kick. We give it a healthy boost of 6.8dB at around 100Hz. We also carve out around 5dB of low mids at 183Hz to reduce boxiness. A high shelf helps keep the upper frequencies in check.
Next, we add an instance of the H-Comp compressor to fatten it up. The PhatKick preset gets us started. The Punch dial is especially useful as it adds a dose of transient shaping to give it a little more attack. We dial back the Mix amount just a little to let some of the original signal through for parallel compression.
Finally, we use V-EQ4, a hardware-style analogue equalizer, for broad tone shaping. Using the MightyKick preset, we give it a boost at 56Hz, cut just a little at 33Hz, add a touch of upper mids at 3.3kHz, and hit the Analog button to warm it up.
Here’s the kick as it started:
And after processing:


Step 2: Percussion
Next, let’s tackle the rest of the percussion, which is made up of two layered snares and two separate hats. Normally we’d process these individually, but for the sake of time, we’ve done it as a single stem.
As with the kick, the first thing we do is add Renaissance EQ to the channel. With this, we give the snare a boost at around 200Hz, cut some of the low mids at 360Hz, and give it a broad lift at the 8khz level to bring some highs to the rather warm samples.
Next, another instance of H-Comp, this time to help pull all of the percussion sounds together. The Drums Punch preset gets us started. It’s a bit heavy-handed so we bring the Mix back to 50% wet. We’ll be adding more compression in the next stage so we don’t need to overdo things here.
As with the kick, we go with V-EQ4 next. We cut a tiny bit at 390Hz and boost just a hair at 1.5kHz and 4.7kHz. Again, we use the Analog function to help glue it together.
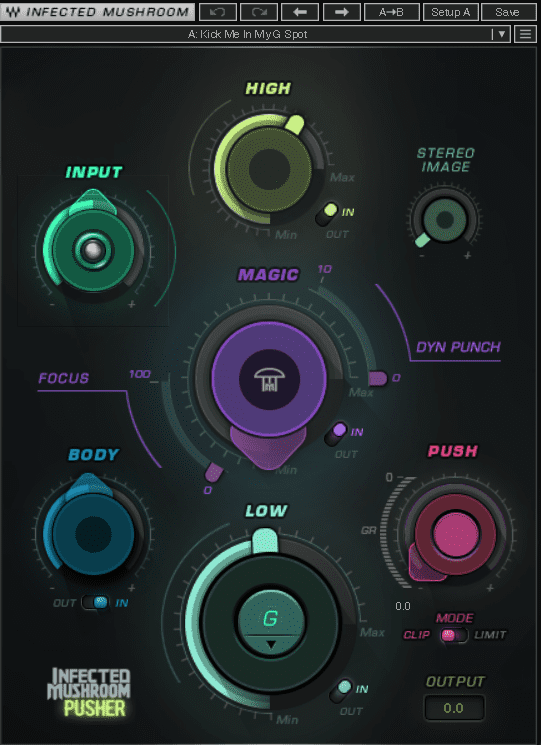
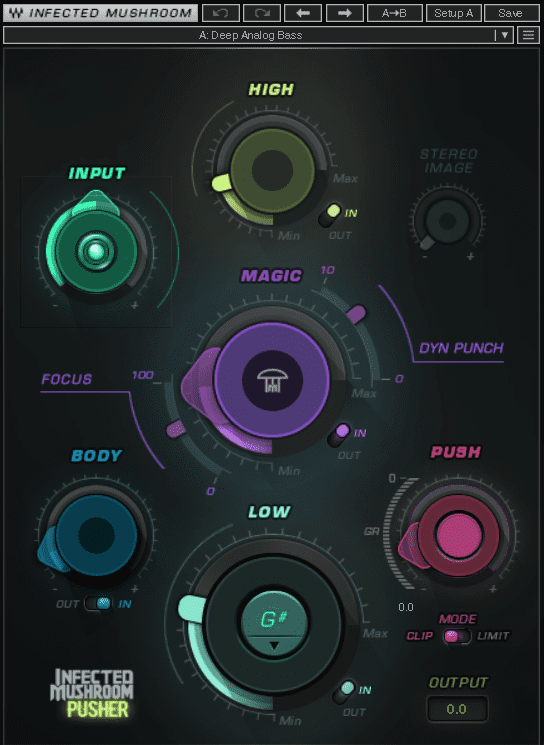
It could use a little magic so we try out the Infected Mushroom Pusher plugin, which uses EQ and dynamics to add a kind of special sauce. This is one of the bonus plugins in Gold Plus and we’re happy to have it. We use the Kick Me In My G Spot plugin to excite the highs.
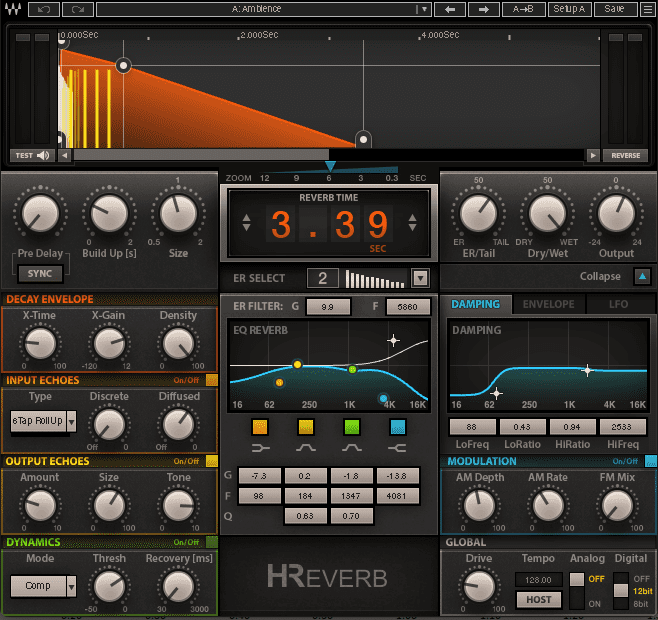
One last step. We want these separate samples to sound like they’re all part of a unified kit. Let’s use reverb to do this. We drop H-Reverb on Send A and set it to the Ambience preset. Ambience is a very short reverb that gives the impression of a drum room. We make some adjustments to the Damping to squash the lows and bring out the highs.
Finally, we add an H-Comp after the reverb, side-chained to the kick, so that the reverb breathes in time to the beat.
The percussion stem originally:
And after using Waves plugins:


Step 3: Drum Bus
Now that our kick and percussion are mixed, let’s use a bus to gel them together. We create a group, call it Drum Bus, and get to work.
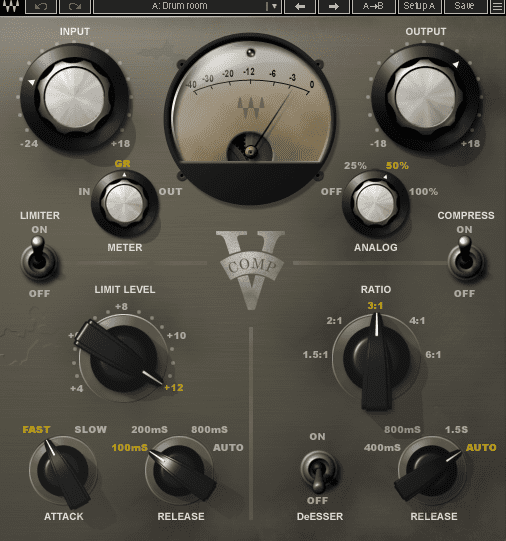
We start with V-Comp, a hardware-style vintage compressor, for glue. We use the Drum room preset to start things off, using fast attack and release settings with a ratio of 3:1.
Next, V-EQ4 adds just a hint of highs at 6.8kHz to help get back what we lost through the plugin chain. The Analog parameter also lends a sense of sonic consistency; helping it sound like it all came from the same recording session.
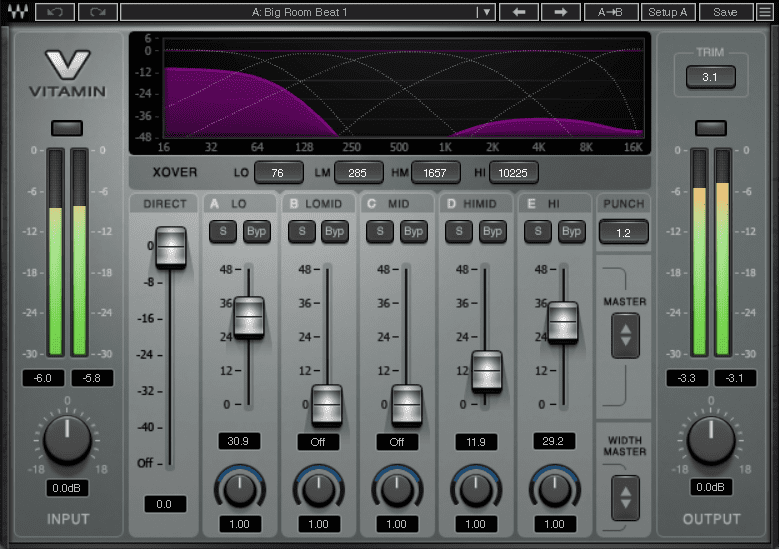
The final touch is Vitamin Sonic Enhancer, a multiband harmonic enhancer. We use it to excite the low, high mid, and high frequencies of the drum bus.
The drum bus before mixing:
And after:

Step 4: Bass
Now that the drums are finished, let’s move on to the bass. The bassline was recorded from a Korg MS-20 Mini. It’s nice and buzzy, but we’d like it to have more impact.
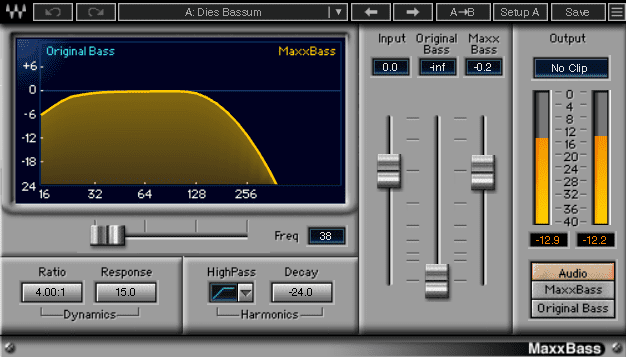
First, we use Renaissance EQ to reduce the lows by a decibel or so. Rather than push the low-end up here, we can use MaxxBass to give us a tight and controlled bass boost.
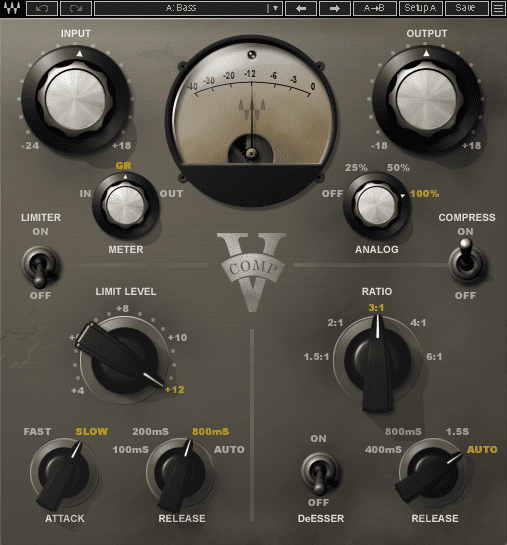
Next, we employ V-Comp (sidechained to the kick) to clamp down on both the original MS-20 signal and the MaxxBass boost. A slow attack and release of 800ms working with the sidechain give us a musical, rhythmic pumping effect while helping to push the bass away from the kick.
We could use some more tonal shaping, so we call up the trusty V-EQ4. Using the Bass preset, we go with a push at 56Hz, a slight cut at 330Hz, and lifts at 3.9kHz and 6.8kHz. Don’t be afraid to use multiple EQs as compression and other plugins will alter the frequency content of the signal.
For the final stage, we use Infected Mushroom Pusher again, this time starting with the Deep Analog Bass preset. We don’t need such a heavy effect so we use conservative settings across the board, adding spice to the bass to give it some heat without overwhelming the flavor.
The bass as it started:
And as it finished:

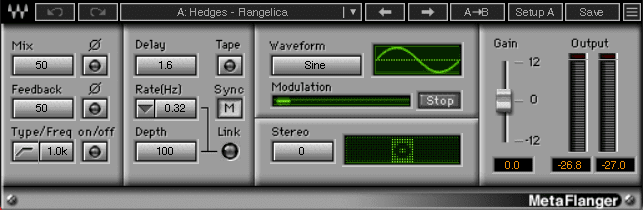
Step 5: Melody
For the melodic portion of the track, we have a line recorded from a Korg Minilogue. It has delay recorded at the source, so it doesn’t need too much work. Some reverb to help it sit in the mix sounds just about right.
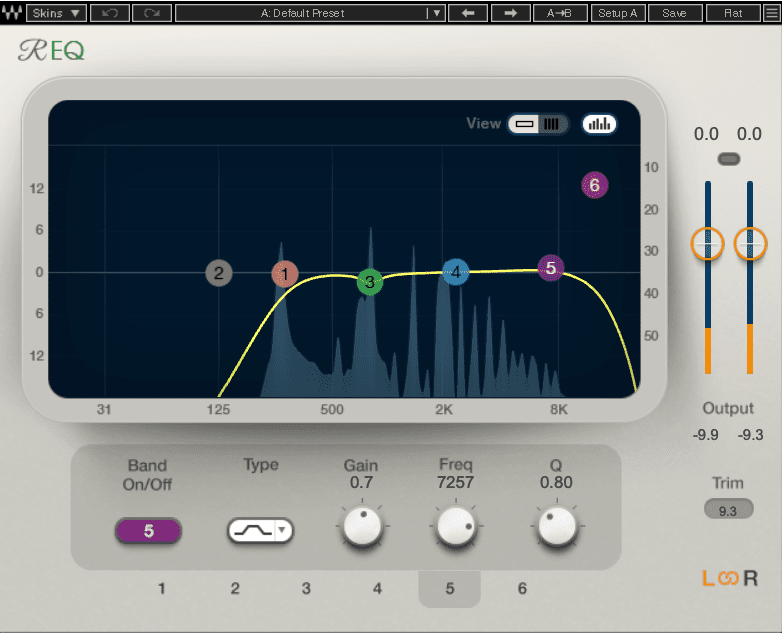
First, an instance of Renaissance EQ to clean up the signal. There’s a pokey spike at around 800Hz that we address, as well as low and high shelves to prevent any errant frequencies from intruding in.
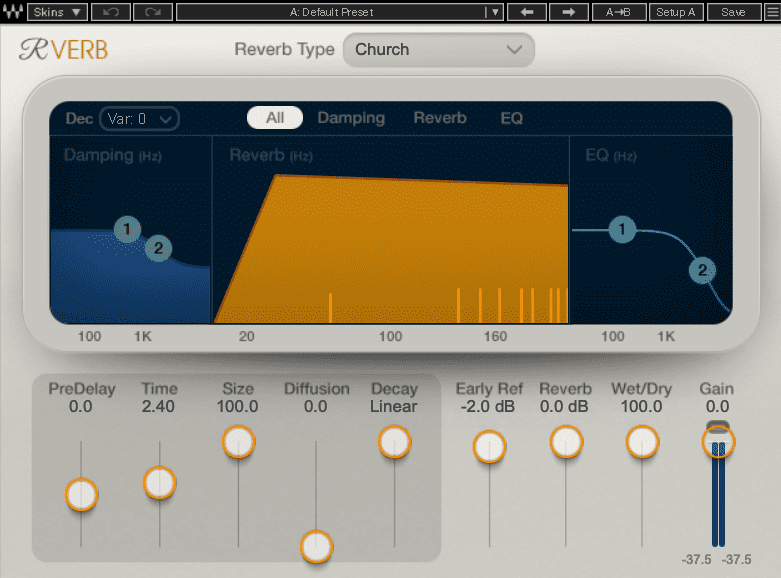
Next, we add Renaissance Reverb to Send B and call up the Church preset. It sounds good as is.
Finally, a small amount of MetaFlanger on Send C adds some subtle movement to the sound.
The Minilogue line before reverb and flanging:
And after:
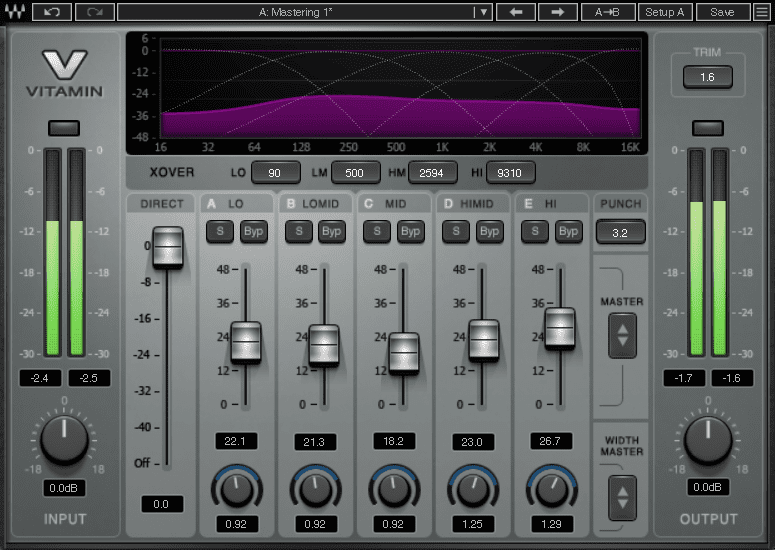
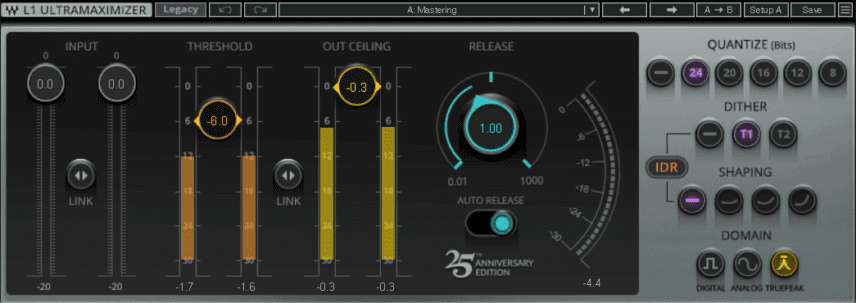
Step 6: Master Bus
And now the final step, mastering. Note that we would turn off both of these plugins before sending the track to a mastering engineer.
First, we call up Vitamin Sonic Enhancer. We start with the Mastering 1 preset, adjusting the frequency enhancement sliders. We get a nice boost overall with some additional help in the highs. We can also control the stereo imaging of each band, reducing the width of the lows and slightly expanding the high mids and highs. We also add transient punch to the overall signal with the appropriately named Punch control.
The last plugin is L1 Ultramaximizer to set the ceiling below zero and bring up the perceived volume.
The track before master bus processing:
And after:
*Attack Magazine is supported by its audience. When you purchase through links on our site, we may earn an affiliate commission. Learn more.
While You’re Here…
If you like this article you might enjoy our book The Secrets of Dance Music Production. It is available from the Attack store!
New customer? Use code ATTACK10WELCOME at checkout for a 10% discount!
