
This channel is sponsored by
 Roland Cloud is your creative hub for Roland hardware and software. Access legendary recreations of Roland Classics, find new sounds for your favorite products, and download updates and companion apps to make music fast and easy. Visit Roland Cloud
The Moog Grandmother is surprisingly flexible for a two-oscillator monosynth. We use a Dark Series edition Grandmother to create a Boards Of Canada-style ambient track in Ableton Live.
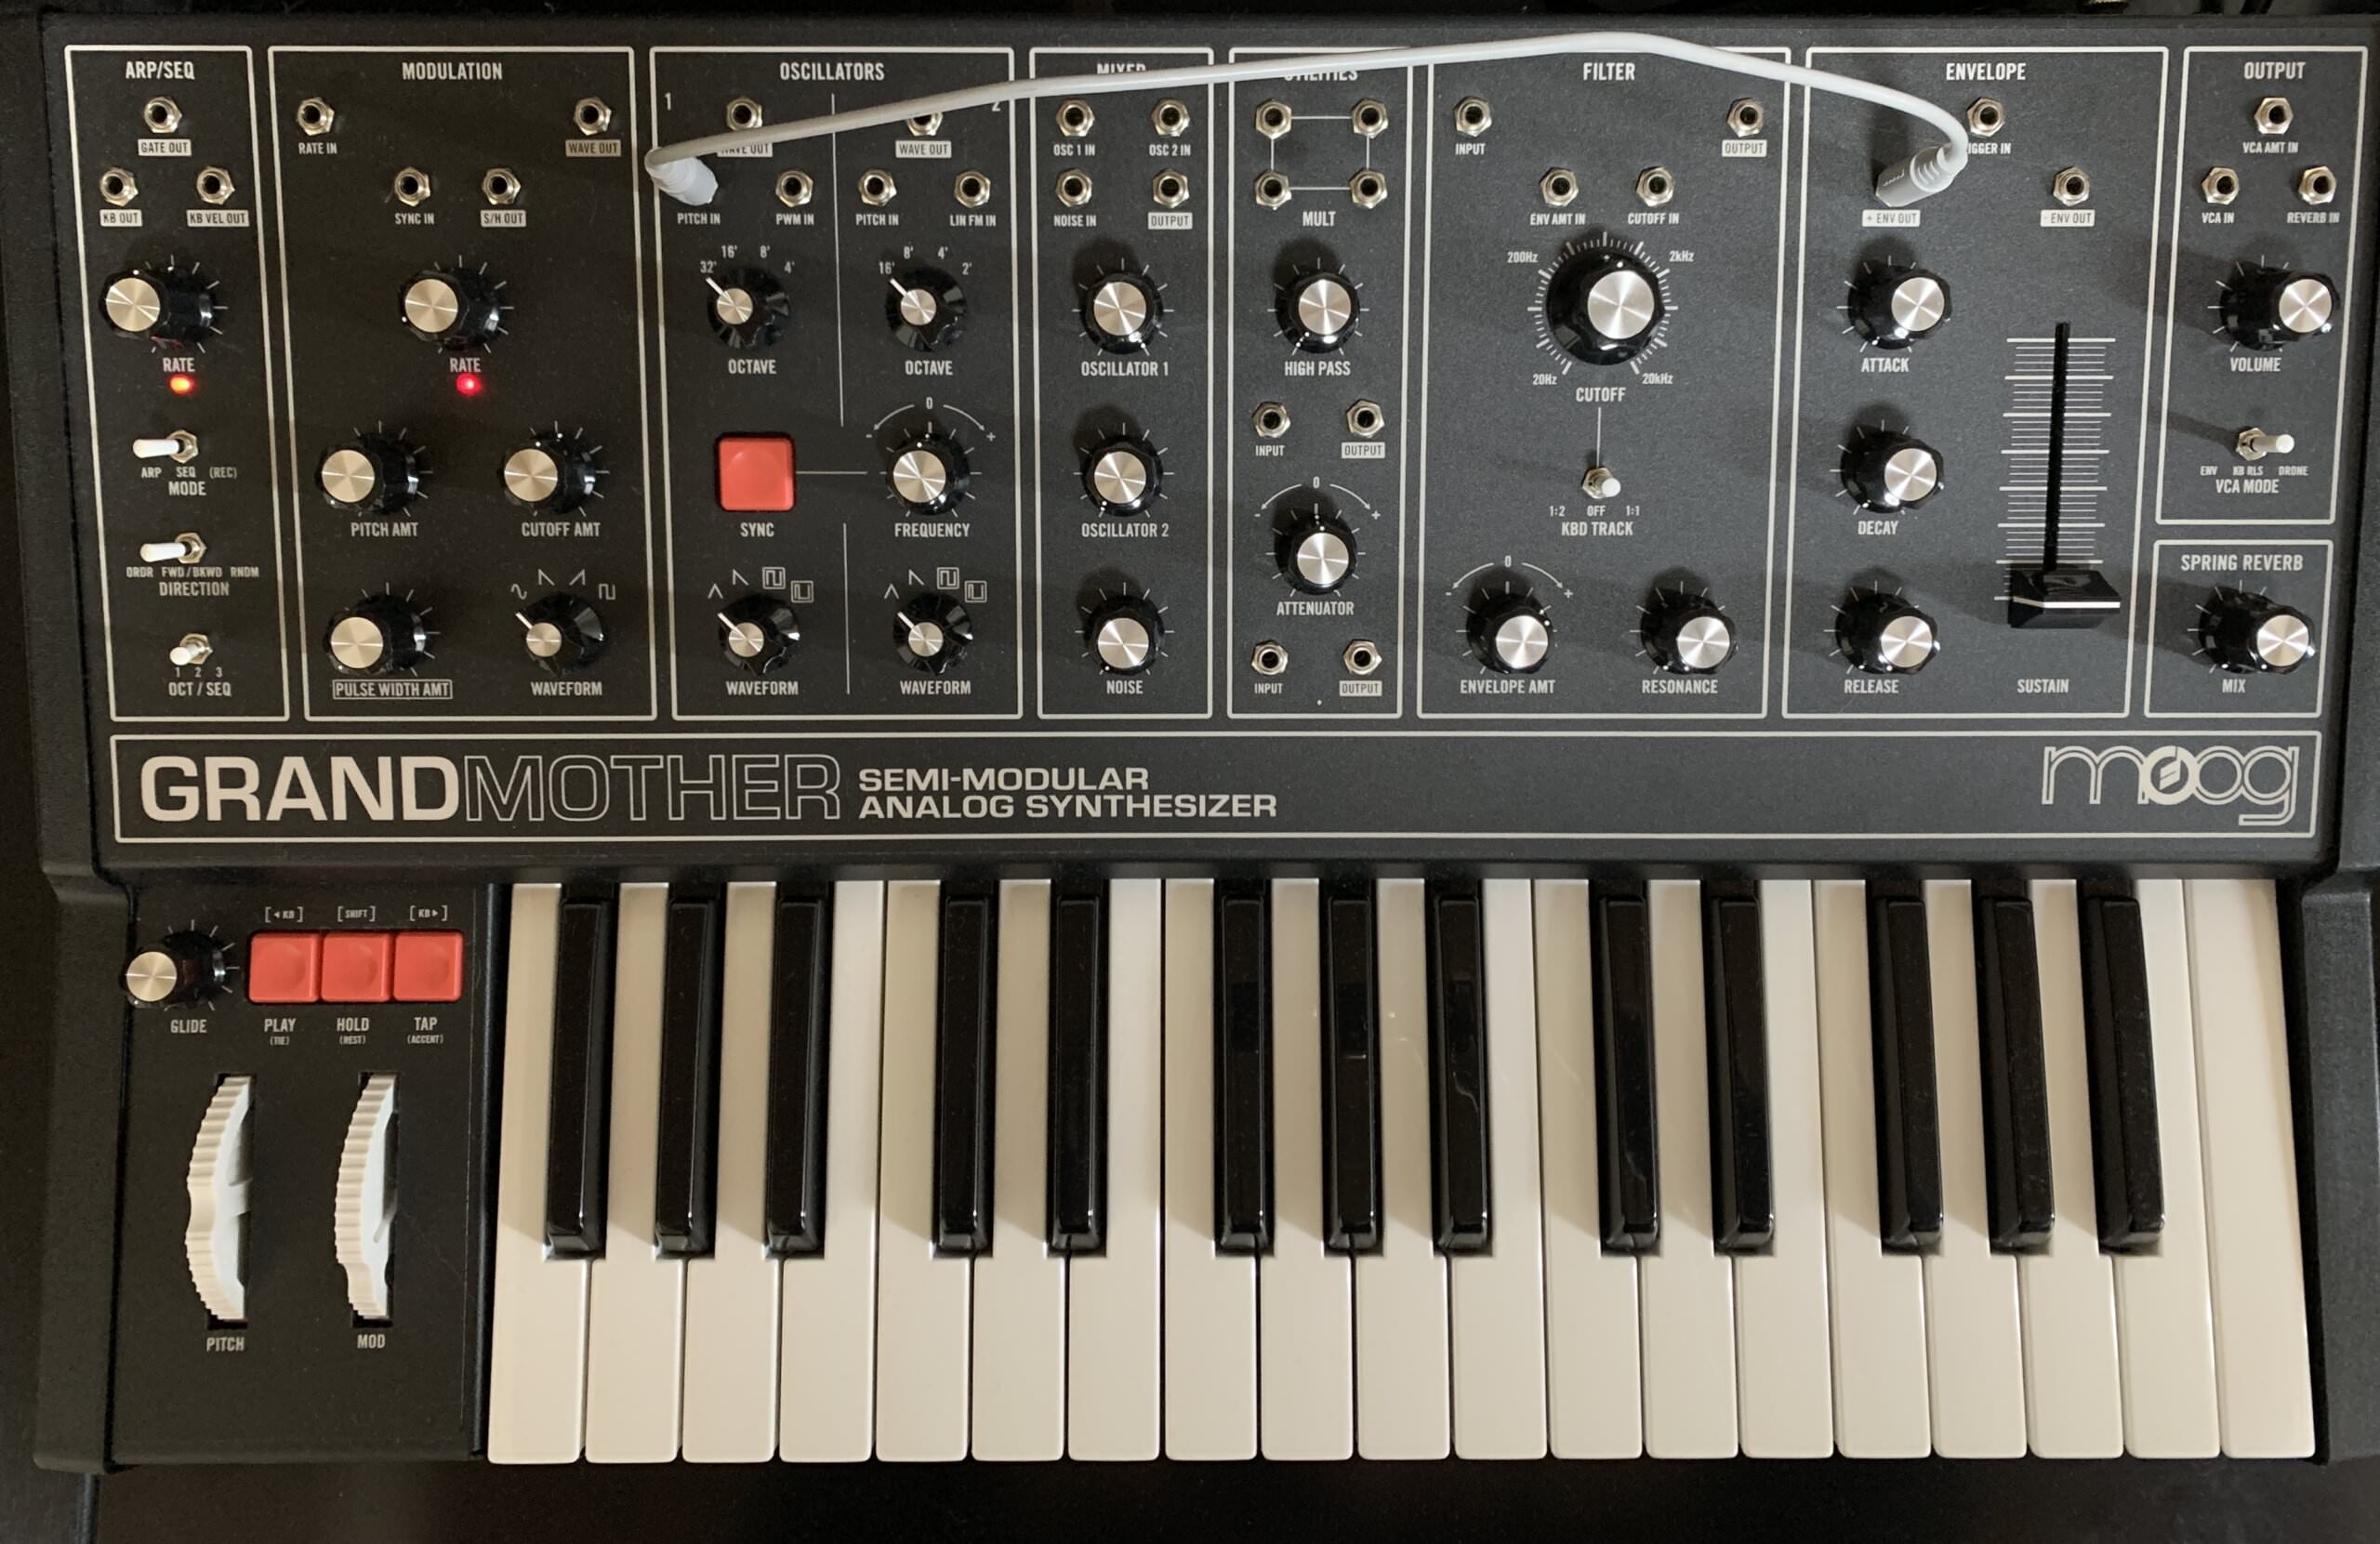
We don’t often think of monosynths as being flexible. They’re great for bass and leads and the occasional whooshy effect but for wildly deep synthesis, we’re more likely to turn to an all-singing all-dancing modern poly. This is decidedly not the case with Moog’s Grandmother. Sure, it’s a monosynth, which limits it to a single note at a time, but ol’ Grandma is semi-modular, meaning that her signal path can be disrupted and rerouted, enabling all kinds of synthesis possibilities.
Today, we’re using a Dark Series edition Grandmother to create the building blocks for a Boards Of Canada-style ambient track. First, we’ll patch up some drum sounds, and then move on to bass, lead and a melodic drone. Once those sounds are recording as audio in a DAW, they can then be further manipulated and massaged. We’re using Ableton Live but any DAW will do you. As always, click any image to see a larger version.
If you’re unfamiliar with the Moog Grandmother, see the run through in our previous tutorial. If you’re unsure how to route everything up, refer to this piece on working with audio and MIDI.
There’s no memory on the Grandmother. It’s old-school like that. To save your patches, you can take a picture or do what synthesists in the 1970s did: make a patch sheet. You can find blank patch sheets in the manual for the Grandmother.
Here’s our finished track after processing with native Ableton plugins:
Step 1: Kick
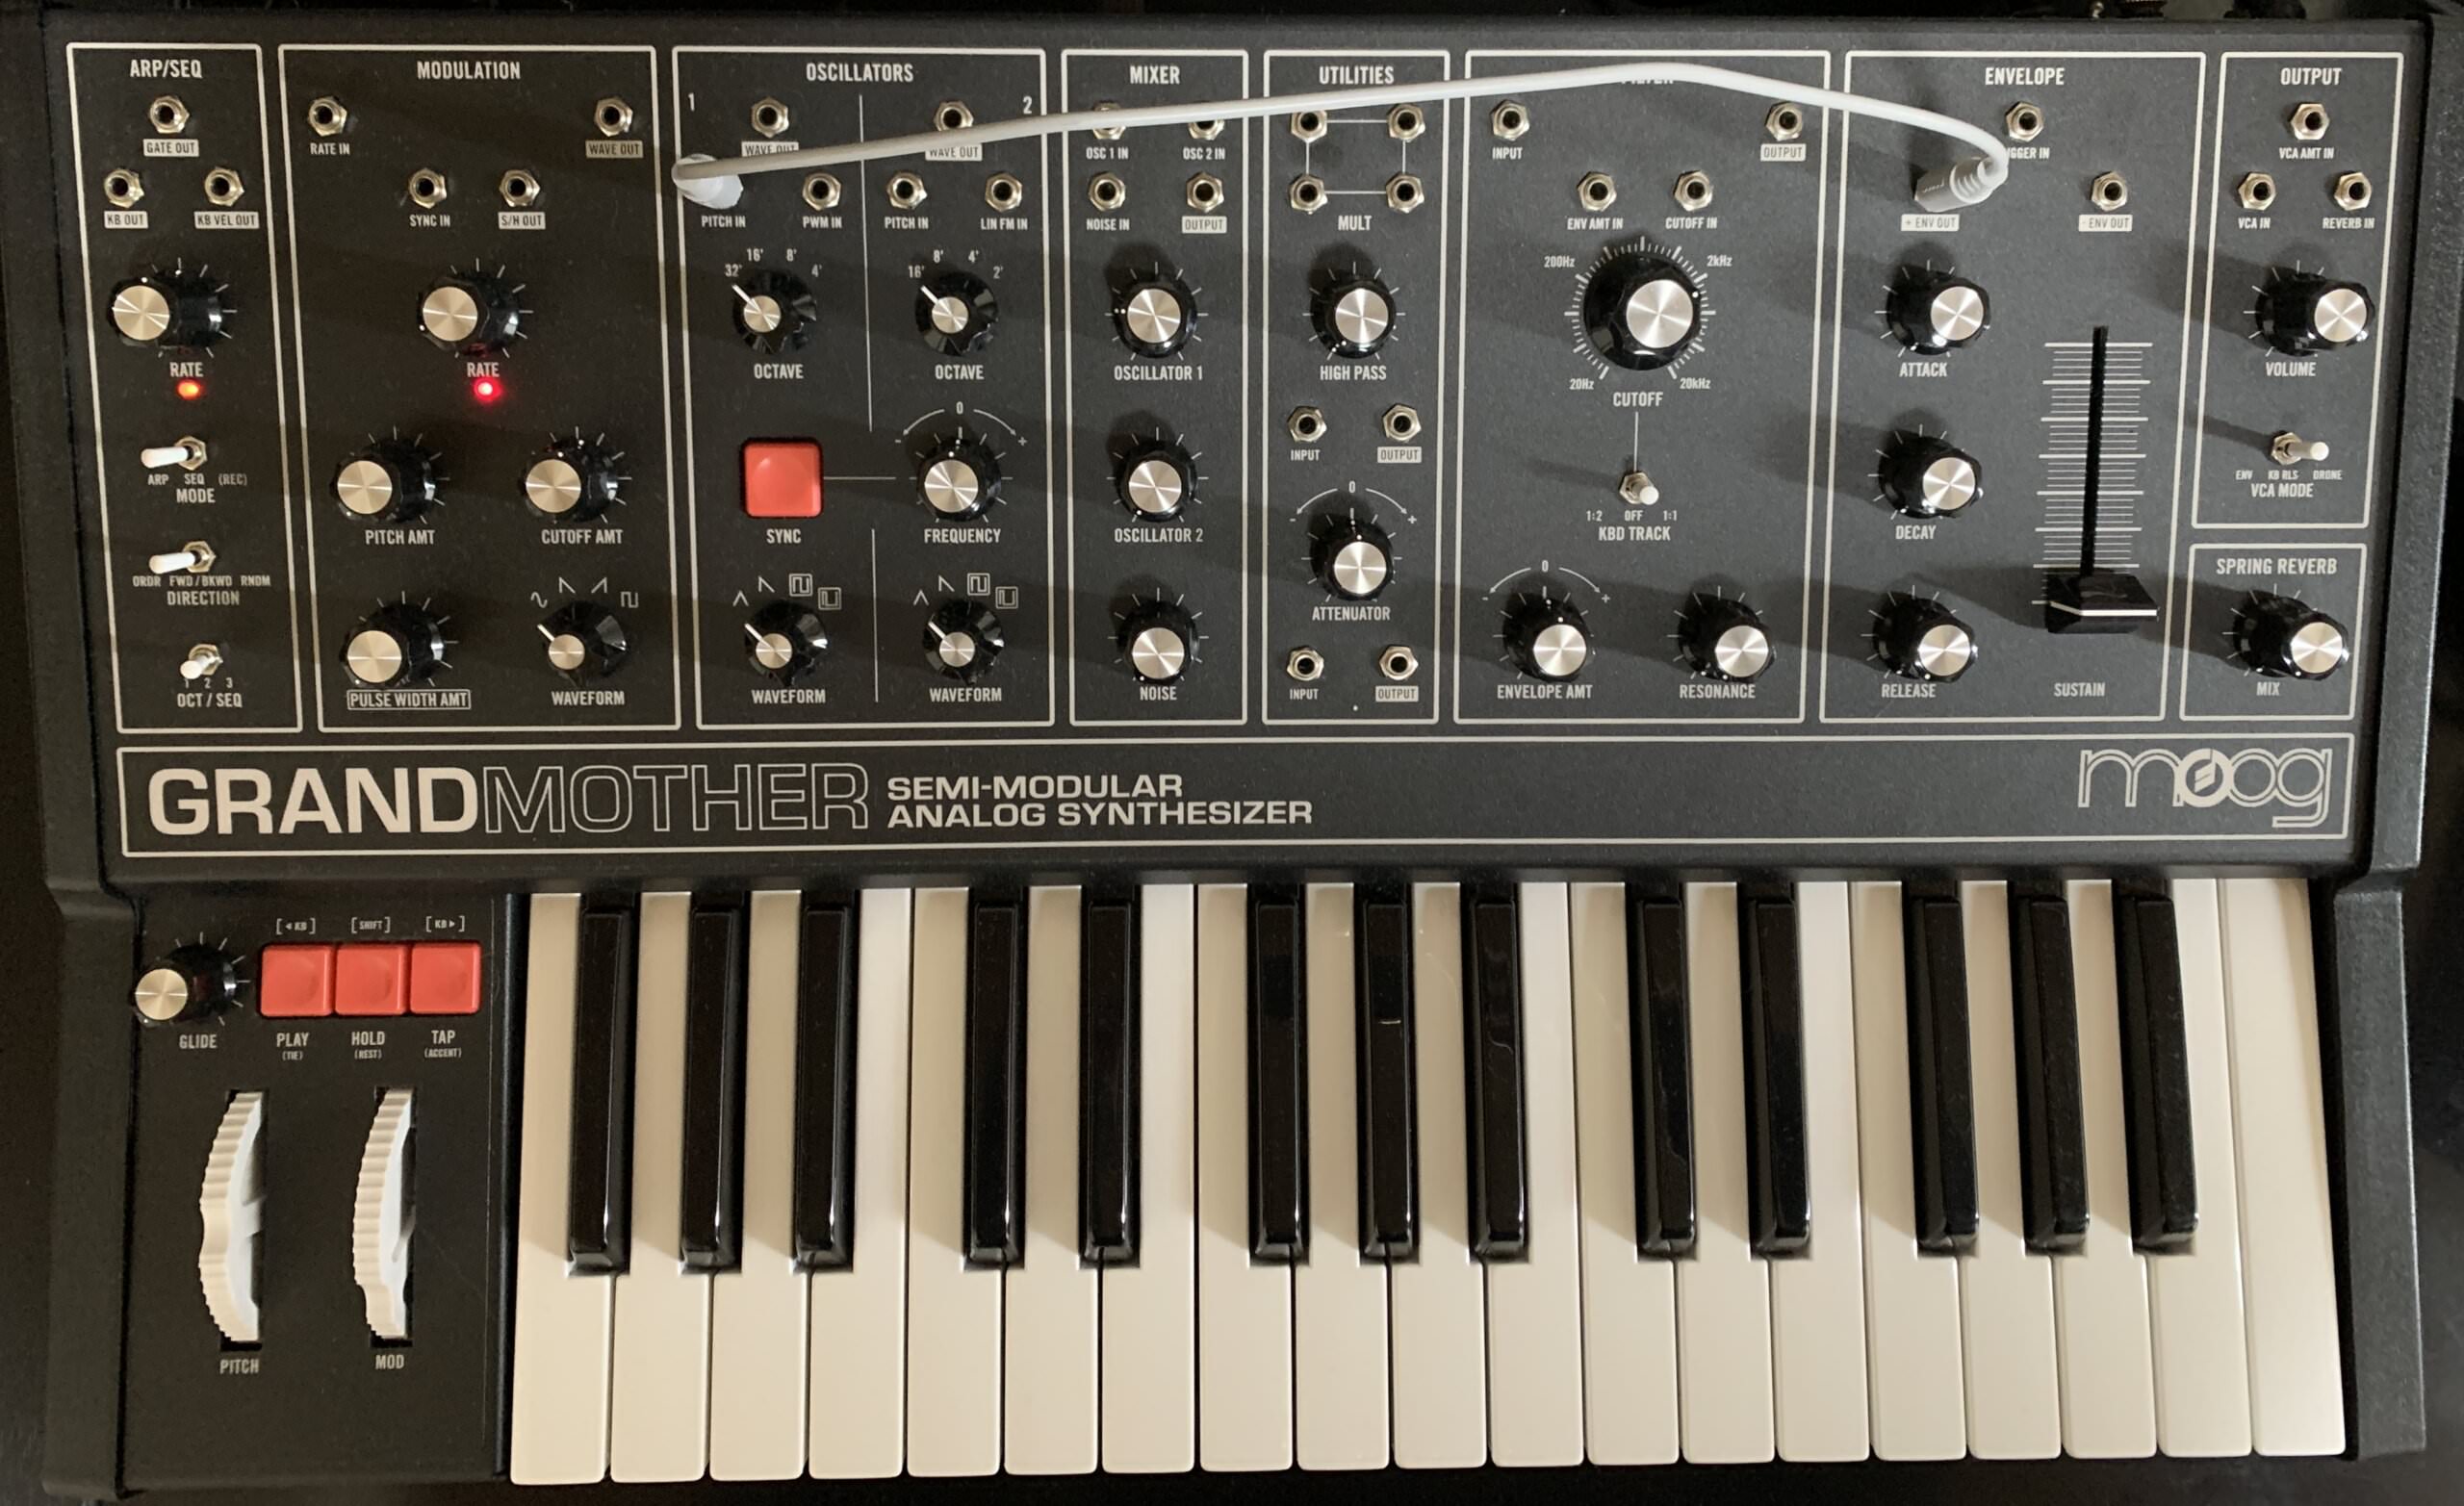
We start with a kick. We want to make a short, tight kick that works in a more mellow kind of song. The key to synthesizing a kick is using a pitch envelope. As the Grandmother only has one envelope (normalled, or hard-wired, to the VCA and filter), we’ll need to use a patch cable to route it to the oscillator.
Let’s set the oscillator first. We only need one so turn down Oscillator 2 in the Mixer. On Oscillator 1, turn the Octave switch to 32’ for that low bass and choose the triangle waveform. Of the four available – triangle, sawtooth, square and pulse – the triangle has the least amount of harmonics and is the most kick-like.
Kicks don’t need to be bright so let’s turn down the Cutoff to halfway. We can bring resonance down all the way as well. Raise the Envelope Amt dial to around 2 o’clock so there’s a slight bump in the frequencies as the kick hits. This will give us a little click.
Next, let’s get the Envelope involved. Kicks usually have a pitch drop as part of their attack. This replicates the sound of the beater hitting the skin on an acoustic kick drum. To create this, run a patch cable from the +Env Out patch on the Envelope section to the Pitch In jack for Oscillator 1. Set the Release to zero. To keep the kick nice and tight, we can set the VCA Mode in the Output panel to Keyboard Release (Kb Rls). This is essentially a note on/off gate mode. Notes will now play for as long as you hold the key. We want a short, punchy kick so we just tap the key when we record the sound into Live.
Now that the kick is recorded, we can arrange it how we like in the DAW.
The kick as recorded into the DAW:
Step 2: Snare
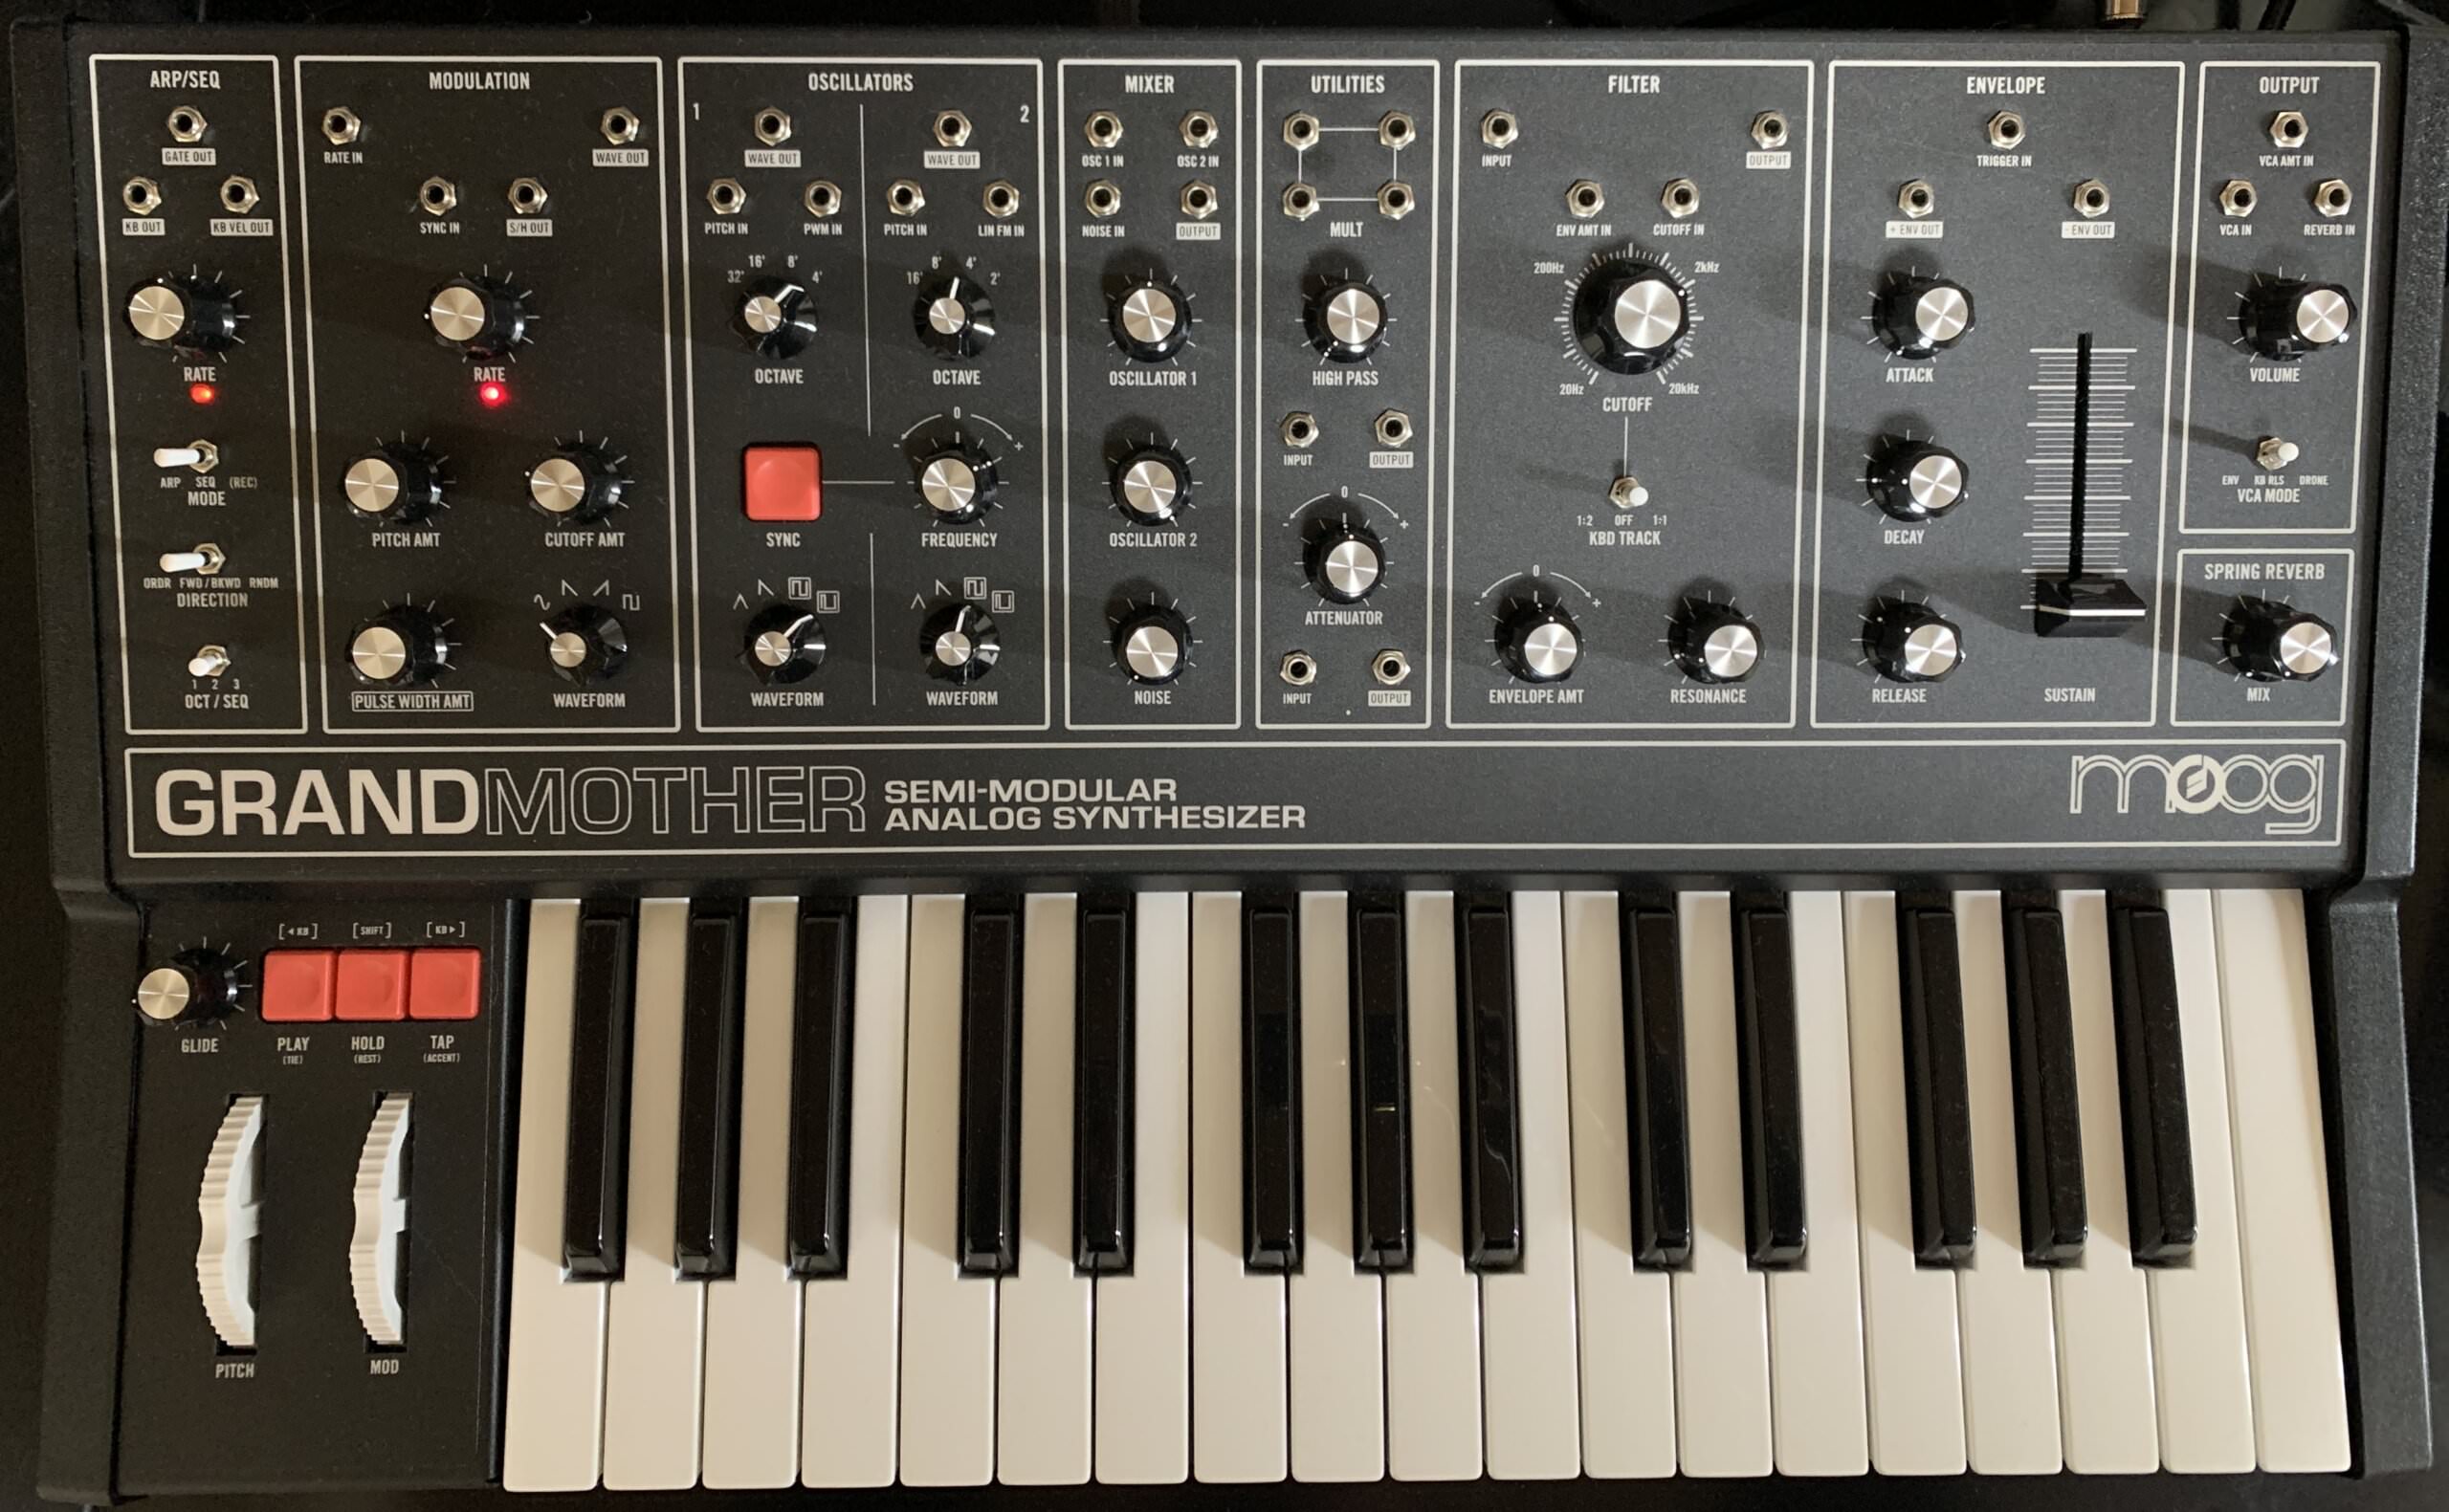
Let’s work up the snare next. Like kicks, snares have a pitched audio component. They also have a buzzy rattle, which we can recreate with white noise.
Starting with the same settings as the kick, turn up the Noise volume pot all the way in the Mixer. We don’t need too much body though, so reduce the volume of Oscillator 1 to around 9 o’clock.
Next, open up the Cutoff in the Filter section a little more. A setting of 2kHz sounds good. We want a nice, consistent crack so we don’t need any envelope modulation this time. Turn down the Envelope Amt knob to zero. The Envelope and Output settings can remain as they are.
Hit record on the DAW, tap a key, and capture your short, sharp snare.
The finished snare:
Step 3: Closed Hi-Hats
Let’s keep going with the percussion and do the closed hi-hats next. It’s easy enough to just record some short white noise and be done with it, but where’s the fun in that? Let’s use the oscillator to add a little more bite.
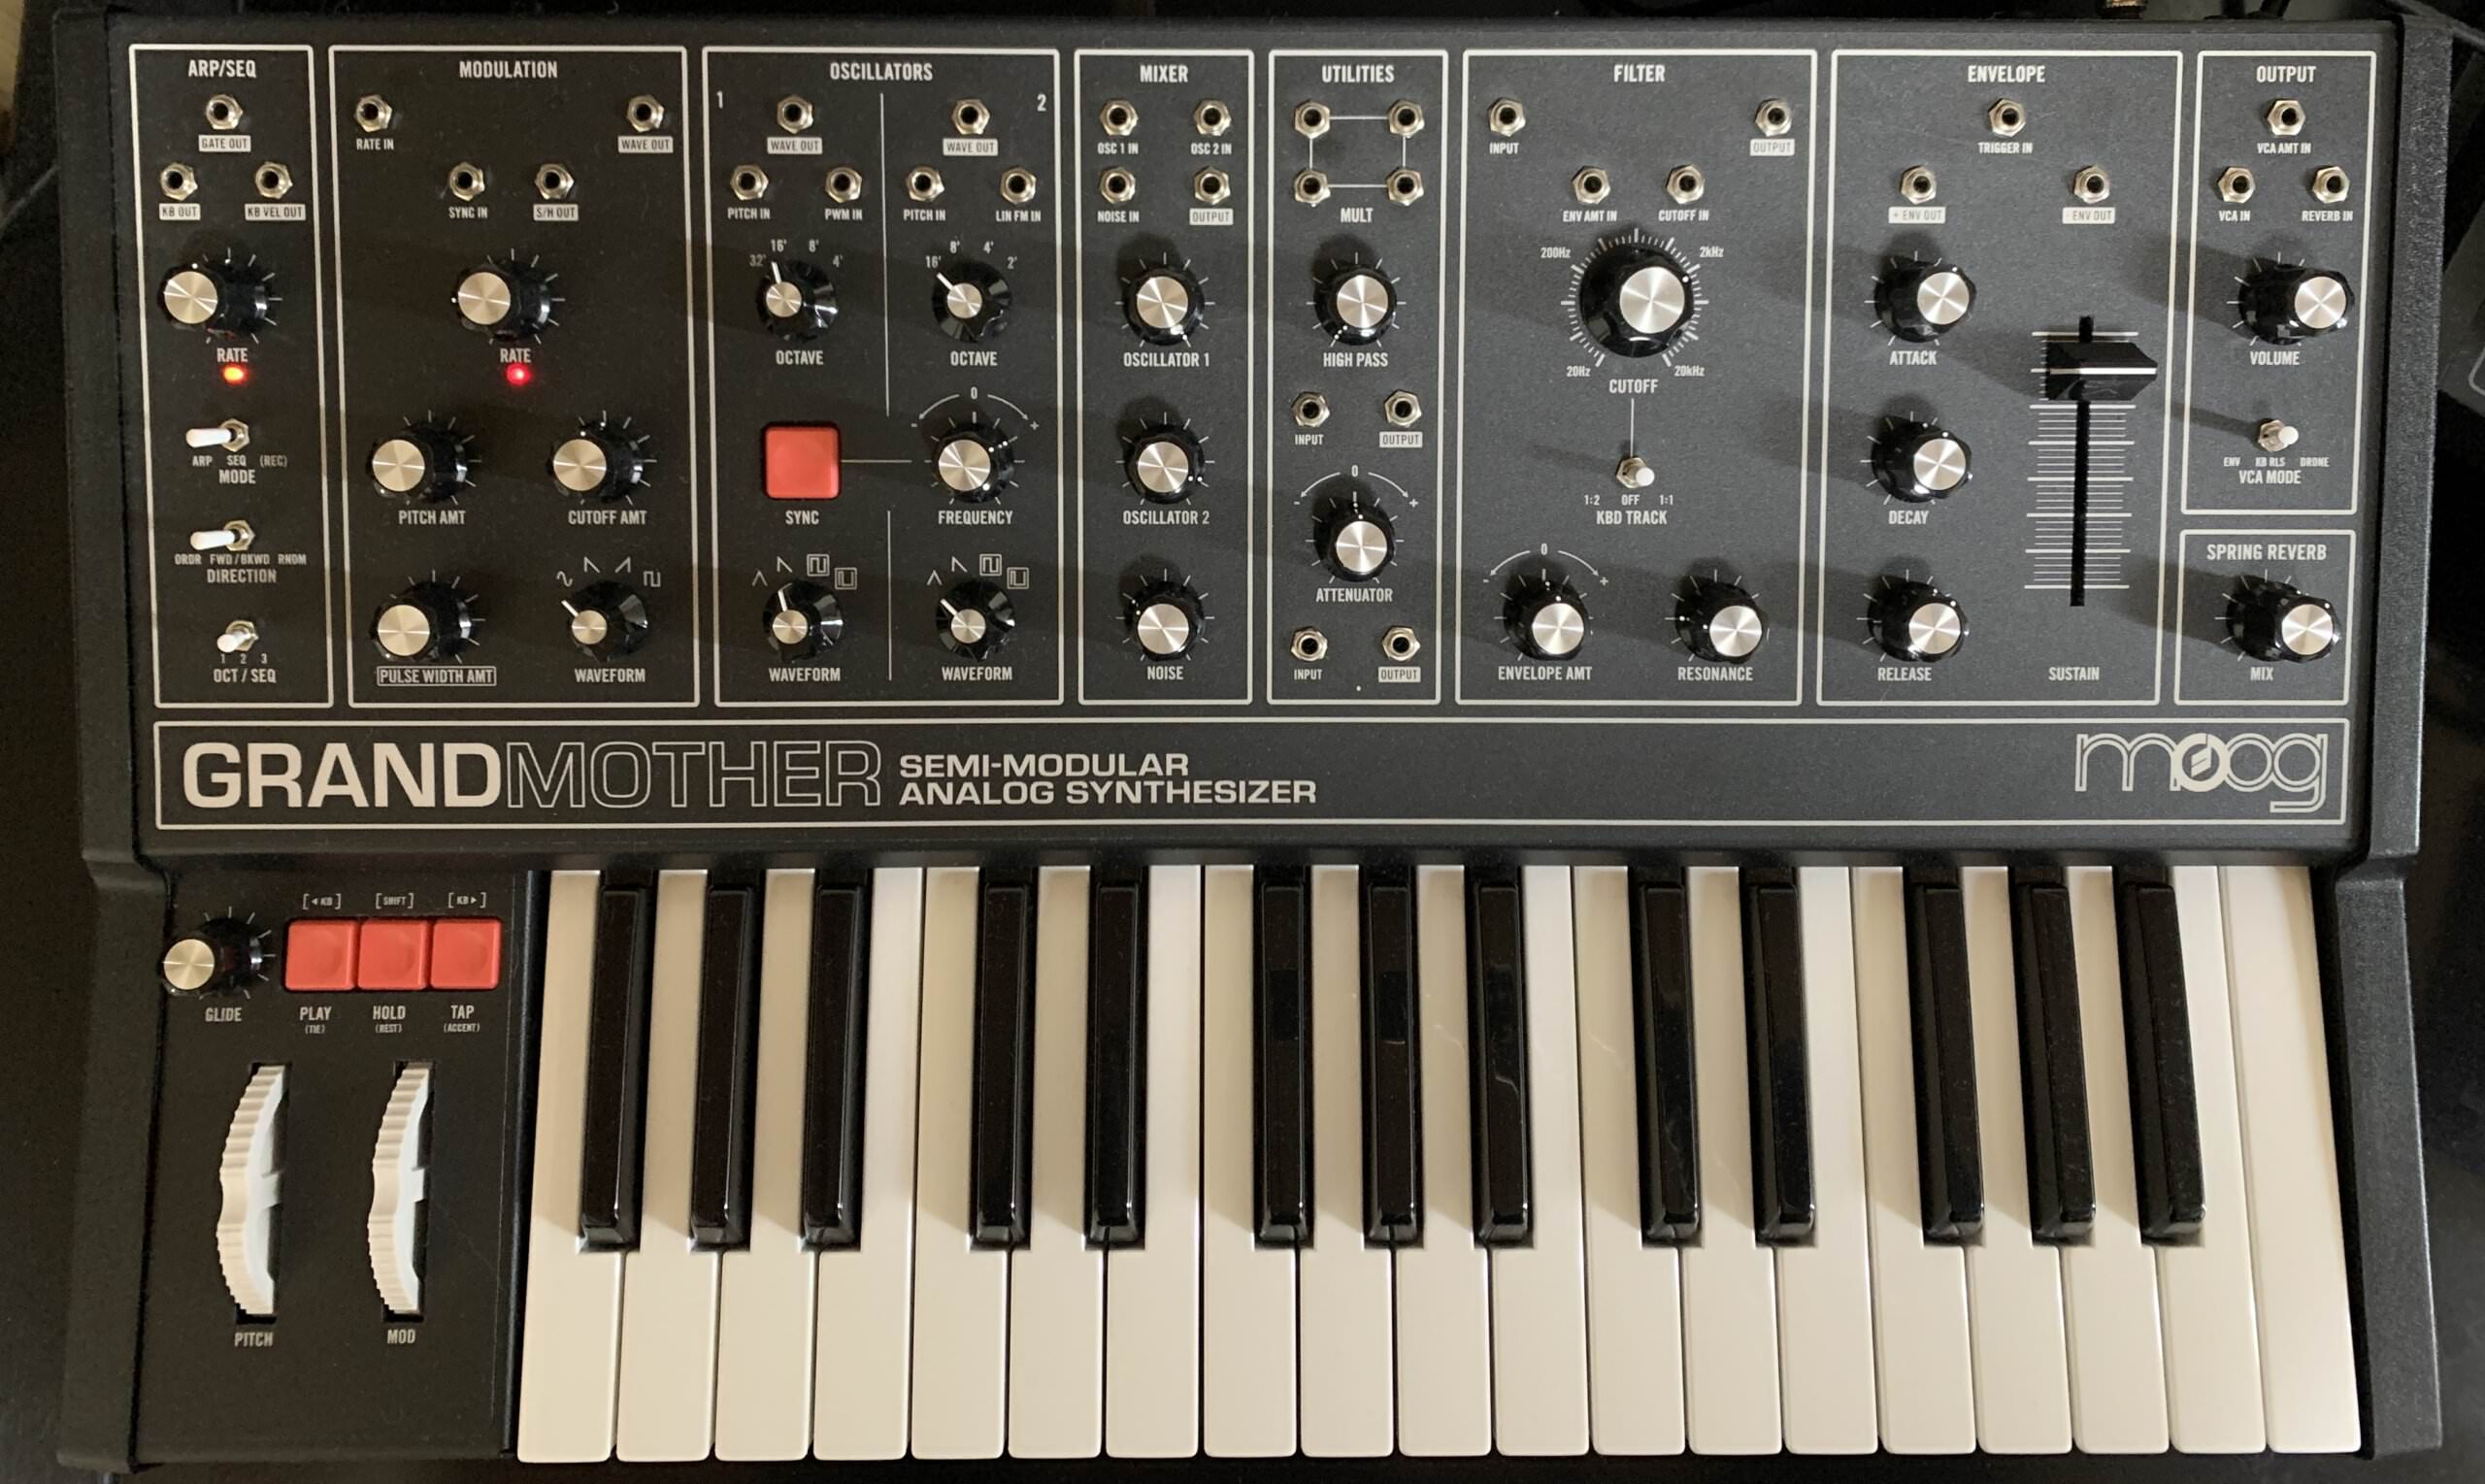
We can continue from our snare patch. Remove the patch cable from the oscillator and envelope. There’s no pitched audio this time.
We’ll use the white noise for the hat sizzle so don’t touch that. For some depth in the cymbal, move the Oscillator 1 Waveform knob to the pulse wave. This gives us a pinched, nasal sound. We can raise the Octave setting to 16’ as well.
On the Filter, open the Cutoff all the way. We want a bright hat. We can also bring in some resonance to give it a bit more of an edge. We can keep the Envelope the same.
Record the hat into Live and then arrange it as you like.
Programmed closed hi-hats:

Step 4: Bass
Now that we’ve finished with percussion, we can move on to the musical parts of the song.
Bass is a Moog speciality. However, we want something musical to support the melody but not overwhelm it. Let’s use the second oscillator and oscillator sync for this.
We start by setting up the Mixer. Bring the volume of Oscillator 1 to maximum. Oscillator 2 will add harmonics so it doesn’t need to be as loud – try 2 o’clock. In the Oscillators section, set both oscillators to square wave. Give Oscillator 1 an octave footage of 16 and raise 2 to 8. Next, hit that big red Sync button to engage oscillator sync. This causes the period of Oscillator 2 to reset every time Oscillator 1 finishes its cycle. Play with the Frequency tuning knob to hear how this sounds. We stopped at a setting of 2 o’clock for a harmonically rich but still mellow vibe.
In the Filter, we bring the Cutoff to around 200Hz and park the Resonance at 10 o’clock.
For the envelope settings, we’re still using Keyboard Release to manually control the length of the note so Attack and decay settings will have no effect. However, Release does. A low setting of 9 o’clock works well.
This time, we write the bassline in Live and then trigger the Grandmother with MIDI.
Our bassline:

Step 5: Lead
Moog is as famous for its synth leads as it is bass. How can we not program a nice, fluty lead for our ambient track?
We’ll again be using both oscillators. We’ve made Oscillator 2 louder than Oscillator 1 but really, it could work just as well the other way around. Just make sure that the supporting oscillator (in this case, number 1) is set at around half the volume of the other. Select 4’ for both oscillators and make the main oscillator a square wave, and the other a pulse.
In the Filter, open the Cutoff to around 2kHz. We want a slightly muted sound but feel free to go brighter if you like. A small amount of Resonance works well here too.
In the Output section, switch VCA Mode to Envelope (Env). Now the Envelope has full control over the shape of the sound. We want a sharp Attack, shortish decay (around 9 o’clock), zero Sustain and medium-short Release. Not too plucky but not too long either.
Let’s modulate the Cutoff amount with the LFO. In the Modulation panel, set both the Rate and Cutoff Amount to around 9’clock to introduce a little movement. The sine wave waveform is a good choice here but feel free to experiment with the different options. Lastly, make sure to bring up the modulation wheel to send the LFO to the Filter.
One last point. The classic Moog lead isn’t complete until you add some glide, or portamento. The Glide knob is down by the mod wheel. Turn that up to taste.
Now you can play in the melody live for a loose feel or use MIDI for a more quantized approach.
The finished lead:
Step 6: Drone
For the final step, let’s synthesize a drone to underpin the melody.
Start by bringing both oscillators up to almost full volume in the Mixer section. We can add a little Noise for texture as well. Set Oscillator 1 to a 16’ sawtooth, and Oscillator 2 to a 16’ triangle. To add Reese-style movement to the drone, tweak the tuning of Oscillator 2 with the Frequency dial until the beating becomes apparent.
In the Filter, set the Cutoff to 2kHz and the Resonance to 9 o’clock. Again, let’s modulate the Cutoff with the LFO. A nice, slow rate (around 8 o’clock) paired with a sine waveform and Cutoff Amount of 50% sounds nice. Bring up the mod wheel to halfway.
We want a pad-like shape to the volume, so in the Envelope area, open the Attack up to 1 o’clock, Decay to 12 o’clock, a very long Sustain, and fairly lengthy Release.
Lastly, open up the Spring Reverb to taste to wash the drone out.
We’ve recorded our drone line using MIDI, freeing us up to slowly tweak the Cutoff manually as we record.
The drone as recorded into the DAW:
Once all the elements are captured in the DAW, you can add effects like EQ, compression, delay and reverb to flesh out the mix.
Here is the finished track:
Tutorials is sponsored by
Roland Cloud is your creative hub for Roland hardware and software. Access legendary recreations of Roland Classics, find new sounds for your favorite products, and download updates and companion apps to make music fast and easy.