We all know what Antares’ Auto-Tune Pro can do to vocals, but what about synths? Follow along with this tutorial to turn a boring drone into a unique melody with the vocal processor.
Few plugins are as ubiquitous as Auto-Tune. Antares’ vocal processor is the industry standard for vocal pitch correction. However, it’s capable of more than just touching up the occasional bum note – and we’re not just talking about Daft Punk vocal stylings either.
Auto-Tune can also do some freaky things to non-vocal material. In today’s tutorial, we’ll be using Auto-Tune Pro to add modulation and even a melody to a static synth drone.
Here’s the drone before Auto-Tune:
And here it is after:
N.B: We recommend following along with headphones or studio monitors as some of these results can be subtle. As ever, click any image to see a larger version.
A Quick Overview of Antares Auto-Tune Pro
Auto-Tune Pro is Antares’ top-of-the-line vocal processor plugin. It comes as part of a subscription suite, which also includes other versions of Auto-Tune, a vocoder, sampler, and effects. You can also purchase Auto-Tune Pro on its own.
Auto-Tune Pro has a lot of features that we won’t be using today, so we’ll restrict this overview to the parameters that apply.
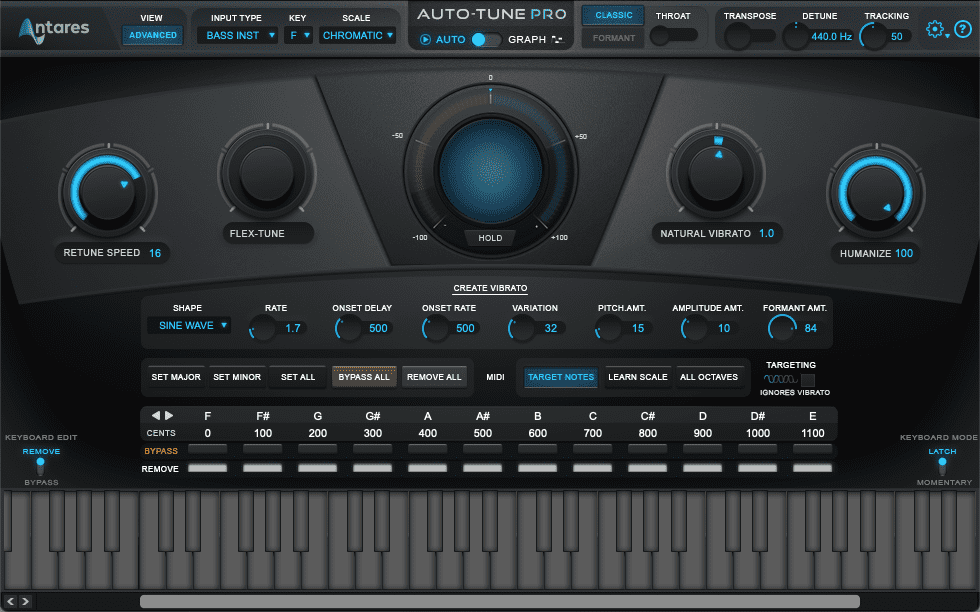
When you first open Auto-Tune Pro, you’re in Auto mode. This gives you basic pitch correction. In the center window, you can see the pitch, displayed as a musical note, of the audio. Surrounding it are four dials: Retune Speed, Flex-Tune, Natural Vibrato, and Humanize.
Retune Speed adjusts how quickly Auto-Tune Pro snaps the incoming pitch to the target note. The faster the speed, the more artificial (and Auto-Tune-like) it becomes. Flex-Tune can preserve the natural vocal gestures of the singer. Keep this at zero for a less natural effect. Humanize allows sustained notes to sound less static.
Finally, with Natural Vibrato you can amplify or diminish the vibrato in a performance. For more control over vibrato, click the Advanced button in the top left. This will reveal a number of controls to fine-tune the vibrato.
Lastly, there are a number of controls at the top, such as for transposing audio and adjusting the formant.
Step 1: Pitch Modulation
We start by placing an instance of Auto-Tune Pro on the target audio track. Our audio consists of a Splice synth drone, ‘ff_dt_130_kit_pad_loop_neon_Fmin.wav’ from the pack, Driving Techno. It has a nice tone but it could be a little more interesting. Let’s use the vibrato settings in Auto-Tune-Pro to modulate the pitch like an LFO.
First, we dial in some vibrato using the Natural Vibrato knob. We don’t want too much as it’ll sound like a sea-sick cat, so we stop around 2. We can’t hear it yet though as there’s no “natural vibrato” in the audio. Next, we hit the Advanced button to reveal the additional vibrato settings. We change the Shape to Sine Wave. Now we can hear it oscillating. We lower the rate to 1.7 for a low, undulating effect.
Lastly, we can play around with the other settings until we get something we like. We’ve gone with a Variation of 32 for a little randomness, a Pitch Amount of 15, Amplitude Amt. of 10 and Formant Amt. of 84. Remember, Auto-Tune Pro is largely made for vocals so you’ll need to experiment to find what works with non-vocal material.
The original synth drone:
And with vibrato modulation:

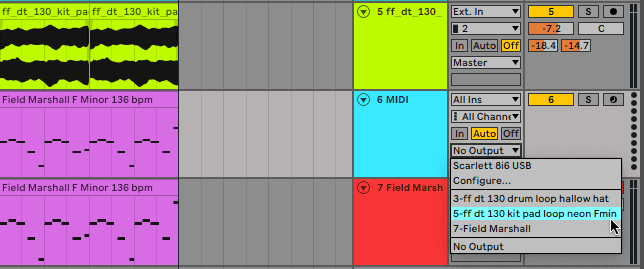
Step 2: MIDI Setup
Now that the modulation is sorted, let’s get Auto-Tune Pro set up to track MIDI notes.
As Auto-Tune Pro is an audio effect, we need a separate MIDI track for the notes, so first we create a new MIDI track. Next, we need to route the output of the MIDI track to Auto-Tune Pro. Change the Output on the MIDI lane from No Output to the audio track containing Auto-Tune Pro.
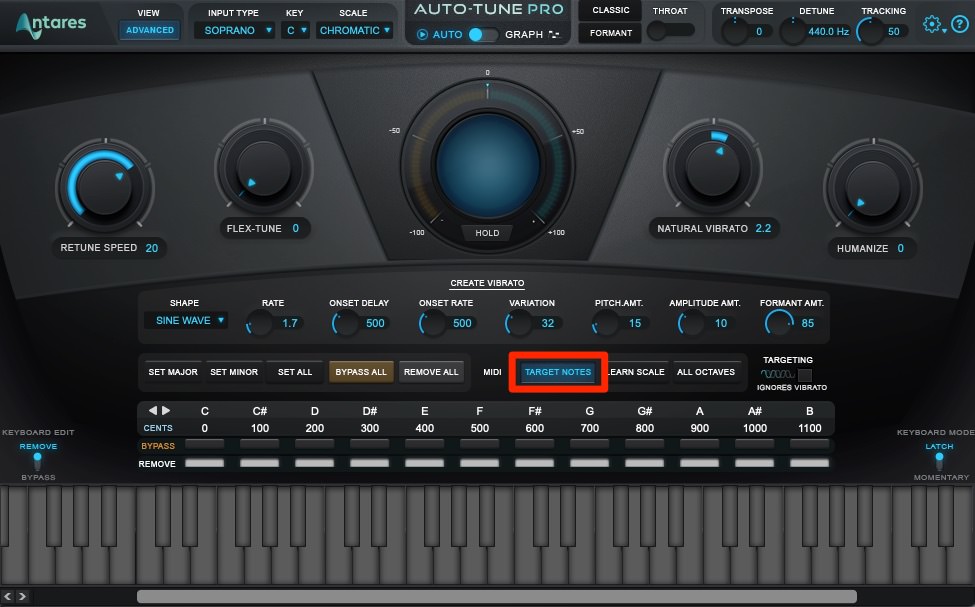
Next, on Auto-Tune Pro, click the ‘Target Notes’ button in the advanced panel. Finally, arm the MIDI track and try playing some notes. You should be able to hear some changes to the pitch in the drone. We’ll make adjustments to the pitch settings next.
With MIDI tracking pitch:
Step 3: Input Type And Mode
Next, let’s give Auto-Tune Pro some clues as to the audio we’re sending it so it knows how best to apply pitch changes.
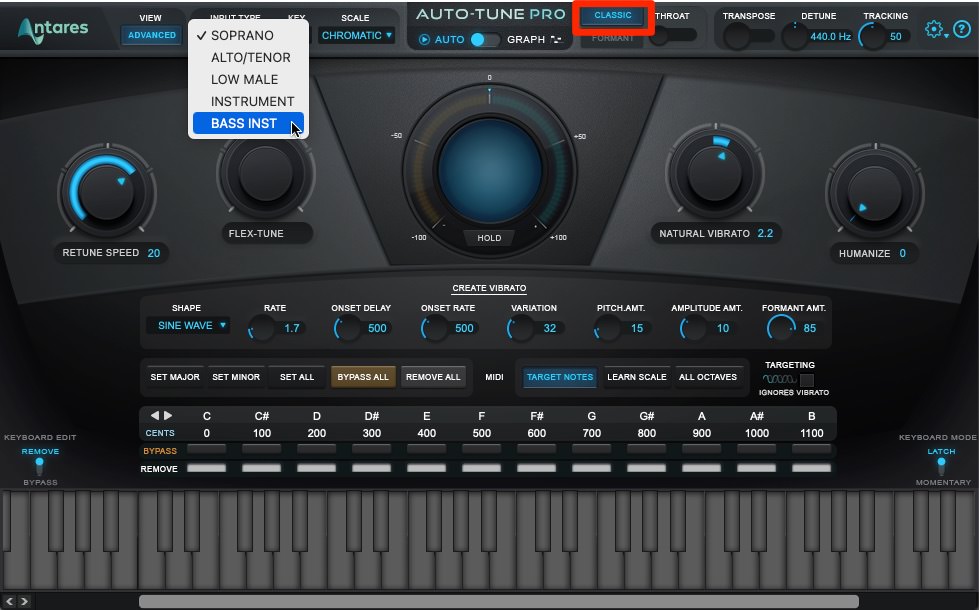
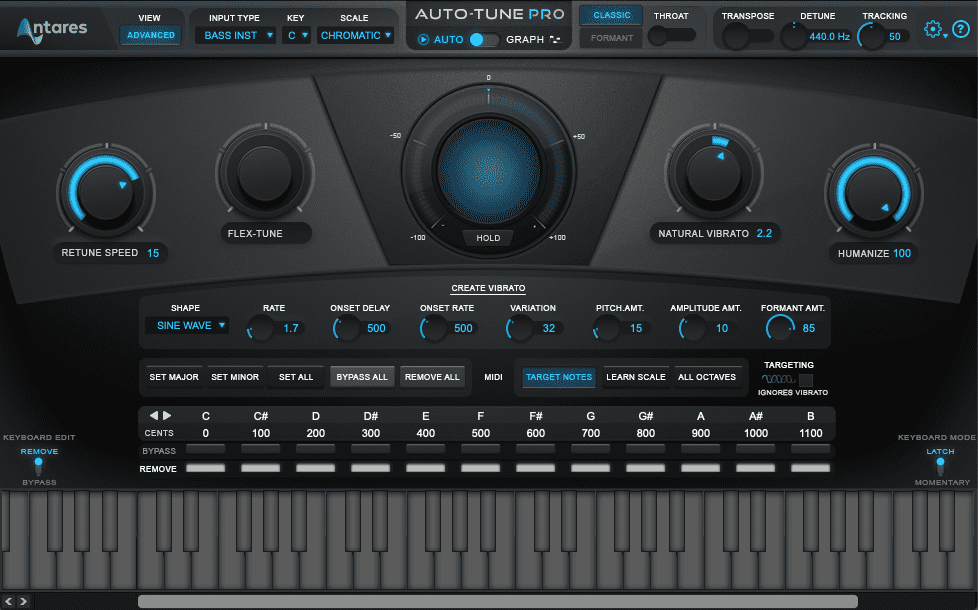
At the top of the plugin, there’s a drop-down menu labelled ‘Input Type’. Here you can choose from among five vocal and instrument types. As our synth drone is relatively low in pitch, Bass Inst seems to work the best. Next, we select Classic Mode. This uses the algorithm from Auto-Tune 5 and has that classic, robotic flavor. While that’s not necessarily the effect that we’re after, we found that this type tracked the best with our material.
Top Tip: Because all audio is unique, try different combinations of Type and Mode until you find one that works the best for you.
Now tracking in Classic Mode:
Step 4: Speed and Timing
While Auto-Tune Pro is dutifully tracking the MIDI notes, they’re sliding all over the place. In some cases, this could be an interesting effect, but it’s not what we’re after today. We can use the dials to adjust the feel of the changes between notes.
Right now, Retune Speed is 20. Faster settings will give us sharper note changes, while slower ones will slur the effect. Let’s speed it up just a bit to a setting of 15. Next, let’s play with the Humanize controls. Humanize adds variation to the ends of notes and keeps them from sounding static. It also affects how notes change from one to another at the sustain end. We like a Humanize setting of 100, all the way to the right. (Note that Flex-Time doesn’t have any effect in Target Notes mode.)
With timing adjustments:
Step 5: Effects
The Auto-Tune Pro Unlimited subscription pack comes with a number of vocal-focused effects and other plugins. Let’s use a few of these to further tweak our synth sound.
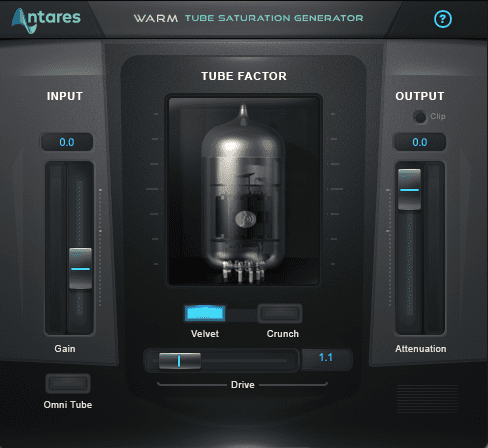
We start by adding AVOX Warm to the audio channel. It’s a Tube Saturation Generator that can add warmth to audio. We have it on the Velvet setting, with just a little bit of drive.
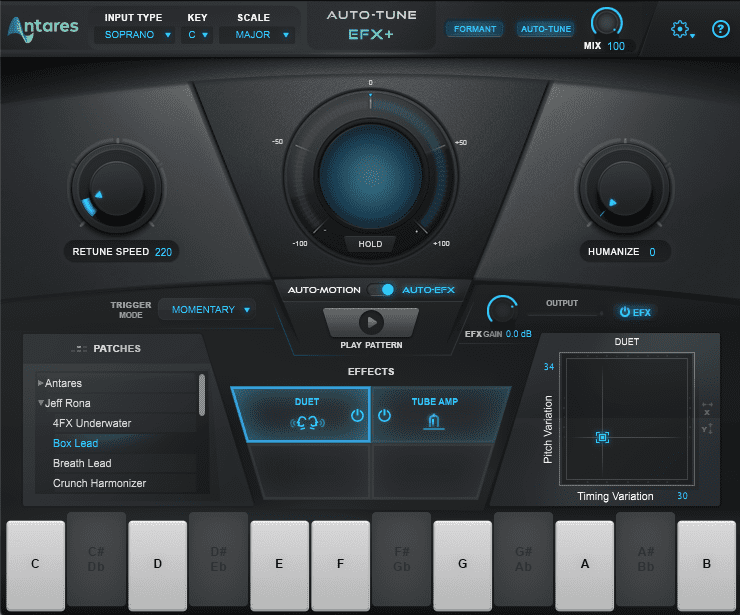
Next, we create a send channel and place the stock Live reverb on it. However, before the reverb, we insert Auto-Tune EFX+, a multi-effect plugin with built-in Auto-Tune. The extra layer of Auto-Tune keeps the pitch nice and tight while the Duet doubler effect and Tube Amp saturator thicken the sound before it hits the reverb.
With added Auto-Tune effects and reverb:
Here is the finished audio with additional production in the context of a techno track featuring more loops from the same Splice pack: