u-he are makers of award-winning software synthesisers and effects including Diva, Repro-1, Zebra2, Hive, Bazille, Presswerk and Satin.
Visit U-he
Technique » Synth Secrets »
Floating Points-Inspired Vocoder Drums
This channel is sponsored by

We use Waves’ OVox to turn a UK garage beat into a melodic line, harnessing the power of both its synthesis and melody-generating capabilities.
One of our favorite songs of the year so far is Floating Points’ ‘Vocoder,’ a bananas UK garage track with a vocoded rhythm as its beating heart. By using a vocoder on a loop, you can get both rhythm and melody in one go.
It inspired us to try something similar so we grabbed a copy of Waves’ OVox VocalReSynthesis plugin, some UKG beats, and started experimenting in the lab. OVox is more than just a vocoder though—it has a unique pitch detection section that allowed us to develop a melodic line that we would never have on our own. Here’s how we did it.
The vocoder beat in action:
N.B: We recommend following along with headphones or studio monitors as some of these results can be subtle. As ever, click any image to see a larger version.
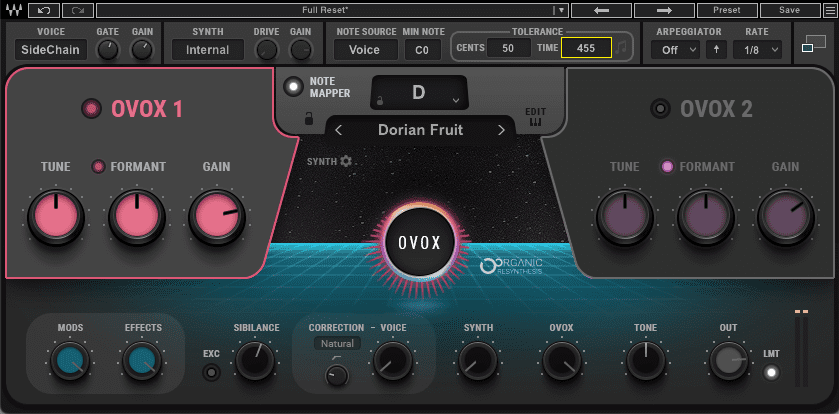
A Quick Review of Waves OVox
OVox is a vocoder-type plugin. It’s not a traditional vocoder—there are no EQ bands or anything like that. Think of it as a vocal transformer with vocoder-like qualities. We’ve covered OVox before in both a review and tutorial so check those out if you’re not familiar with how the plugin works. The part that we’ll be mainly focusing on today, however, is the pitch detection and harmonizer, so let’s talk about that before we start breaking down the effect.
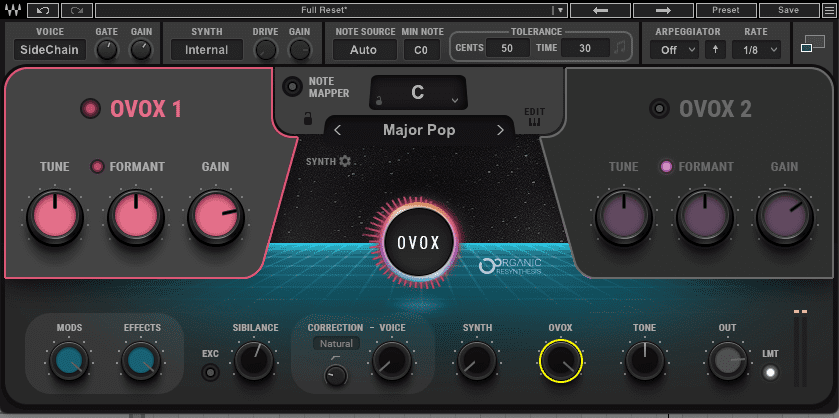
The Note Mapper section in the center of the plugin allows you to “map a single incoming sung note or MIDI note to one or more notes”, according to the OVox manual. Click the Note Mapper button on the main panel to turn this function on. Notes can then be changed into other notes or harmonized with chords. The Root Note box sets the first note for the scale. You can then select from preset chords, scales, and harmonies for note harmonization and transposition. (You can also do this manually on the Note Editor page.)
Finally, you can fine-tune the note detection trigger in the Notes Generator section in the Top Bar. Note Source has three choices: Voice (determined by pitch), MIDI (for manual voice triggering via a keyboard), and Auto (mixes the previous two). You can also set the minimum note to be detected and the note tolerance by pitch cents or time. This last one is useful for reducing the number of triggered notes.
Step 1: Setting Up The Sidechain
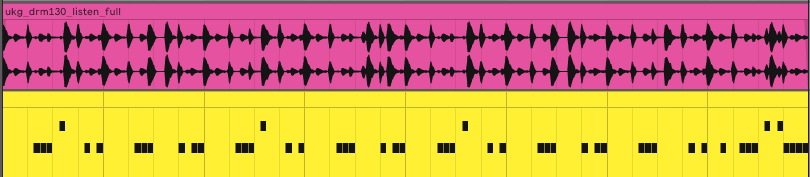
Our track will have two rhythm sections: the main drums and the vocoder drum track, based on the Splice loop ‘ukg_drm130_listen_full.wav’ from the pack, It’s A London Thing. We won’t hear any of the dry vocoder drum track, only the affected part. In OVox speak, it will be acting as the sidechain voice. Let’s get that set up.
First, we create a new MIDI track in Ableton Live and load Waves’ OVox on it. We make sure it’s in Full Reset mode. Next, we set the sidechain input to the loop that we want to process. Over on OVox, we toggle the settings on the Voice panel until it says SideChain. We hit play on the transport and we should be able to hear the rhythm coming through. There’s a little bit of dry audio bleeding through so the last step is to turn the OVox dial in the center panel all the way to the right. This acts like a wet/dry knob.
The original loop:
The loop as heard through OVox:
Step 2: Notes and Harmonies
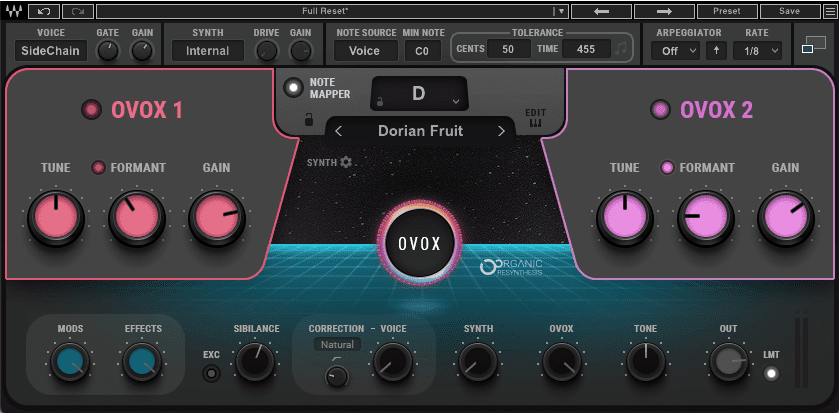
Next, let’s set up the Note Mapper section to start playing something a little more harmonically interesting. First, we click the Note Mapper button to turn on the function. We can instantly hear that it’s changed the note content. It’s currently set to the key of C so let’s change the Root Note to D. We also want a chord set that’s different from the default Major Pop. After trying a few, we go with Dorian Fruit, a set of chords based on the Dorian mode.
The processed audio constrained to the Dorian mode in the key of D:
Step 3: Fine-Tuning The Notes
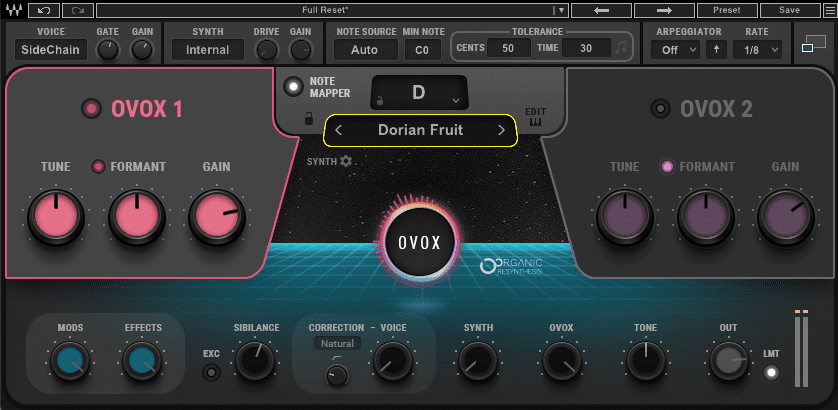
Let’s do some more fine-tuning. First, we change the note detection mode from the default Auto to Voice so it’s using all its power to try and pull notes from the loop. We also increase the Tolerance to 455 to give it a smoother feel. This will help it sit with the regular beat later.
Now fine-tuned:
Step 4: Adding Additional Triggers
For the final note step, we want to add a few more drum sounds to give the vocoder rhythm a bit more bounce. We add a Drum Rack to Ableton and program in some rimshots and claps. We then group the loop and the Drum Rack together onto one track and change the sidechain input on OVox to this new group. Now the vocoder rhythm is jumping.
The clean audio with additional percussion:
And as heard through OVox:
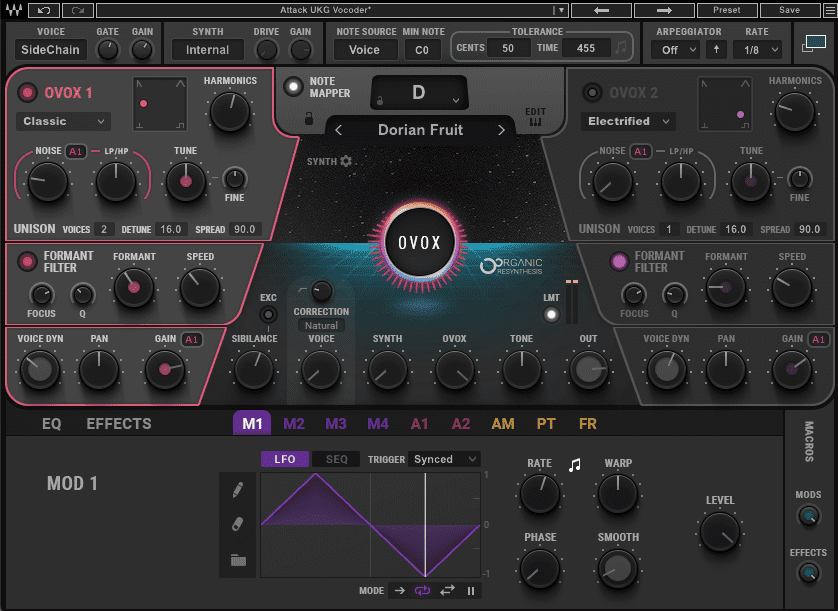
Step 5: Synthesizer 1
Now it’s time to start adjusting the synthesis controls in OVox. First, we click the Expand/Collapse button in the upper right corner to reveal additional controls.
OVox comes with a number of vocoder algorithms. Let’s stick with Classic to start. This is the traditional string-type vocoder that you commonly hear. The OSC shape panel defaults to a pulse spike. This is great for helping make speech intelligible but is a little harsh with beats. We can smooth it out by moving the marker closer to sawtooth. About halfway between strikes a good balance. We also add a little Noise to the signal to accentuate the rhythm.
Let’s use Unison to thicken the sound. We increase Voices from 1 to 2. Now it’s lush with added stereo width to boot.
In the Formant Filter section, we lower the Formant dial for a more ‘masculine’ feel, increase the Speed just a touch, and lower the Focus and Q settings a hair. Finally, we reduce the Voice Dynamics to around 60. This also smoothes out the results and gives us less of a jagged response.
With synthesis adjustments:
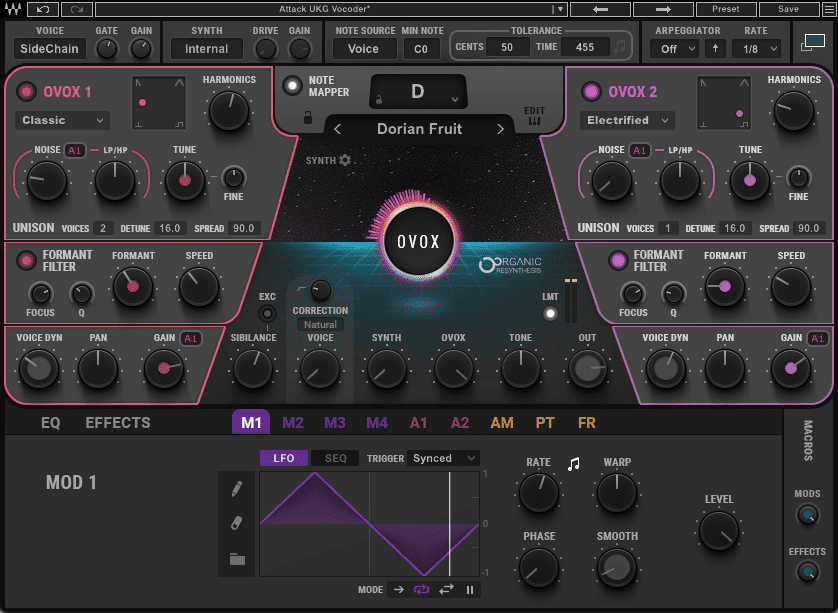
Step 6: Synthesizer 2
For the final step, let’s bring the second synthesizer online. This will add to the sound harmonically as well as help bring back a little focus.
We choose the Electrified preset, which has a nice buzz to it, and move the oscillator shape marker closer to the square wave. We also lower the Harmonics dial to give us a more subtle oscillator shape.
In the Formant Filter section, again we lower the Formant and Q settings.
Finally, we increase the Voice Dynamics to highlight the rhythm hiding under the synthesis.
The finished vocoder rhythm:
Here’s our finished vocoder line in the context of a song with elements from Ableton Live as well as a Splice hi-hat loop (‘ukg_drum130_cris_opnhat’) also from It’s A London Thing:
*Attack Magazine is supported by its audience. When you purchase through links on our site, we may earn an affiliate commission. Learn more.
FOLLOW ATTACK MAGAZINE
Synth Secrets is sponsored by
u-he are makers of award-winning software synthesisers and effects including Diva, Repro-1, Zebra2, Hive, Bazille, Presswerk and Satin.
Download the demos and try them for yourself at www.u-he.com