u-he are makers of award-winning software synthesisers and effects including Diva, Repro-1, Zebra2, Hive, Bazille, Presswerk and Satin.
Visit U-he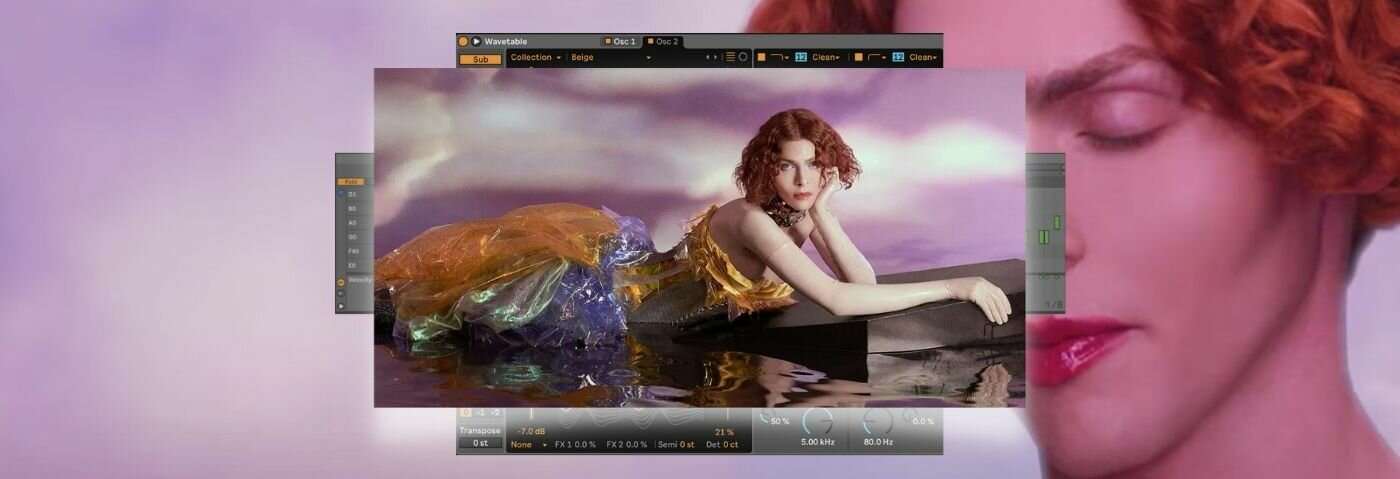
Technique » Synth Secrets »
Recreating The Sound Of Immaterial By Sophie Using Wavetable
This channel is sponsored by

In this Synth Secrets, we’re going to use Ableton Wavetable to show you the foundational elements of Sophie’s ‘Immaterial’.
Sophie might well have been a reclusive figure, at least at the start of her career, but Sophie’s music was the opposite. The music created in a relatively short time frame was exquisitely produced and wonderfully original. If you’re in the market for progressive, classy and crisp pop music then you should look no further than Sophie. It was no surprise that when Sophie unexpectedly passed away in January 2021, condolences were sent from a wide array of artists including Rihanna, Sam Smith and Vince Staples.
Sophie’s most played song on Spotify is ‘Immaterial’. We’ve recreated the main hook section of the song using Ableton’s built-in instruments and effects, including a clone of the hard-hitting bassline which we brought to life using Wavetable. This is a great bass patch to hold on to. It works in a ton of contexts, from pop to rap, from house to drum and bass.
To follow along, set your BPM to 138.
Here’s what we’re creating today:
And here it is in the context:
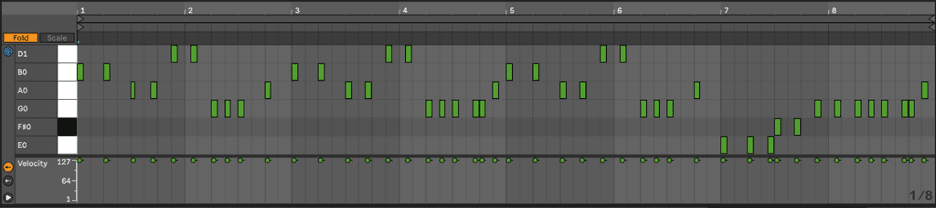
And here’s the MIDI pattern we’ll be using to construct this section of the song:
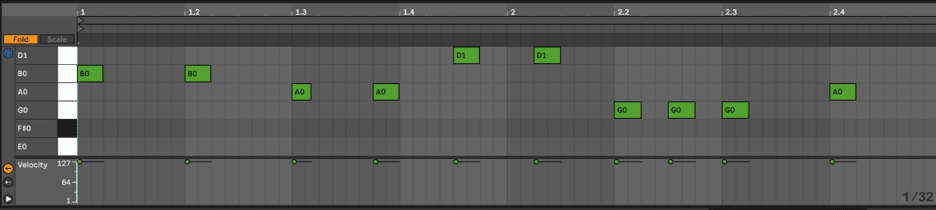
And here’s a closer look at the first couple of bars so we can get a better sense of the syncopated rhythm that forms the groove of the whole track:
To download the session and follow along. Give the email a few moments to arrive!
Let’s get to it and remember to click any image to enlarge!
Want to watch instead? You can below but make sure to follow us on YouTube!
Step 1
Basics
The bass drives this song and it’s a deceptively complex sound. We’ll recreate it starting with the lowest, deepest bits. We’ll pull up an instance of Wavetable. Stay in the Basic Shapes table and keep the table position at 0.0%. Then modify the Amp Envelope so the decay reads 275 ms, the sustain is at -8.0 dB, and the release is at about 325 ms.
Set the voice mode to Mono rather than the default Poly and pump the volume up to 0.0 dB and you should have something like this:

Here’s our progress so far:
Step 2
Add Punch
Our bass sound is nice but lacks impact. The same way you would add impact to an 808 or 909 kick, you can add kick-like impact to a bass sound by modulating the oscillator’s pitch with a snappy, short envelope.
Select Envelope 2 in the mod sources tab, pull the attack, sustain, and release to essentially zero, and pull the decay down to 125 ms.
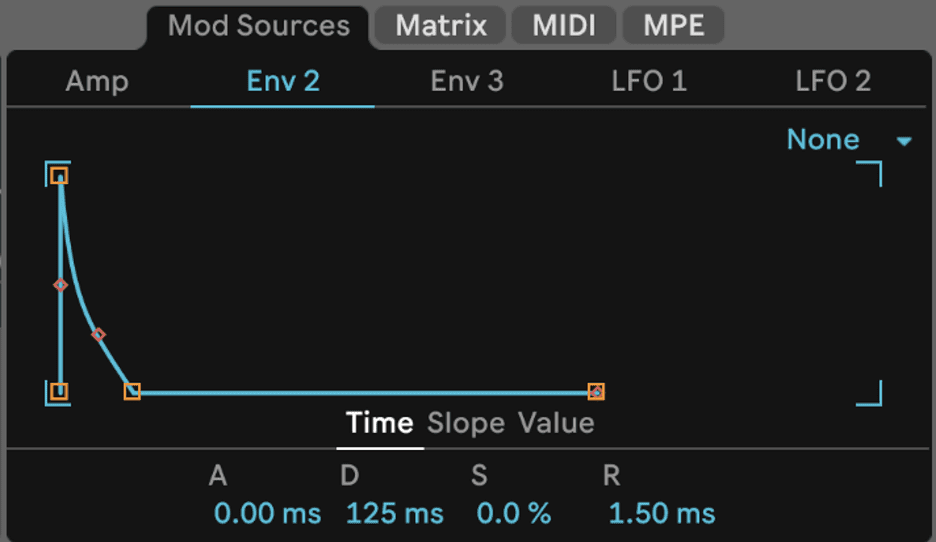
Then move to the Matrix tab and give the pitch modulation an aggressive value in the Env 2 column, something like 20-25.
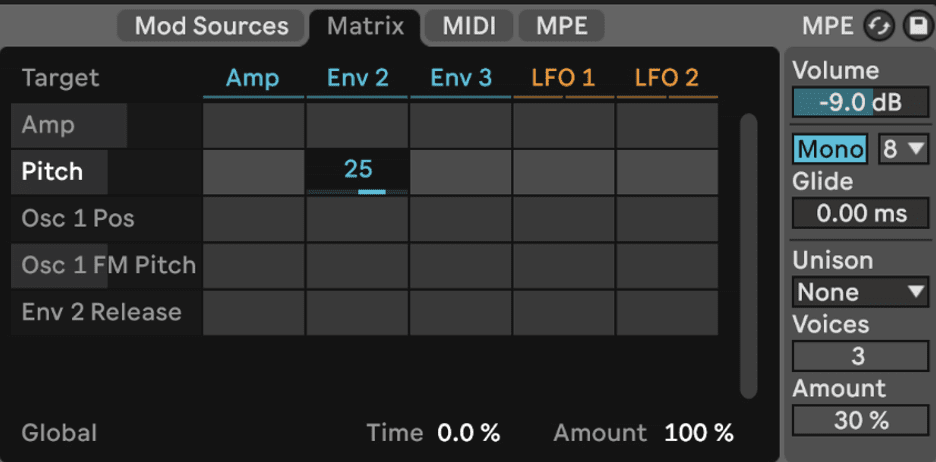
Already you’ll hear the sound is far more punchy.
Here’s our progress so far:
Step 3
A little width
It’s important with sub bass patches to keep it simple. The purest tones feel the punchiest, the most solid, the most centered. However there’s one additional modification this sound needs, and that’s width.
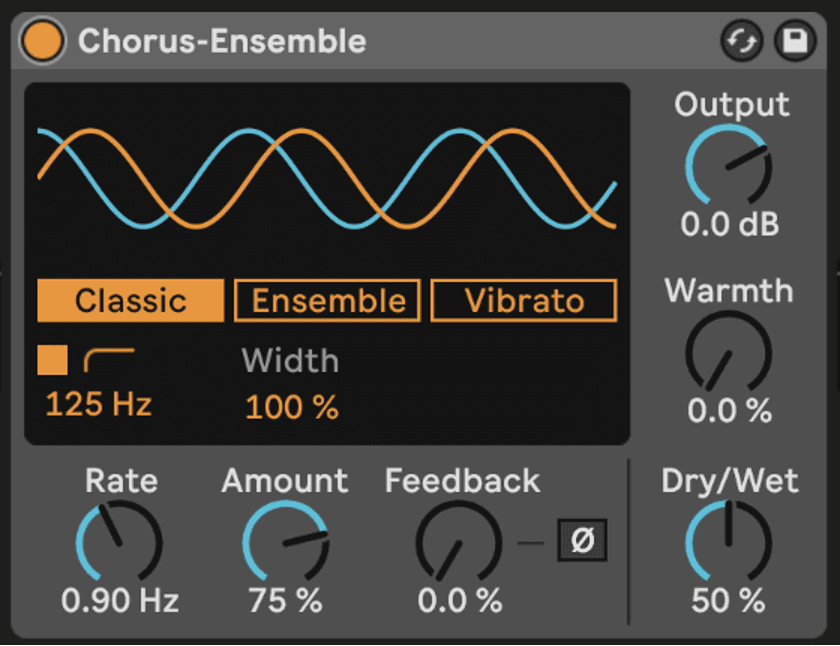
In many cases, just using the unison feature on any synthesizer is the best way to get a sense of width. However that’s not so with bass patches, because the unison function smears the lowest frequencies and decreases clarity and punchiness. That’s where Ableton’s Chorus-Ensemble audio effect comes in.
Drop an instance of Chorus-Ensemble onto your track and engage the high pass filter on the bottom left, setting the frequency cutoff to 125 Hz. Crank the Amount knob to 75%. That high pass filter leaves the low frequencies untouched by the Chorus-Ensemble effect while taking anything above 125 Hz and spreading it across the stereo field. Granted, there’s not a lot of information here above 125 Hz, but even adding width to what little content is there really does liven up the whole sound.
Here’s our progress so far:
Step 4
Another bass, this time with less bass
A common trick for adding impact to bass sounds without muddying up the lowest harmonics is to mirror the sub bass with a punchy, maybe even distorted sound that follows the same notes as the sub but focuses on the middle frequencies that really hit the body a bit higher up.
Create a new instrument track with a fresh instance of Wavetable for our mid bass and copy and paste the MIDI from our deep/sub bass track over to it. Engage the sub oscillator with the Sub button, boost the gain up to -1.0 dB, and select a 0 octave offset. For oscillator 1, select the “Complex” category and the “Kicked” table. Set the position to about 23%
Then move over to the Mod Sources section tab, select the Amp envelope, and change the decay setting to about 330, sustain to nothing, and release to about 275.

Here’s how that should sound:
Step 5:
Add punch (again!)
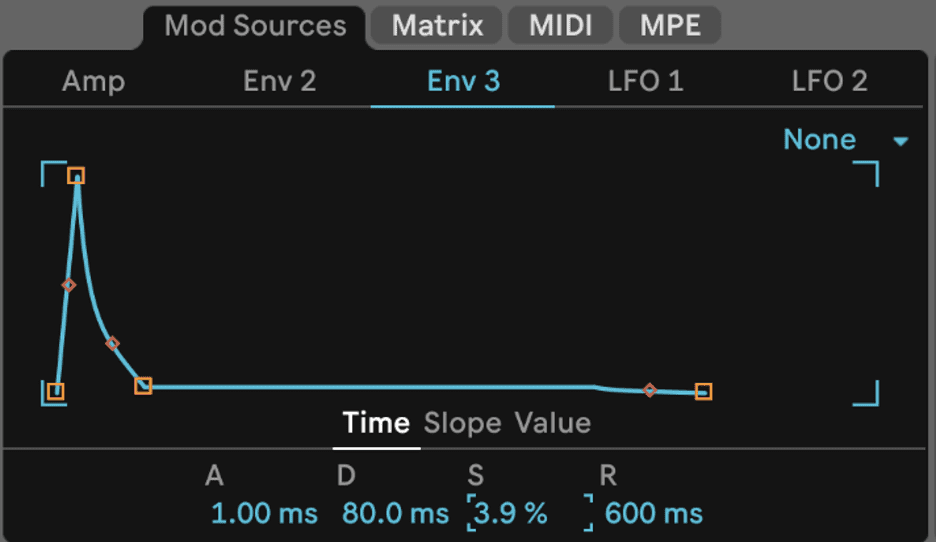
We’ll pull some of the same old tricks to add punch to this mid-focused bass sound. Select Envelope 2 in Mod Sources, move the decay to a very snappy 80 ms, and set sustain to 0%.
Now move over to the mod matrix and apply this envelope to pitch at a value between 15 and 20.

That will add that same punch we added to the sub bass.
Here’s how that should sound:
Step 6
Add motion
For our mid bass, we need some more interest. We’ll use LFO 1 to modulate the wavetable position on oscillator 1 and get things moving. Simply select LFO 1, change the rate to about 1.75 Hz, then map LFO 1 to Osc 1 Pos on the matrix at a value of about 20.

Here’s how that should sound:
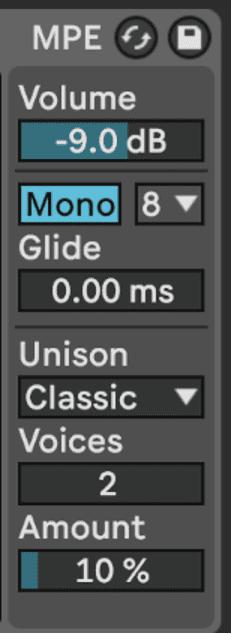
And also engage the unison function by changing the dropdown selection from “None” to “Classic,” change the unison amount to about 10% and the voice count to about 2. Now you should have a pretty apparent boost to your stereo width
Here’s how that should sound:
Step 7
Some final touches
To make the sound really interesting, activate oscillator 2 and call up the Beige wavetable from the Collection category. Set position to about 21% and gain to about -7.0 dB. This adds some nice harmonics that make the tone richer and more interesting. Then activate both filters, set one to high pass at about 5 kHz with a resonant peak and another to low pass at 80 Hz

Finally, throw on an instance of Drum Bus with the default settings – maybe add a tiny bit of crunch if you like – and you’ve got something.
And now layered with our sub bass from Steps 1, 2 & 3
In the context of the track:
If you want to see and play with the extra sounds that make up the final audio don’t forget to download the session at the top of the article. Enjoy!
While you're here, you may enjoy...

The Secrets of Dance Music Production
The world-leading book on dance music production. Comes with samples too.

Replicants – Elektron Analog Rytm Sample Pack
Electro sounds for the Elektron Analog Rytm. Free your spirit.


Synth Secrets is sponsored by
u-he are makers of award-winning software synthesisers and effects including Diva, Repro-1, Zebra2, Hive, Bazille, Presswerk and Satin.
Download the demos and try them for yourself at www.u-he.com