This channel is sponsored by
 Roland Cloud is your creative hub for Roland hardware and software. Access legendary recreations of Roland Classics, find new sounds for your favorite products, and download updates and companion apps to make music fast and easy. Visit Roland Cloud
In this second installment of our LFO-focused tutorials, we complete the house beat from part one with a modulating pad and randomized vocal effects.
There are many ways to spice up a track but one sure-fire method to bring interest and movement to a production is with LFOs. Short for Low Frequency Modulation, LFOs can help inject a static part with life and excitement.
In Part One of this tutorial, we gave life to house drums and bass via LFOs. The same concept continues here but this time we are going to use no less than three LFOs on a pad and two LFOs on a vocal sample.
Here’s our progress from Part One followed by the final beat we’re going for:
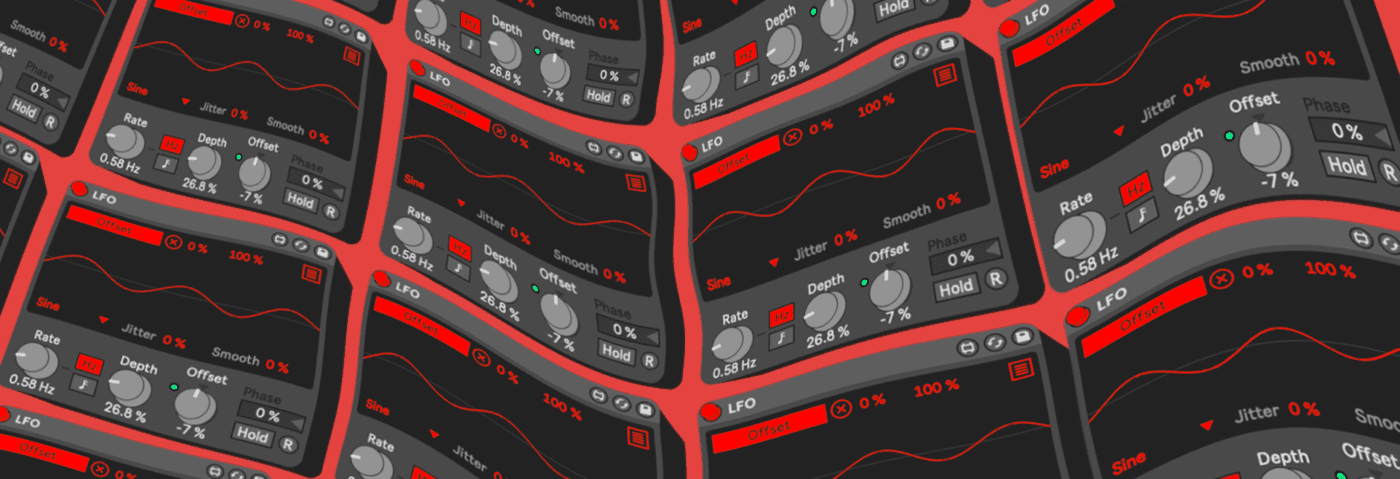
Deep LFO Inception for Layered Modulation
To clarify, we’re talking about LFOs mapped to other LFOs here, not dreams within dreams! Our next part is the pad, which will get its character from dynamic filter modulation and ambience via some delay and reverb.
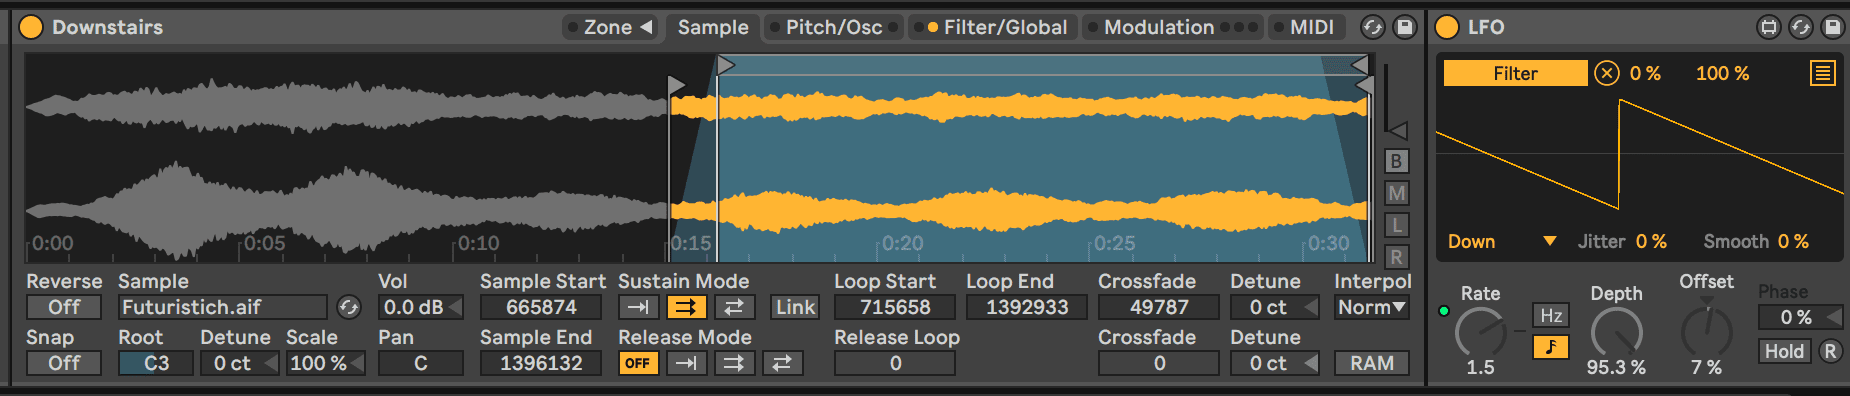
We start with a pad. The one we used is the Downstairs preset under the Ambient & Evolving category of the Sampler presets from Ableton’s Core Library.
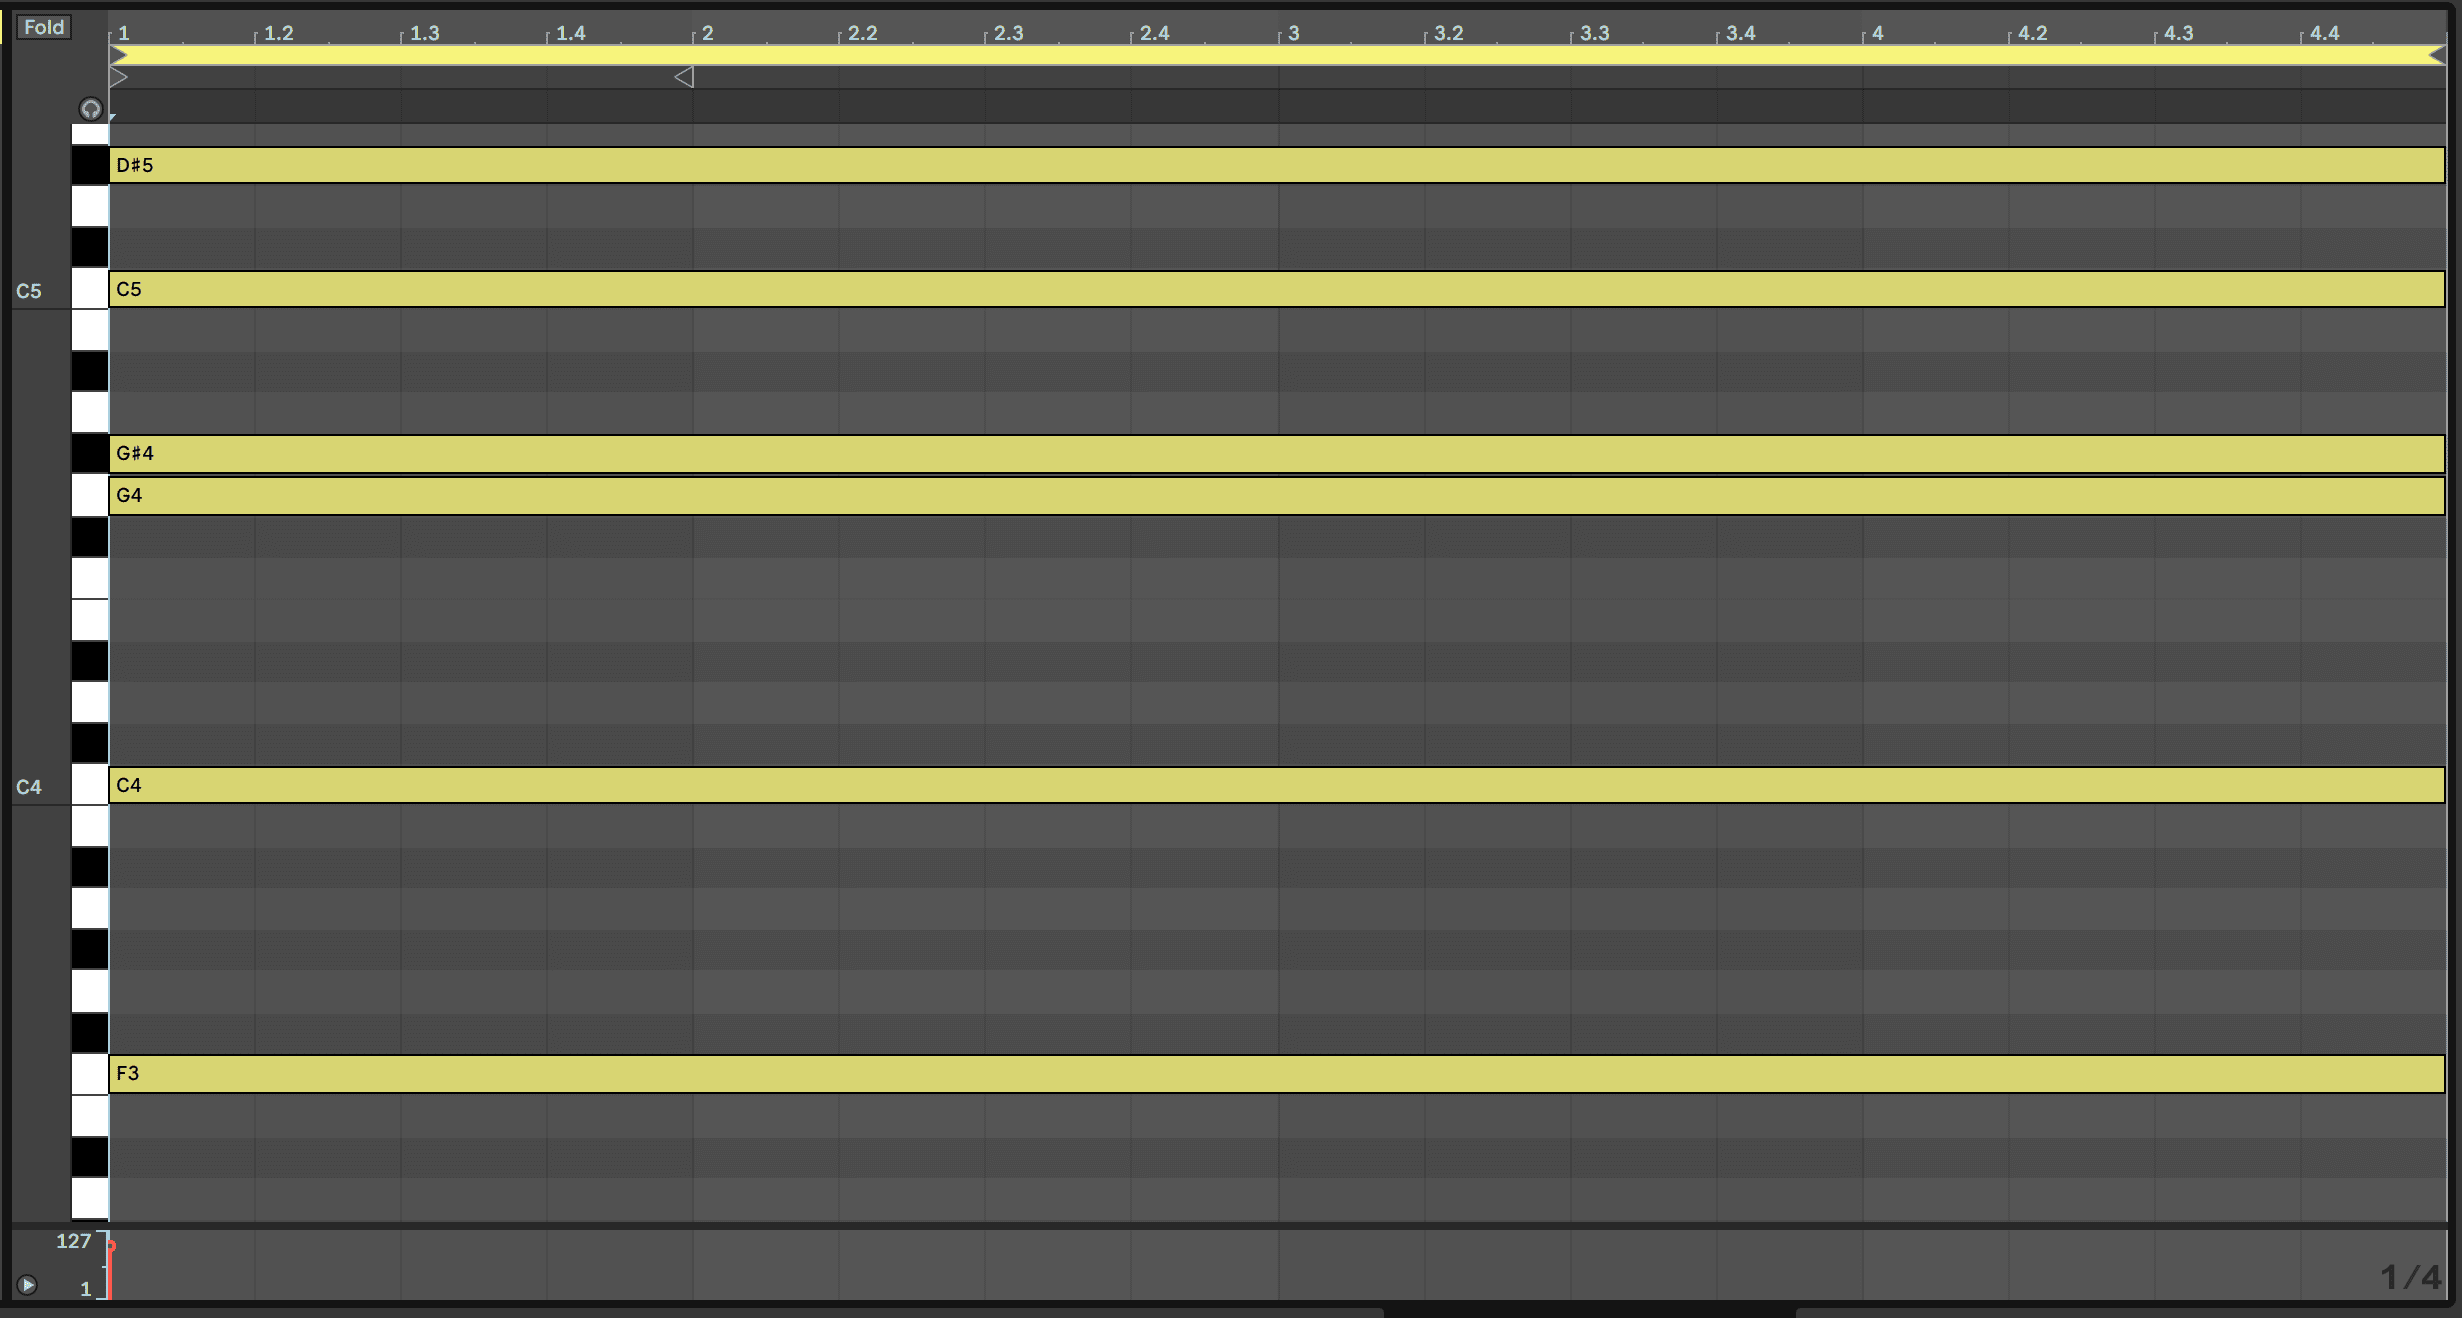
Here’s how it sounds with no processing. We programmed an F minor 7 (add9) chord:
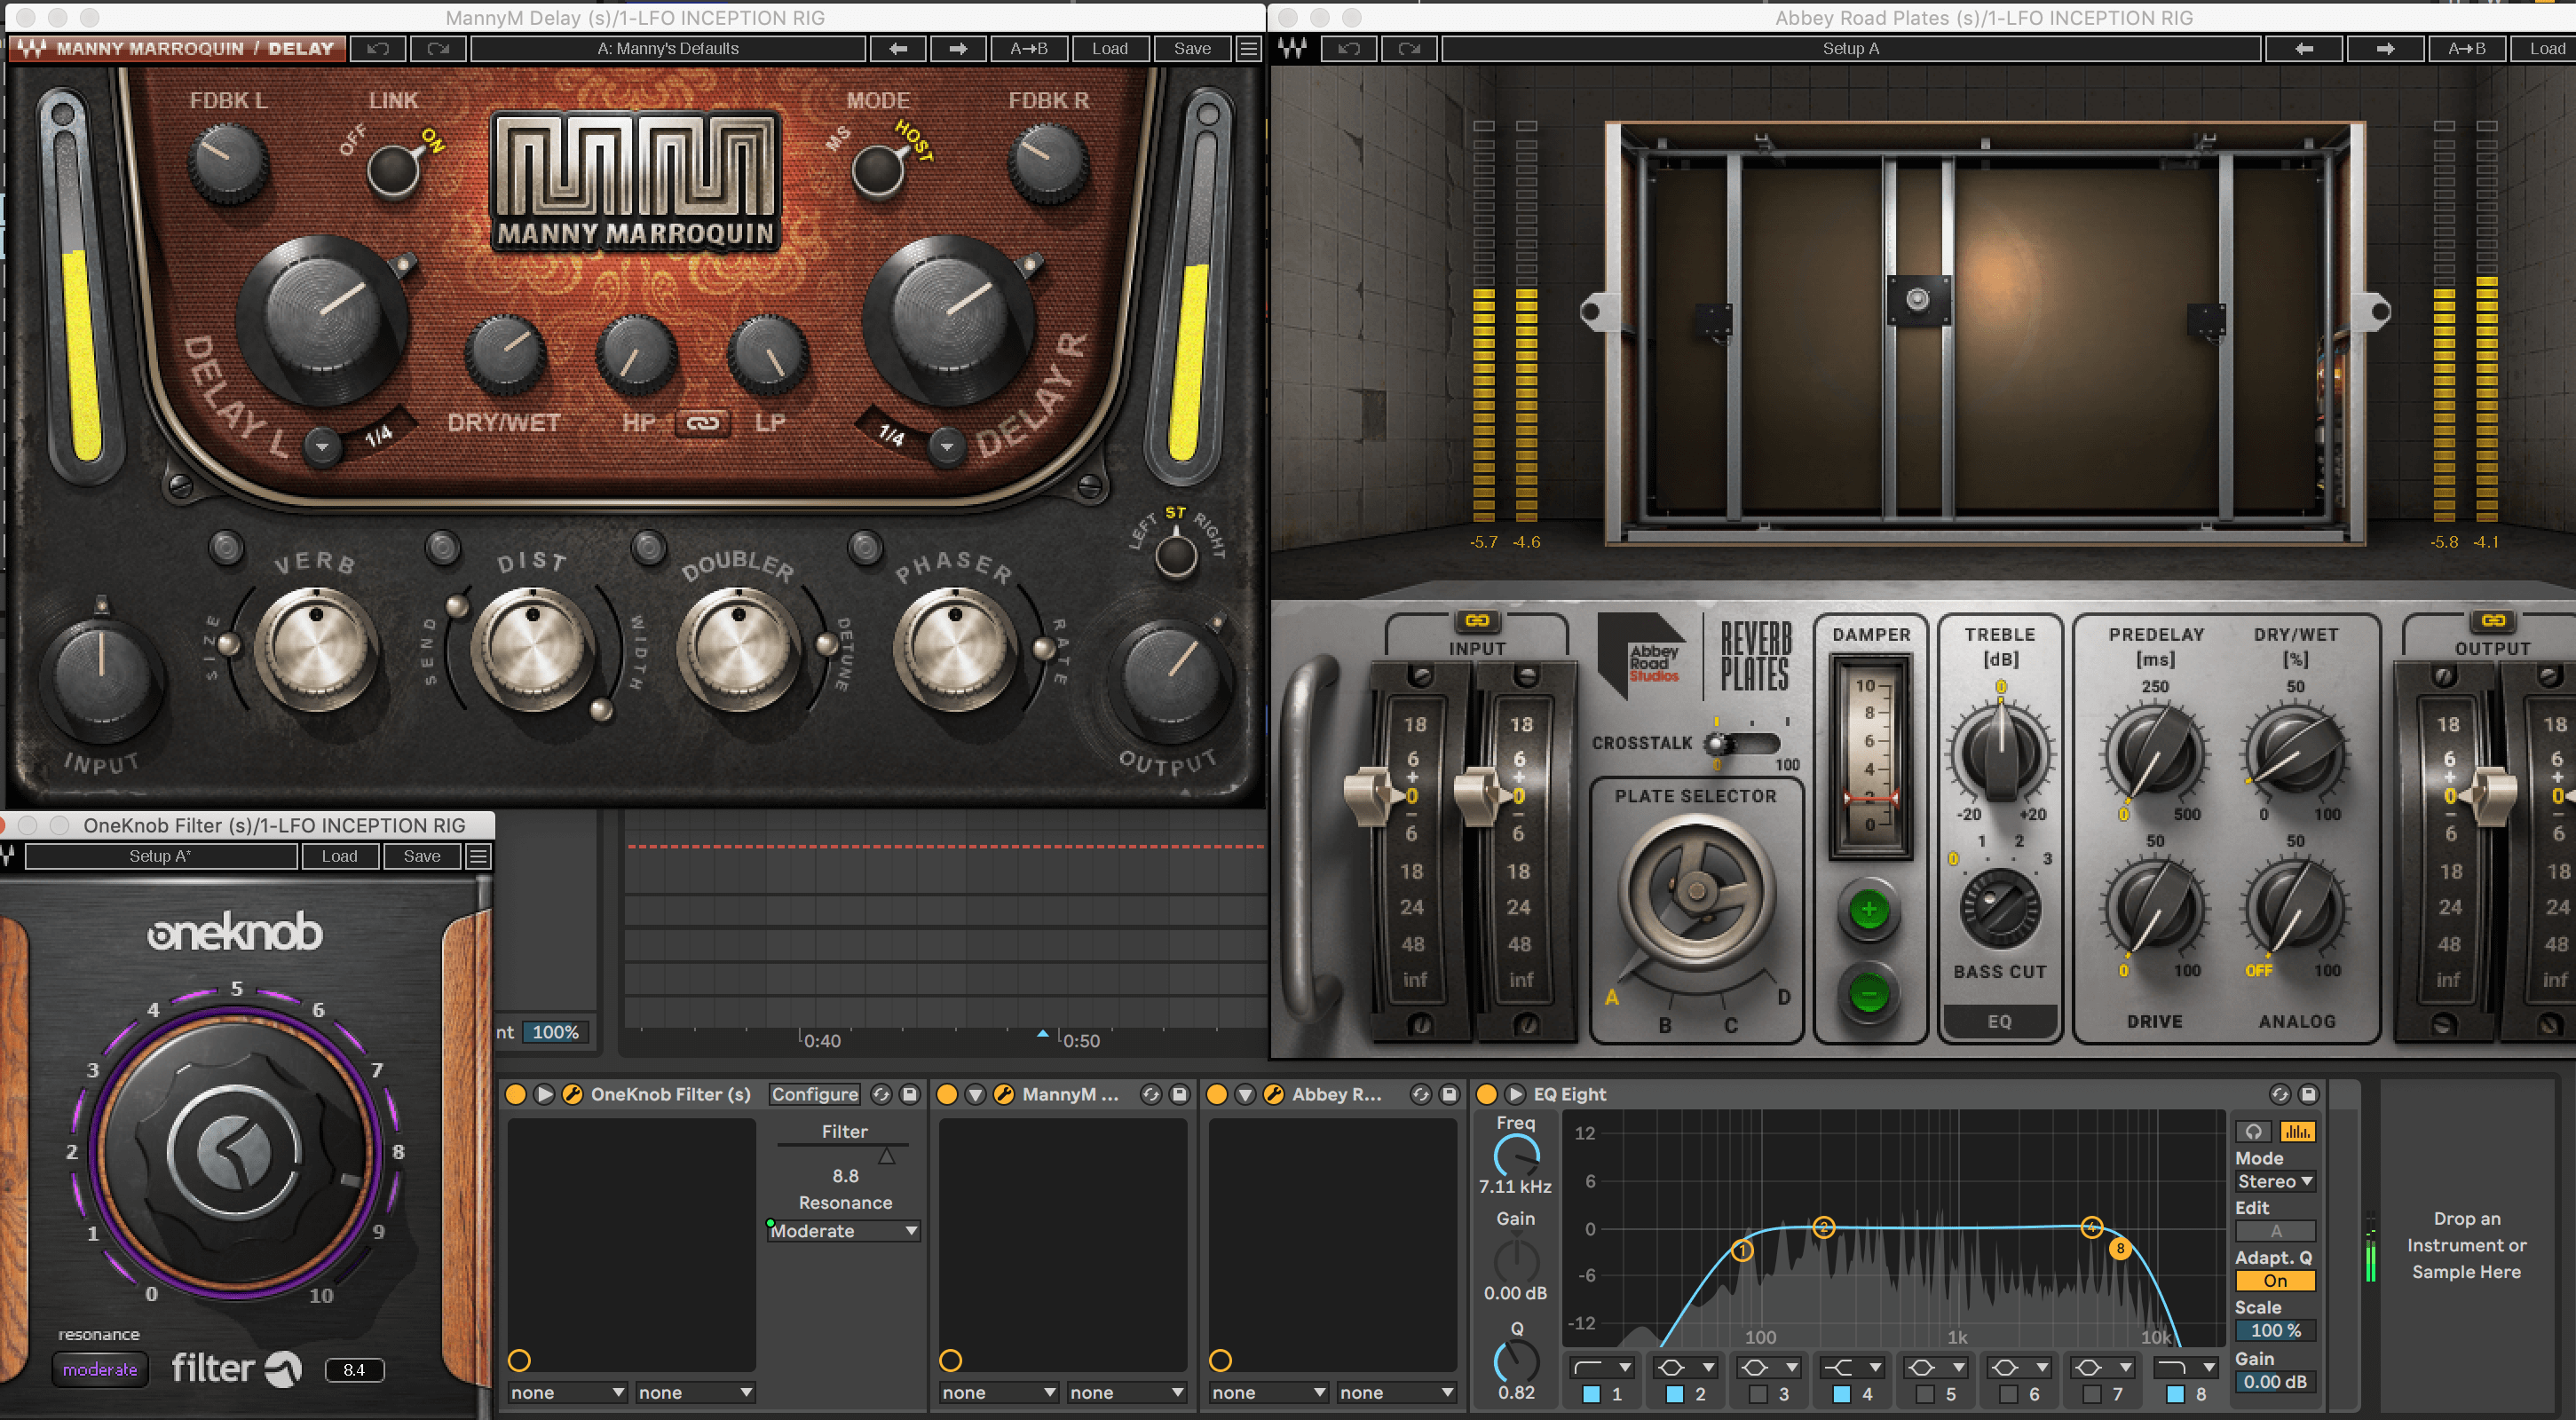
First, add some reverb and delay followed by an EQ cutting the frequencies both below 100Hz and above 7k. For the delay, we used Waves’ Manny Marroquin Delay with a quarter note delay time with a high dry/wet balance to lower the harshness in the pad. For the reverb, we employed Waves’ Abbey Road Plates in its default state with the dry/wet at 10%.
Next, insert a filter plug-in of your choice along with an LFO and map the LFO to the filter cutoff frequency. We used Waves’ OneKnob Filter, which only has cutoff and resonance parameters.
We’re going to add two more LFOs to this channel but first set the first LFO’s shape to Down, leave the depth at or around 100% and leave the offset at 0%. Now MIDI map the rate to a knob or fader on your MIDI controller to experiment with some live rate automation!
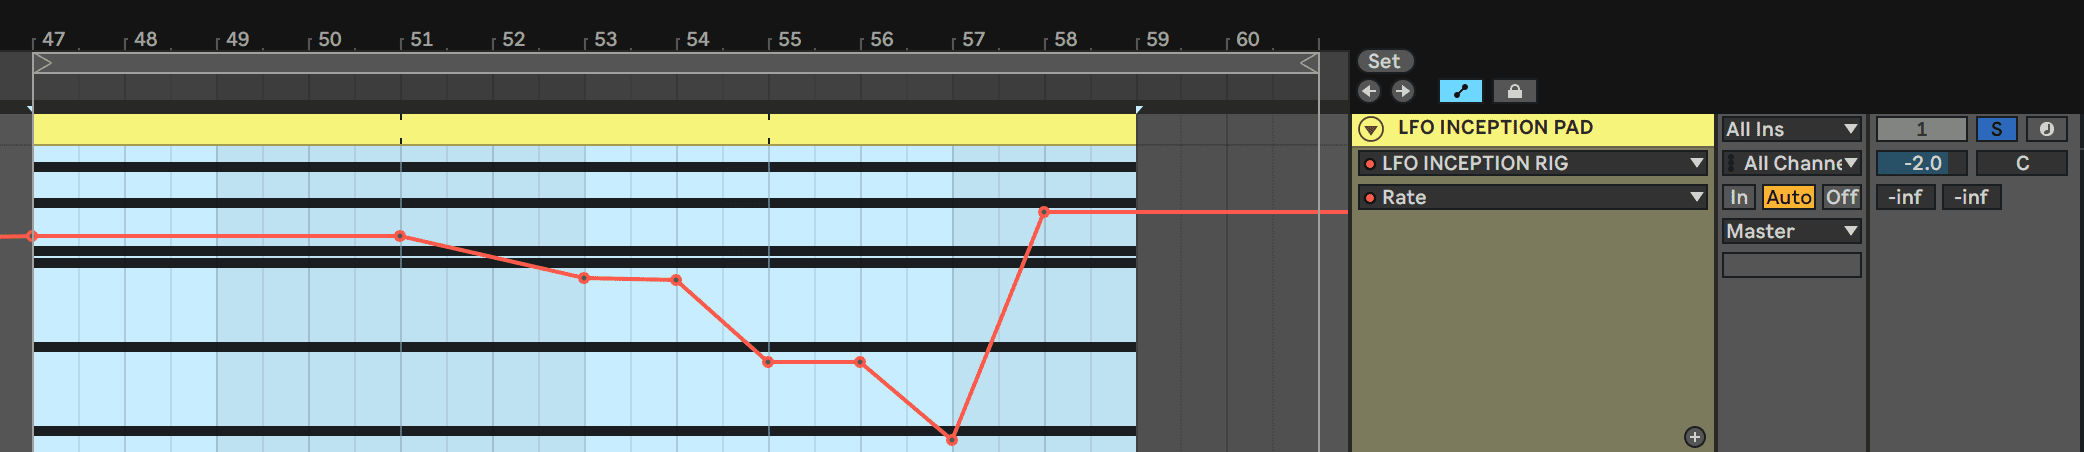
Map the second LFO to the first LFO’s Depth and leave it in the sine wave shape. This will modulate the range of the filter cutoff modulation. Set a very slow rate so that the change occurs gradually, making it seem like there is constant movement in the patch. Map the third LFO to the first LFO’s offset. This will then modulate the central point of the range of filter modulation. Again, use a slow rate to give the impression of a continually changing sound.
Let’s make this easier to control with macros. Group the instrument, LFOs and plugins together by selecting all of them and pressing command+G. This will create an instrument rack and allow you to assign parameters in the rack to the eight macros. We mapped the rate of the first LFO, the filter resonance, the depth of the second LFO (which is constantly changing the depth of the first LFO) and the offset of both the second and third LFOs.
Here’s how the pad sounds with all four of these macros modulating.

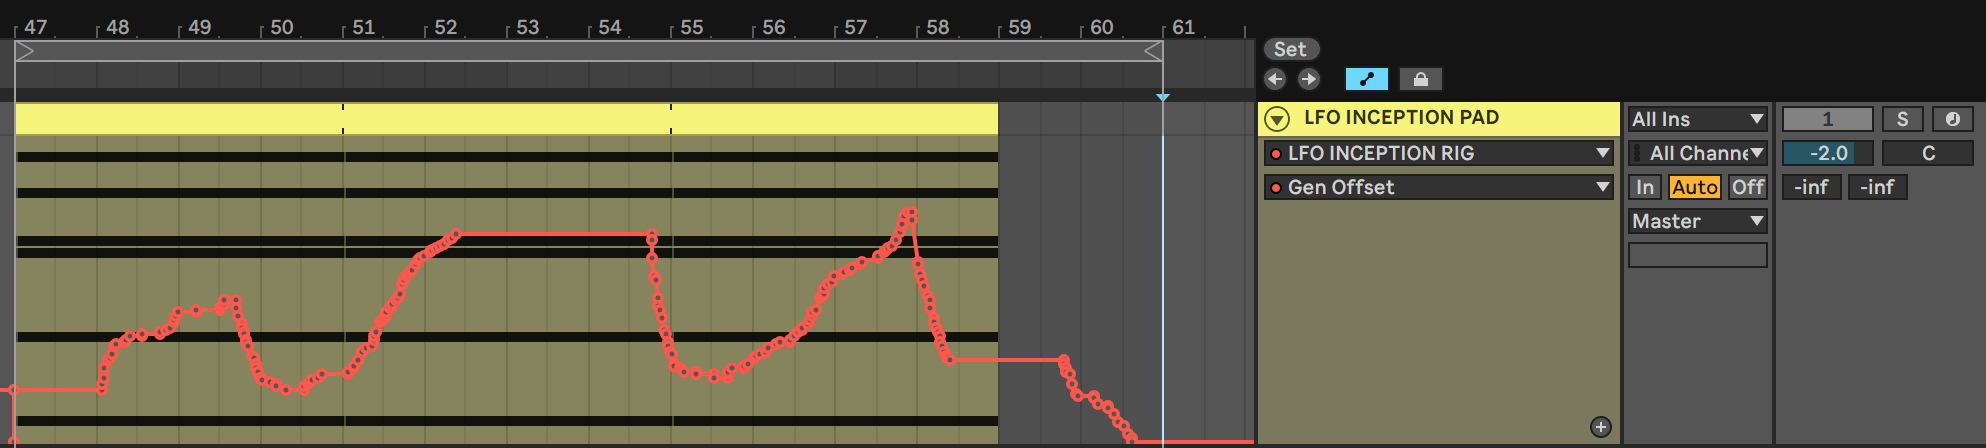
Top Tip: We use the offset macro at the beginning to bring down the offset of all three LFOs, thus keeping the filter cutoff range low. When we increase the offset we get the higher frequencies back and this sounds great when turned into echoes via the reverb and delay. With a higher resonance, these echoes get more intense.
Sample Offset Automation
The final LFO trick we used in this track was modulating the sample offset within Ableton’s sampler to turn speech into effects.
The sample is from the It’s a 6th Sense Beat Album from the creative commons website the Free Music Archive.
Create a new MIDI channel, insert Sampler and import this sample or any of your own acapella/voice samples. In the Sampler’s modulation tab, simply enable one of the LFOs and select Sample Offset in the LFO’s dropdown list for either A or B. Set the modulation amount to 100.
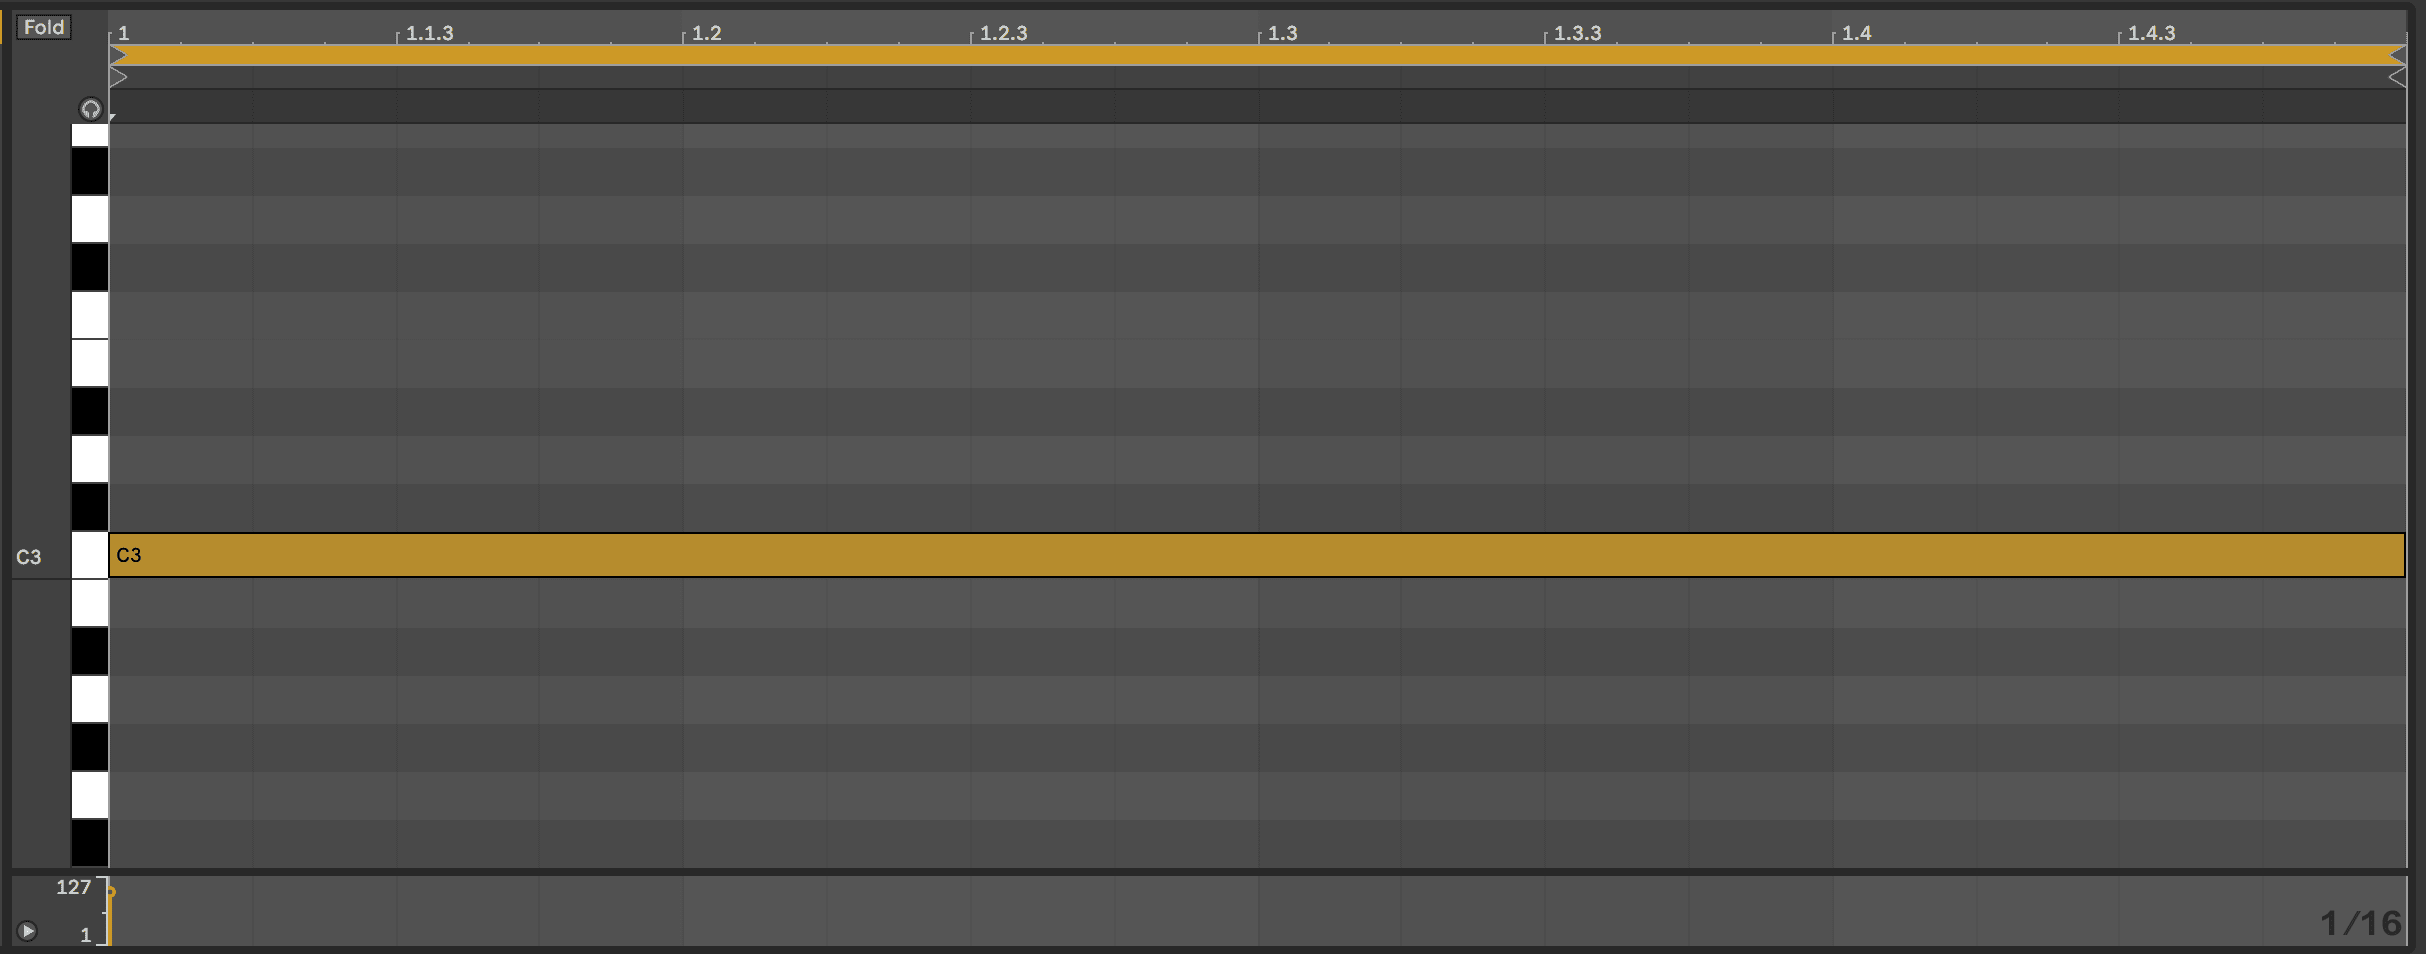
Now every time you press a note on your keyboard to launch the sample it will start from a different point. To make this happen quickly, insert an arpeggiator and set it to 1/16 so that now when you hold down a note you get a pattern of 16th-notes.
We programmed in a looping sustained C3 note as that is the root note for Ableton’s sampler so it plays the sample through in its original key.
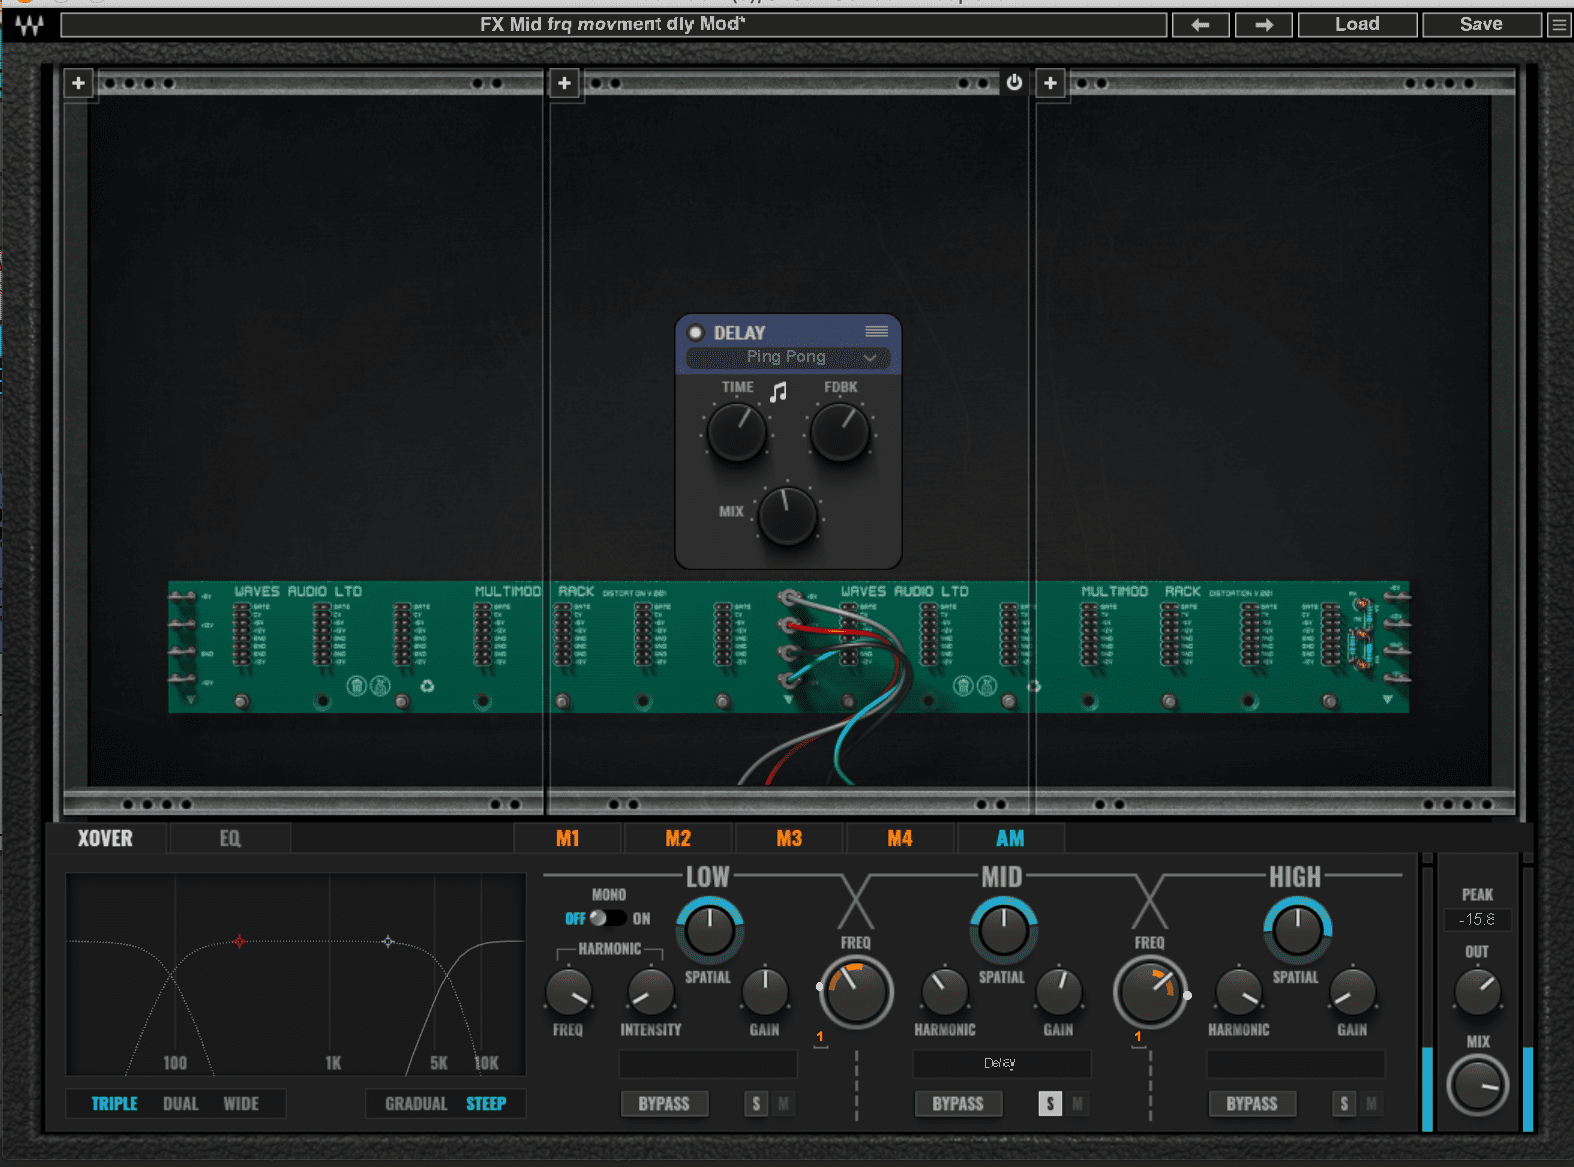
We also added some modulating filter effects by means of the Waves MultiMod Rack preset ‘FX Mid frq movement dly Mod’ as well as another Max for Live LFO to modulate the arpeggiator’s steps parameter. Now the octave of the voice keeps changing.
Here’s how the modulating voice sounds in solo:

Here is our final beat featuring all LFO-enhanced elements:
*Attack Magazine is supported by its audience. When you purchase through links on our site, we may earn an affiliate commission. Learn more.
Tutorials is sponsored by
Roland Cloud is your creative hub for Roland hardware and software. Access legendary recreations of Roland Classics, find new sounds for your favorite products, and download updates and companion apps to make music fast and easy.