
In this tutorial, we program a dub techno beat and look at multiple ways to use LFOs to add layers of modulation.
LFOs are always there. The synth you’re using has two or three internal LFOs, the DAW you’re using will most likely have various stock LFOs, but after a while, you may start to forget about them and take them for granted. One big reason for this is that many producers simply prefer to draw in automation for parameters to have more control over timing and other parameters. However, the unpredictability of LFO modulation can add a completely unique character, as well as swing and groove resulting from non-quantized timing.
In this – the first of two tutorials – we’ll first recap some key LFO parameters and then use various LFO techniques on drums and an FM-style bass line. Click on any image to see a larger version.
Here’s the beat we’re making:
Low Frequency Explanation
We’re going to use Max for Live’s internal LFOs – LFO and LFO MIDI – for the purposes of this tutorial, but if you don’t have Max For Live there are other options for third party LFO plug-ins like Cableguys’ MidiShaper or Xfer’s LFO Tool. However, the speed of Max for Live’s mapping workflow is unmatched as you can simply click Map and then choose any parameter to map it to the LFO device, for example.
The key parameters of any LFO (which stands for low-frequency oscillation) are the Shape, Rate, Depth and Offset controls.
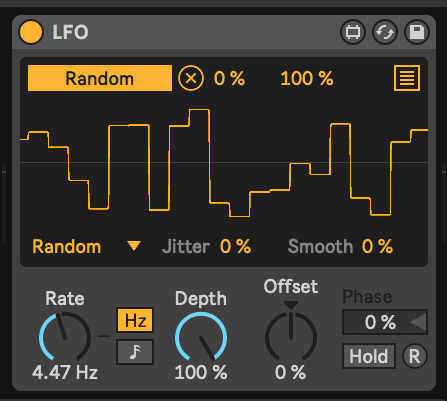
The shape determines the type of movement of the parameter – for example, a sine wave moves smoothly across all values in the LFO’s range, whereas a triangle or square wave shape has more jumps between values because of the nature of their curves. Other common shapes are upward, downward and random. We’ll use a number of different shapes in the examples.
Rate determines how fast the LFO scrolls through the values and you usually get the option to either sync it to the BPM or select a value in Hz for its speed.
Depth sets a range for the movement. For example, if your value starts at 0 and the entire range of movement is -100 to +100, a depth setting of 10% will have the value moving between +10 and -10. A depth setting of 20% will have the parameter go between – 20 and +20. The idea of increasing and decreasing the range of movement makes depth a great control to automate!
The offset control builds on depth by setting the central point of the range. In our above example, the central point was 0 and a 10% depth is causing movement between +10 and -10. If we set the offset to -20 then the central point would go down to -20 and the new range of movement would be -30 and -10, which is -10 and +10 added to the offset value of -20.
Adding Texture and Expression to Drums
The beat for this track has four elements in total. The first two are pre-prepared loops: an Ableton kick and sub loop, and a 909-style open hat and clap loop we recorded.
The next two elements are the ones we will use LFO-processing on and these are a layered 16th-note closed hat pattern and a snare part.
Hi-Hats
For the hi-hats, the goal is to make every single hit sound unique and live and we’re going to use multiple LFOs to automate the volume of each sample to achieve this.
First, create a new MIDI channel, load up a drum rack and insert three hi-hat samples. You’ll get the best results if you use recordings of the same hi-hat but with different expressions. For example, closed, slightly open and completely open. You can also add in completely different samples for variation. We used ‘RF Hat4’ and ‘RF Hat5’ from Ableton’s Konkrete Breaks Factory Pack and ‘NM_HAT3’ from the Loopmasters Mixtape pack.
Program a one-bar MIDI clip with all three of the samples playing every 16th-note. Insert three Max For Live LFO devices and map them to their volume faders in the drum rack. These faders appear when you click the arrow next to the name of the channel in session view.
Leave the default sine wave shape selected for all three of the LFOs and set the depth rate for all of them to between 10% and 20%. This is to avoid a large volume range as we want the effect to be subtle. Set the offset lower for any sample that you want to be quieter in general.
Here’s how the pattern sounds with two bars with the LFOs disabled and then two bars with them active. The resulting volume modulation even introduces new syncopated patterns!


Snare
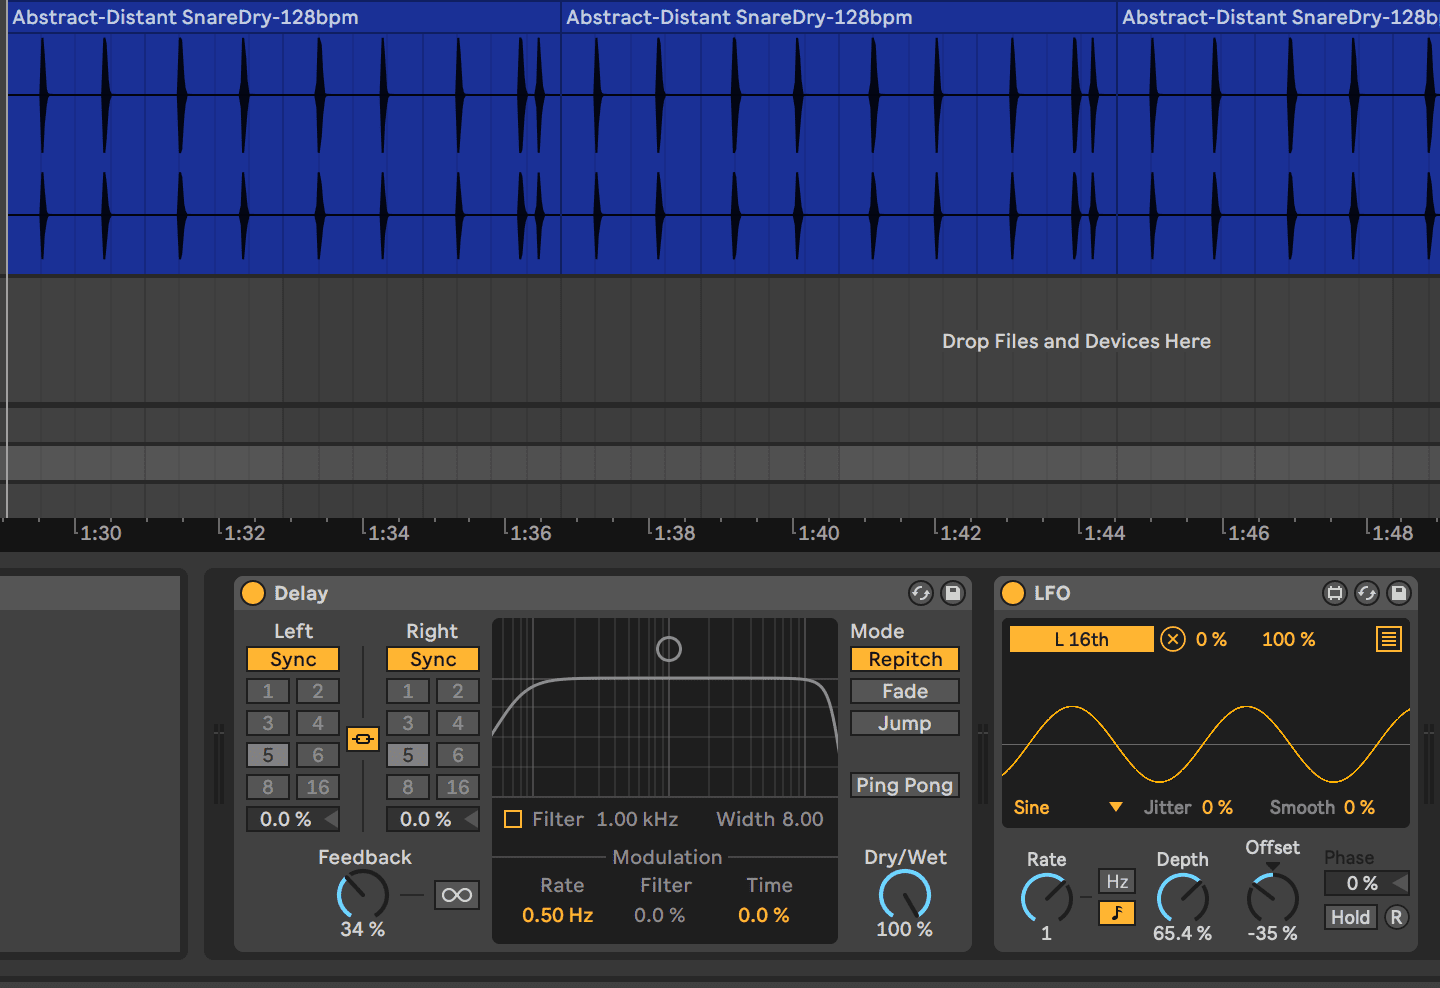
For the snare, we again used a loop, ‘Abstract-Distant SnareDry-128bpm’ from Ableton’s Loopmasters Mixtape pack, with some room reverb mixed in.
The goal with the snare is to add delay to it to generate textures by continually changing the delay time. Insert Live’s stock Delay on a new return channel and send about -9Db from the snare’s channel to this return. Insert a Max for Live LFO and map it to control the delay time. Synch the LFO’s rate to the track BPM by clicking the note button and set the rate to 1 so that the pattern repeats every bar.
Set the depth to taste and lower the offset so that the higher (longer) delay times are avoided. You can leave the delay’s dry/wet at 100% because it’s on a return channel. Dial-in a higher feedback setting if you want a more active pattern.
Here’s how the snare sounds with the kick loop underneath, with four bars without the delay return active and then four bars with it.
LFOs for Random Modulation
One of our favorite LFO tricks is using them to quickly add fast randomization.
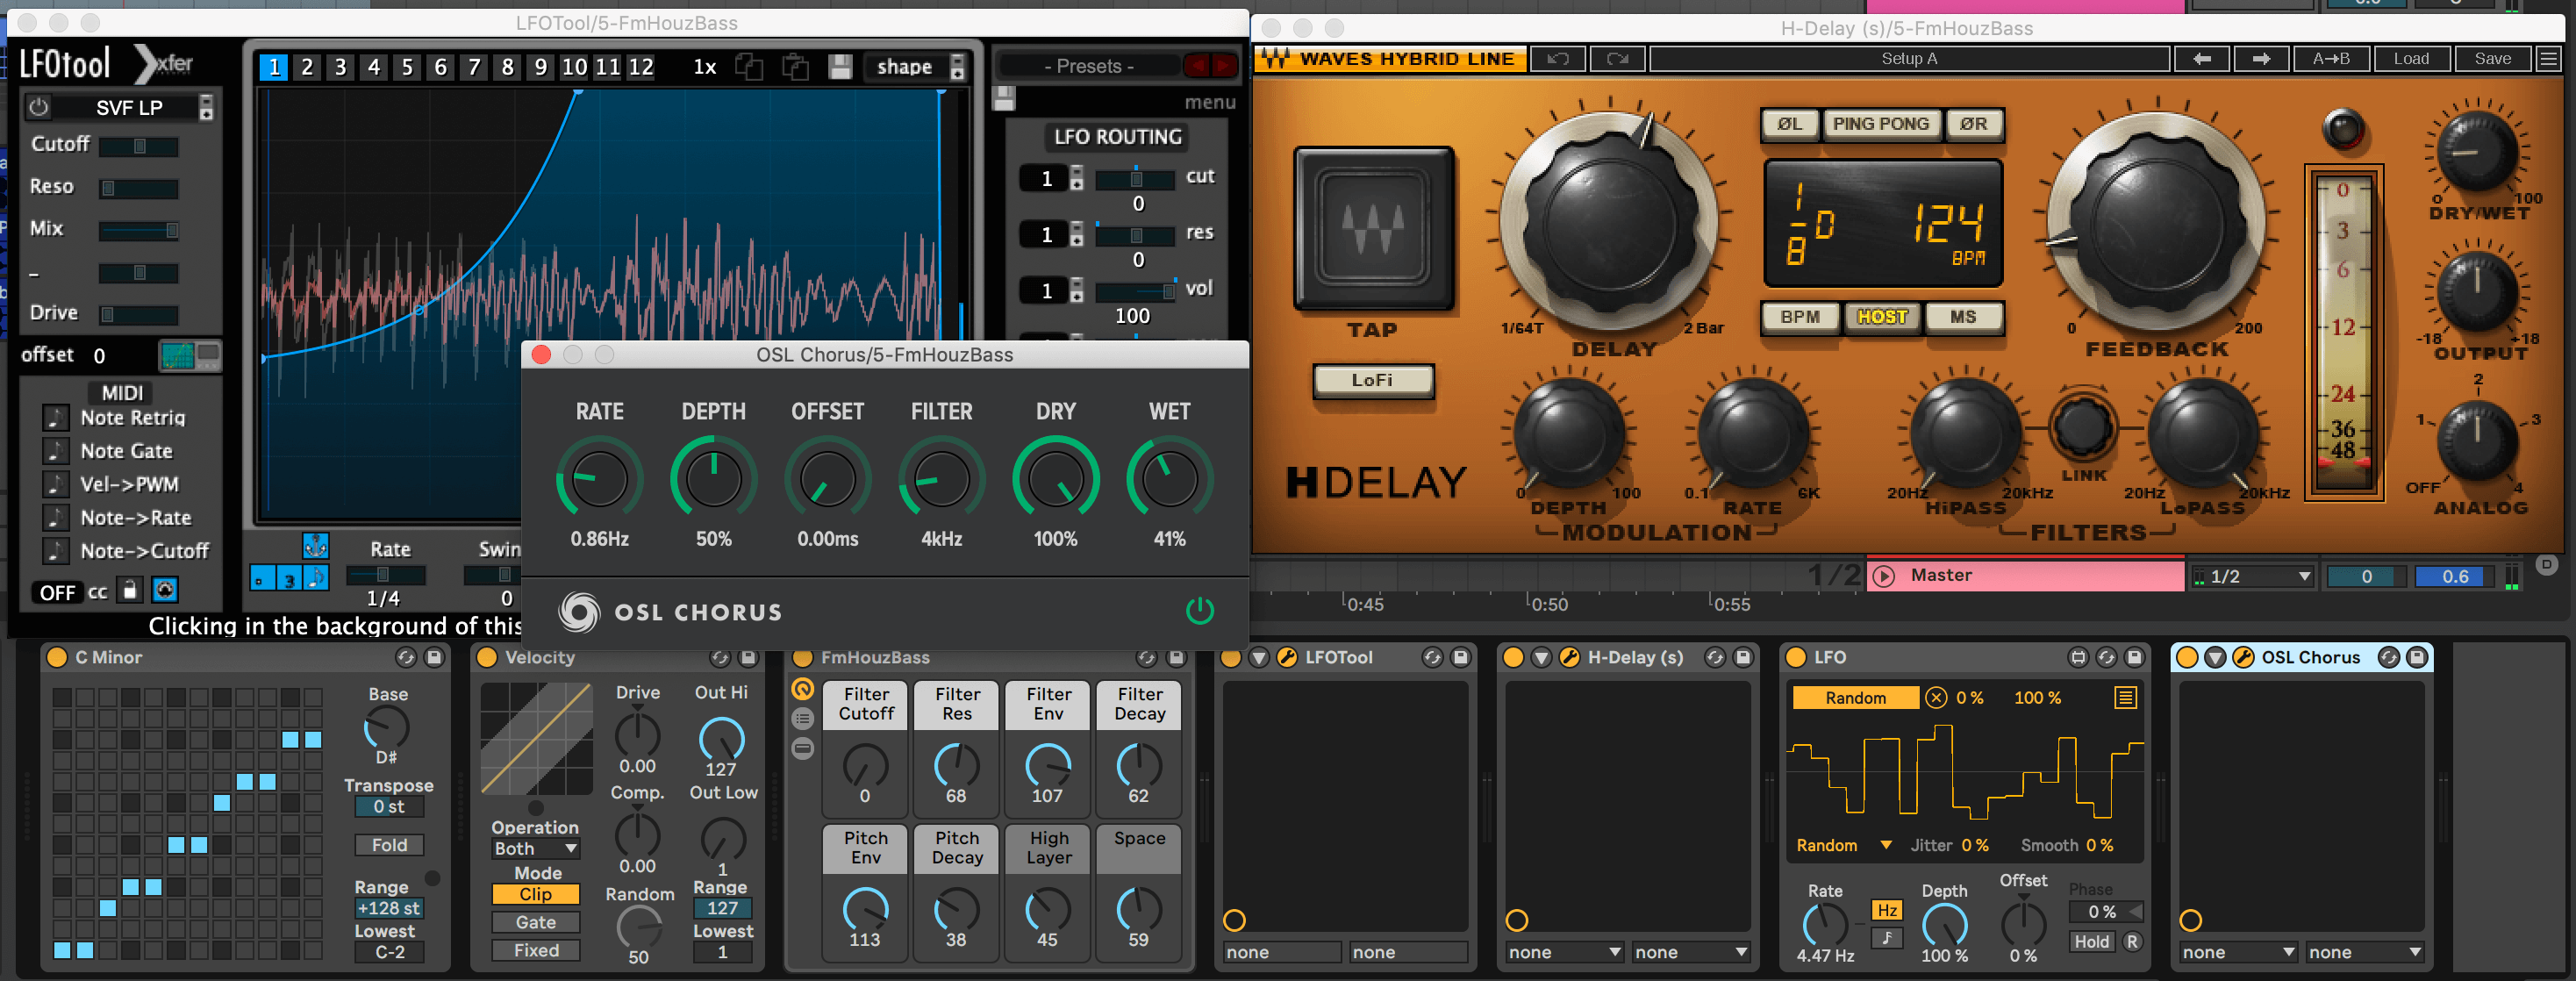
For example, we programmed a bass line using Live’s FmHouzBass preset from the Skitter and Step pack and noticed that it has a nice and resonant filter envelope movement when played with higher velocities.
Live’s Velocity MIDI device usually does the trick for adding constant velocity automation with its Random knob, but we found that using an LFO to modulate the amount yielded even better results.
To use this technique, insert an LFO and the Velocity MIDI device to your bass channel and map the LFO to the velocity device’s Random knob. Select the Random shape in the LFO and set the depth, range and rate to taste. Add a delay to the channel to further emphasize the notes with higher velocity.
We also added the LFO Tool plug-in to have the bass duck every quarter note to avoid clashing with the kick and some chorus via the free OSL Chorus plug-in by Oblivion Sound Lab.
Here’s how the bass sounds in solo, with two bars without the LFO and then two bars with it:
And here’s how the bass and drums sound together:

In part two of this tutorial, we’ll dive even deeper into LFOs, using them to modulate sample offset as well as other LFOs.