This channel is sponsored by
 Roland Cloud is your creative hub for Roland hardware and software. Access legendary recreations of Roland Classics, find new sounds for your favorite products, and download updates and companion apps to make music fast and easy. Visit Roland Cloud
In this tutorial, we look at many different ways to add swing to a beat, using a main room-style track as an example.
There is no debating that swing is one of the most important aspects of beats in dance music. The right swing processing on a catchy pattern can take a track to the next level. Though the concept of swing seems straightforward, it has different meanings in different contexts.
On paper, and in the context of beat-making, 8th or 16th-note swing is referring to musical parts in which every second 8th or 16th-note is slightly delayed or early with the goal of adding groove. However, to many it simply means whether a beat makes the body move or not.
In this tutorial, we will first recap swing templates in Ableton and then use sidechain-style ducking, velocity editing, track delay, panning and effects to add multiple layers of swing.
We’ll be starting with this beat that has zero swing:
Adding movement with swing-focused processing:
You can download the project file here to follow along.
Swing & Swing Templates
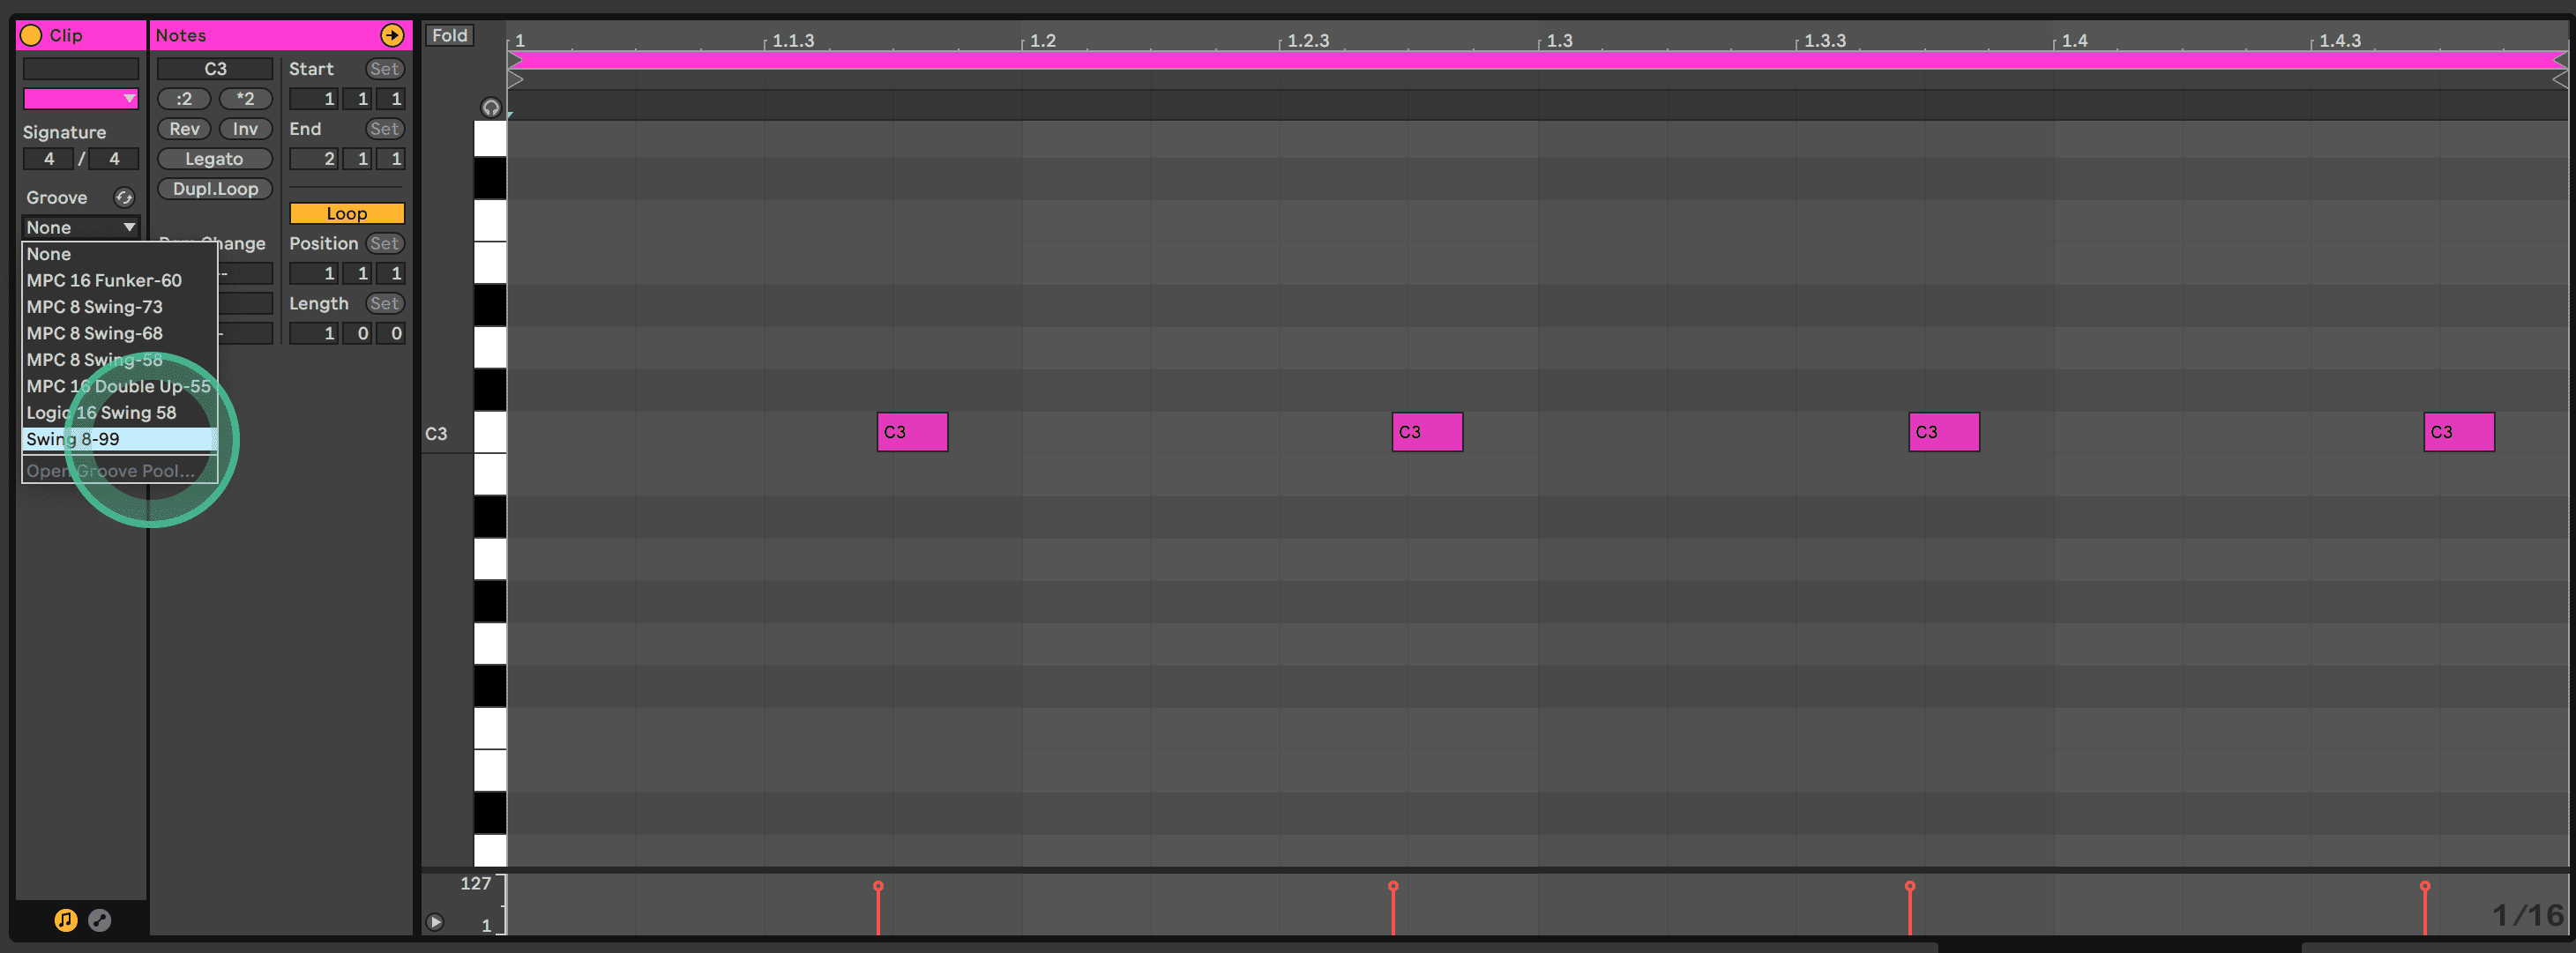
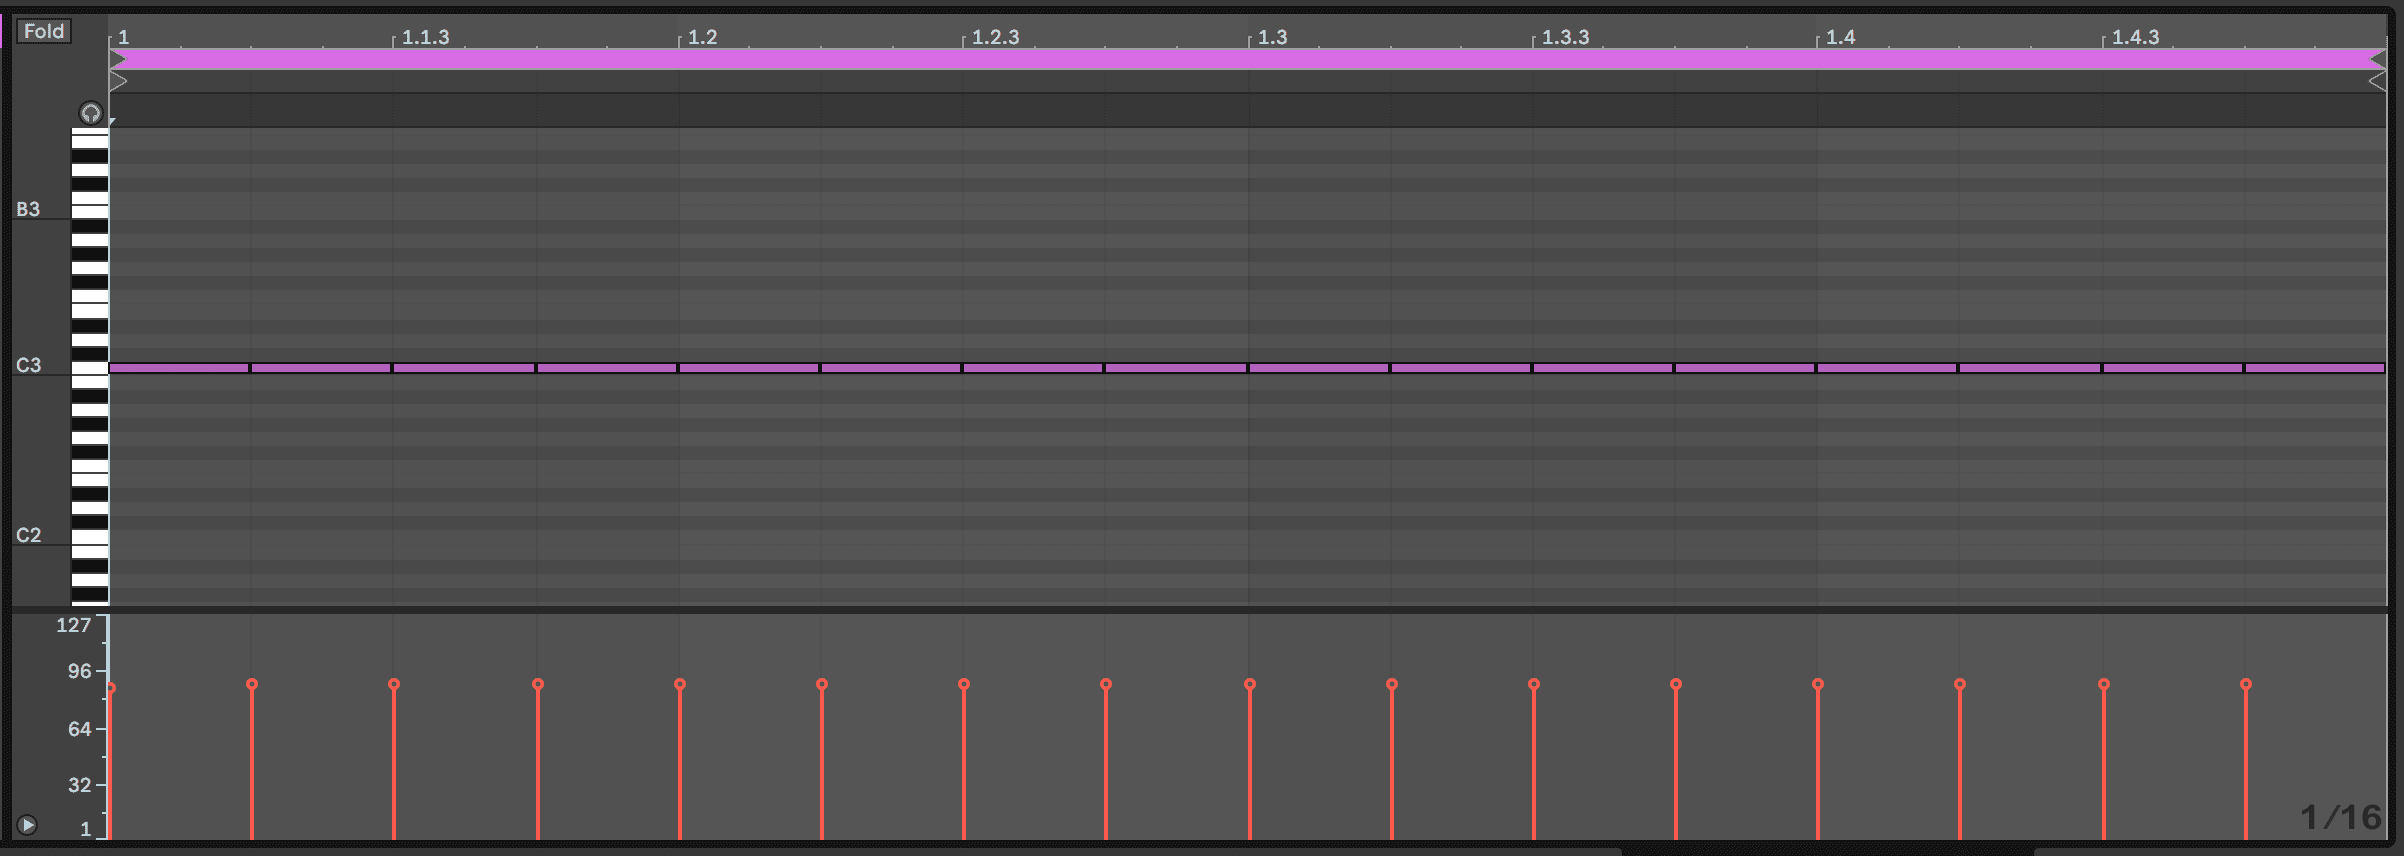
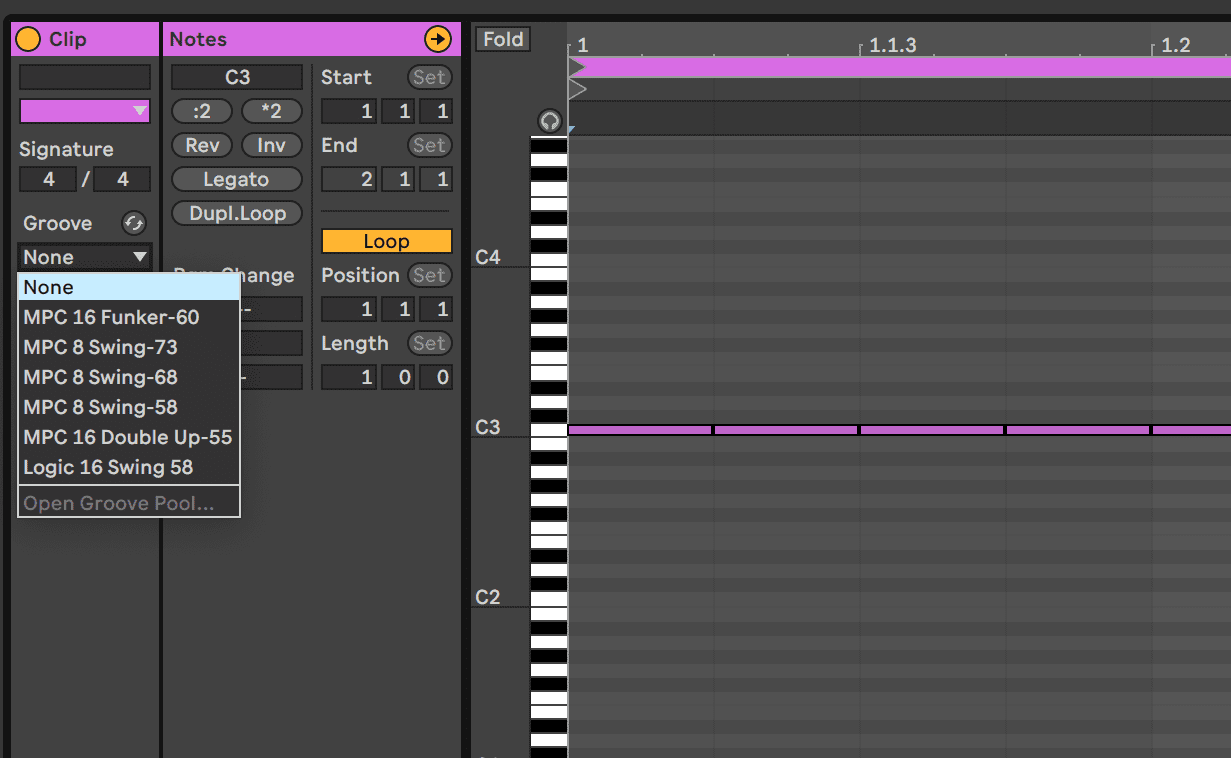
In technical terms, swing refers to slightly delaying every second note on the grid. For example, if you have an 8th-note hi-hat part playing and you add Ableton’s Swing 8-99 groove to it (99 is the highest amount in the generally used range of 50-99), every offbeat hi-hat will be delayed and they will start to hit right before the next downbeat:
Here’s how this sounds with a kick (the swing comes in on the second bar):
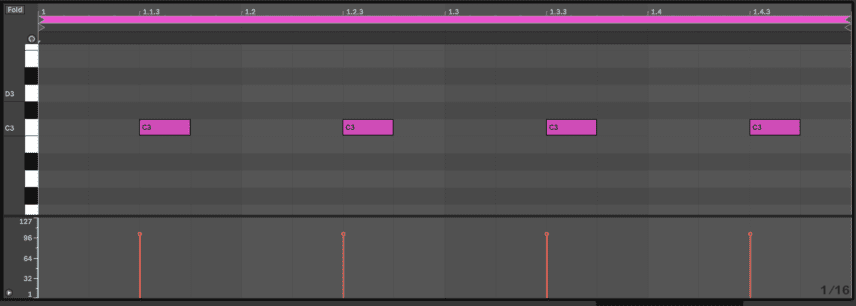
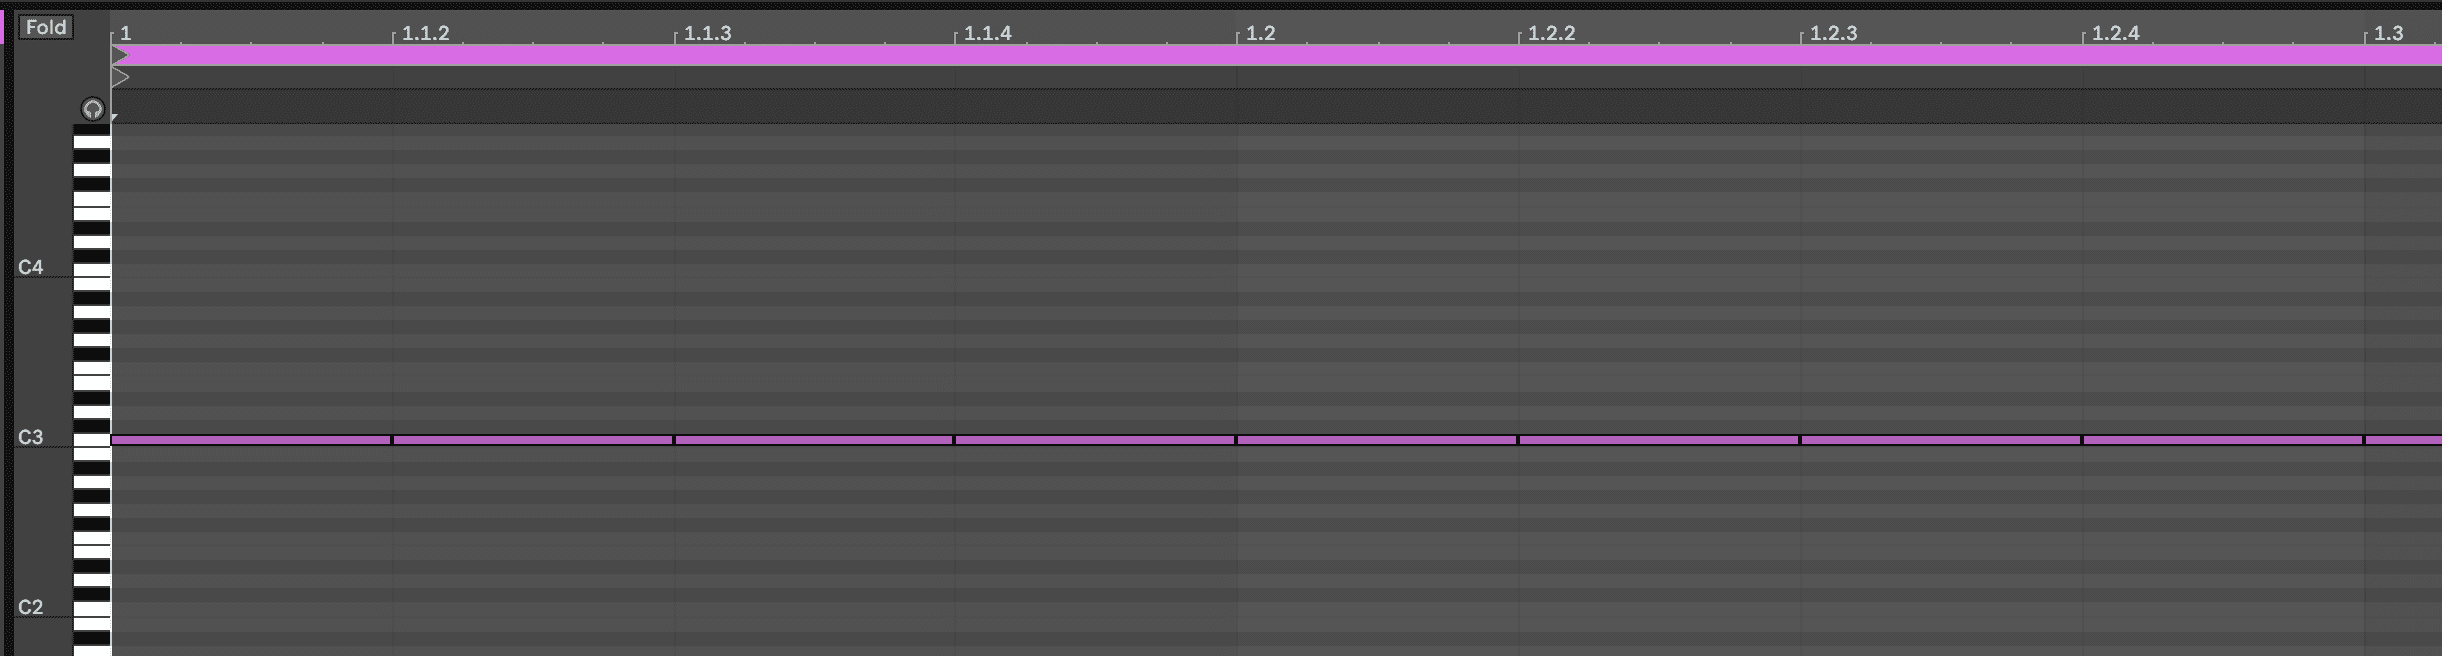
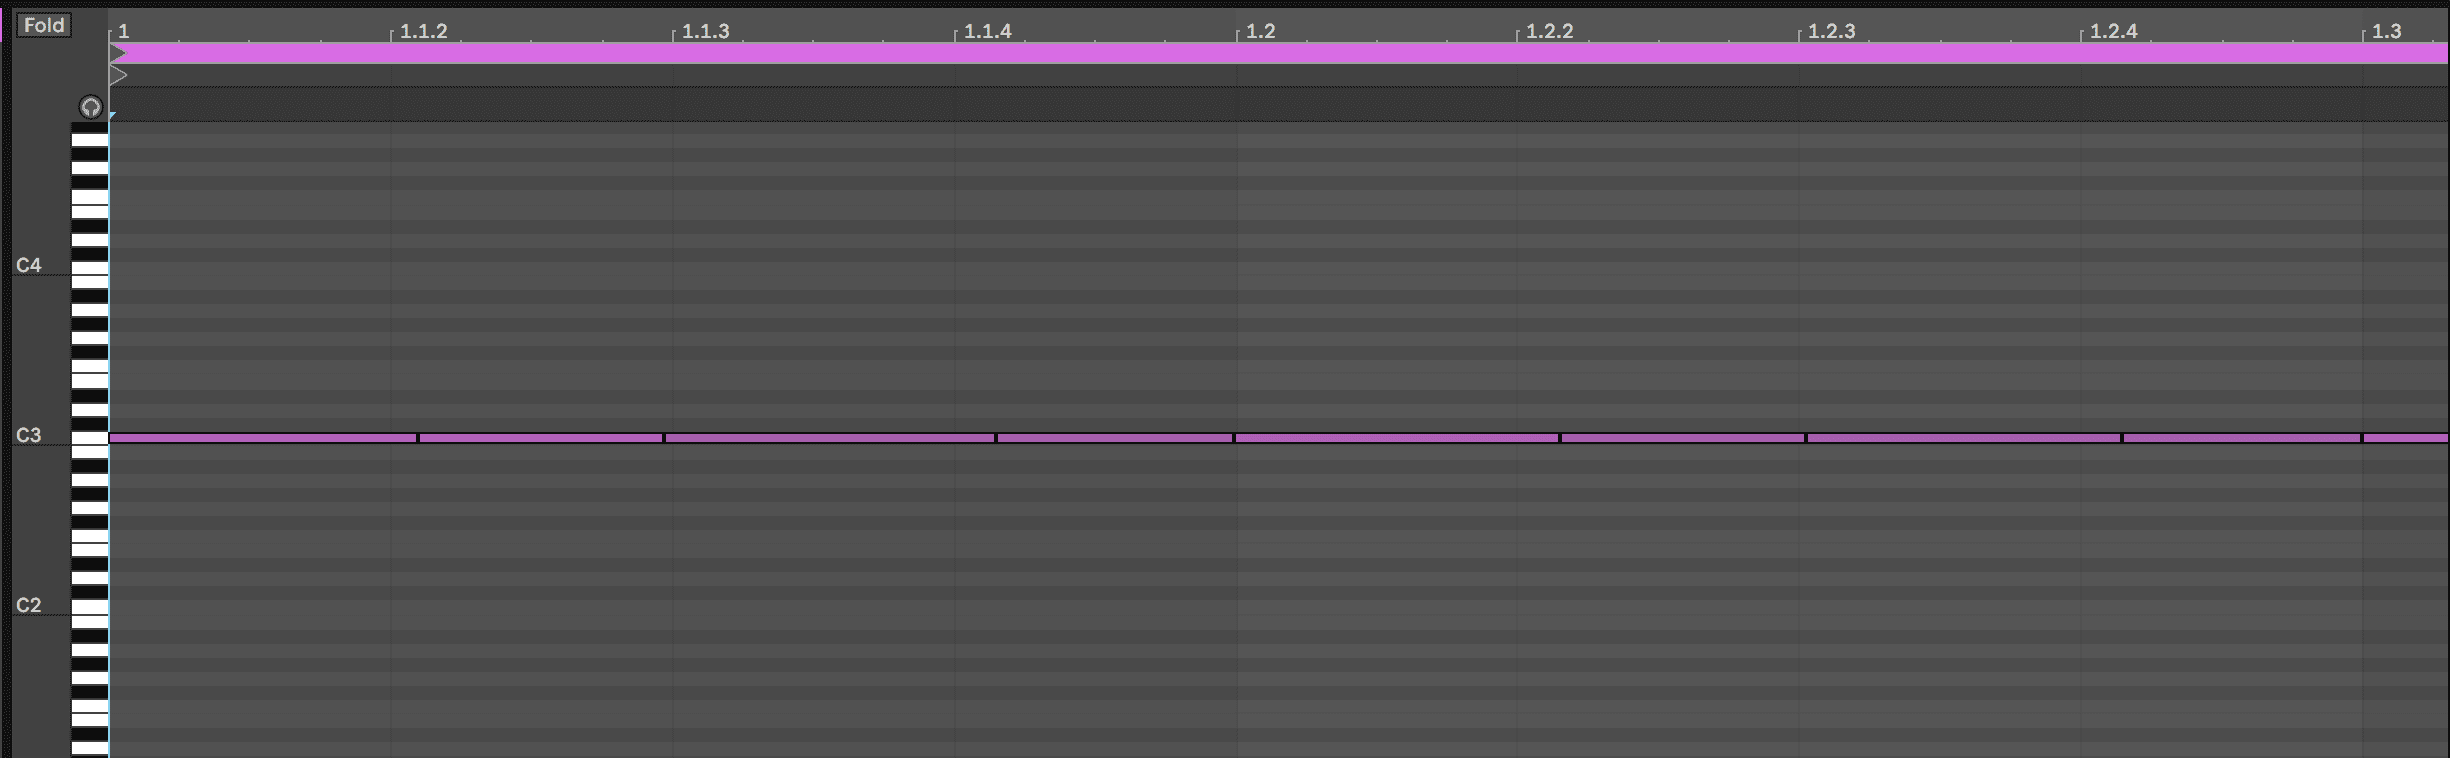
After adding one of Ableton’s swing templates from the Swing and Groove folder to a MIDI Clip, you can click Commit in the clip edit section under the Groove dropdown list so that the clip visually reflects the swing. The below pictures show our 8th-note hi-hat MIDI clip before and after clicking commit.

This example is extreme as 99 is the heaviest swing setting and we will be using much more subtle movements in the next steps.
Sixteenth-note swing is the same, but with 16th-notes. If you have a 16th-note hi-hat pattern and you drag one of the swing templates to its MIDI clip, every second hat will be delayed.
Here’s how a 16th-note hat pattern sounds with 55 level swing coming in on the second bar:
A majority of swing presets are designed for 8th and 16th notes and these are indicated in their titles. For example, Live’s Swing Folder’s 16th-note presets have titles like Swing 16-55.
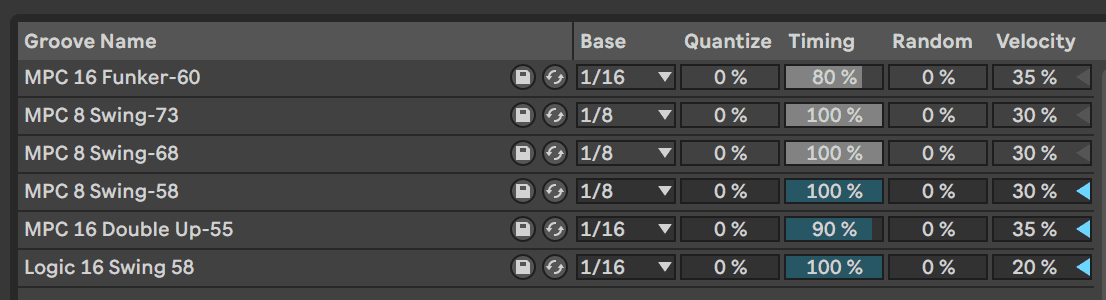
Two final points about swing templates. The first is that some of them also affect the timing and velocity of all notes in the pattern and not just every second 8th or 16th-note. This is why it is worth clicking commit to see how any template you import affects your MIDI.
The second point is that 16th-note swing presets do not really affect 8th-note patterns but 8th-note swing presets will affect 16th-note patterns by changing the timing of the third 16th-note in every bar.
That said, the rule of thumb is to use 16th-note swing on 16th note patterns and 8th-note swing on 8th-note patterns.
Step 1: The Beat
Our beat is comprised of a kick, a closed hi-hat, an open hi-hat, two claps and a bassline.
For the kick, use Live’s Kick 909 sample with the glue compressor to add some punch and sustain.


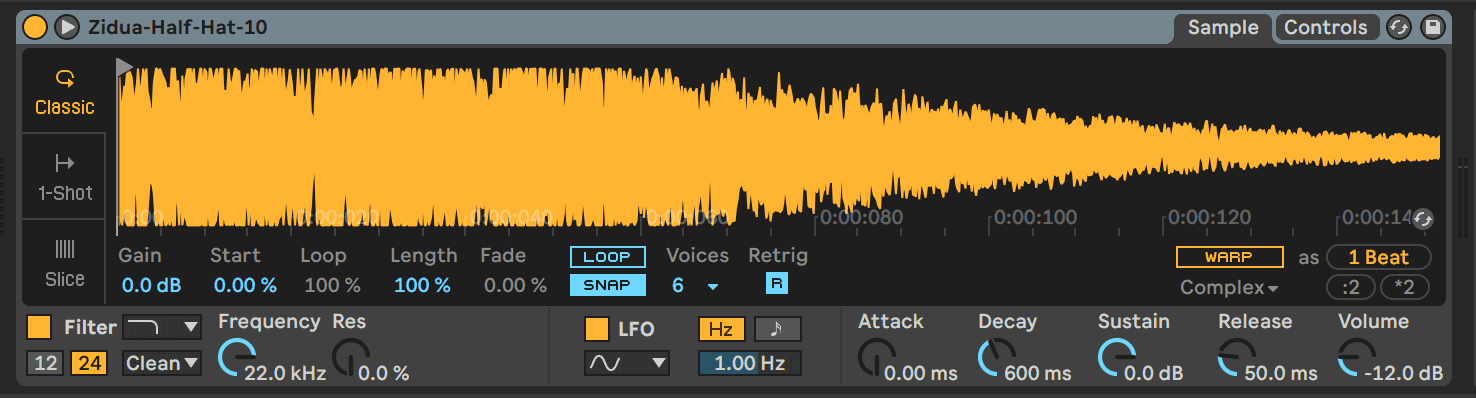
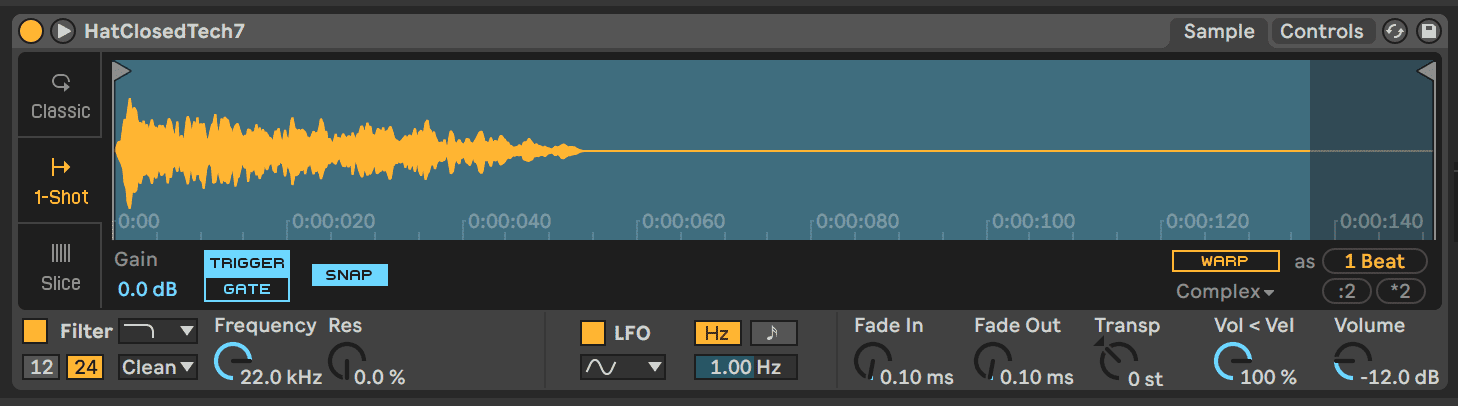
For the closed, we used the HatClosedTech7 sample from the Loopmasters Mixtape Live pack and for the open hat we used Zidua-Galf-Hat-10 from the Konkrete Breaks pack. The pattern is fairly straightforward with the closed hat playing every 16th note and the open hat playing every off-beat 8th note. Make sure to keep the hats on different channels to be able to process them separately.

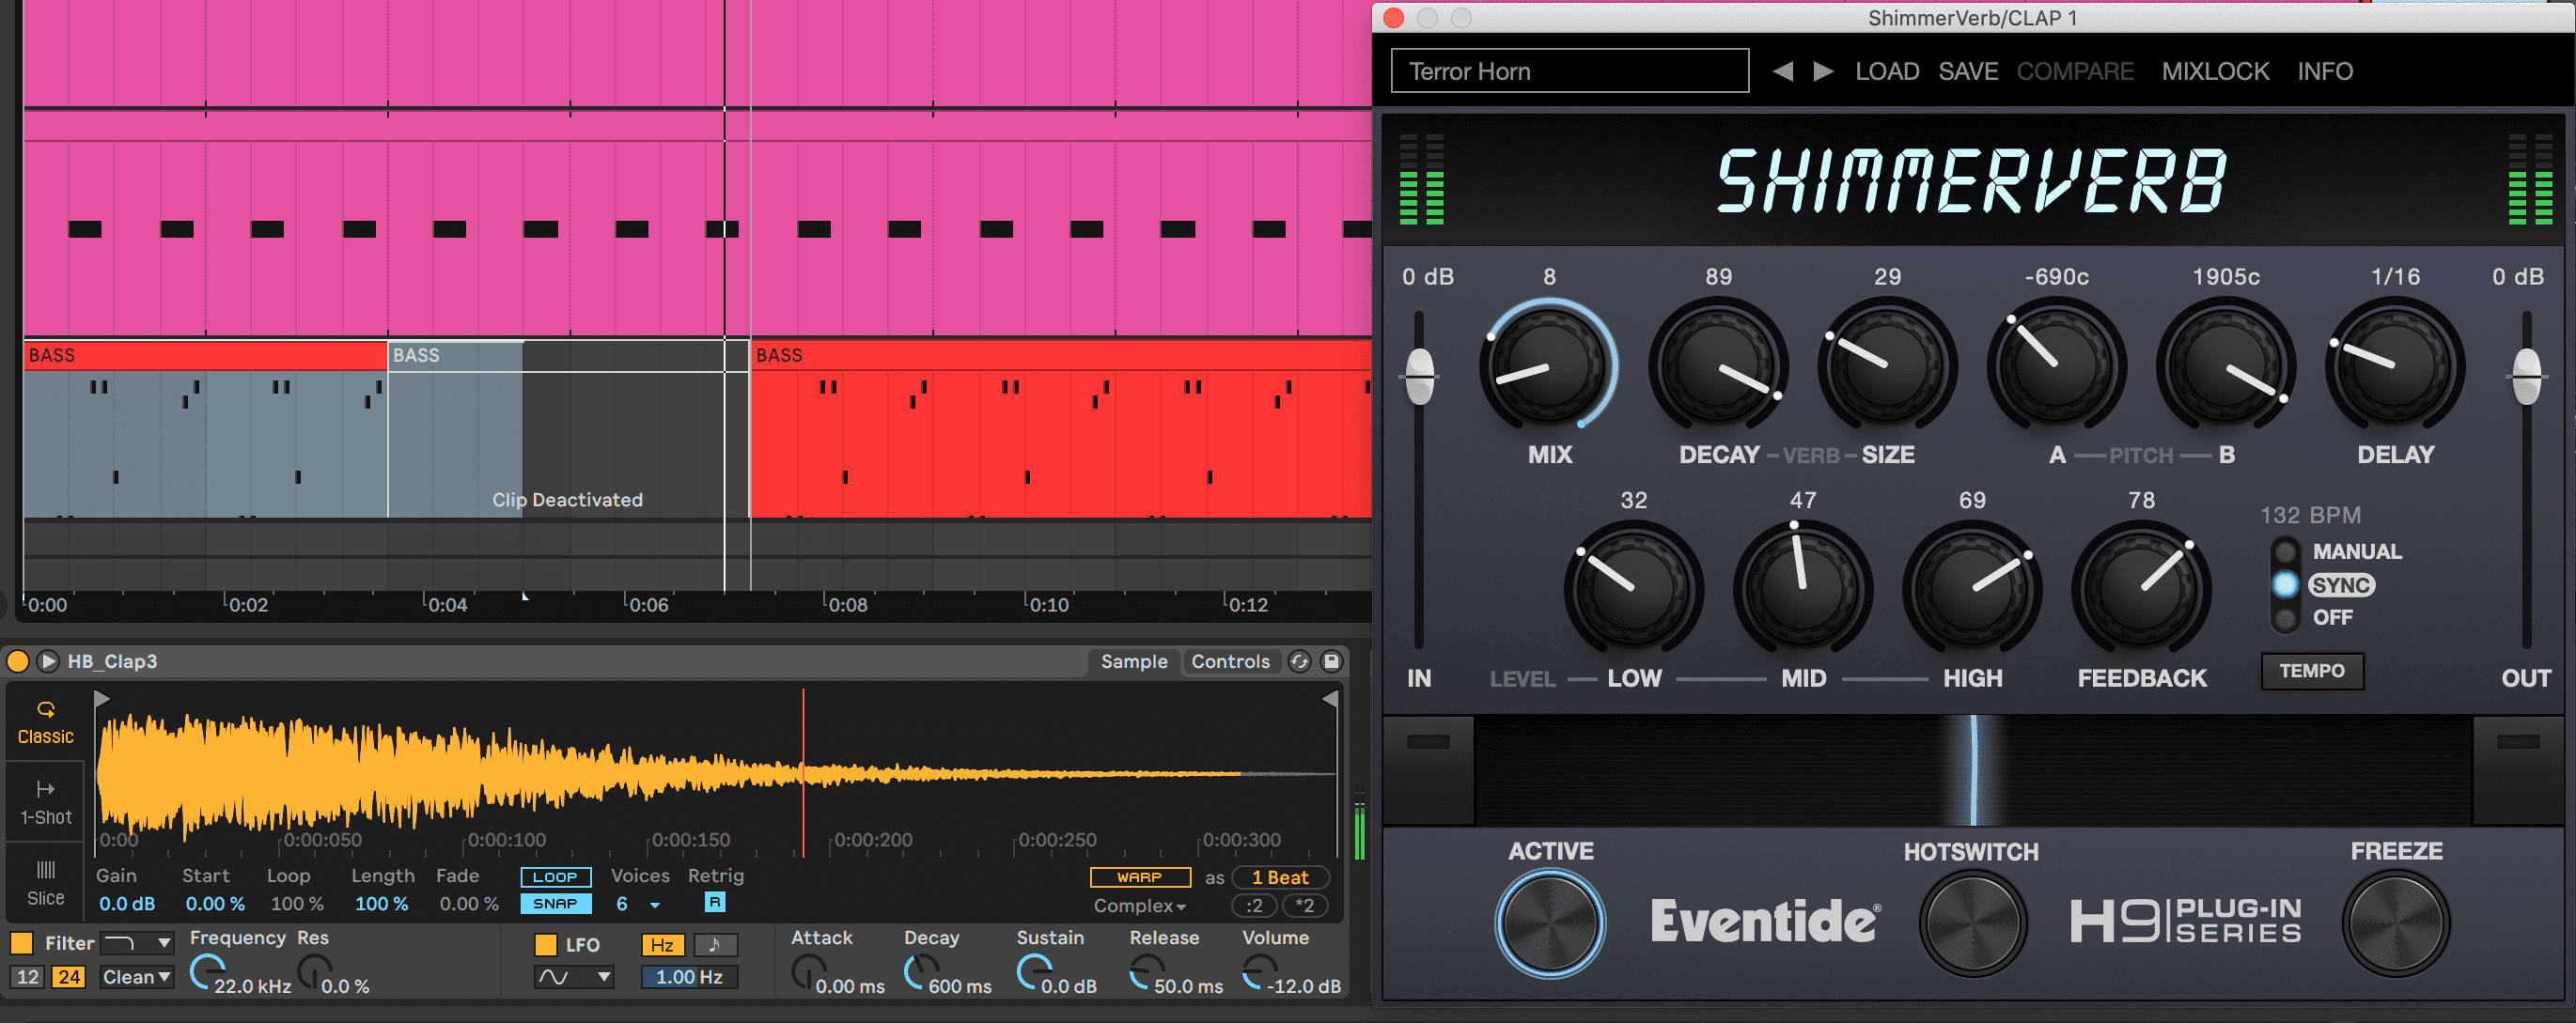
The two claps should also be on individual channels and playing a predictable pattern, hitting on the two and four of every bar. The first clap is the HB_Clap3 sample from Live’s Loopmasters Mixtape pack with Eventide’s Shimmerverb plug-in added for ambience and the second is courtesy of one of our favourite free Max For Live devices, Palmas. This is a great free tool for claps so be sure to download it and use it to follow along when we get to the clap step!

For the bass, program a one-bar loop with hits that emphasize off-beats. We used ROLI Equator2’s Classic Acid Bass preset. The next step is sidechaining the bass to the kick with a compressor and adding a slightly mixed-in reverb. We also added Waves Renaissance Bass to add some sub frequencies to the patch as its low end was slightly lacking.
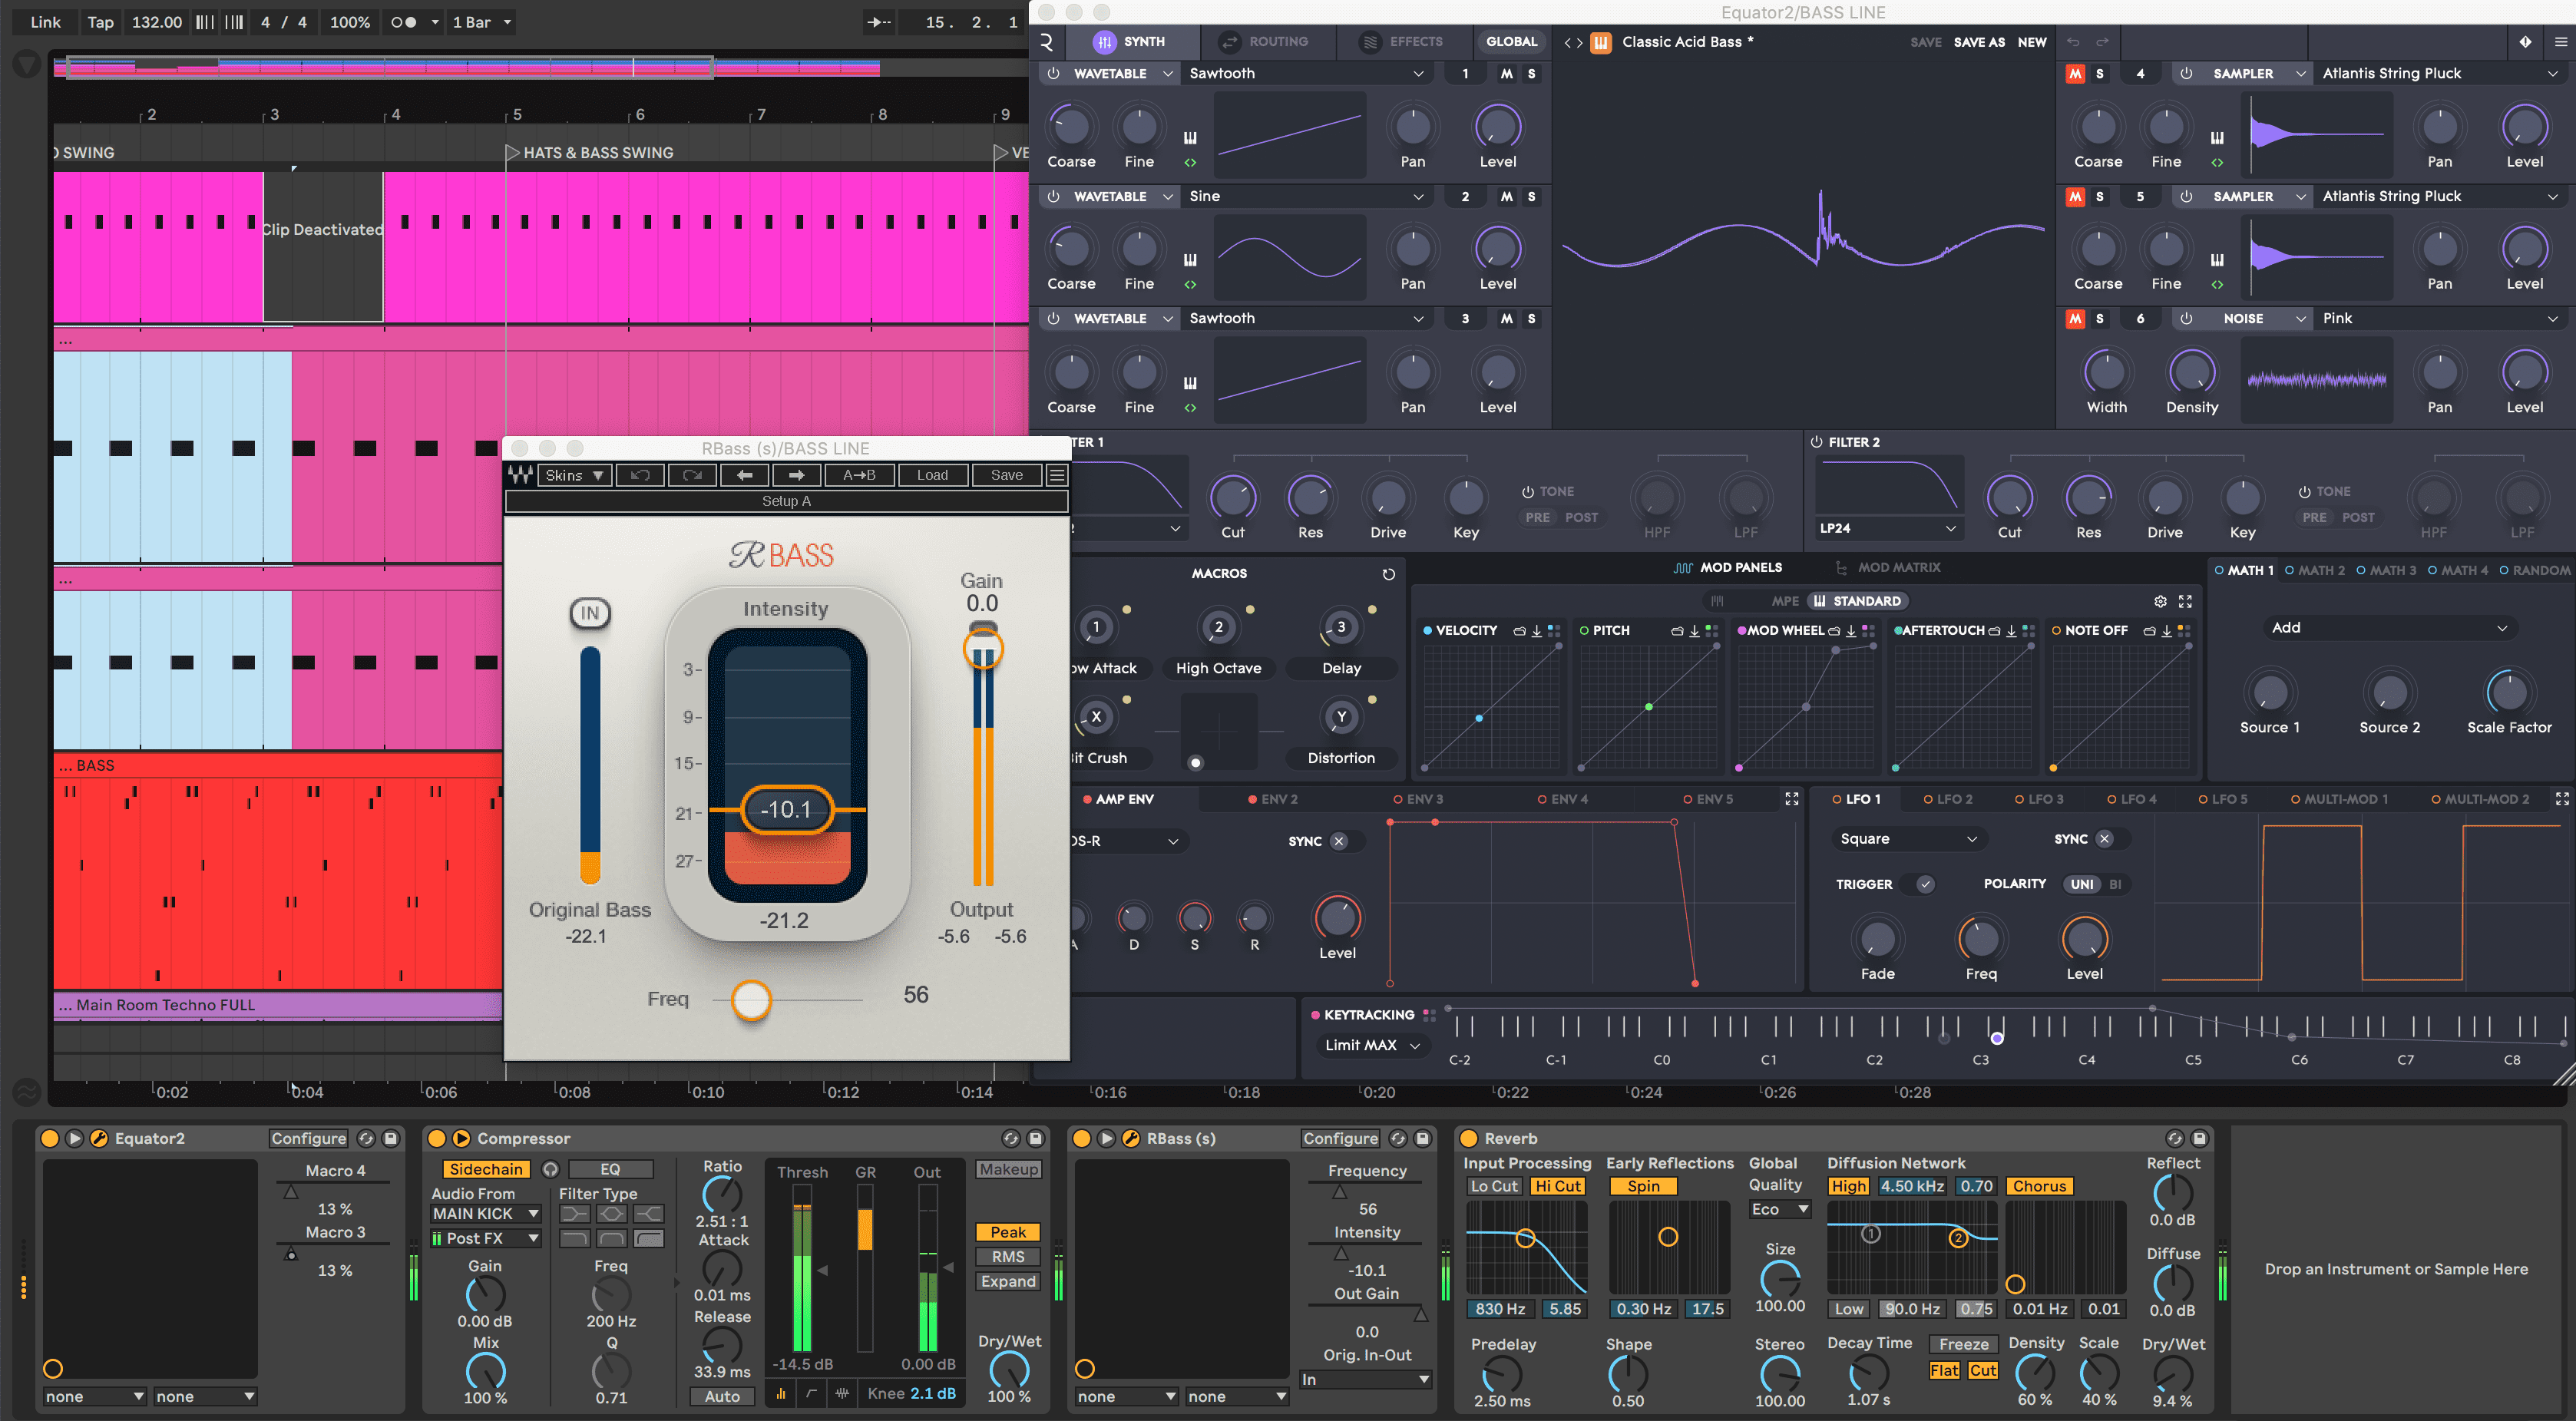
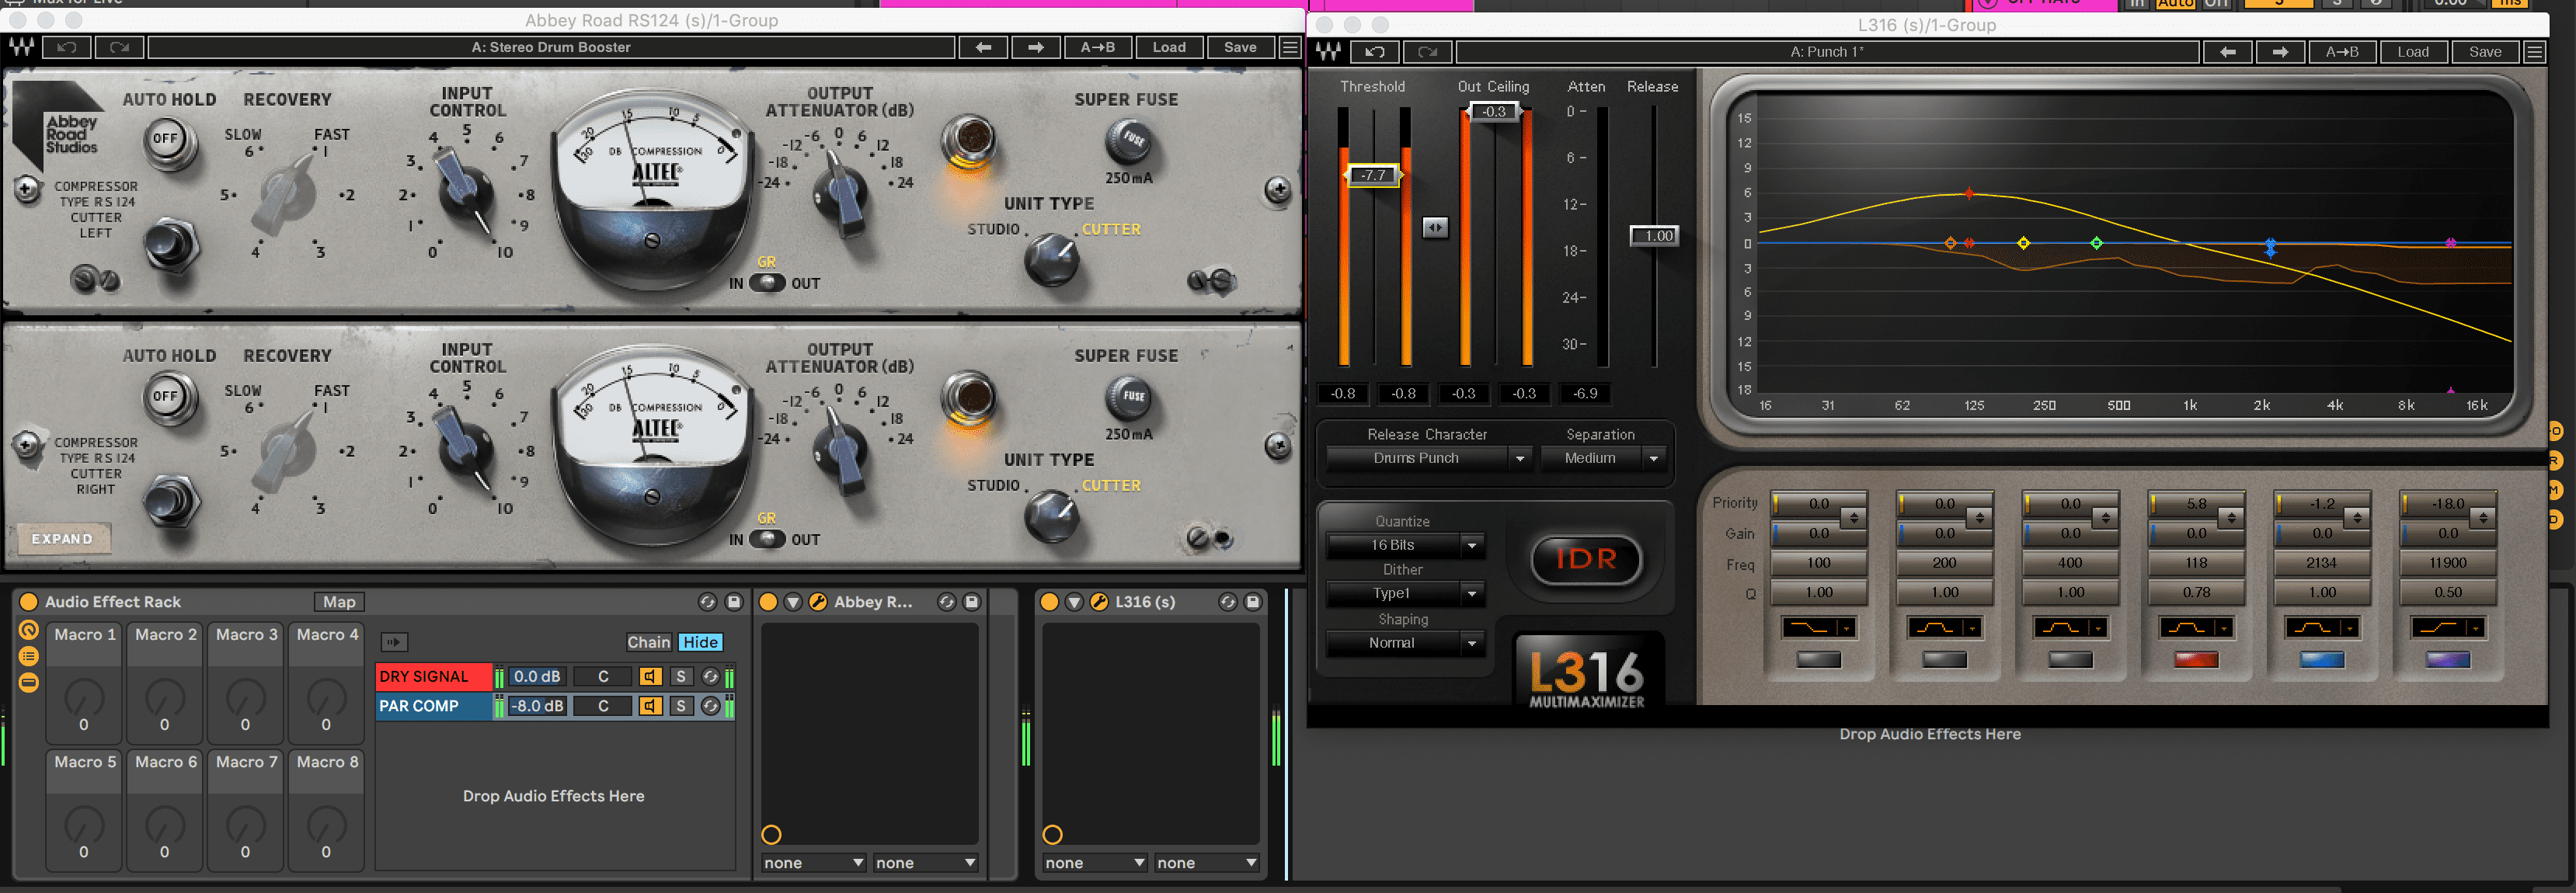
It is a good idea to add a compressor and limiter or both to the master channel to glue the parts together. We added some parallel compression via Waves’ new Abbey Road RS124 and Waves’ L3-16 limiter for some punch.
Step 2: Swing With Sidechained Sub Bass
The interaction between low-end elements like kick, sub and bass is crucial for groove but this is not only referring to mixing. Sometimes even a subtle sub with creative timing can add a lot of movement.
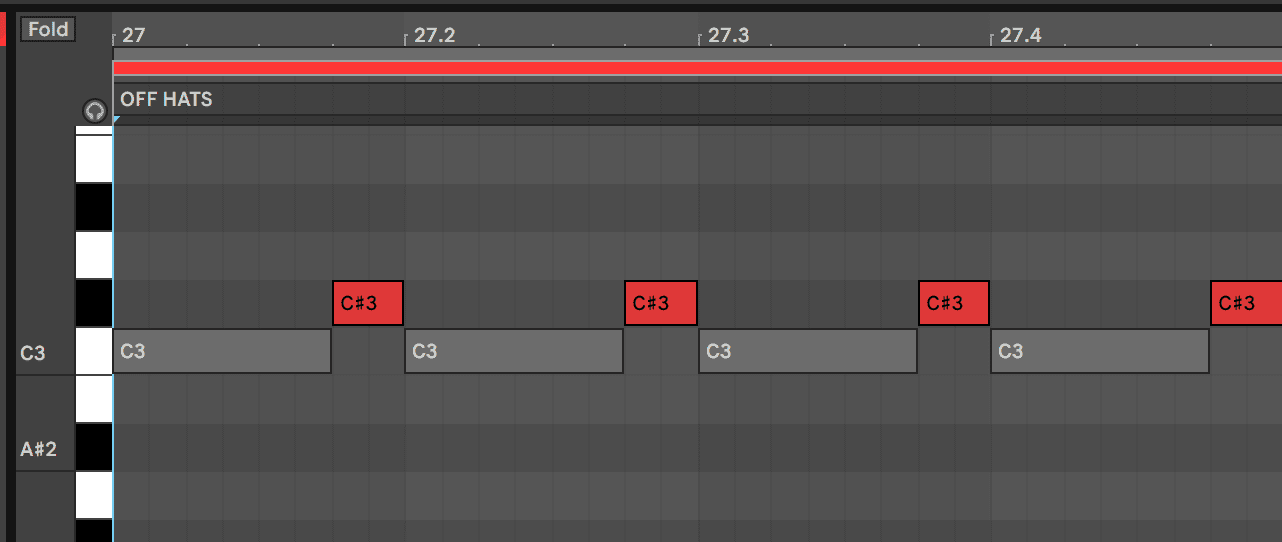
For the first swing technique we are going to use a roomy sub sample that has been programmed to emphasize the fourth 16th-note in every bar. You can get the sample from the project file and here’s how it sounds in solo:
The sample has been sidechained to the kick, which is why it is ducking on the one and increasing in volume until the downbeat of the next bar. We used Xfer’s LFOTool volume shaping plug-in to achieve this, but another method would be to simply automate the volume of the sub’s channel.
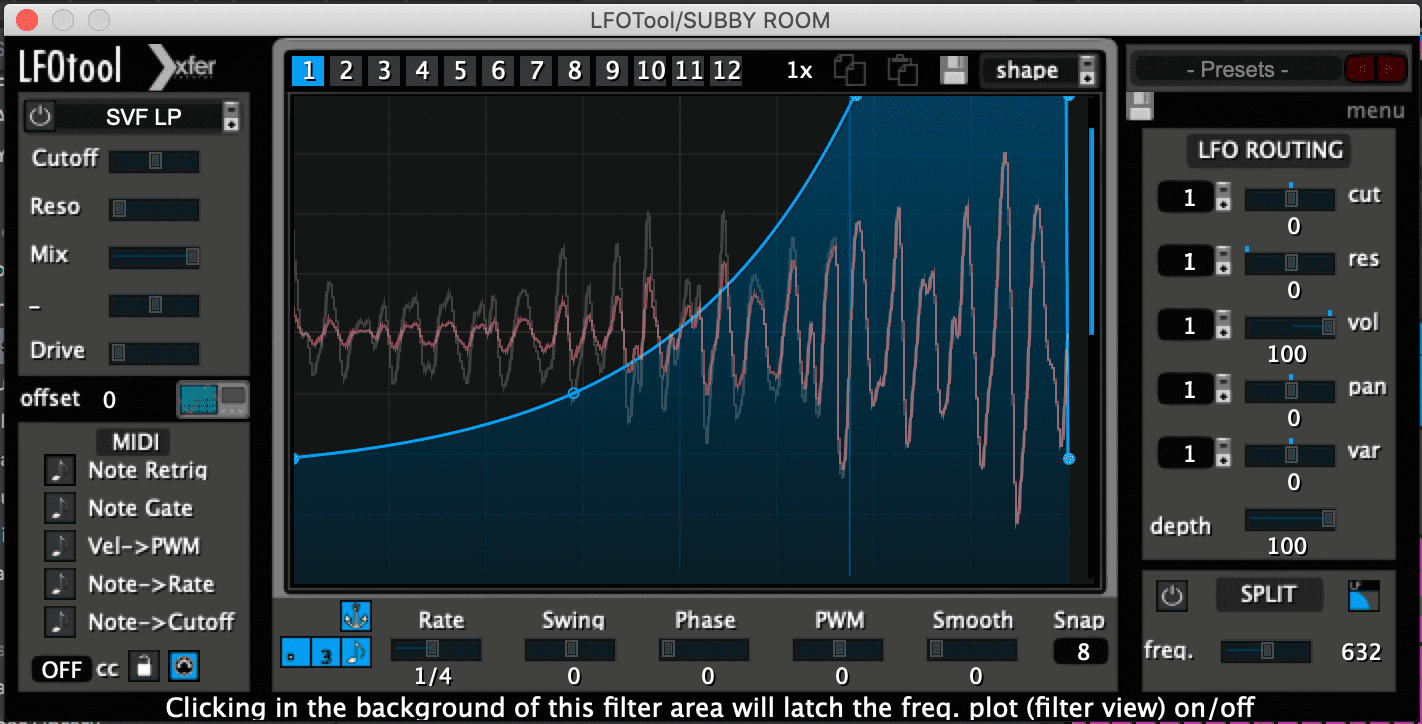
Make sure that the loudest point of the audio is right before the next downbeat and that the sub is not too loud in the mix.
Here’s how the sub sample sounds with the kick and off-beat hi-hat:
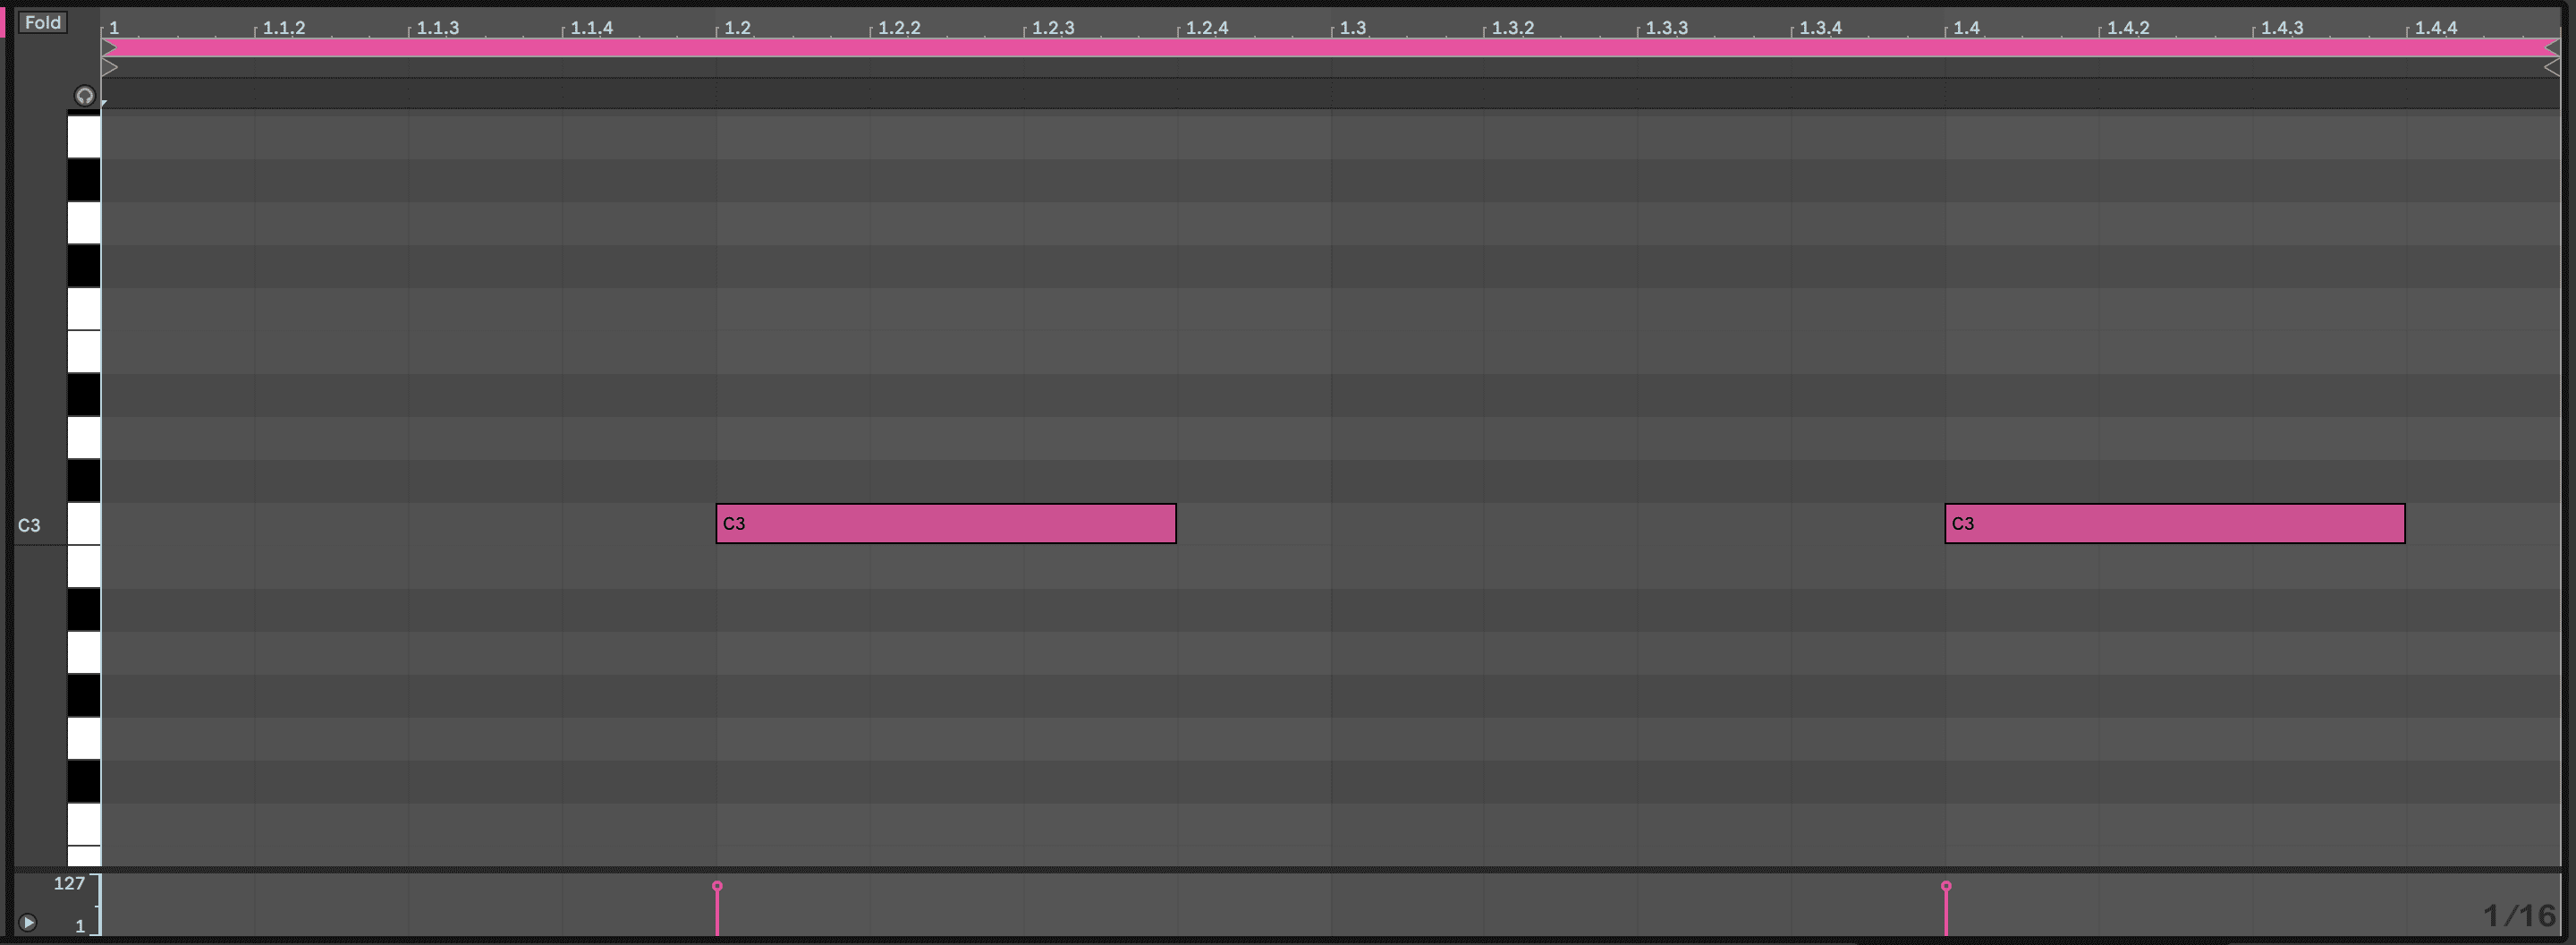
We are technically adding 16th-note swing with this one sub hit alone. This is because the sub’s loudest moment is a consecutive 16th note after the hi-hat and it is slightly off the grid in terms of timing. If we replaced the sub hit with a hi-hat, here’s how it could sound:
Very swung! Many producers talk about using sidechaining as a creative rhythmic tool and that definitely applies here.
Step 3: Swing Templates On Multiple Parts
It is common to make beats in Ableton with a Drum Rack but when you do this all of the parts are in one MIDI clip. This means that if you add a swing template to this MIDI clip it will affect all parts. This is why it is a good method to sometimes keep each part on its own channel to have complete control over individual swing.
Unique grooves start to appear when you combine parts with different swing and even swung parts with completely quantized elements like the 4/4 kick and off hi-hat.
Drag Live’s MPC 16 Double Up-55 onto the 16th-note hi-hat pattern and your bass pattern. This swing template affects the timing of all 16th-notes, not only the second consecutive notes. It also affects velocity so bring the velocity percentage to 0% in the Groove Pool.
Here’s how the hat and bass sound in solo two bars without the swing and then two bars with the swing.
We’re definitely starting to get some movement but the hat still sounds robotic.
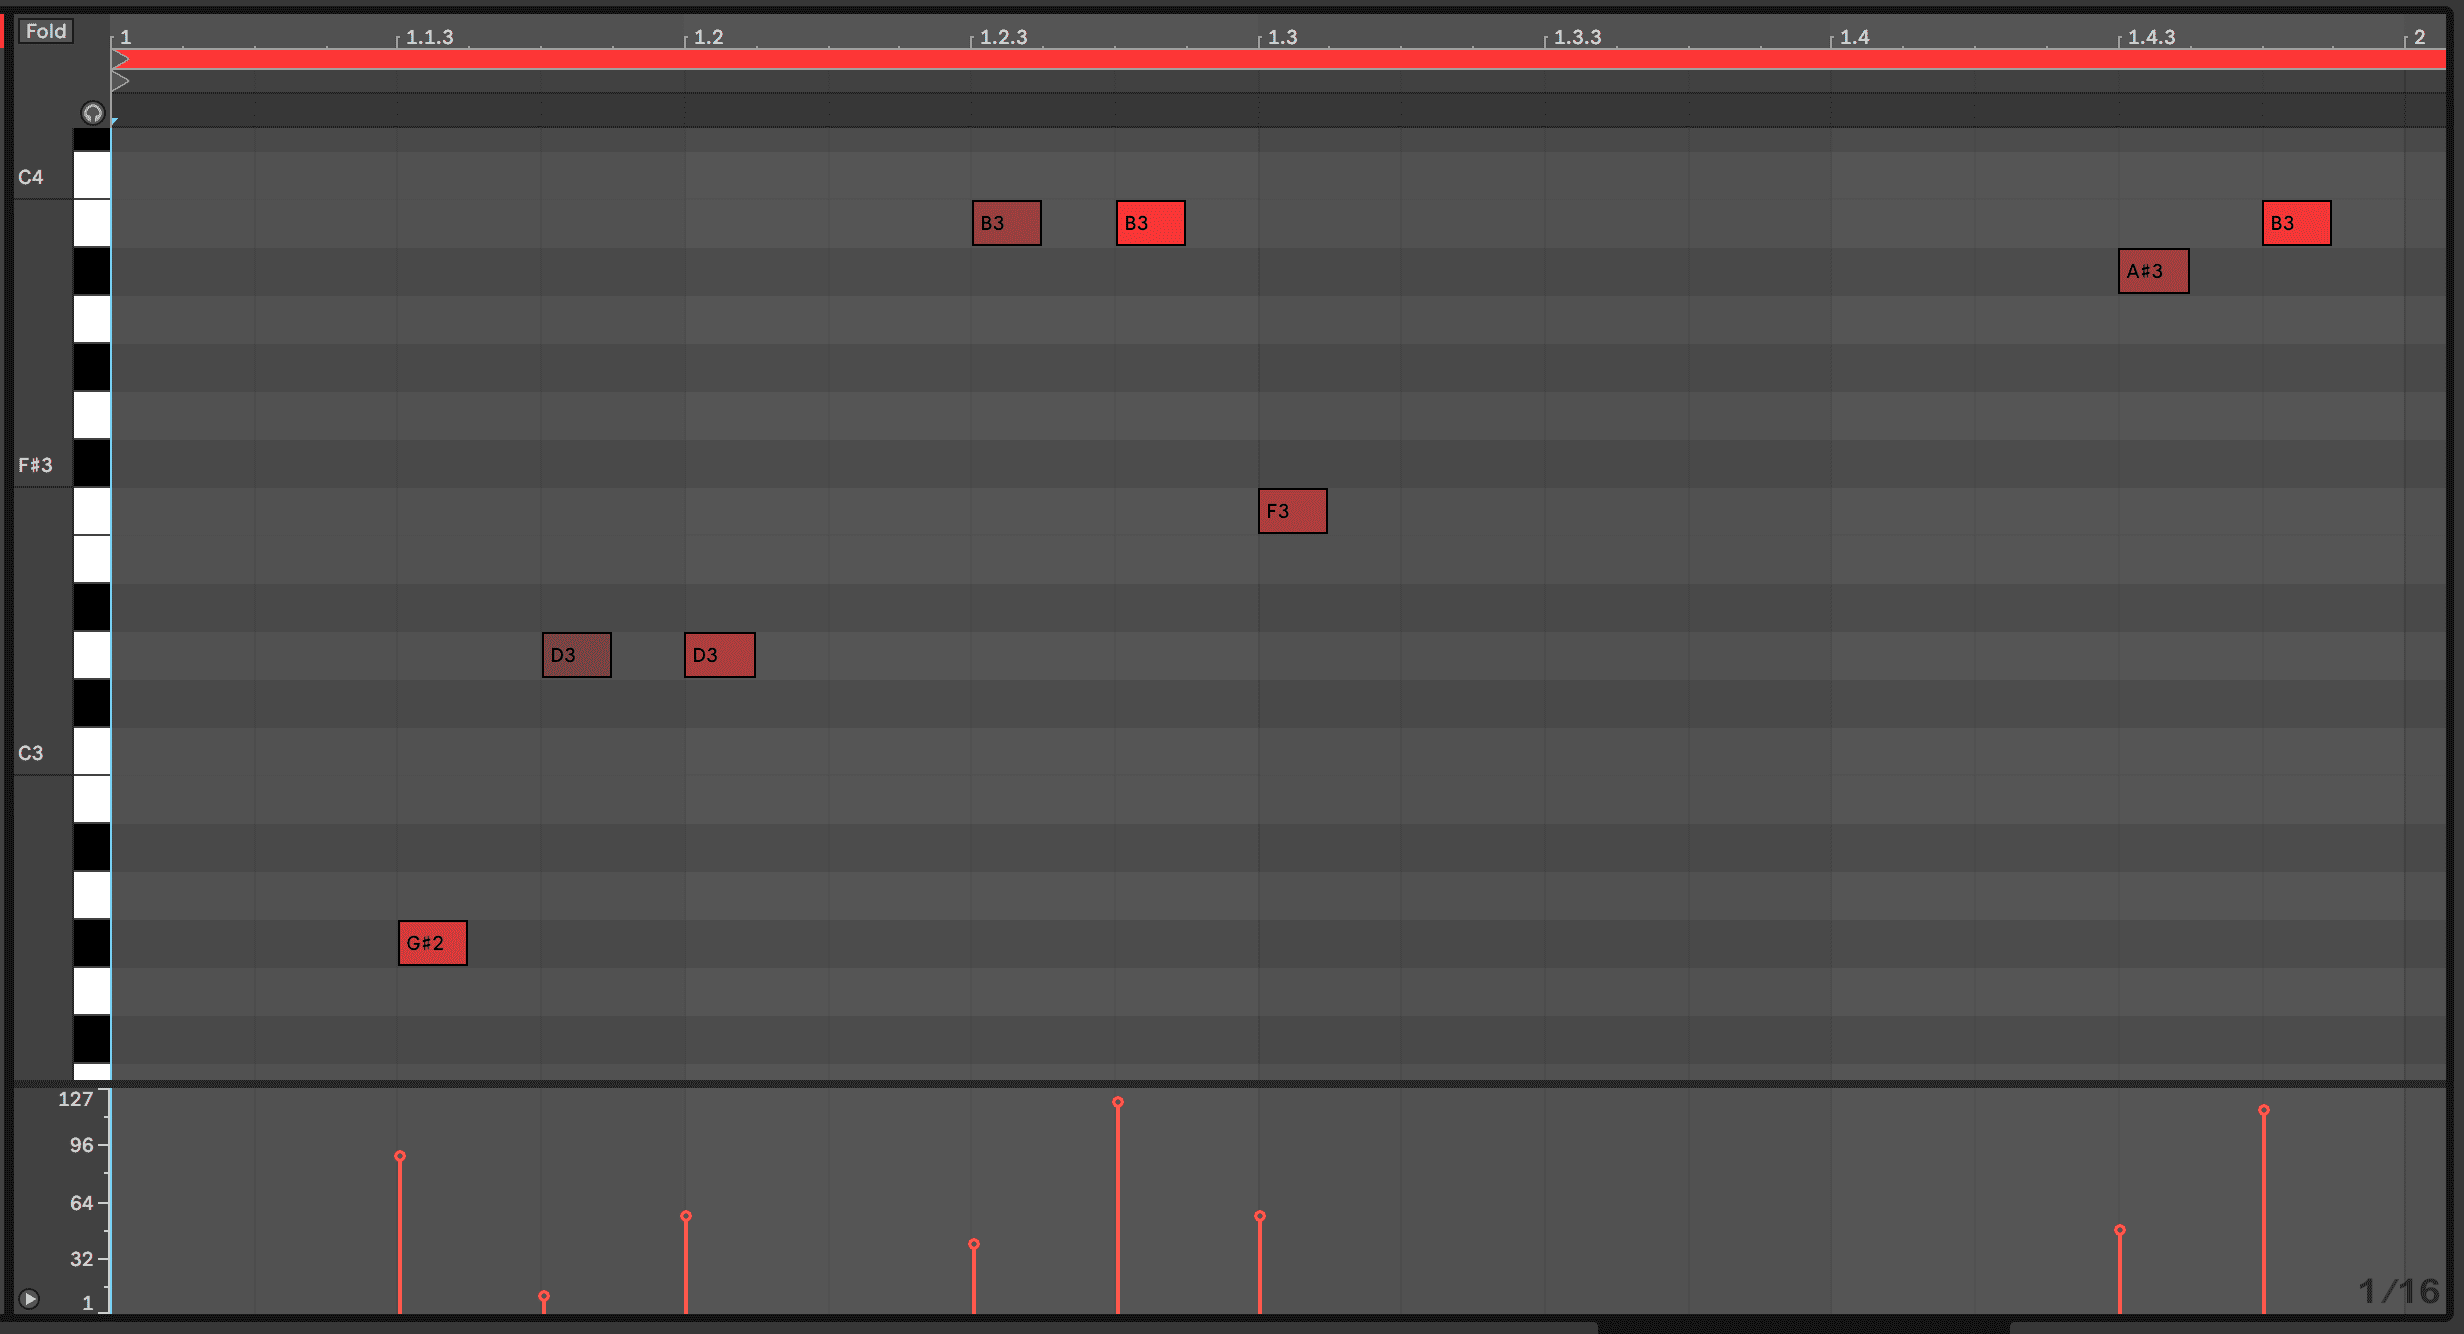
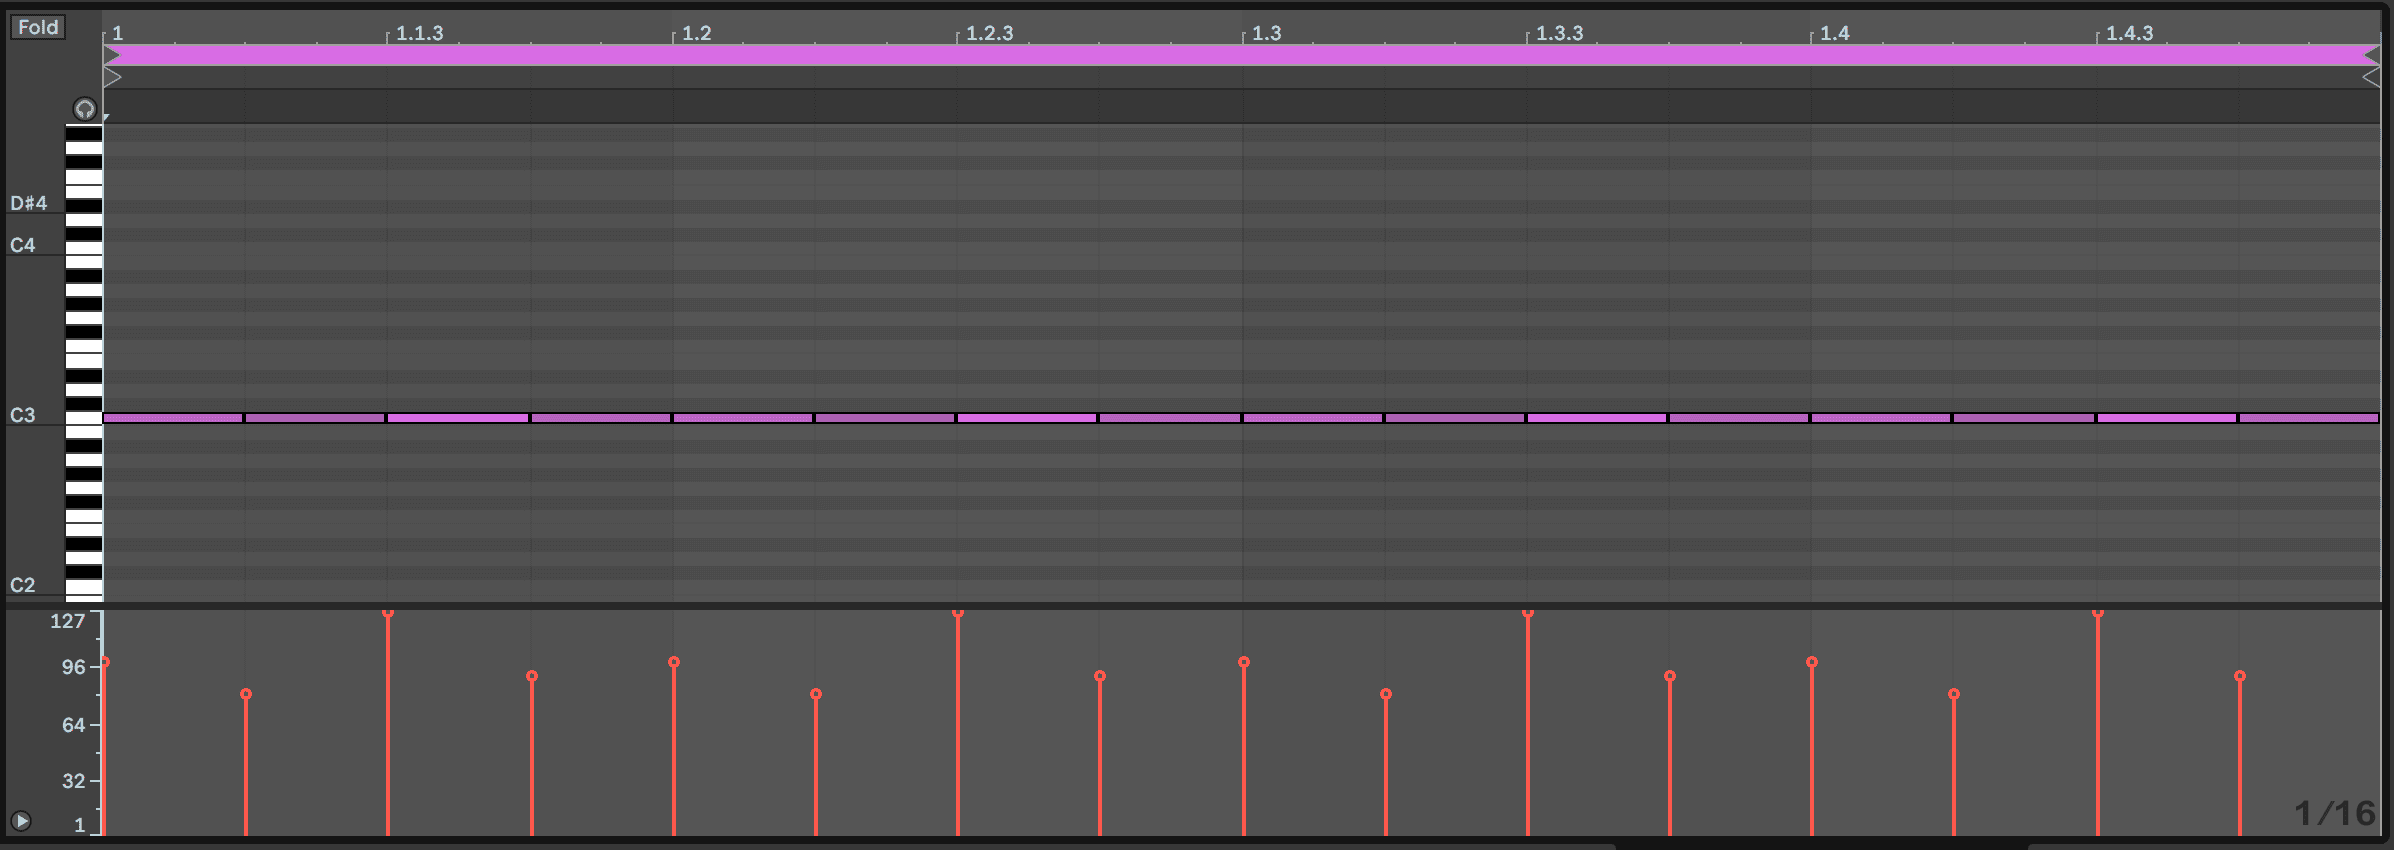
This brings us to one of the most important aspects of swing: velocity. Dynamic velocity can really bring patterns to life. To achieve this in this beat, turn the hi-hat’s Vol<Vel knob in Simpler to 100% – this makes the volume more sensitive to velocity expression – and change the velocity of the hats in their MIDI clip to build up and emphasize the third 16th-note of every bar.
Here’s how the hat sounds in solo one bar without velocity editing and one bar with it:
Here is our progress so far:
Step 4: Swing With Track Delay
There are more ways than one to make hits drag or rush for a swung feel. Track delay is one of the most practical tools for this, allowing you to pull a channel forward or backwards in time. The option to use it becomes available when you click the ‘D’ button in the bottom right corner of Live.
For the first clap set, the channel to -9ms. Since both clap patterns are perfectly quantized on the two and four of each bar, this means that it will now hit a bit earlier.
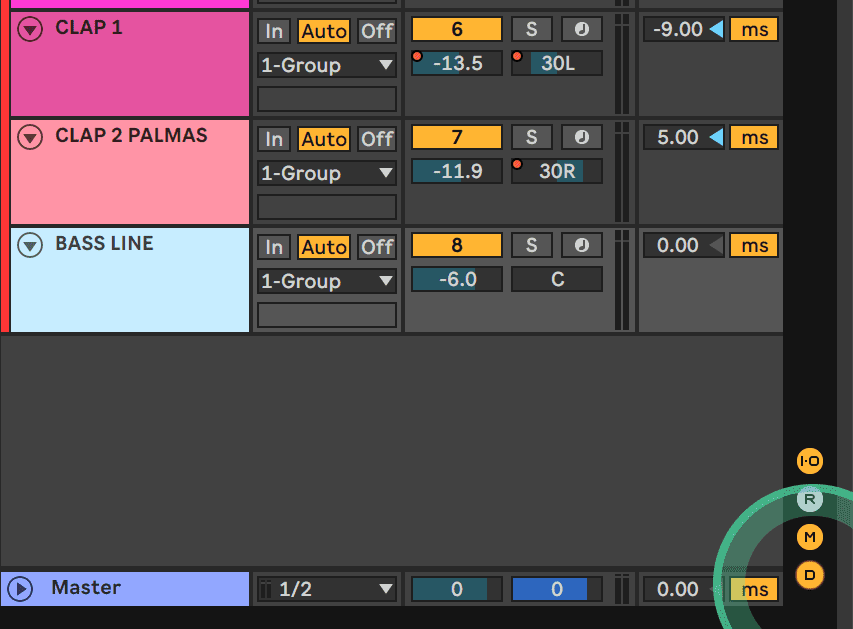
For the second clap with the Palmas M4L device, set the channel to 5ms so it comes a bit late. Palmas’ top left knob allows you to add additional claps that are all slightly delayed as well, emphasizing the dragging swing effect even further. You can also add more claps by increasing the number next to the hands on the left.
If you don’t have Max For Live, then all you would need to do is program one or two additional claps and have them be delayed by values slightly higher than 5ms.
Next, pan these claps away from each other so the dragging effect is felt more in the stereo field. We panned the first clap 30L and the Palmas clap 30R.
Here’s how the claps sound with only the kick:
And here is our progress so far:
Step 5: Swing With Effects
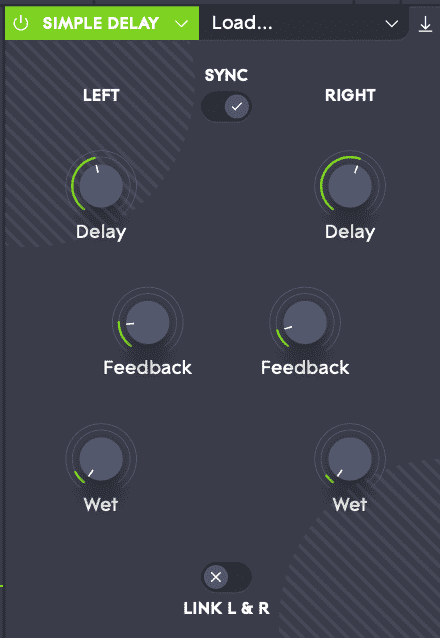
Delay is a good method to add more swung parts to a beat. The secret is to insert a delay plug-in on parts that are already swung so that the echoes it generates reflect the swing. We’re going to add Equator2’s internal simple delay effect to the swung bass patch and Live’s stock Delay to the first clap. Use the dry/wet knobs to control the volume of the swung delay.

Here’s the delayed clap in solo and then with the kick:
You can hear that the delay has added a quieter clap echo that essentially adds another loop to the beat.
Here’s the delayed bass in solo first two bars without delay and then two bars with it:
As mentioned in previous steps, adding stereo width to swung parts can further emphasize the rhythm. We’re going to try this with the 16th-note hi-hats.
Insert the Auto Pan audio effect on the closed hat’s Simpler and raise the amount to 80% or higher. Keep the rate quantized to 1/8 or 1/16 to make sure the panning catches each hit on time.

Here’s how the hat sounds for one bar without the auto pan and then one bar with the effect activated:
One final note about swing is that sometimes reducing the number of parts or making your beat less busy can also add more movement. To test this, we tried a version of the beat without the 16th-note hi-hats. The resulting movement was definitely different, highlighting other elements like the delay more.
Here is our final beat without the 16th-note hi hats:
And with the hats added back in:
Tutorials is sponsored by
Roland Cloud is your creative hub for Roland hardware and software. Access legendary recreations of Roland Classics, find new sounds for your favorite products, and download updates and companion apps to make music fast and easy.