u-he are makers of award-winning software synthesisers and effects including Diva, Repro-1, Zebra2, Hive, Bazille, Presswerk and Satin.
Visit U-he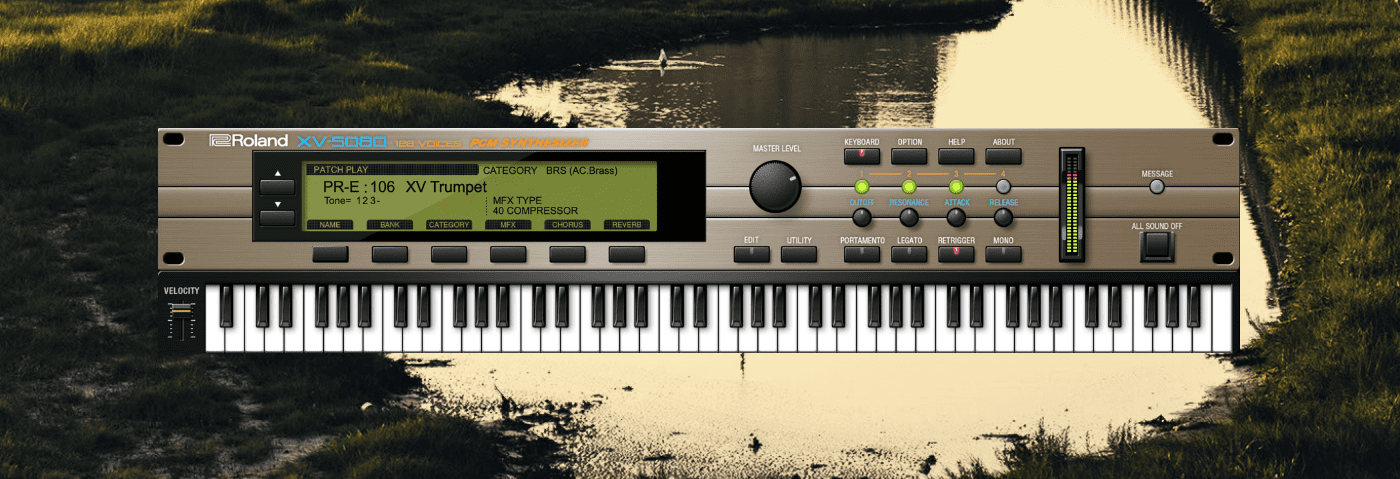
Technique » Synth Secrets »
Programming a ‘90s-Style Drum and Bass Lead With Roland’s XV-5080
This channel is sponsored by

Roland’s sample player modules were the secret weapons of the biggest drum and bass producers in the ‘90s. We use the XV-5080 plugin to craft a multi-layered synth lead.
Jungle, drum and bass, and trip-hop producers in the ‘90s made extensive use of samplers, as we all know. However, they also relied on sample player modules for additional sounds. Roland’s JV-1080 and JV-2080 were some of the biggest sellers of their day. They combined high-quality sampled sounds with a subtractive synthesis structure that allowed for more than just preset playing.
The company’s sample player modules reached their peak with the XV-5080 in 2001, a monster box with waves from the JV series plus more. The XV-5080 is currently available in Roland Cloud as well as in the Jupiter-X, Jupiter-Xm, and Juno-X synthesizers. Let’s use the Cloud version to build up a multi-layered synth lead for a drum and bass track.
Here’s the synth lead in a finished track:
N.B: We recommend following along with headphones or studio monitors as some of these results can be subtle. As ever, click any image to see a larger version.
A Quick Overview Of The Roland Cloud XV-5080
The XV-5080 is a sample player or ROMpler. It has a fairly complex synthesis structure with multiple levels. However, Roland tends to use a similar structure across many of its instruments so once you get the gist of one of them, you’re good to go for all of them.
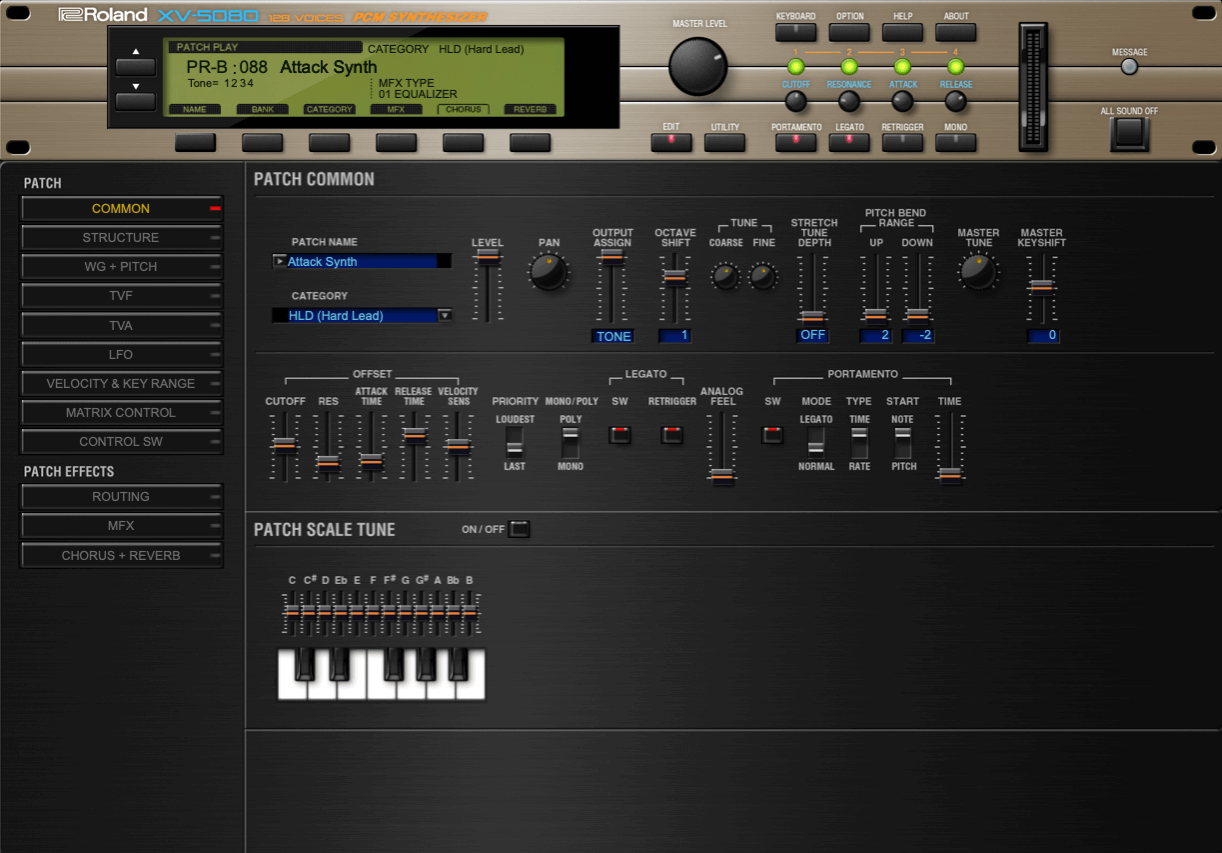
The name for the top level of the XV-5080 is a patch. This is what you search for in the preset list. Each patch can have up to four tones, or what Roland calls the “building blocks” of the patch. Each patch also has an MFX (or multi-effect), chorus and reverb. There’s also a cutoff and basic envelope for the patch.
Each tone has a Wave Generator (sample player oscillator), a Time Variant Filter (TVF) with envelope, a Time Variant Amplifier (TVA) with envelope, a modulation section and an LFO. Click the Edit button on the front panel to get to the additional controls.
There’s quite a bit more, but that should be enough to get us started.
Step 1: Setup
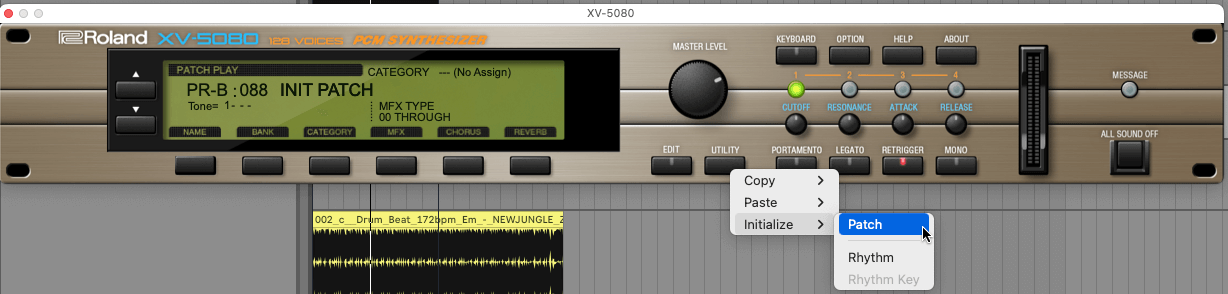
We start by creating a new MIDI track in our DAW. We’re using Ableton Live but any DAW will work. We program in a melody. We’re actually using chords with Live’s Arpeggiator to generate the individual notes, but you should go with whatever is appropriate for your track. Finally, we click the Utility button and select Initialize from the dropdown menu to create a starting patch with a basic piano sound.
Here’s what that sounds like:
Step 2: Wave Generator
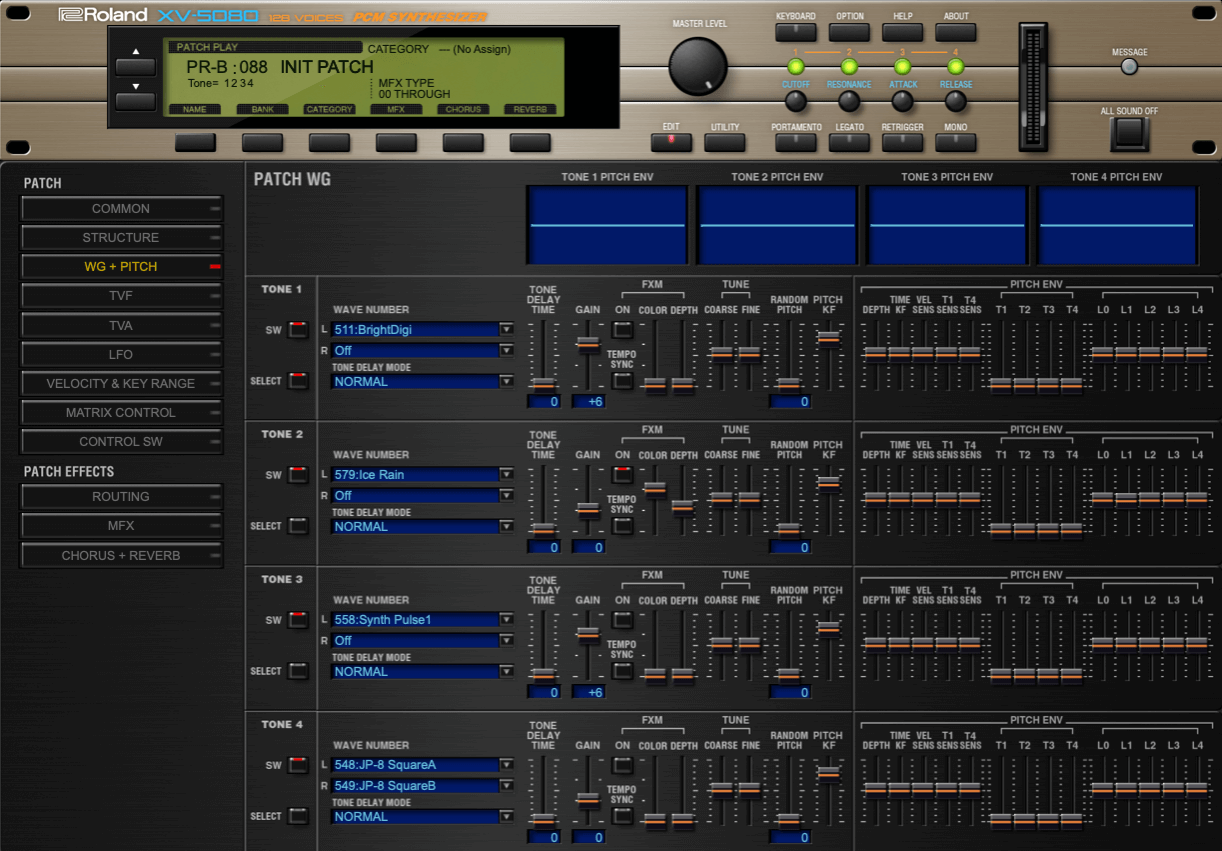
Let’s tackle the wave generator section next. We can set up all four tones on the same page by hitting the Edit button and then selecting WG + Pitch on the left side.
Let’s do Tone 1 first. The SW button turns on the tone. In the Wave Number section, we can see that there are left and right slots for waves. We can either use one mono wave in the L slot, a stereo wave across both, or two different mono waves panned hard left and right. For the first wave, let’s use just a mono wave. We choose number 511, BrightDigi. It’s got a nice plucky feel with a sharp attack that should cut through our mix. We bring up the Gain to +6 as we want it to be the stand-out tone.
Let’s bring in some texture next. For Tone 2, we choose 579 Ice Rain, turn on the frequency modulation section (FXM) and bring up Color and Depth. That’s added some grain. For Tone 3, we go with 558 Synth Pulse 1 and raise the Gain to +6. It has a similar vibe to Tone 1. Finally, let’s use two different waves panned wide to fill out our sound. For Tone 4, we go with 548 JP-8 SquareA on the left and 549 JP-8 SquareB on the right.
For the final step, we flatten all the pitch envelopes as seen in the image below.
Here’s the sound with the WG fully loaded:
Step 3: TVF
It’s all very bright, so let’s set the filter next.
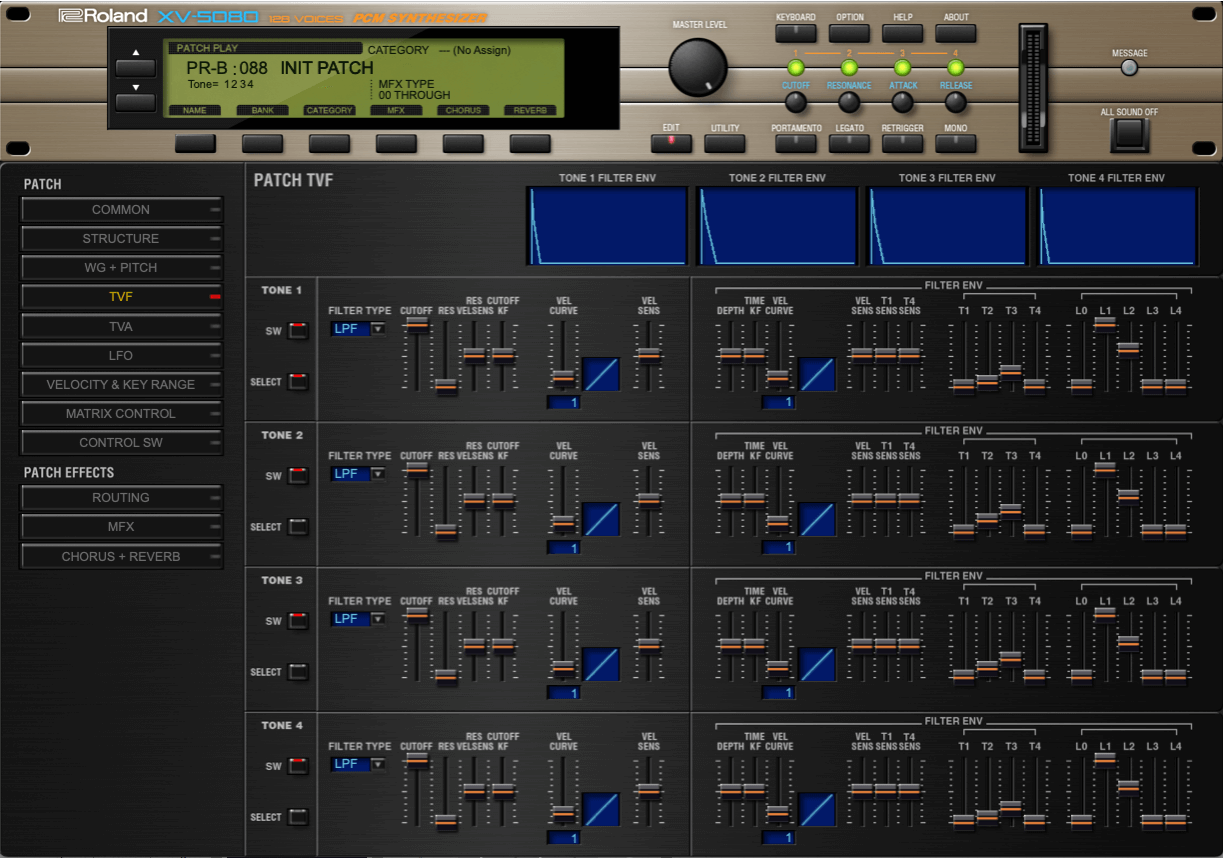
We can apply similar settings to all four tones, with lowpass filters across the board, a medium amount of cutoff, a touch of resonance, and a small bump in the Cutoff KF for extra brightness in the higher notes.
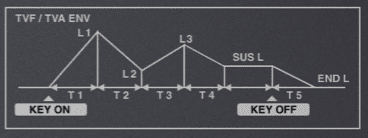
Roland’s digital synths, from the D-50 on, have a TVF (Time Variant Filter). This means that they have an envelope that is a little more involved than the usual ADSR, with time and level amounts. We can set them the same across all four tones. We want short filter settings to match the plucky style of the sound. See the image below for how to do this.
Now with filter set:
Step 4: TVA
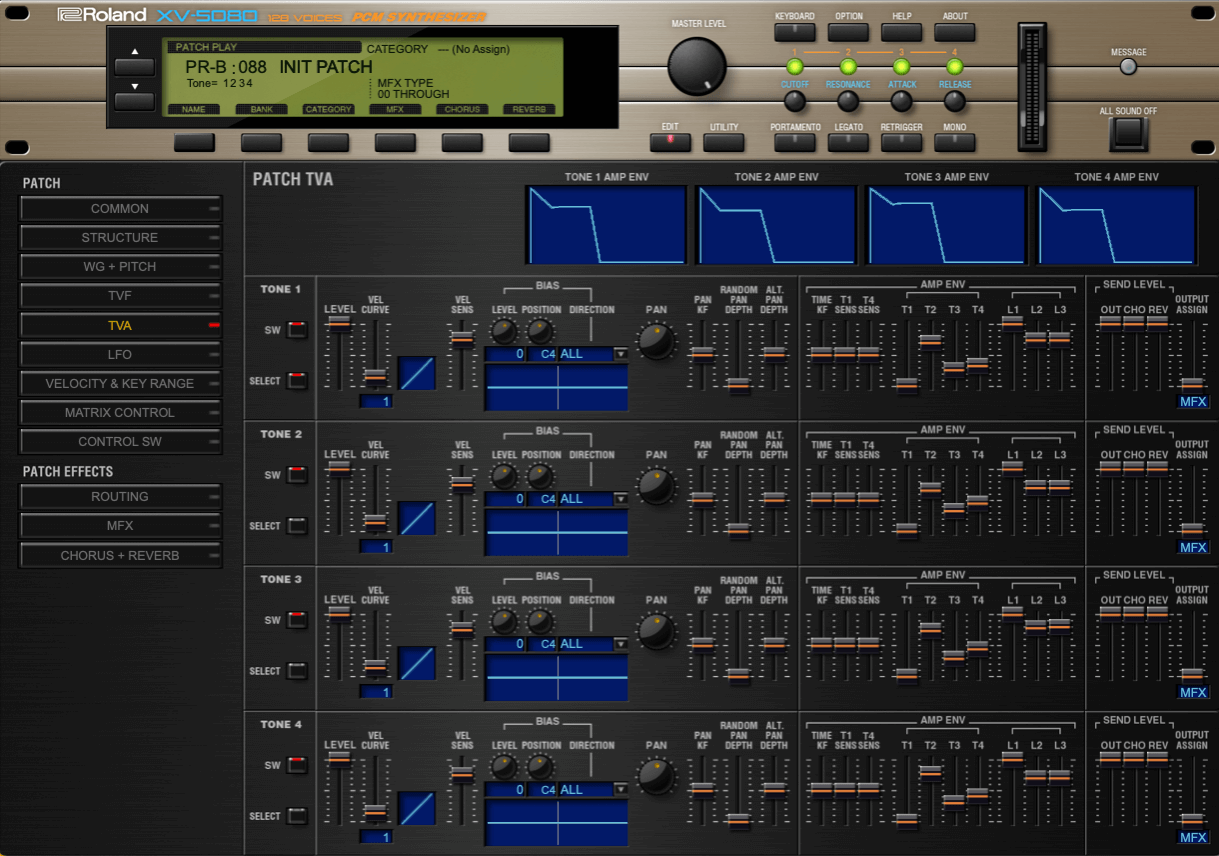
The Time Variant Amplifier is our next stop. It has a similarly complex envelope that will let us dial in the volume shape of our tones. Again, we want the same envelope parameters across all the tones.
Set T1 to the lowest setting, T2 to around three-fourths up, T3 to around 34 and T4 to 43. Leave L1 where it is and bring down L2 and L3 to about 95. Do the same for all four envelopes.
Finally, under the Send Level section, bring the Chorus and Reverb sliders up so we can hear them later.
With TVA on board:
Step 5: MFX
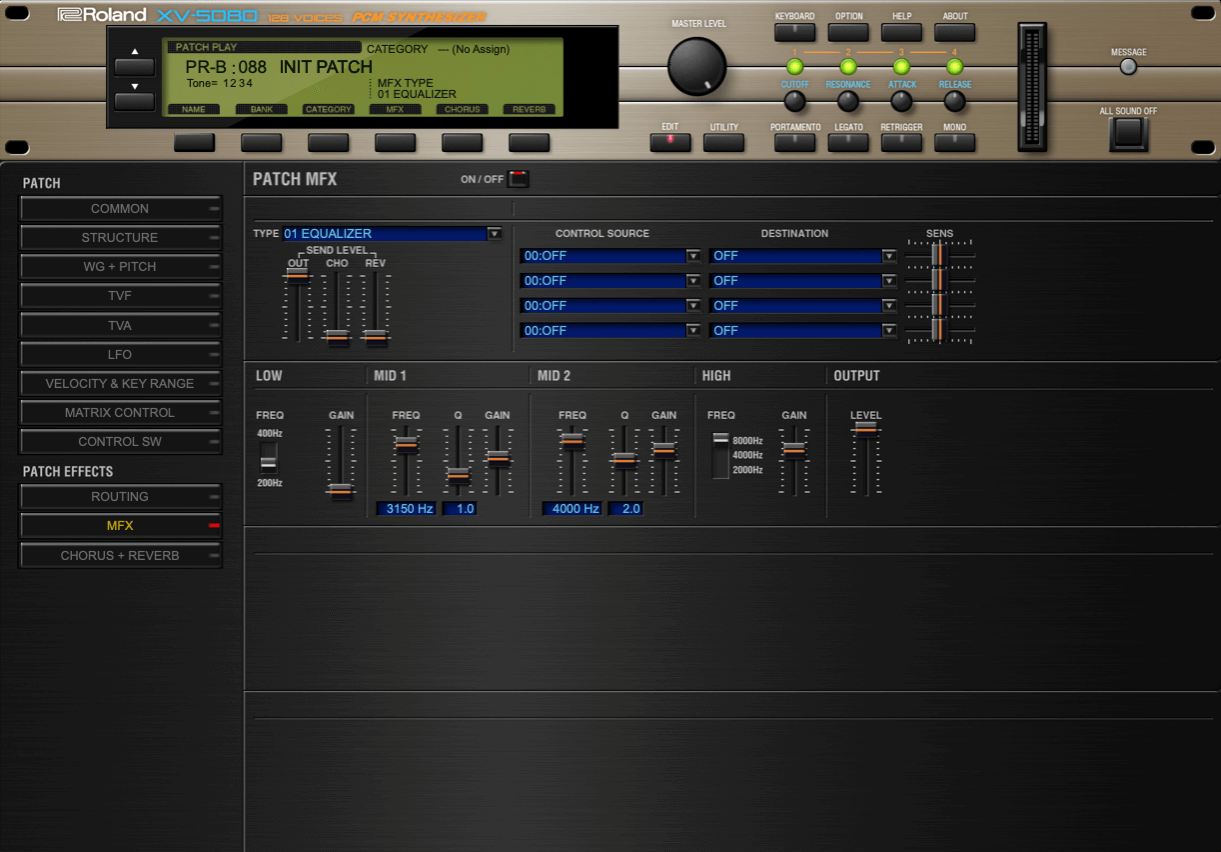
We’re getting there slowly but surely. Next, let’s use an equalizer in the MFX section to shape the sound.
Under Patch Effects on the left side, select MFX. On the Patch MFX page, choose 01 Equalizer from the dropdown menu. This gives us a four-band EQ to work with. We want to make sure there are no low frequencies muddying up the bottom end, so we set the switch to 200Hz and bring the Gain all the way down to -15dB. Next, for Mid 1, we go with a frequency of 3150Hz, a Q of 1.0, and give it a tiny boost of +1dB. For Mid 2, we choose 4000Hz, a Q or 2.0, and a +5dB bump. Finally, we select 8000Hz in the High section and bring up the gain +5dB.
Top Tip: Make sure to make EQ adjustments while listening to the whole mix. You want your sound to work together with all of the other elements in the song, after all.
With EQ adjustments:
Step 6: Reverb and Chorus
Let’s add reverb next. We can also use the chorus to soften the reverb.
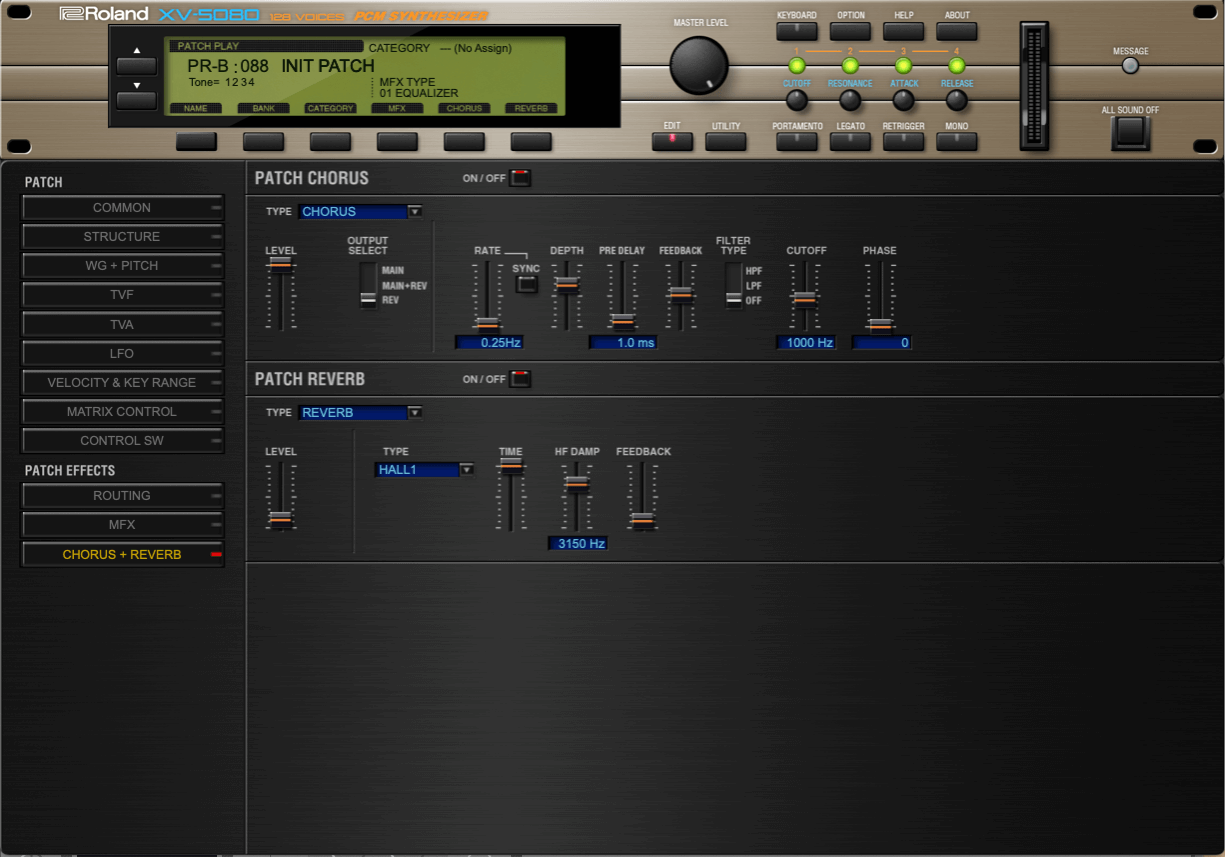
We hit the Chorus + Reverb button on the left to enter the Reverb page. Let’s set up the reverb first. Under Patch Reverb, we go with Type: Reverb, and bring up the level just a little. We don’t want to swamp it. The Hall 1 type works well with this sound. We bring up the Time all the way, dampen the HF to around 3150Hz to keep the reverb from sounding too brittle and add a little Feedback for flavour.
Up top in Patch Chorus, we choose Type: Chorus and move the Output Select to Rev. Now the chorus will only affect the reverb. We go with a slow rate (0.25Hz is enough to add a little movement), a Depth of 85, a Pre Delay of 1.0ms to let the transients through, and a medium setting for the Feedback.
With reverb:
Step 7: Main Panel Adjustments
We’re almost finished. For the final settings, let’s close the Edit section and turn our attention to the main panel.
There are a number of global parameters here that we can use to fine-tune the sound. We raise the Cutoff just a touch but bring the Resonance down to about 10 o’clock. We lower Attack all the way to make sure it’s sharp and plucky, and play with release to taste. Just under halfway sounds good to use. For the final touch, we smash the Portamento button for a lively, IDM-style feel.
The final sound:

Here’s the sound in the context of a track with additional production, some more sounds from XV-5080 modules, and drum loops from Splice’s New Jungle pack:
While you're here, you may enjoy...

The Secrets of Dance Music Production
The world-leading book on dance music production. Comes with samples too.

Replicants – Elektron Analog Rytm Sample Pack
Electro sounds for the Elektron Analog Rytm. Free your spirit.


Synth Secrets is sponsored by
u-he are makers of award-winning software synthesisers and effects including Diva, Repro-1, Zebra2, Hive, Bazille, Presswerk and Satin.
Download the demos and try them for yourself at www.u-he.com