
We don our lab coats and do some experiments with two IK Multimedia UNO Synth Pros, using internal feedback to generate dirty transition effects.
Sometimes it can feel like there are a lot of rules in music production. Don’t pan bass. Reverb after delay. Remove all resonances and peaks from audio signals. Sometimes it can feel good to just throw the rule book out of the window and get a little crazy with experimentation. That’s just what we’re doing today.
We have two UNO Synth Pro units here on loan from IK Multimedia. Why not run one into the other? And while we’re at it, what would that sound like with an internal feedback loop? And finally, can we use the resulting audio to make transitions and risers? We’re going to take an UNO Synth Pro desktop, create a feedback loop, and then run it through the external input on a full-size UNO Synth Pro. We’ll record the output, edit out the best bits, and use it as raw material for dirty and noisy transition effects in a techno track.
Note that you don’t necessarily need to use the UNO Synth Pro to replicate this in your studio. You will, however, need two hardware synths both with external audio in jacks.
Here’s our finished track:
Ready to get wild?
What Is Internal Feedback?
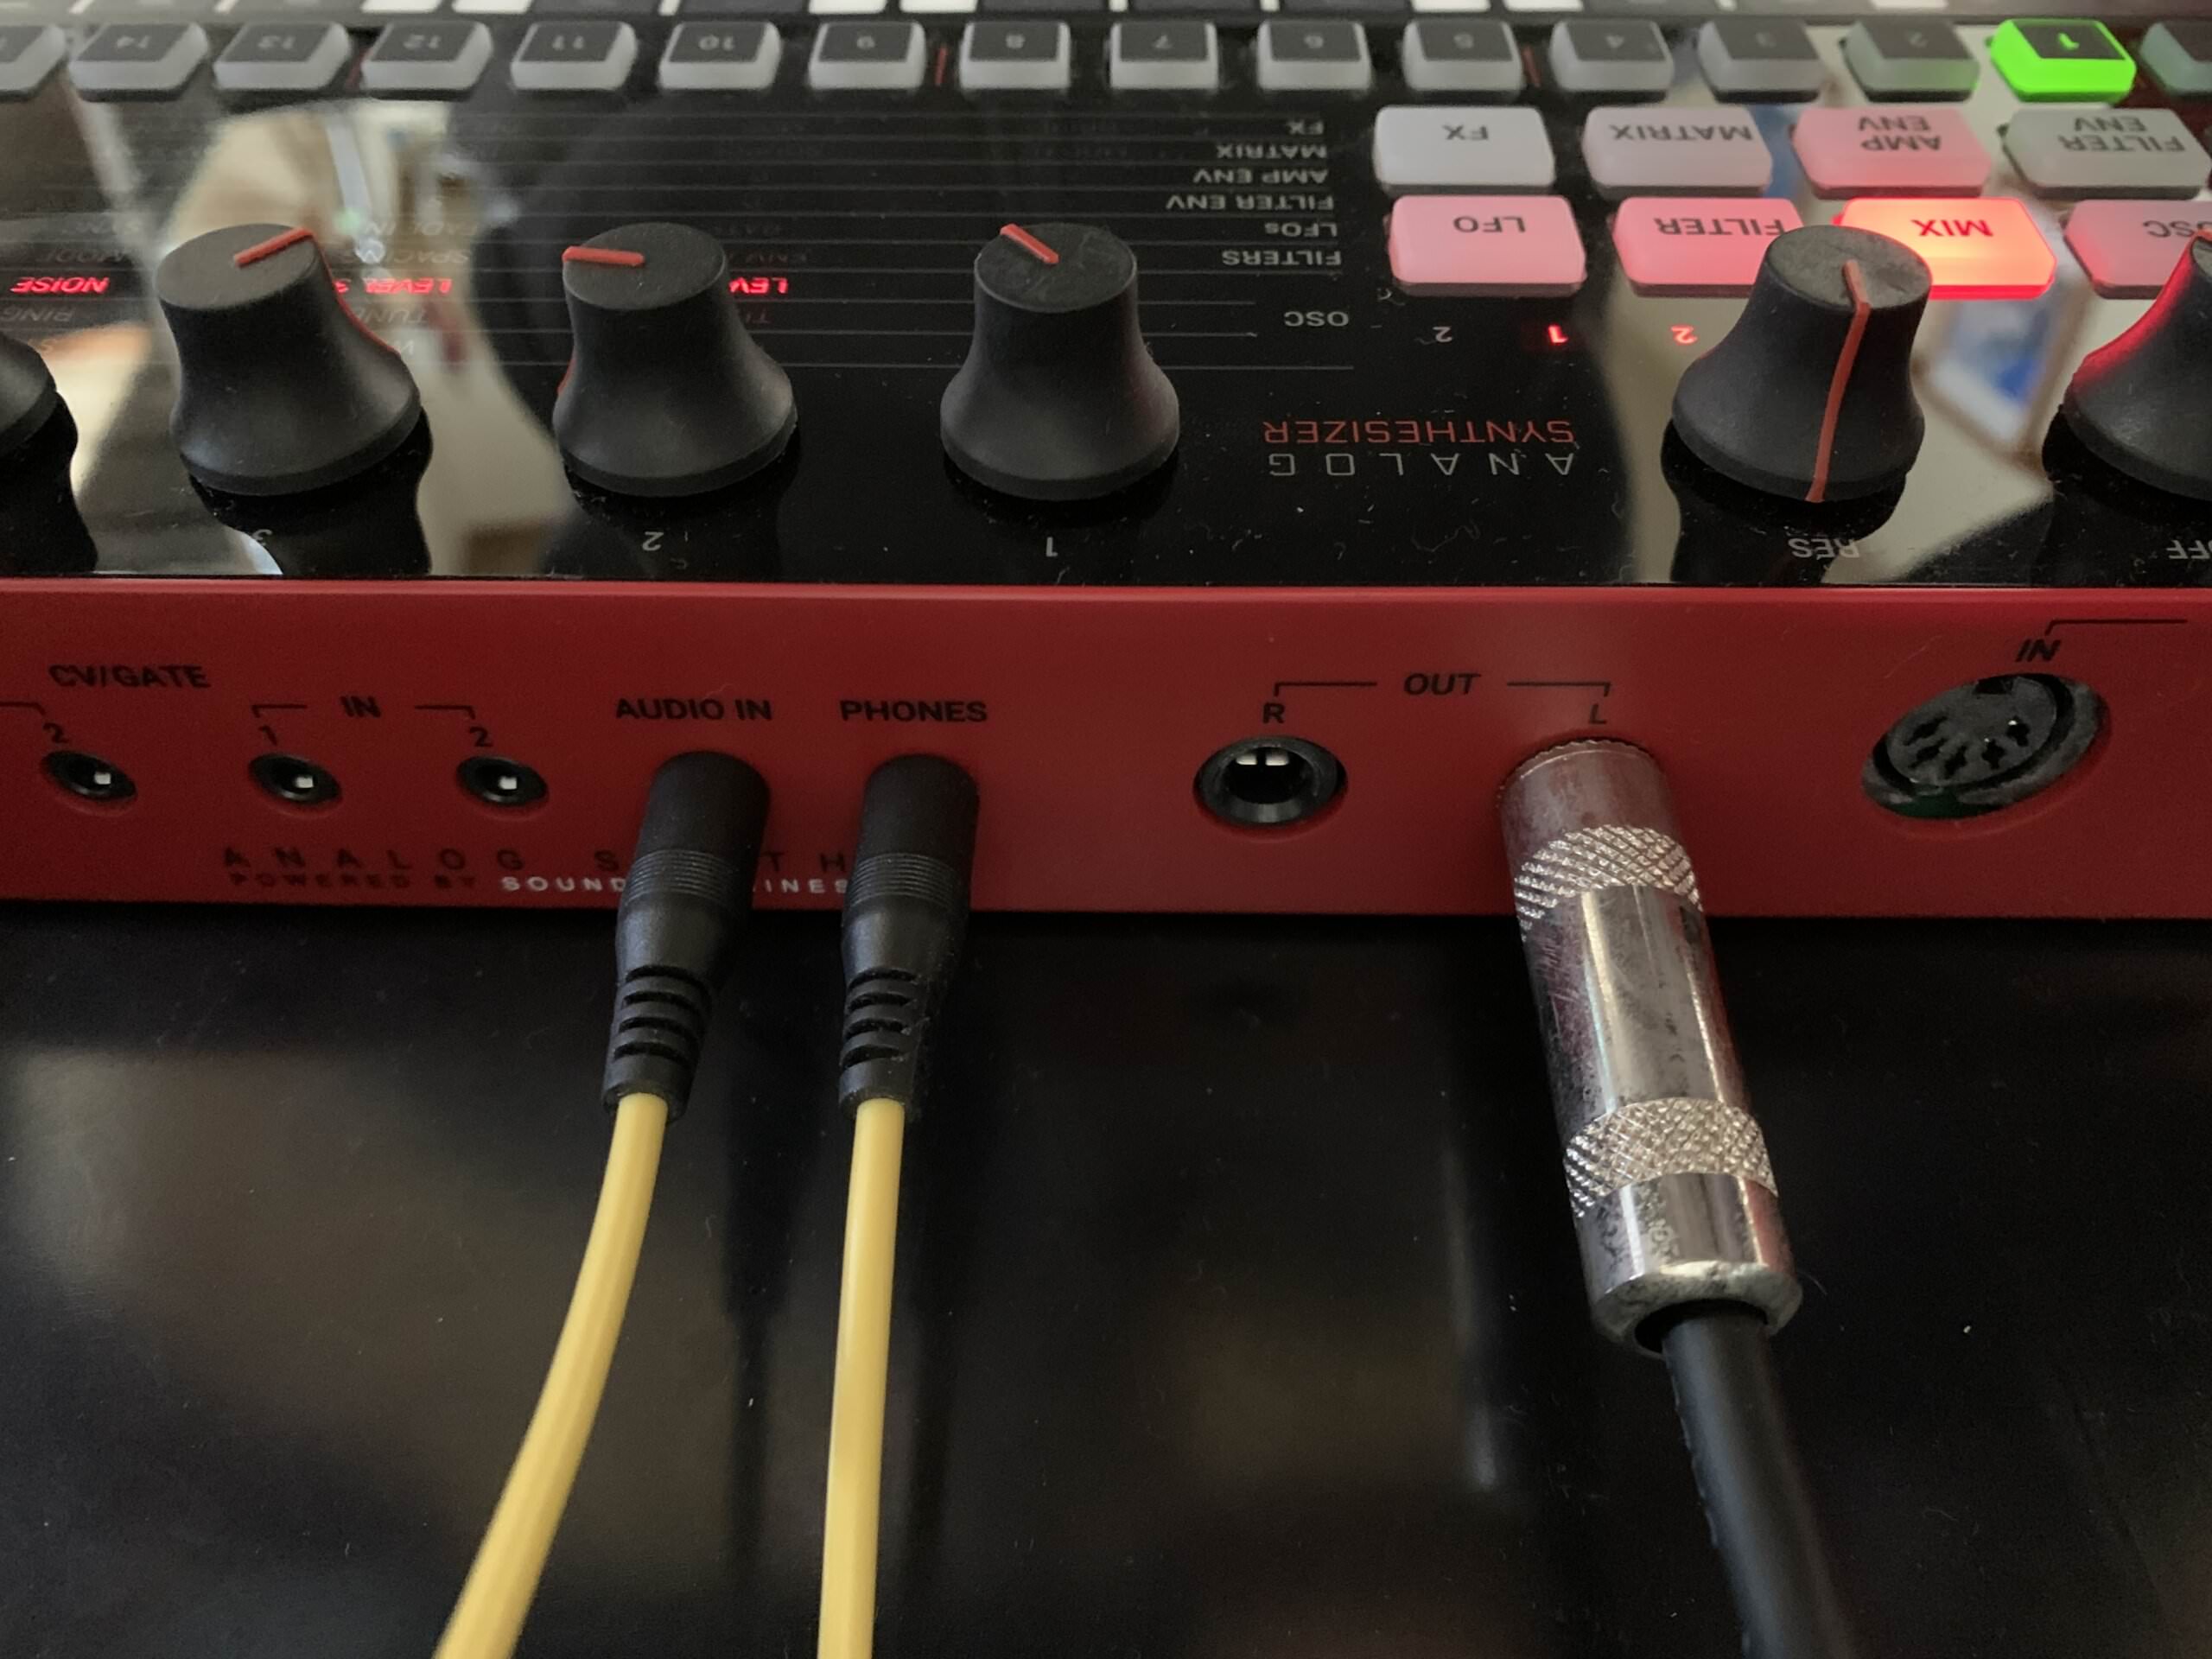
You’re probably familiar with the kind of feedback you get with a microphone or guitar. A guitar player stands in front of the amplifier and the sound vibrates the strings, creating a loop of audio that feeds back into itself. With a synthesizer, instead of creating feedback using audio moving through the air, we can use cable routing to achieve a similar effect. To do this, you need a synthesizer with both a headphone output and an external in (sometimes called an audio in) jack. By routing a cable from the headphone out to the external in, you’re creating a feedback loop.
Internal feedback can be useful for adding extra harmonics to a signal, beefing it up in often unpredictable ways. The effect becomes more apparent when you push the volume, such as by increasing resonance, oscillator volume, or drive. The drive circuit on the UNO Synth Pro is especially powerful. Get two of these going and things can get pretty hairy.
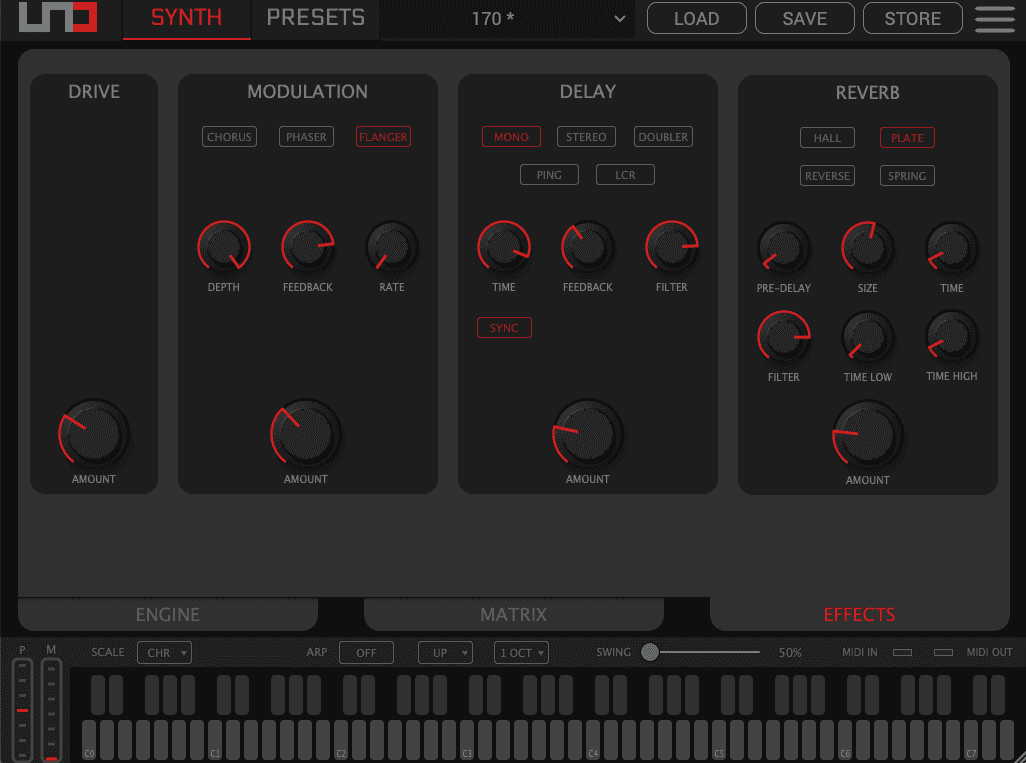
We’re going to assume that you’re already familiar with the UNO Synth Pro. If not, go ahead and get up to speed with our review before coming back and continuing. Also note that although the UNO Synth Pro has stereo outs, it only has a mono audio in so we’ll be using it in mono.
Step 1: The First Patch
For the main sound source, we’re going to use something relatively simple. We don’t need to generate too many harmonics at this point, as adding feedback and drive later will pile on plenty of juicy overtones.
We start with Oscillator 1 set to sawtooth and Oscillator 2 on square, both slightly detuned against each other. We also bring in some noise. The Mixer settings aren’t too important now, as we’ll be adjusting them (along with other parameters) later when recording raw audio. For now, we have Oscillator 2 set lower than 1. We’re going to take a similar approach with the filters, adjusting as we go, but for now, we have them set with a slight reduction in highs with some resonance added to make things interesting. We set the envelope in a basic pattern – we’re going to use the Hold function to make a drone so this part really isn’t important – and lastly, add a bit of drive just for flavour. We ignore the effects for now but will use some of those on synthesizer number two.
Here’s how our basic patch sounds:
Step 2: With Feedback
Now we can start to make things interesting. Let’s use a cable to connect the phones out jack to the audio in. UNO Synth Pro automatically routes audio through the filter and effects once you press a key. Feedback can be subtle at first but once you start playing with the filters and drive, you can really hear it.
Here’s the same patch now with audible feedback:
Step 3: Through The Second Unit
It’s already getting pretty nasty. With two filters plus a drive circuit, UNO Synth Pro is a very capable noisemaker. But what if we run this signal through another unit? Let’s try it and see what happens.
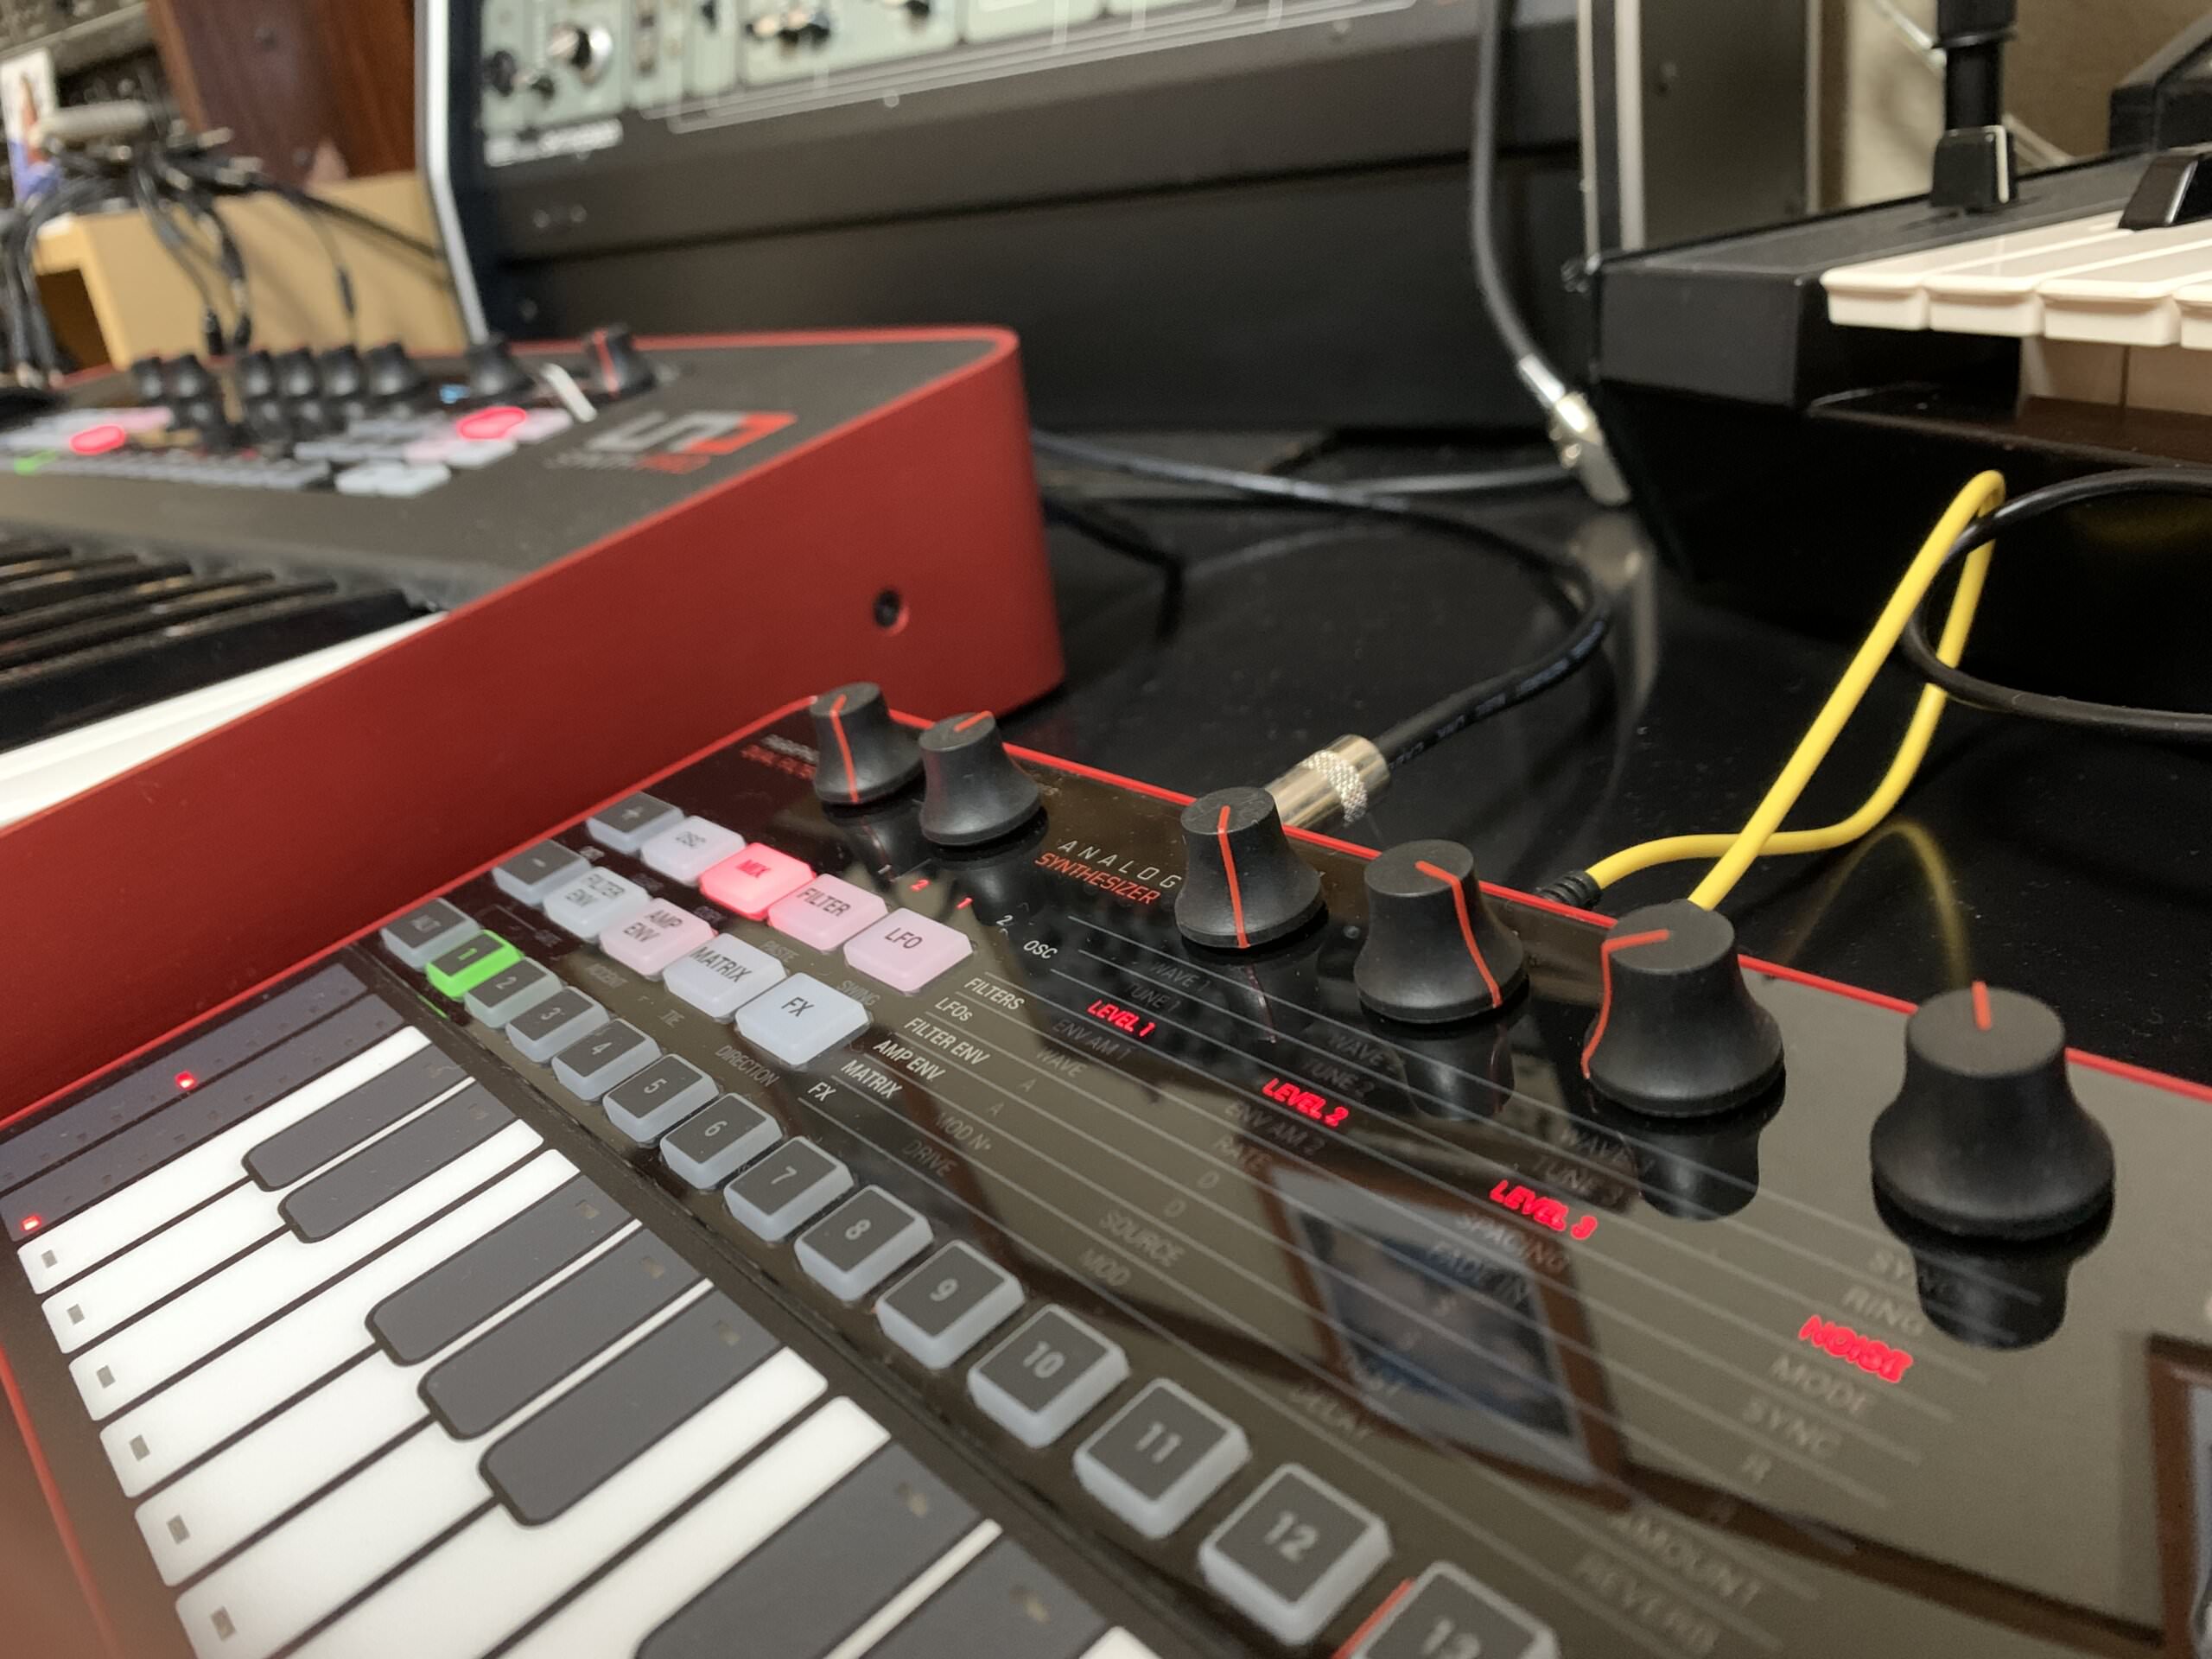
We run a cable out from the first UNO Synth Pro, the desktop unit, into the audio in on the full-size one. We don’t want to hear the oscillators on the second unit, only the audio is passed through from the first, so we turn down the oscillators. On the effects page, we bring up some Drive plus Flanger, Delay and Reverb. Finally, we need to press down a key to hear the audio. We press the Hold button to latch the key on.
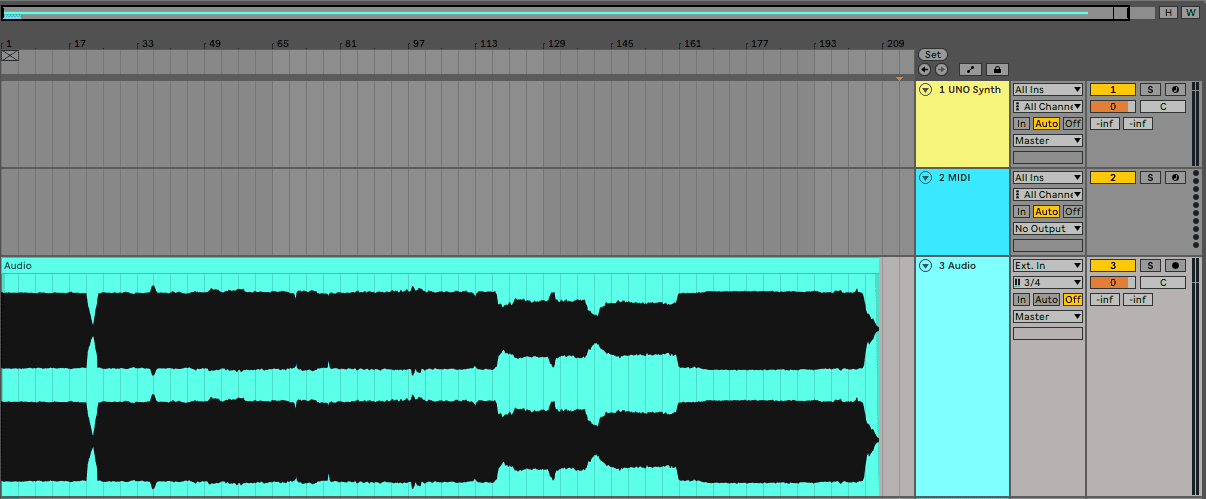
Step 4: Recording
The next step is to hit record in Ableton Live and jam out a drone. There are lots of parameters to tweak here. On the first unit, there’s the volume on the two oscillators plus the noise, the two cutoff and resonance amounts, and drive. On the second UNO Synth pro, there’s both filters plus drive amount, flanger, delay and reverb. Play with the knobs and generate a variety of sections: just white noise, just oscillators, full-on effects madness, etc. Remember, there’s feedback happening here too, so even small tweaks can create big changes in the behaviour of the feedback. Luckily, the UNO Synth Pro seems to have a limiter on the output so things never get too out of hand.
We jammed for a good five minutes. The idea is to create a chunk of raw material that can later be edited into something useful.
Here are a few excerpts from that:
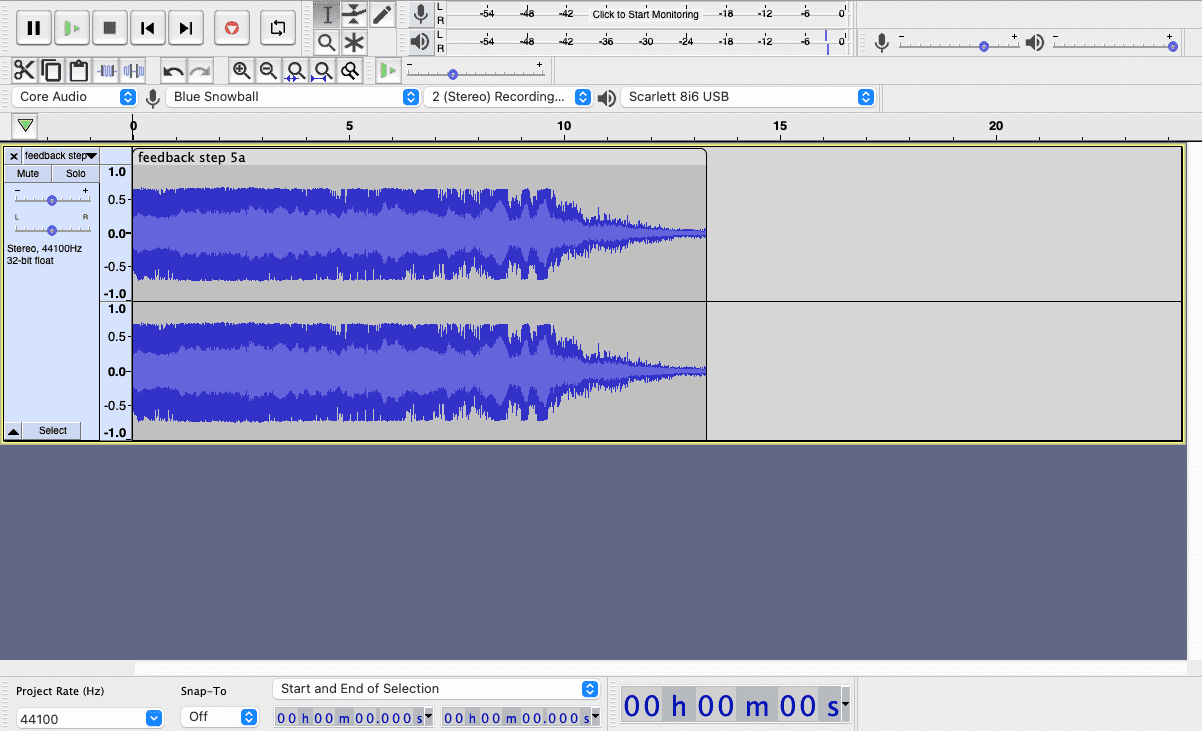
Step 5: Editing The Best Bits
Once the jam is finished, it’s time to listen back through the raw block of audio and bounce out the best parts. We want a variety of transitional effects so sections that convey a sense of motion are best. Find the most promising bits, bounce them out, and edit them down to a manageable size. We like to use a separate wave editor for these kinds of jobs but your DAW works too.
Here are a few that we liked:
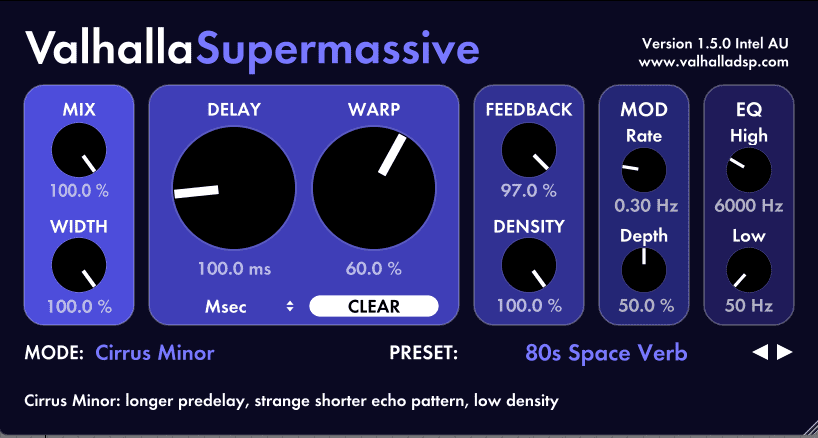
Step 6: Applying Effects In Ableton Live
Finally, we drop our bounced and truncated audio files into Ableton Live for some final tweaking and shaping. The first step is EQ Eight to remove any low-end rumble and overly harsh highs. Next, we add Live’s built-in Delay plugin with a Feedback setting of 60% and Ping-Pong engaged for stereo echoes. Finally, Valhalla’s free Super Massive on a send adds some reverb to give the risers some space.
Here are some of the finished risers and transitions:

And here are a few of the risers in the context of a song featuring loops from the Splice pack, Raw Industrial Techno: