Get inspired by disco and funk and bake your own dirty, rezzy filtered Rhodes electric piano.
Usually, Synth Secrets is all about synthetic tones – analogue bass, FM leads, wavetable madness. But there’s something to be said for more organic tones too. If you’re working in genres like disco, funk or soul, a good electric keyboard like a Fender Rhodes is a must. Think Nachtbraker, Never Dull, and Pool Attendant. Instead of reaching for a sample though, why not cook up your own?
Today we’ll be synthesizing a Rhodes-style electric keyboard using Arturia Pigments. For a modern and filtered sound, we’ll also be processing it with Arturia’s Filter Mini and Guitar Rig 5 Pro from Native Instruments. As usual, click any image to see a larger version.
Here’s our target electric piano in action:
Let’s get dirty.
Step One
Start by placing Arturia Pigments (or a similar instrument with electric piano samples) on a MIDI track and program in the appropriate notes. We’re using ours as the lead melody. If it’s not in Default (init) mode, make sure it is.
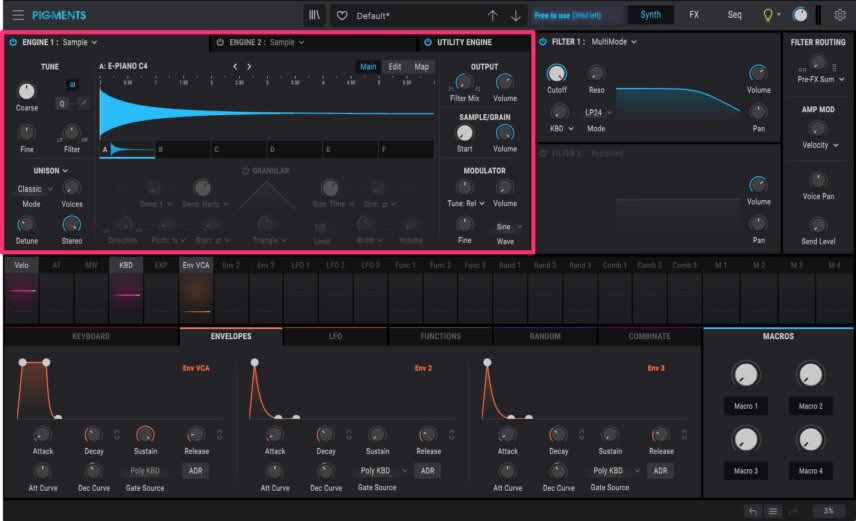
Right now it’s just a simple sine wave playing off a wavetable. Change the oscillator type of Engine 1 to Sample. You should hear a grand piano. Click on the sample name to reveal a selection of samples. Conveniently, we’re already in the keys folder so just choose E-Piano C4.
Here is our progress so far:
Step 2
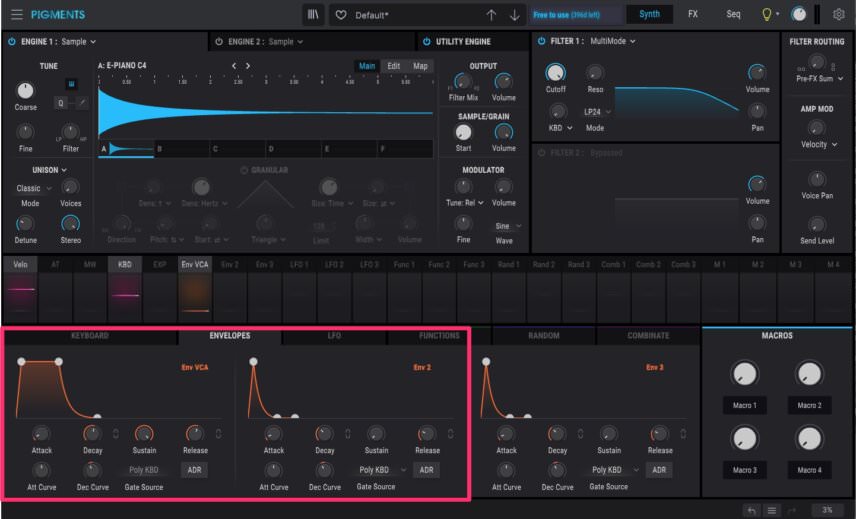
Our sound is uselessly short so let’s address that with a VCA envelope. Click the Envelopes tab to reveal the envelope section. Now let’s draw in a suitably Rhodes-like volume shape. The actual envelope shape will depend on how you want to use it. We’re going for a lead over existing chords so ours is on the shorter side. If you plan to use it for a chord progression, something longer might be better. As it is, all we’ve done is extend the release out slightly to around 4 seconds.
Top Tip: Shorten the sustain for a punchier attack.
Step 3
It’s a little vanilla-sounding. Let’s use an LFO to add some subtle pitch motion to it.
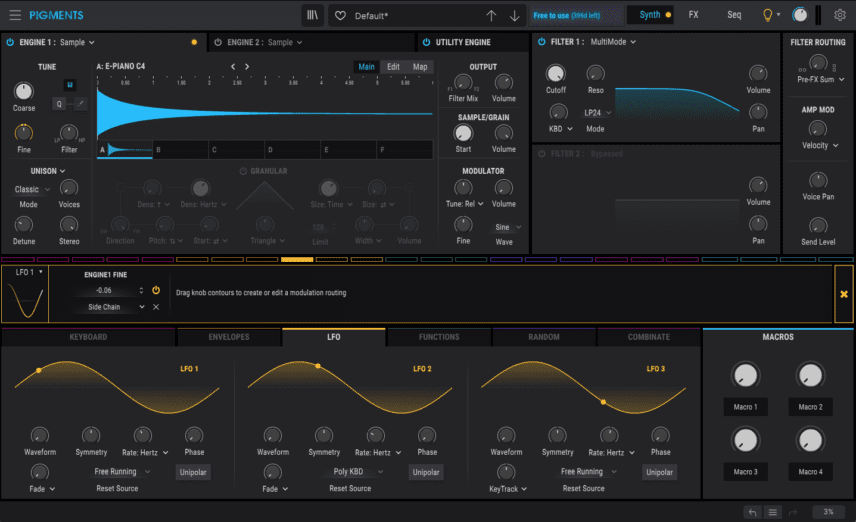
Click on the LFO 1 tab. Next, let’s assign this LFO to the Fine pitch control of Engine 1. Drag on the outer ring around Fine until it says -0.06. Now LFO 1 will modulate the fine pitch.
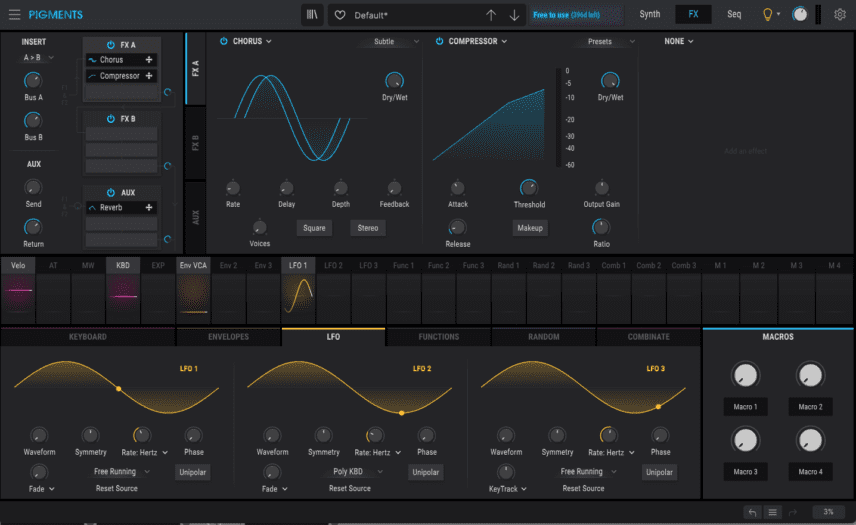
There’s a little more work to do though. The LFO is currently set to reset on every note. Let’s change that. Click on the large LFO tab at the bottom. Under LFO 1, change the Reset Source to Free Running so the LFO continues to cycle even when no notes are sounding. Let’s also increase the Rate to 1.70Hz. Now there’s a slight wobble in the pitch.
Step 4
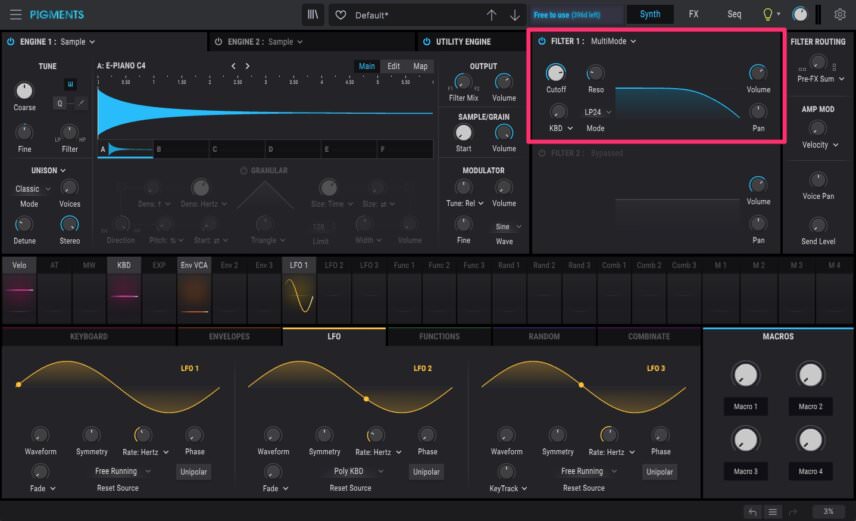
We’re going to do quite a bit of filter shaping once we introduce Filter Mini to the signal chain but we can get started here with Pigments. In the filter section, lower the cutoff to about 4800Hz and increase resonance to 0.200 or so. This will give it a bit of bite and set the stage for more extreme filter processing later.
Step 5
Let’s do some final tone shaping with Pigments’ onboard effects before moving on.
Click on the FX tab in the upper right to call up the effects page. In the first effects slot, change it from Delay to Chorus. Choose the Subtle preset as we don’t want to affect it too much. Increase the rate to around 0.5Hz. Lastly, turn off the Stereo function. A wide chorus is nice but we want to keep it reined in.
Next, replace the Reverb with the Compressor in slot two. Lower the threshold to 6dB to tame it. (Note that this stage is fairly subtle. Feel free to dial in more extreme chorus settings and see how the filter processing in the next step affects the sound.)
Step 6
That’s our electric piano done. Next, let’s use a dedicated filter plugin to bring it to life. We’re using Arturia Filter Mini as it has not only a Moog-style filter and LFO but an envelope follower. The last part is not absolutely necessary but can add extra emphasis, as we’ll soon see.
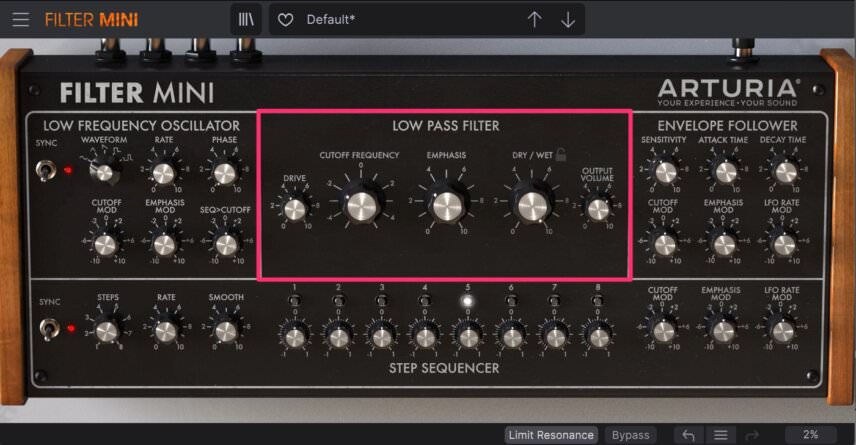
Drop Filter Mini into the MIDI channel after Arturia Pigments. Make sure it’s in Default (initialized) mode. In the Low Pass Filter section, set Cutoff to -2, Emphasis (what Moog calls resonance) to 3, and bring up the Drive to 4. You also may want to increase the Output Volume to make up the loss from turning up the resonance.
Dark and moody keys:
Step 7
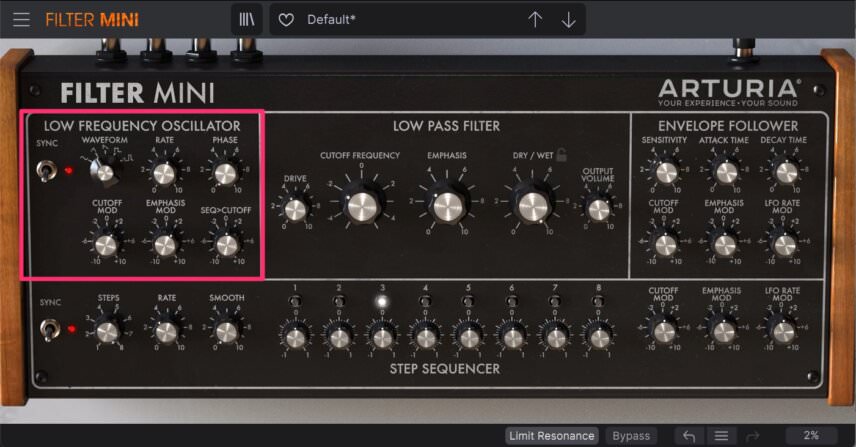
A hallmark of modern funk and disco genres is a vibey, tremolo-like effect on the keys. Let’s use the LFO to recreate this. Set the waveform to triangle for a more pronounced effect than a sinewave. Bring up the rate to 6, or 1/8 (the Sync switch should already be engaged). Finally, increase both Cutoff Mod and Emphasis Mod to +2. Now the filter will open rhythmically every 1/8-note.
Step 8
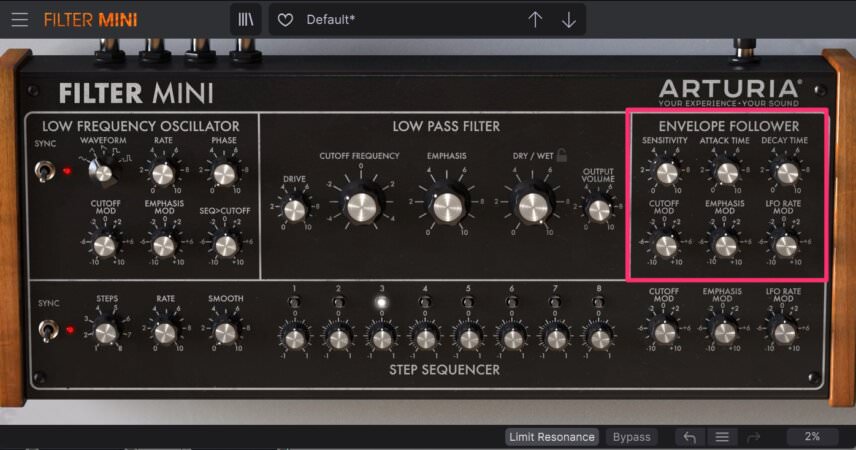
We can make the effect more pronounced using the Envelope Follower. Turn up the Sensitivity to 6, bring Attack Time to zero, set Decay Time to 3, and finally up the Cutoff Mod to +2. Now the cutoff will open quickly and briefly every time a note sounds.
Step 9
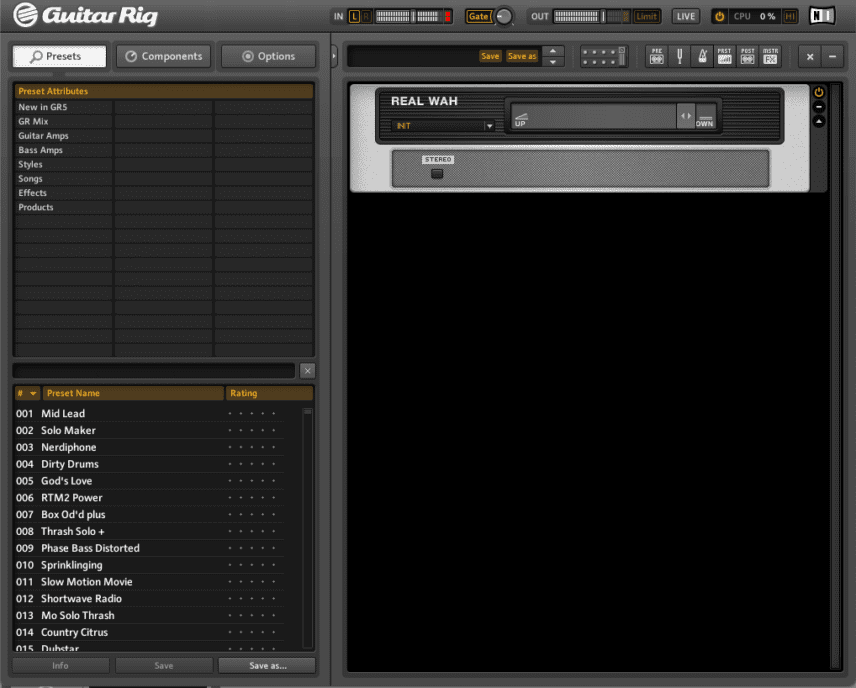
For the last step, let’s use a wah-type guitar effect to pinch the signal’s frequencies and give it some organic, guitar-like harmonics.
There is any number of guitar effects plugins available but we’re using Native Instruments Guitar Rig 5. We place it after Filter Mini on the same channel. We call up the Real Wah component, which models a wah-wah pedal. A wah is essentially a bandpass filter with a foot pedal control. On the plugin, the foot pedal is represented by a slider. We like the way it sounds closer to the Dwn (down) end of the spectrum. Lastly, we increase the input to drive the signal hard.
Top Tip: Automate the slider for a Hendrix-style effect.
Filtered keys now with wah-wah:
Here is the finished electric piano in the context of a track featuring samples from Splice’s Oliver: Power Tools sample pack, as well as reverb and delay on the effects sends and some light saturation and compression on the master bus.
