
Resampling an Old Project
More often than not, old projects are abandoned for one reason or another and then left backed up for eternity on your external hard drive. However, you must have liked something about the idea to save it in the first place. Revisiting old projects after some time has passed can be a great source of inspiration.
Step 1
For this walkthrough we’re revisiting an old, abandoned project that hasn’t been listened to for 18 months. We’ve bounced two sections from the track as 24-bit WAV. While the project was open we made a note of project key (G minor) and tempo (125bpm).
Here are the two sections we’ve bounced:
Step 2
We now load up an empty project in Maschine and set the tempo to 125bpm. You can use any sampler for this as we’ll be using the familiar REX technique, but we’ve chosen Maschine so we can jam in some ideas using the pads on the hardware. If you don’t have a hardware controller like Maschine you could always use a MIDI keyboard.
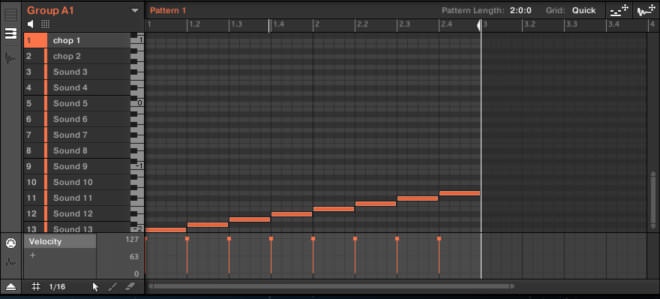
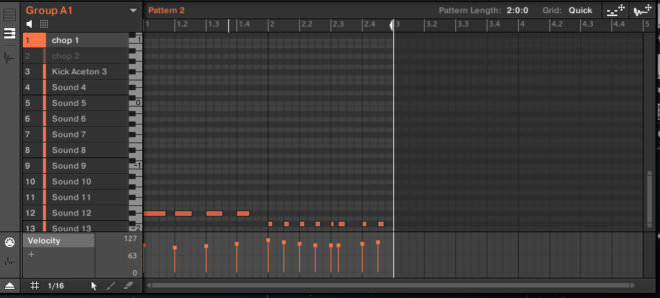
We load our pieces of audio onto Sounds 1 and 2 in a new group. On Sound 1 we go to the Sampling page, and then we go to Slice to reveal our waveform. At the bottom in the TIME menu there are some options for how we chop up the sample. We change the MODE to Grid, and with the SLICES set to 4TH, every bar of the audio is chopped into four.
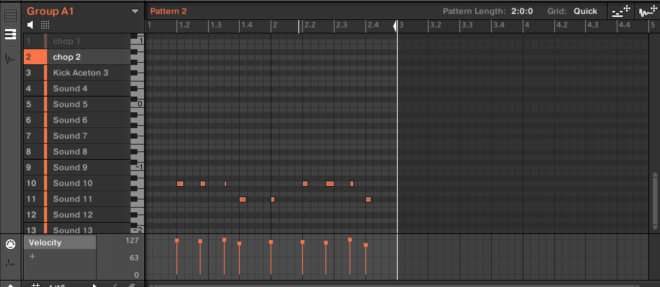
Over to the right we can hit Apply, chopping the audio at these slices and assigning each chop to a pad on Maschine. If we go to the keyboard page and scroll down we can see Maschine has assigned the chops starting from C-2 and going upwards. We repeat this process for Sound 2.

Step 3
We load a kick drum on Sound 3 and program a four-to-the-floor pattern, acting like a metronome and providing some rhythm to play along to. We can then play the pads live to see if we can trigger some interesting chops. For Sound 1, the chops that feature snippets of the vocal sound quite interesting, so we play in a simple pattern only using two of those slices:
For Sound 2, we focus on one the chops featuring the synth. We play in a pattern using this and one of the percussive chops:
Step 4
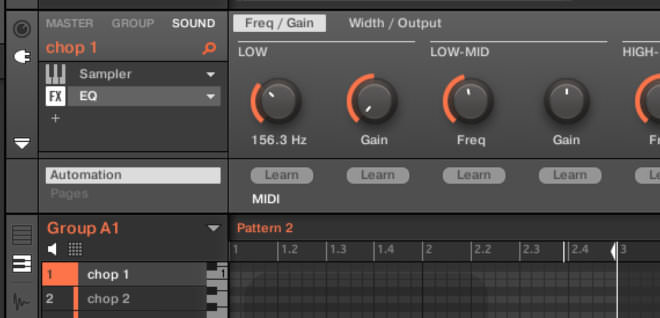
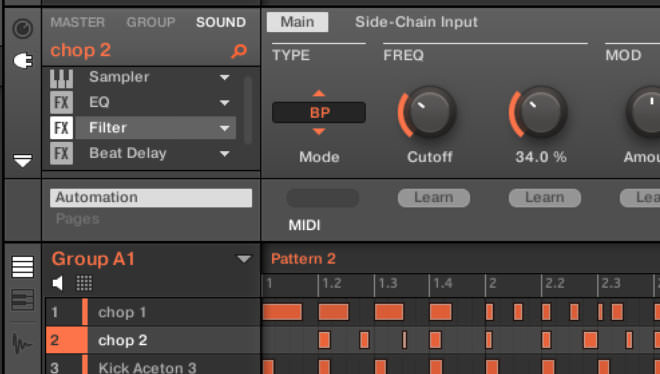
We could do with applying some EQ to both chopped sounds, so we load the Maschine EQ on both Sounds 1 and 2, using a LOW band cut of -20.0 dB at 156.3 Hz, removing any low frequencies.
For Sound 2, we also add a Filter and Beat Delay. On the Filter we load a bandpass (BP) Filter, push the Resonance up to 34% and set the Cutoff around 280 Hz. We leave the Beat Delay as it is, since the default 3/16 Time setting works well. We also apply a master swing of 18% to loosen the groove and duplicate our pattern so there’s a four-bar loop playing.

Step 5
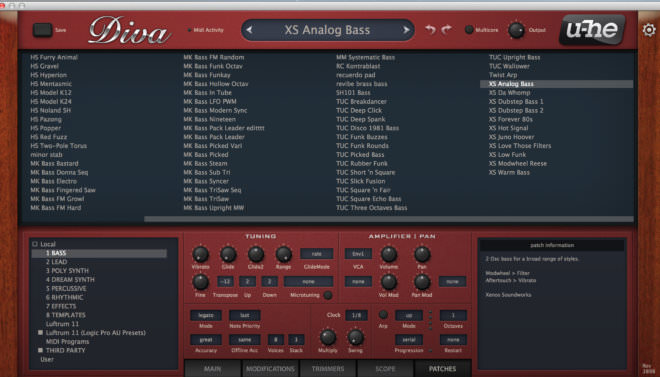
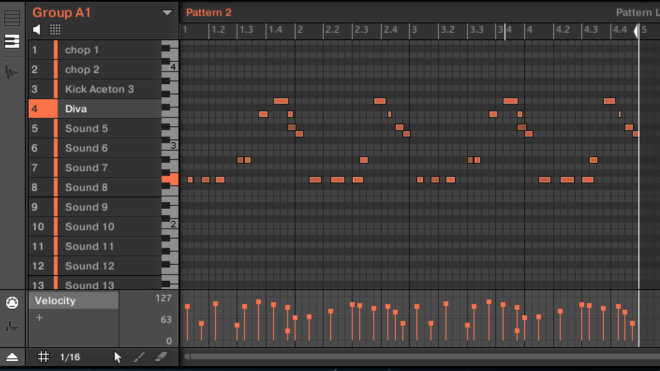
For our final step, we load an instance of U-he Diva on Sound 4, select the ‘XS Analog Bass’ preset and program a bass hook in the key of G minor.
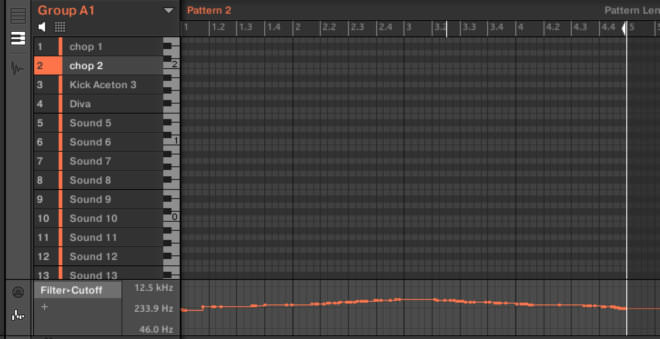
We also record some automation of the cutoff frequency on the bandpass filter we set up on Sound 2. The result is a simple but effective loop to get us started on a new track.
03.54 AM
Really nice tutorials thank you !
Any way to do the tutorial number 4 with only Ableton ?
08.53 AM
In session view, right click on your audio region and select ‘Convert Audio to New MIDI Track’
10.12 AM
In this case, “Convert Audio to new Midi Track” is going to slice the audio up. If you want to extract the melody, just right click and select “Convert Melody to new Midi Track”
05.40 PM
Thanks for clearing that up Ben!
07.22 PM
I think its fair to say most people can get nice loops going, but moving beyond that can be the problem, fleshing out an idea can be difficult – and loop-mong often sets in…… better off doing some tutorials about that subject………
08.14 PM
This was GREAT! Thanks for all the ideas. I love the fact that I can record my voice and create a midi track out of it.
12.36 PM
Thanks you Ben and Jonny Striate !
08.29 AM
Genius. Thanks for the tips!
09.55 AM
audio doesn’t appear to be working for these examples?
11.05 AM
Thanks for pointing this out Craig.
It appears to be working for us.
Which browser are you in?
Is it all the examples?
06.30 PM
The last tip is really really great, never thought about it.
02.49 PM
I have done this couple of times myself. It’s great trick how to kick off creative process. I never understood why it works so well but recently someone told me that it’s not melody (or notes) itself that is catchy, it’s the rhythm. It might be most boring chord progression ever, but if you play it in cool fashion, add some swing… You’ve got yourself a banger