
Technique » Tutorials » Breaking Writer’s Block: Creative Ways To Start New Tracks »
Breaking Writer’s Block: Creative Ways To Start New Tracks
This channel is sponsored by
 Roland Cloud is your creative hub for Roland hardware and software. Access legendary recreations of Roland Classics, find new sounds for your favorite products, and download updates and companion apps to make music fast and easy. Visit Roland Cloud
Jamming Live with Native Instruments Flesh
In this walkthrough we’ll use Native Instruments’ Flesh plugin, loaded with some of our own drum loops, to create some improvised audio on the fly. We could use this type of technique either in a live setup or, as we do here, by recording the output of Flesh with the view of using the audio as the basis for a new idea.
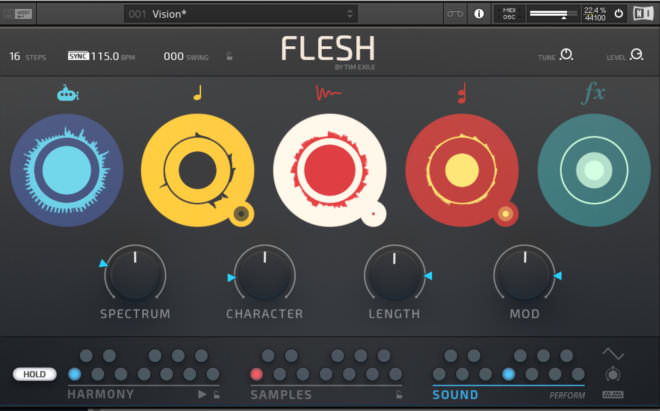
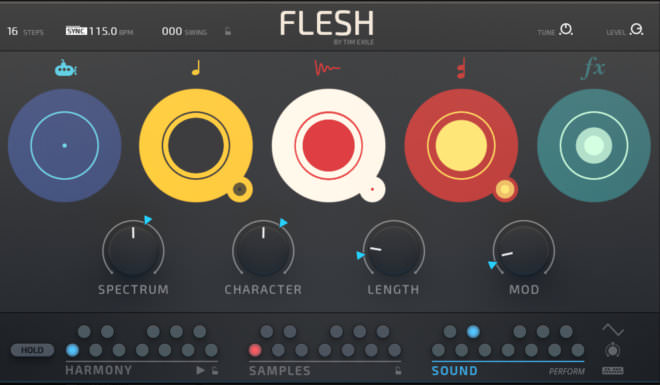
Flesh is an interactive synthesiser and sampler which analyses audio loops (working especially well with drums) and then generates rhythms and melodies for its five sound generators: a sub, a monophonic bass synth, a sample player, a polyphonic synth and a delay FX unit.
Step 1
Load an instance of either Reaktor 6 or the free Reaktor 6 player onto a MIDI track in your DAW. We’re using Ableton Live.
There are a couple of things we need to do in Flesh so we can begin playing the instrument live. First, sync Flesh to the host DAW tempo (in our case 115BPM) using the Sync button in the top panel, and then activate the Hold button bottom left.
Different keys on the keyboard will trigger different sounds and patterns in Flesh. With Hold activated it’s the same as holding down on a key continuously, which will mean there are no gaps in the audio.
Step 2
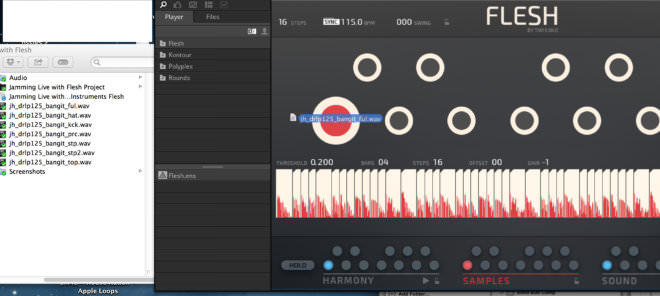
The current instance of Flesh has one of the presets loaded, however it’s very easy to load in your own loops. Click on the Samples text in the bottom centre to bring up the Samples page. You can have 12 different samples loaded in any instance of Flesh, the sample slots represented by the 12 circles.
Load your own samples by dragging and dropping them onto a circle. We’ve loaded ‘jh_drlp125_bangit_ful’ (a full drum loop) onto the first sample slot, then added ‘jh_drlp125_bangit_kck’ (a four-to-the-floor kick drum) onto the next two slots, with ‘jh_drlp125_bangit_top’ (the full drum loop without the kick) on the fourth slot.
Step 3
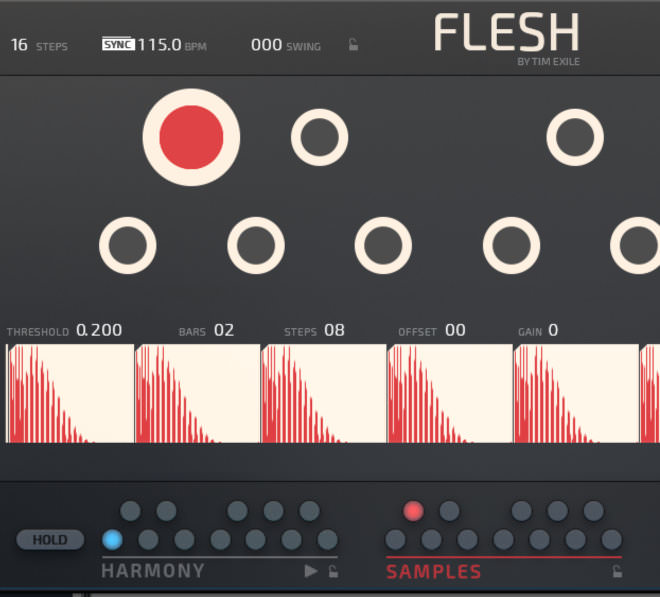
On the second sample slot, where we’ve loaded the kick drum loop, we change the Steps setting to 8. This doubles the speed.
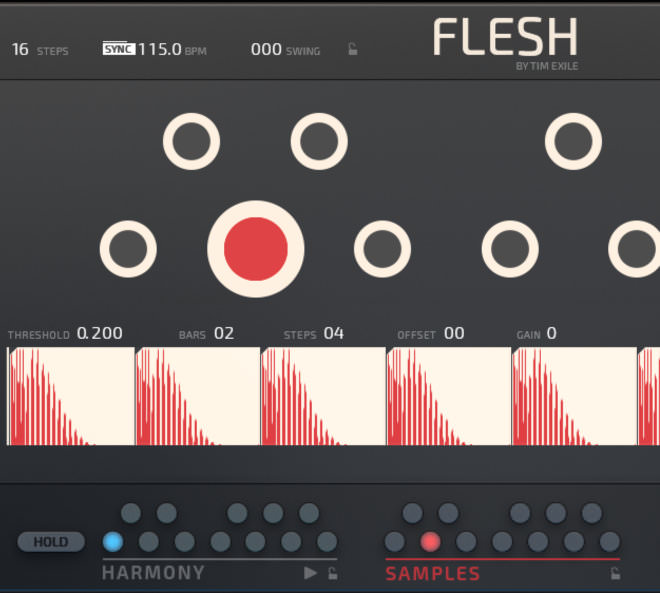
On the third sample slot we change the Steps to 4, which doubles the speed again. Both of these samples will now work well as drum fills and/or rolls. All you have to do in order to trigger playback of one of the sample slots is click on the circular sample slot.
Step 4
Click on the Flesh By Tim Exile logo at the top of the window to bring the main pane back up. Pressing one of the first four sample slots will now trigger one the loops we’ve loaded in (there are another eight slots if you want to load more loops, or even use one of the presets to trigger pre-loaded loops).
To the left, we can trigger different harmonies by clicking on one of the 12 Harmony slots, and to the right we can trigger 12 different sound slots, which will load different presets for each of the five sound generators.
Clicking and dragging up or down on one of the five large coloured circles will turn the individual sound generators up or down. Of the four rotary controls underneath, Spectrum & Character shape tone, Length controls the envelope and Modulation adds either envelope or LFO modulation depending on the settings.
Jamming around with these various controls can be a huge amount of fun. Here’s how it sounds with our loops:
Step 5
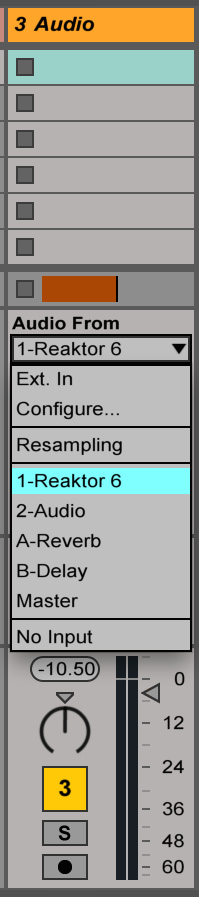
In order to record the output of Flesh, you need to set up an audio track in Ableton to receive the signal. On the mixer page, pick an empty audio channel and click the drop-down menu underneath Audio From. Select Reaktor 6 and a record button will appear at the bottom of the channel. Click the record button so it goes red and arms the channel for recording.
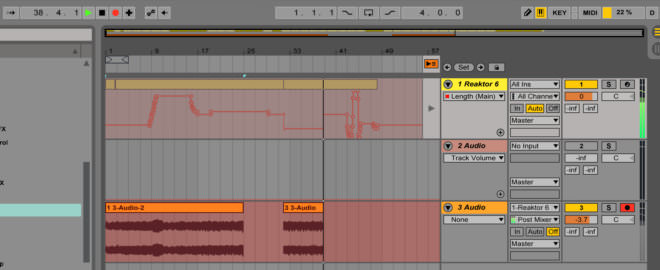
Now, if you press record on the main transport bar, the output of Flesh will be recorded onto this audio channel, enabling you to record live sequences on the fly. Great for random, improvised inspiration!
We’ve taken our previous recording and begun to chop it up and form the basis of an arrangement.
Flesh goes a lot deeper than what we’ve covered in this walkthrough, offering much more detailed control of audio creation, so if you like what you hear be sure to have a closer look at some of its more advanced features. It’s an excellent way to trigger the creative process.
Tutorials is sponsored by
Roland Cloud is your creative hub for Roland hardware and software. Access legendary recreations of Roland Classics, find new sounds for your favorite products, and download updates and companion apps to make music fast and easy.
03.54 AM
Really nice tutorials thank you !
Any way to do the tutorial number 4 with only Ableton ?
08.53 AM
In session view, right click on your audio region and select ‘Convert Audio to New MIDI Track’
10.12 AM
In this case, “Convert Audio to new Midi Track” is going to slice the audio up. If you want to extract the melody, just right click and select “Convert Melody to new Midi Track”
05.40 PM
Thanks for clearing that up Ben!
07.22 PM
I think its fair to say most people can get nice loops going, but moving beyond that can be the problem, fleshing out an idea can be difficult – and loop-mong often sets in…… better off doing some tutorials about that subject………
08.14 PM
This was GREAT! Thanks for all the ideas. I love the fact that I can record my voice and create a midi track out of it.
12.36 PM
Thanks you Ben and Jonny Striate !
08.29 AM
Genius. Thanks for the tips!
09.55 AM
audio doesn’t appear to be working for these examples?
11.05 AM
Thanks for pointing this out Craig.
It appears to be working for us.
Which browser are you in?
Is it all the examples?
06.30 PM
The last tip is really really great, never thought about it.
02.49 PM
I have done this couple of times myself. It’s great trick how to kick off creative process. I never understood why it works so well but recently someone told me that it’s not melody (or notes) itself that is catchy, it’s the rhythm. It might be most boring chord progression ever, but if you play it in cool fashion, add some swing… You’ve got yourself a banger