In this latest Beat Dissected we program a percussion-driven house beat inspired by Lone and use stereo widening techniques to add character to the drums.
Using time-based audio effects like chorus, flanging and short delays on drums can be a touchy issue. A lot of the time people simply write this off as these effects can mess up the low end, create pitched feedback sounds, and reduce the transient impacts. However, when used correctly modulation FX can add texture and make the drums sound far more powerful in the mix.
The beat we’re programming to demonstrate this is inspired by Lone’s banger ‘Blue Moon Tree’. Released in 2018, it’s one of many golden nuggets on the artist’s EP Ambivert Tools, Vol. 4, released on R&S Records.
There is definitely a lo-fi quality to the beat but what we’re going to focus on is the width especially prominent in the kick, hi-hats and percussion. We would encourage you to put on headphones and go back and forth between this track and other tracks paying specific attention to the kick and hi-hats.
You’ll notice that typically the hats and kick are centred in the mix, whereas in Blue Moon Tree they are present in the whole stereo spectrum and can really be felt in both the left and right.
Furthermore, we’ll be looking at using reverb and panned percussion to enhance this 3D effect. Here’s what we’re creating today:
And here it is with a bassline for context:
Step 1
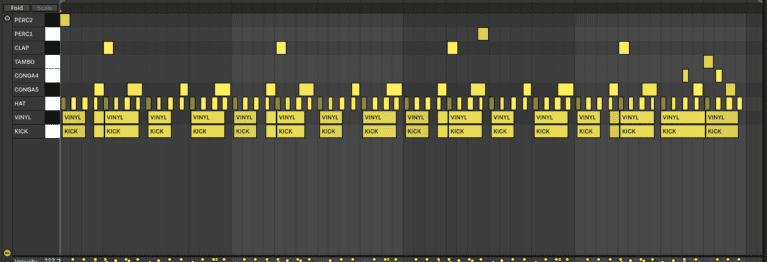
Let’s start with the kick. We’re going to get into some detail here, but the next steps will be much more straightforward! Create an empty drum rack and drag in a punchy kick sample. We used ‘Kick 08 – Minimalogic Shot’ from Ableton’s Loopmasters Mixtape Pack.
Program a simple four-to-the-floor pattern with a double kick on the second downbeat and use Simpler’s internal filter to lower the cutoff frequency to around 9.5k. The high knock of a kick can get harsh when run through spatial effects so it’s good practice to curb this early on.
Insert the Chorus-Ensemble audio effect, set it to Classic mode, and increase it to around 80%. Enable high pass and increase it to around 300 Hz so that the low end is not affected by the chorus. Also, increase the width to its max value of 200% and set the dry/wet to around 50%. A slow rate setting of 0.15 Hz should be perfect for the wide effect we’re going for.
To make sure the kick still has an impactful transient we’ll compress. Set a high attack time with auto-release and lower the threshold until you get about 2dB’s of gain reduction. You can then increase the output by 2-2.5dB to compensate for this.
Here’s how the kick sounded without processing:
And here’s how the kick sounded with chorus and compression
A good way to make wide sounds sound more realistic is room-style reverb. Insert Live’s Reverb and simply lower the decay time to around 800 ms while setting the Dry/Wet between 3-6%.
You’ll notice that the chorus removed a lot of the kick’s low end so we can use the Drum Buss audio effect’s Boom setting to re-introduce some of that sub. An 11% boost 50 Hz should be more than enough but if it’s too much you can lower the general Dry/Wet to 70-80%.
To add that last bit of warmth to the kick we can layer each kick hit with a vinyl noise sample. Add your favourite vinyl crackle sample to the drum rack and copy-paste the kick’s MIDI. Set the release time of your sample to taste in Simpler so that the crackle also disappears when the kick’s not playing.
We used ‘Vinyl Noise Zoned’ from Ableton’s Chop and Swing Pack and here’s how the final kick sounds:


Step 2
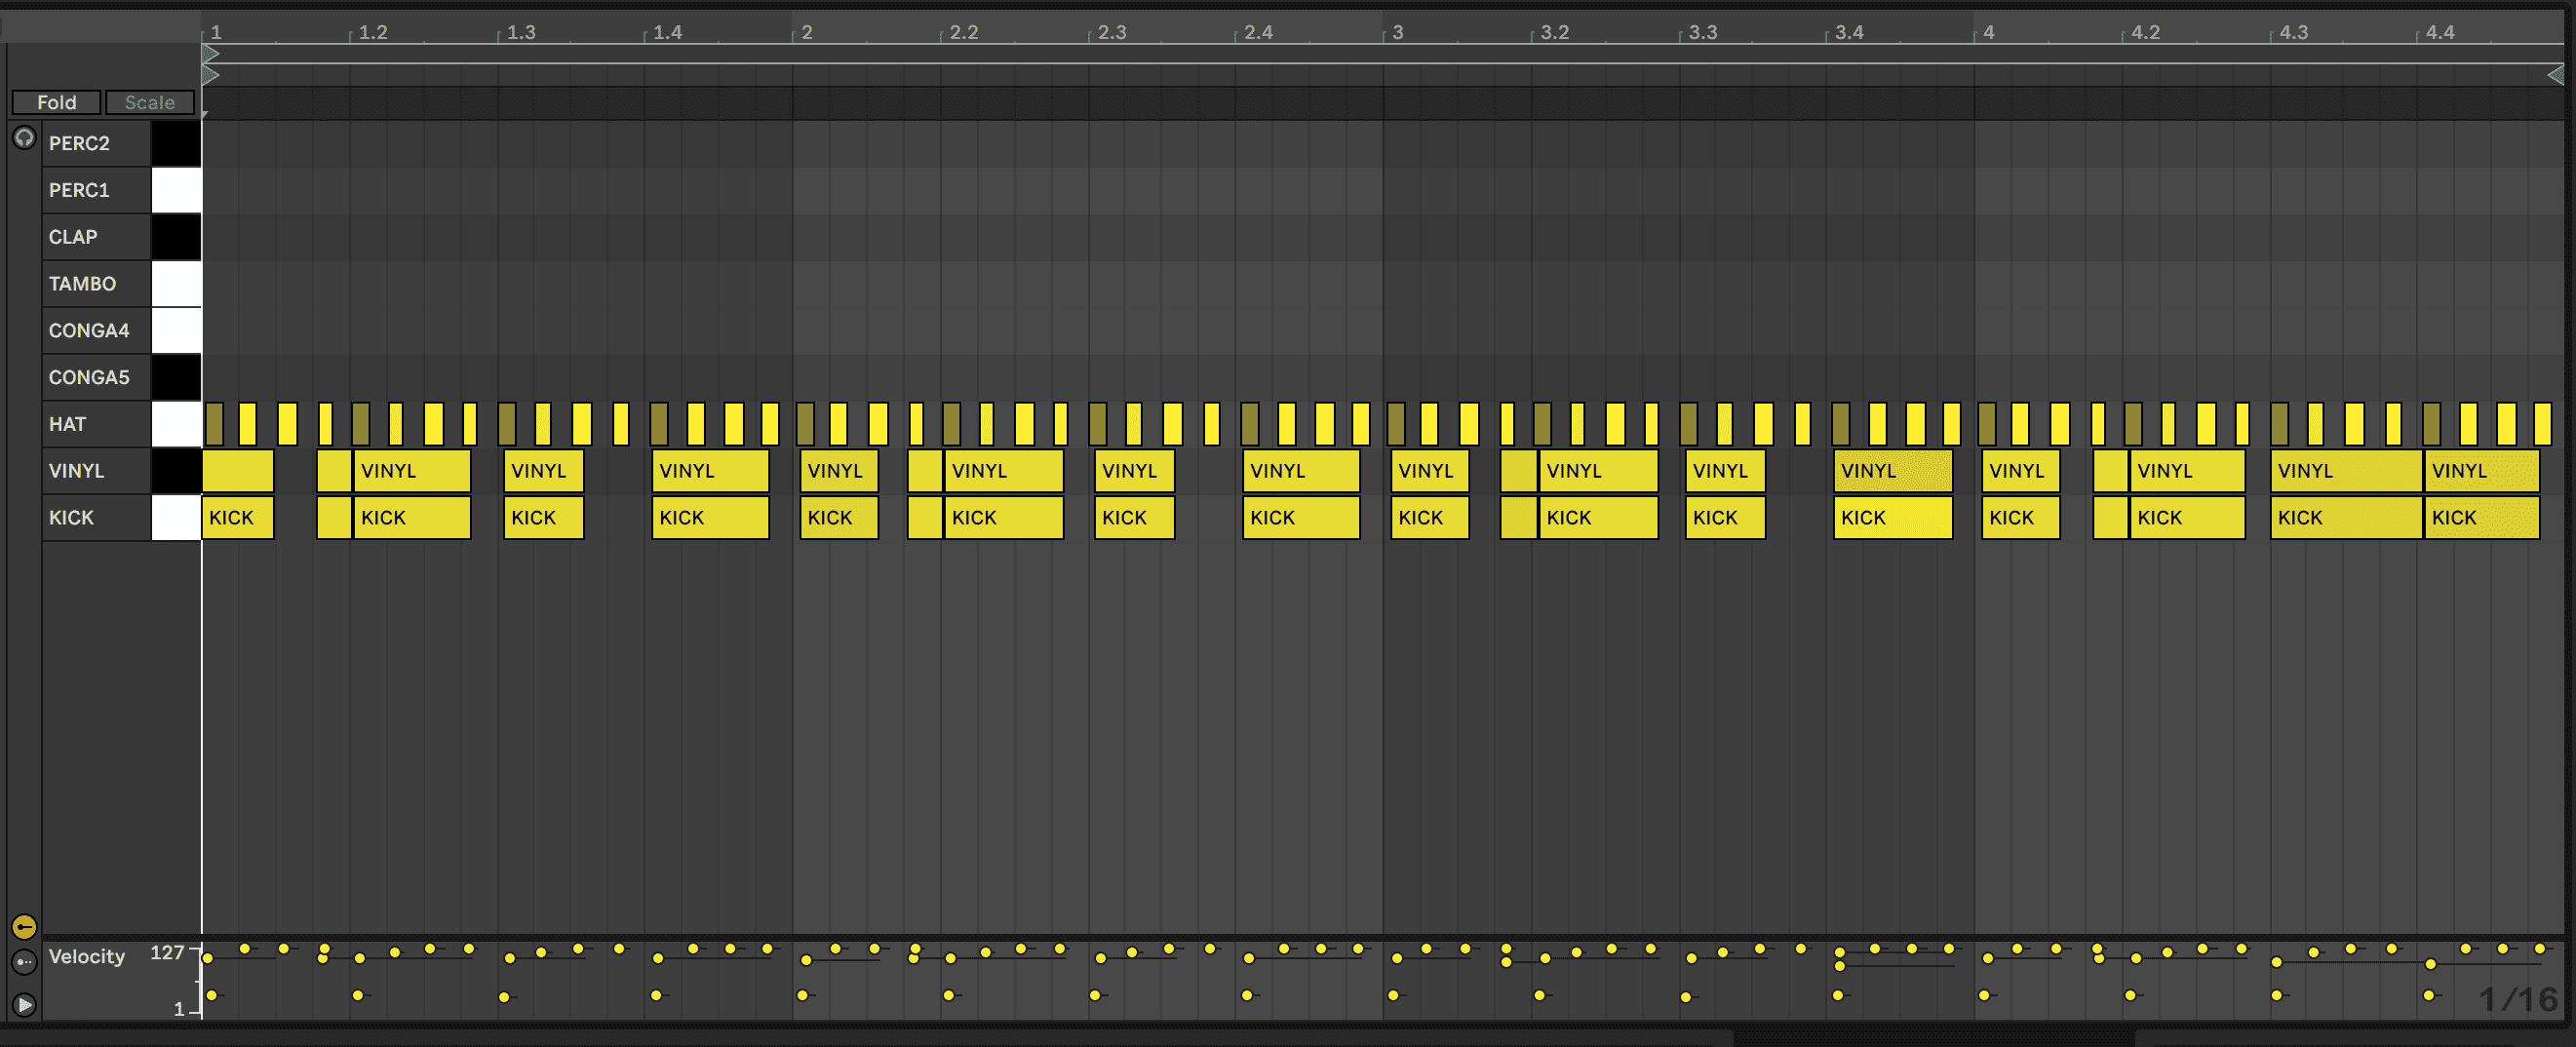
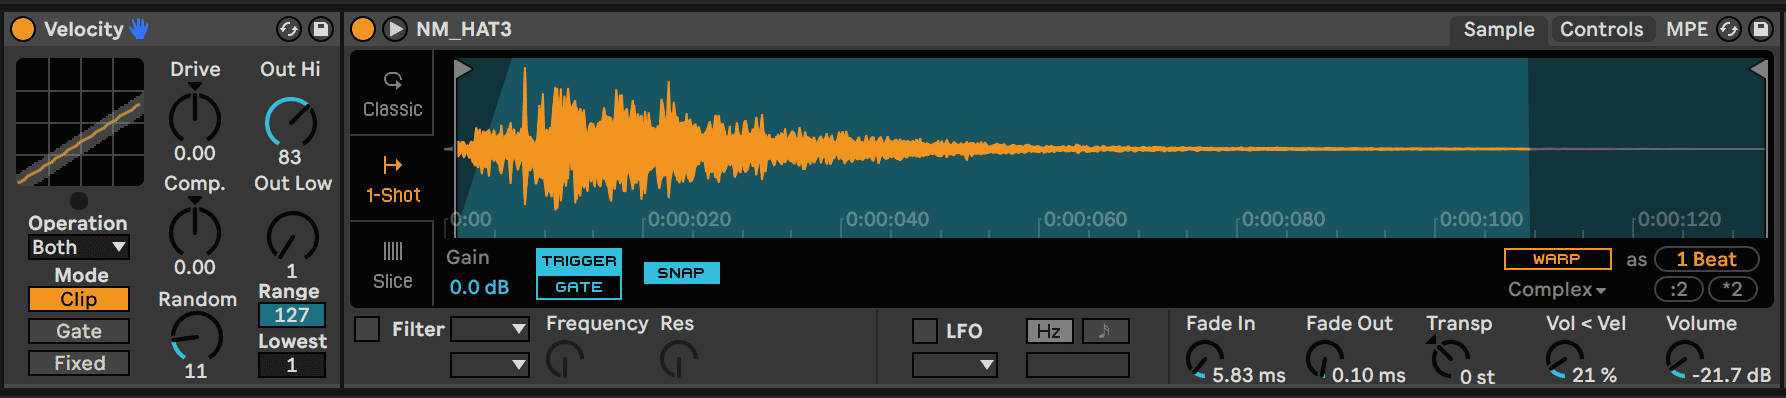
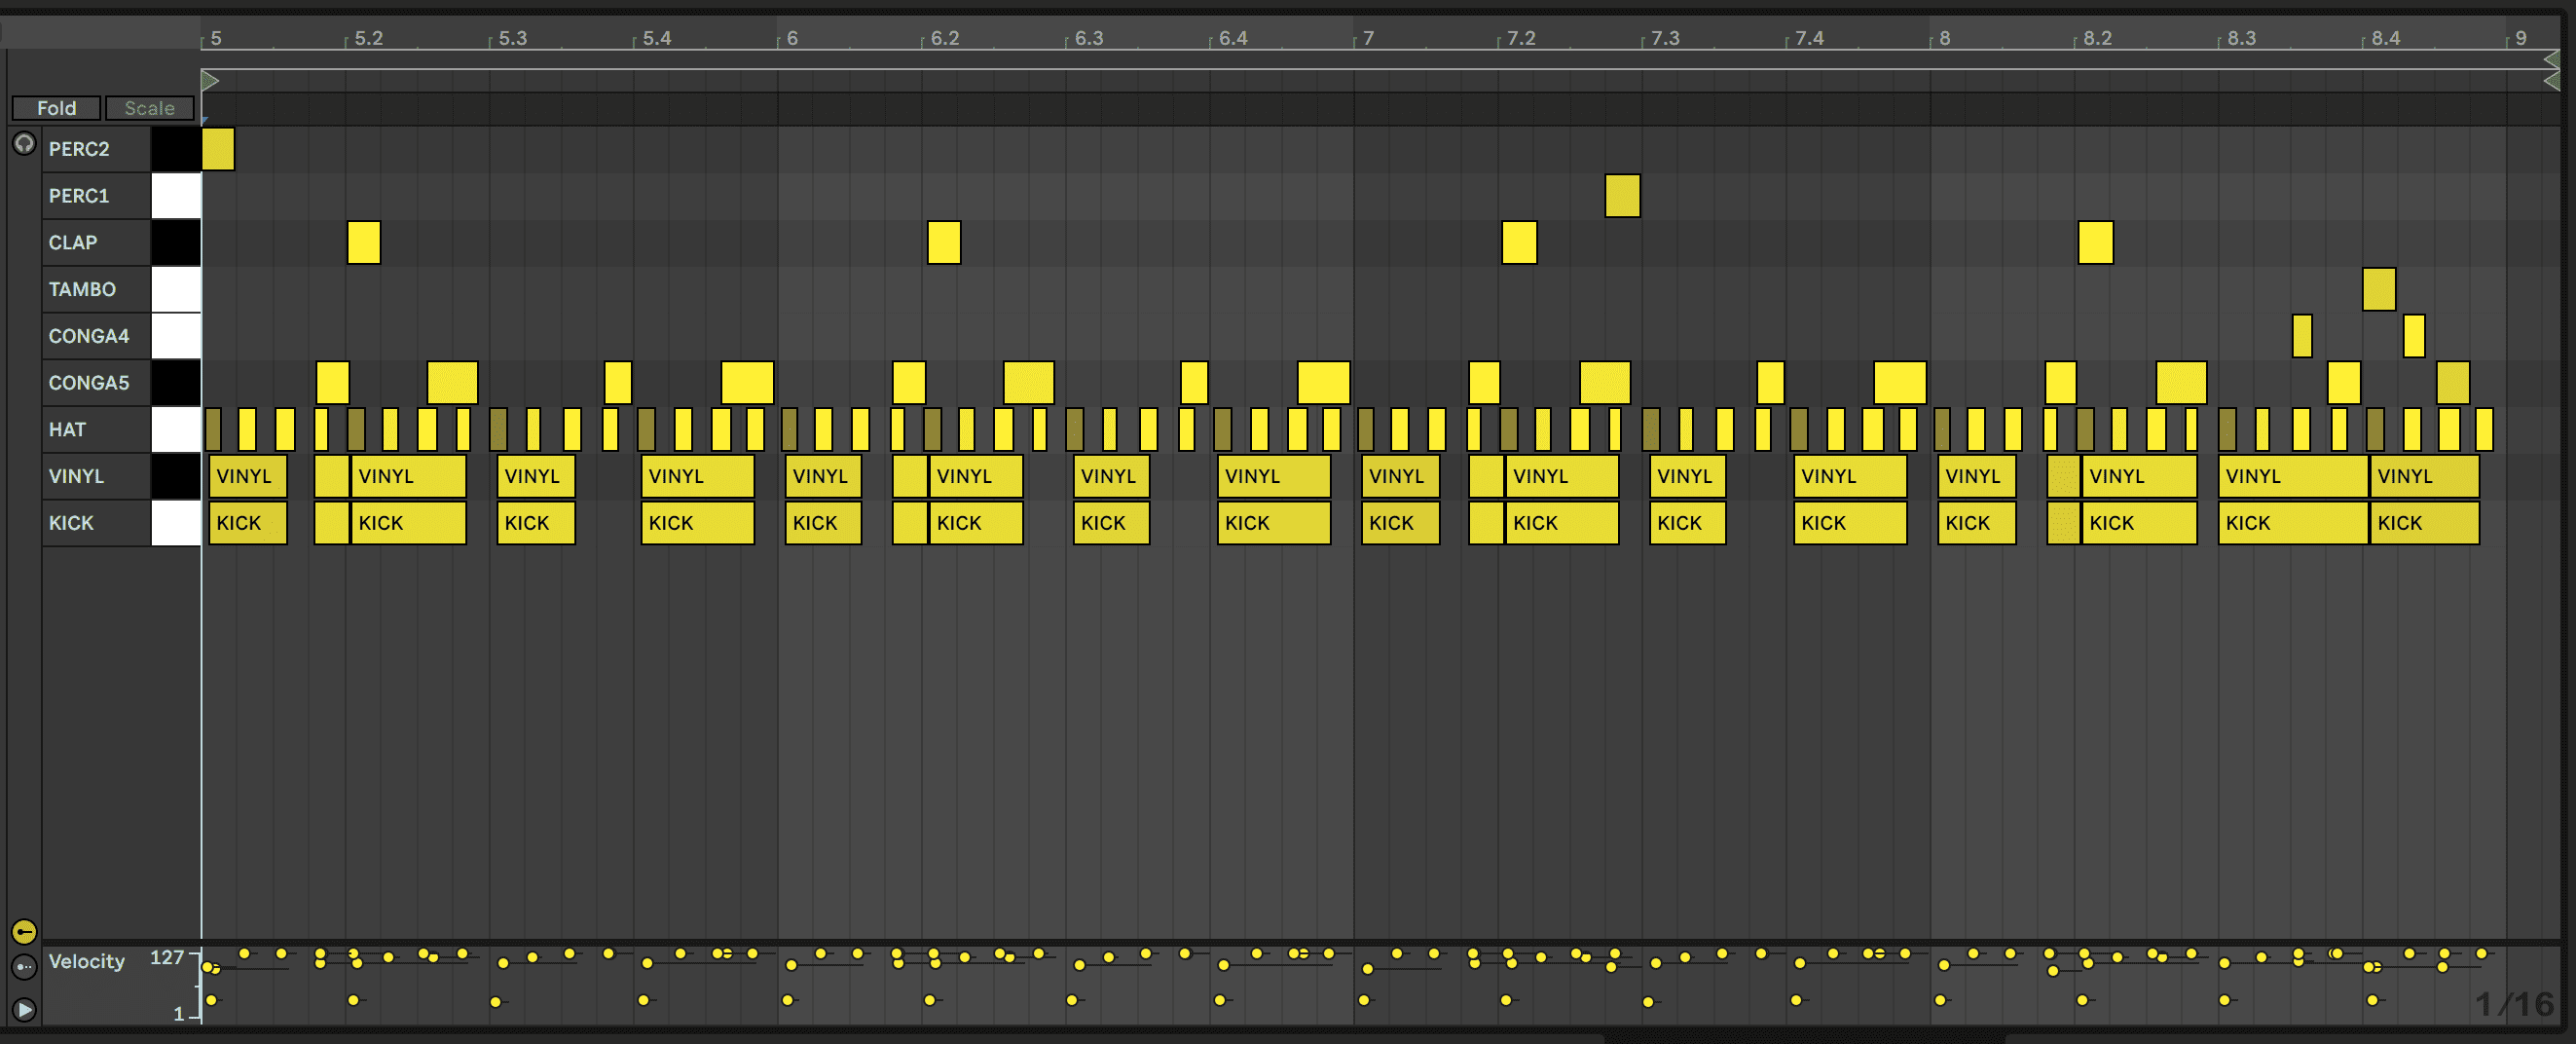
Add a closed hi-hat sample to the drum rack and program a 16th-note pattern. We used ‘NM_HAT3’ from Ableton’s Loopmasters Mixtape Pack.
Lone’s patterns have significant swing, resulting from un-quantized patterns with lots of varying velocities. To emulate this, we played the pattern live with a MIDI keyboard, chose the best take, and duplicated it. To add even more expression to your velocity settings you can use the Velocity MIDI effect’s random knob.
We again want to achieve a 3D effect with these hats but this time we’re going to use delay. Insert Ableton’s Echo device and set the time to 11 ms, the feedback to around 31%, the Dry/Wet to 100% and the mode to Ping Pong. Disable the filter at the very bottom of the Echo tab and increase the Reverb knob slightly to add some ambience.
To increase the presence of the hats in the stereo spectrum, even more, you can use some mid-side EQ’ing. Insert an EQ Eight after the Echo device and switch the mode to M/S at the top-right. Under ‘Edit’ click on the M to change it to S – the sides – and boost the high frequencies to taste.

Step 3
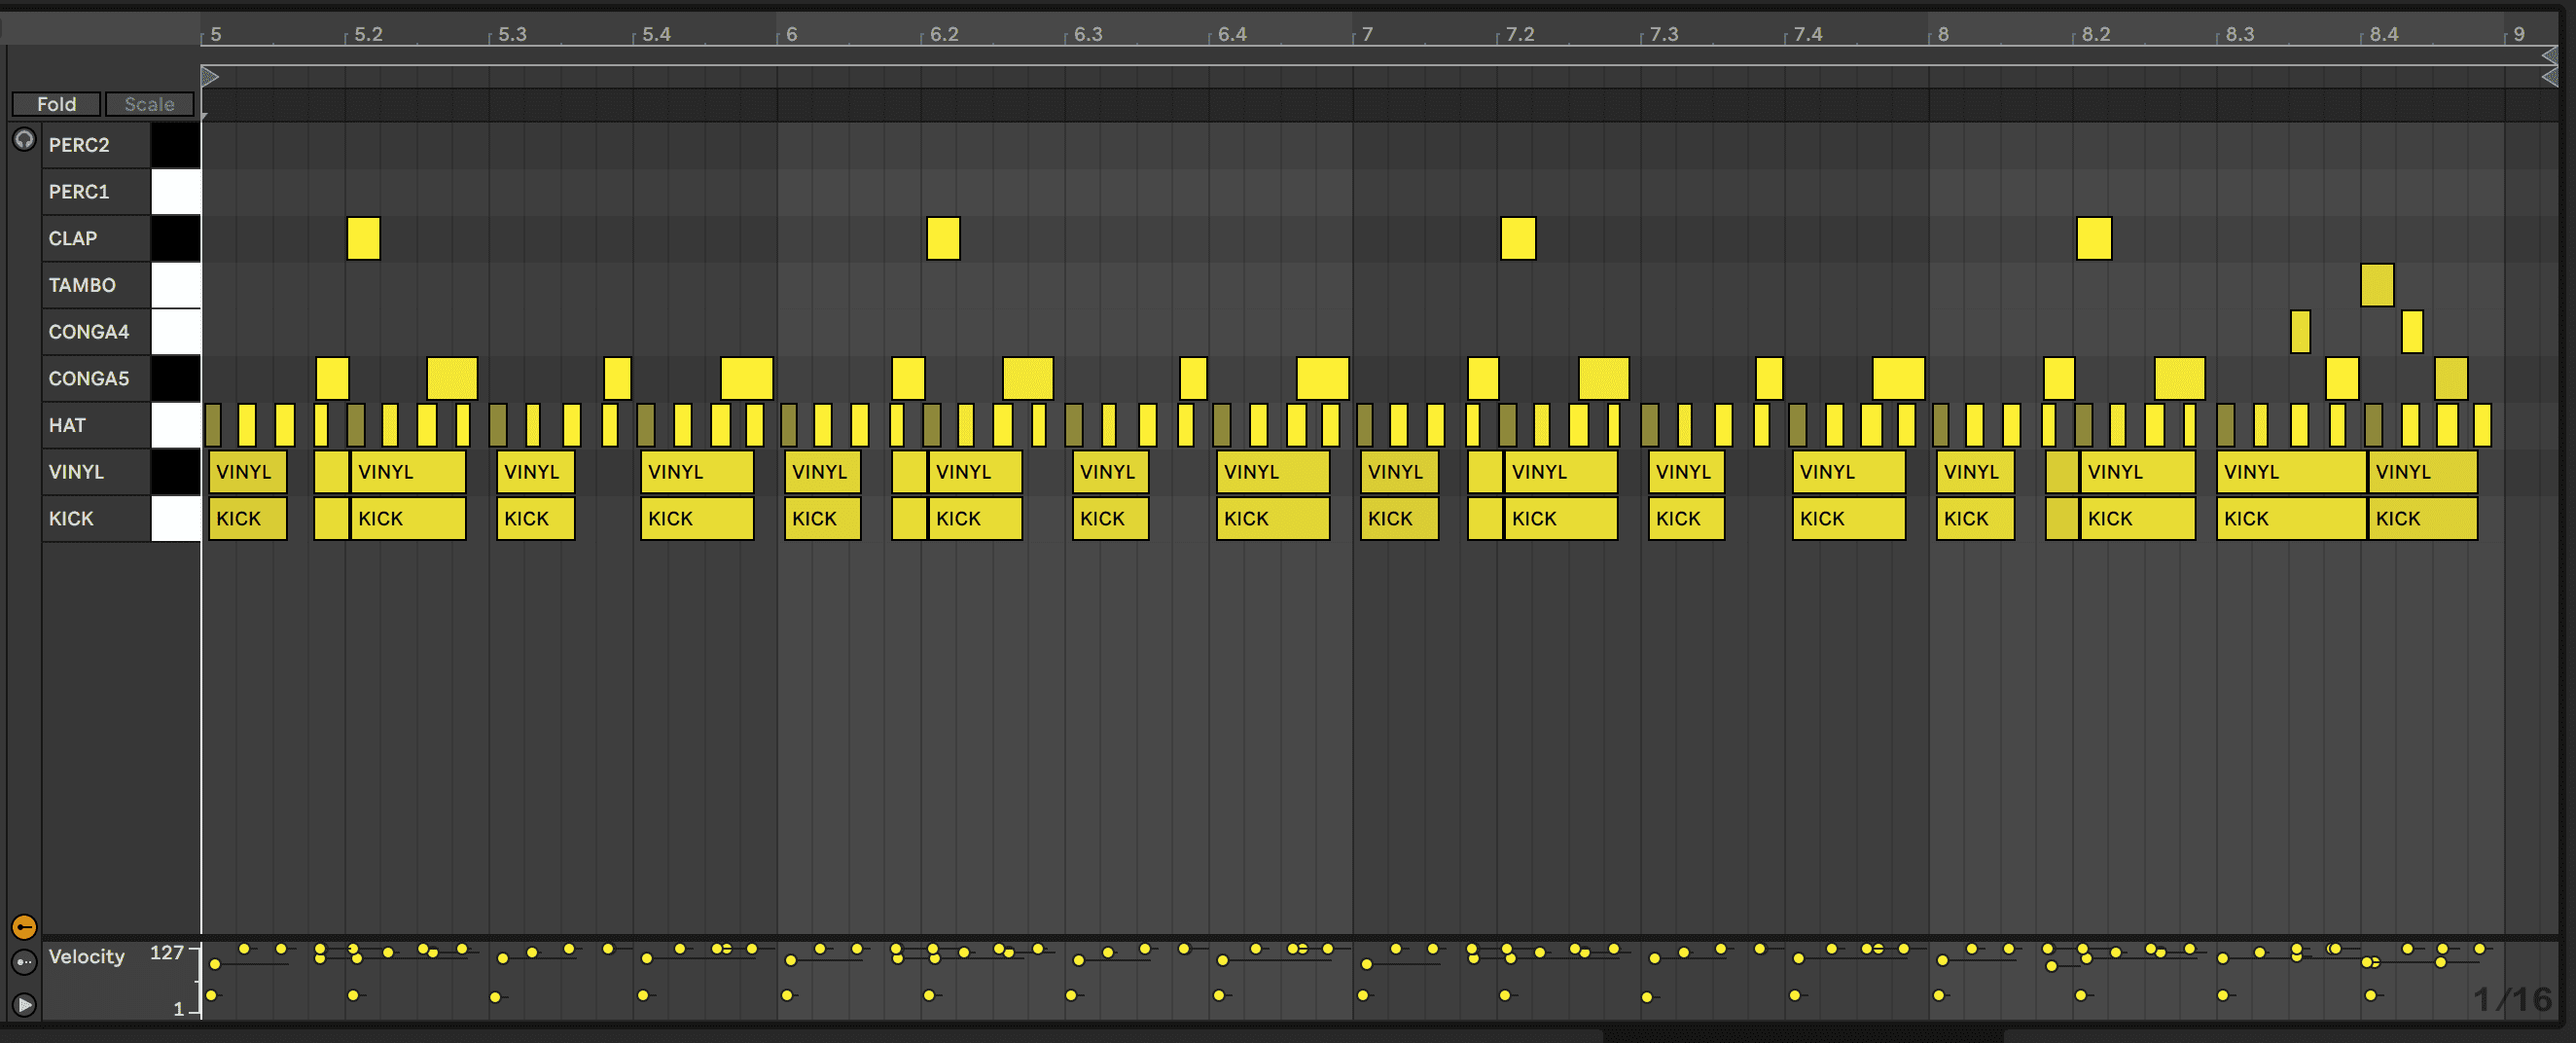
For percussion, you’ll need two conga samples pitched and panned differently to again add to the room effect. We used ‘conga5’ and ‘conga4’ from Ableton’s Loopmasters Mixtape Pack.
Pan the lower conga 34L and the high one 26L. Add Live’s Reverb to one of them and, as before, pull the decay time to less than 1 second and set the Dry/Wet to taste. Copy the reverb over to the other conga. You can also add an EQ to the lower-pitched conga and set a high pass until around 3k to prevent the low frequencies from clashing with the kick or bass.
As in Blue Moon Tree, the higher conga comes in for a call and response-style fill at the end of each fourth bar.


Step 4
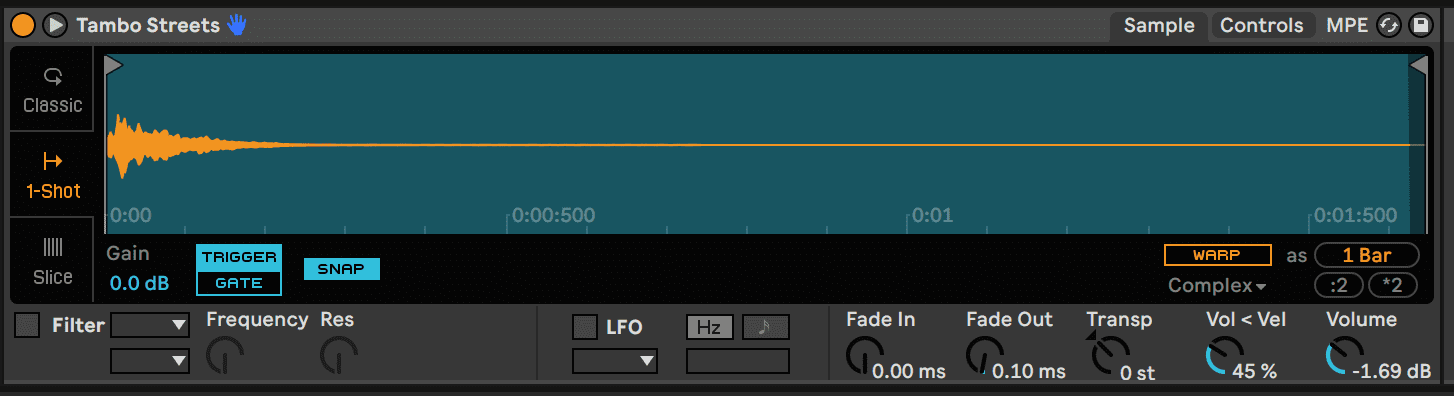
For this step drag a tambourine sample and clap sample into the drum rack. We used ‘Tambo Streets’ from Ableton’s Chop and Swing Pack and ‘Clap Bit Nighties’ from Ableton’s Drum Essentials Pack.
The parts are fairly straightforward with the tambourine only hitting once at the end of the fourth bar for syncopation and the clap hitting once every bar on the second downbeat.
Add Live’s Reverb to the clap and bring up the decay time to over 5 seconds. A long way up! This will create spatial contrast with the other parts as their reverbs are much shorter. We’ve duplicated the four-bar loop and have the claps programmed in on the second loop for contrast.

Step 5
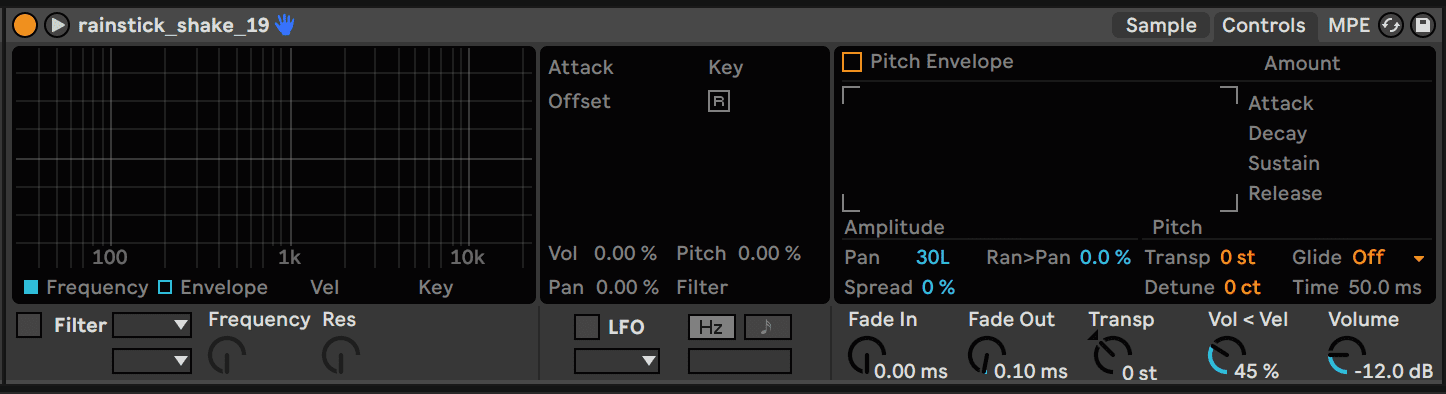
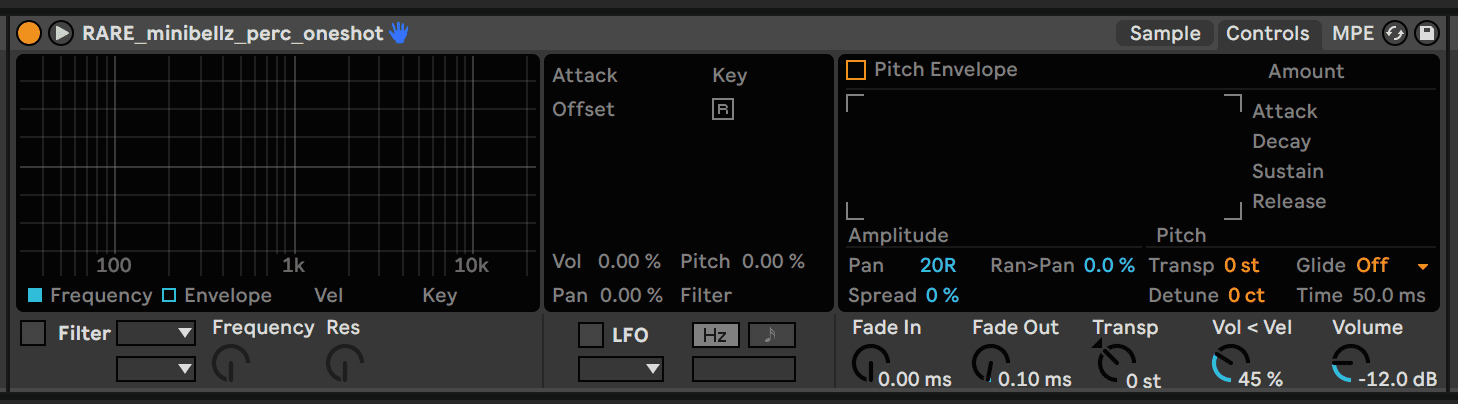
Lone is definitely known for making use of organic and panned percussion so we downloaded two long percussion one-shots from Splice to place throughout the beat. We used ‘RARE_minibellz_perc_oneshot’ from RARE Percussion’s pack Texture Weapons Vol 2 and ‘rainstick_shake_19’ from Soundiron’s pack Antidrum 2.
If you choose good samples processing is not always necessary so we’ll leave the one-shots as they are in simply pan one 20L and the other 30R. As with the previous step’s samples, we have these coming in in the second four-bar loop.
Top Tip: If you want to bring this percussion to life, you can automate the panning to slowly move from left to right and back again.
Step 6
To add a little lo-fi ambience, create a separate audio channel and insert a long tape noise sample or any drone to taste. We used ‘PMSP_FX_Vinyl_Noise_Tape’ from Production Master’s pack Stereophonic – Hip Hop Soul & Organic Jazz Sessions on Splice.
Be sure to also add a compressor and sidechain the noise to the kick so as to allow the kick to cut through the mix.

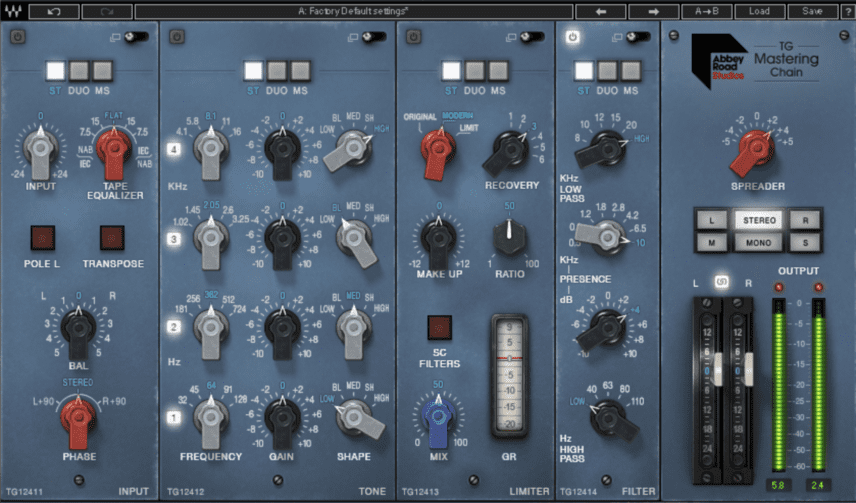
The final step is adding a mastering-friendly stereo imaging plug-in on the whole drum rack and one of our favourites for the job is Waves’ Abbey Road TG Mastering Chain. This plug-in looks quite complicated but all we need is the Spreader knob on the very top right. A value around +3 should be more than enough to really emphasize all of the information on the sides of your mix.
This mostly affects sounds that have already been enhanced with stereo width and reverb. If you don’t have the TG Suite there are lots of options on the market for mastering-style width plug-ins including iZotope’s free plug-in Ozone Imager.
We also added some top end via the Presence knob in the filter module, but you can use any of your favourite EQ’s to do the same.
Here’s the end result:
And here it is with some bass for context – we used the Core Library’s Basic FM House Bass preset:
Beat Dissected is now available on YouTube also. Subscribe to your YouTube channel to catch all the latest videos.