In this installment of Beat Dissected we continue our exploration of dub techno and program a beat in the style of Basic Channel, the duo that pioneered the genre.
When Basic Channel’s Phylyps Trak album was released in 1993 a new sub-genre of techno was born. The thumping fast Roland TR-909 beats had brought the coveted Detroit sound to Berlin but with new twists like tape delays, noise effects and reverbs creating a new style of ambience.
In this article we revisit this style of production, creating a beat inspired by Basic Channel classics like ‘Phylyps Trak’ and ‘Quadrant Dub I’. We’ll start with the drums and then move on to dub chords, delays, percussion layers and effects processing, all aimed at emulating the analogue character of early dub techno.
Here’s the beat we’re building today:
Spec
Tempo
145 BPMSwing
NONESounds
Splice and AbletonBeat Dissected is a regular series in which we deconstruct drum patterns, showing you how to program them in any DAW. Just copy our grid in your own software to recreate the loop. The objective is to analyze drum programming techniques, not to recreate the artist’s beats exactly.
To follow along, download the session! Just put your details in once only!
To enlarge any photo, just click on the image.
You can now also follow the Beat Dissected series on YouTube. Make sure to like and subscribe so we can keep bringing you great content.
For more tutorials about dub techno, be sure to check out our recent Synth Secrets installment, Dub Techno Synth Chords, as well as our in-depth tutorial about creating dub delays with standard plug-ins.
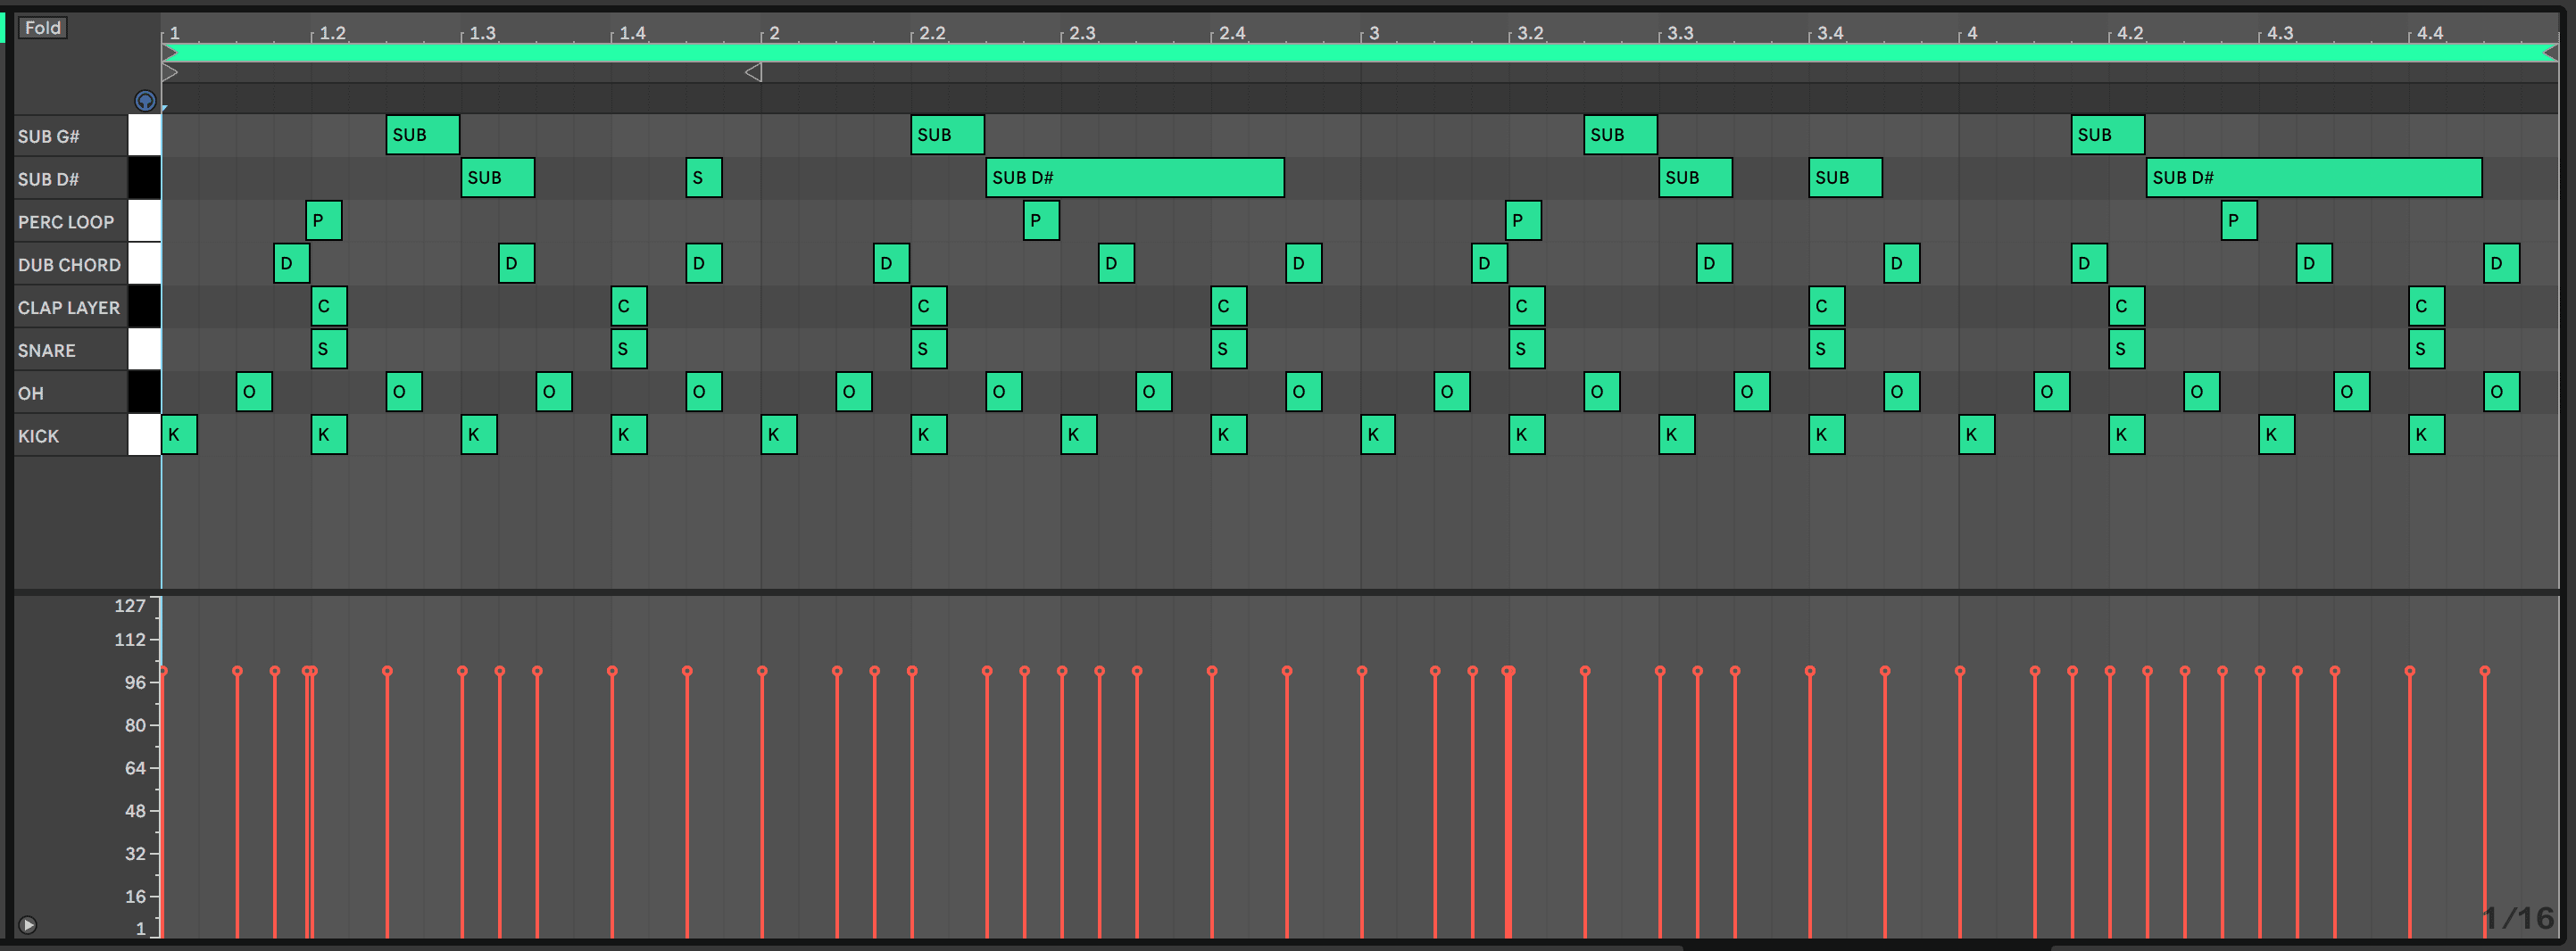
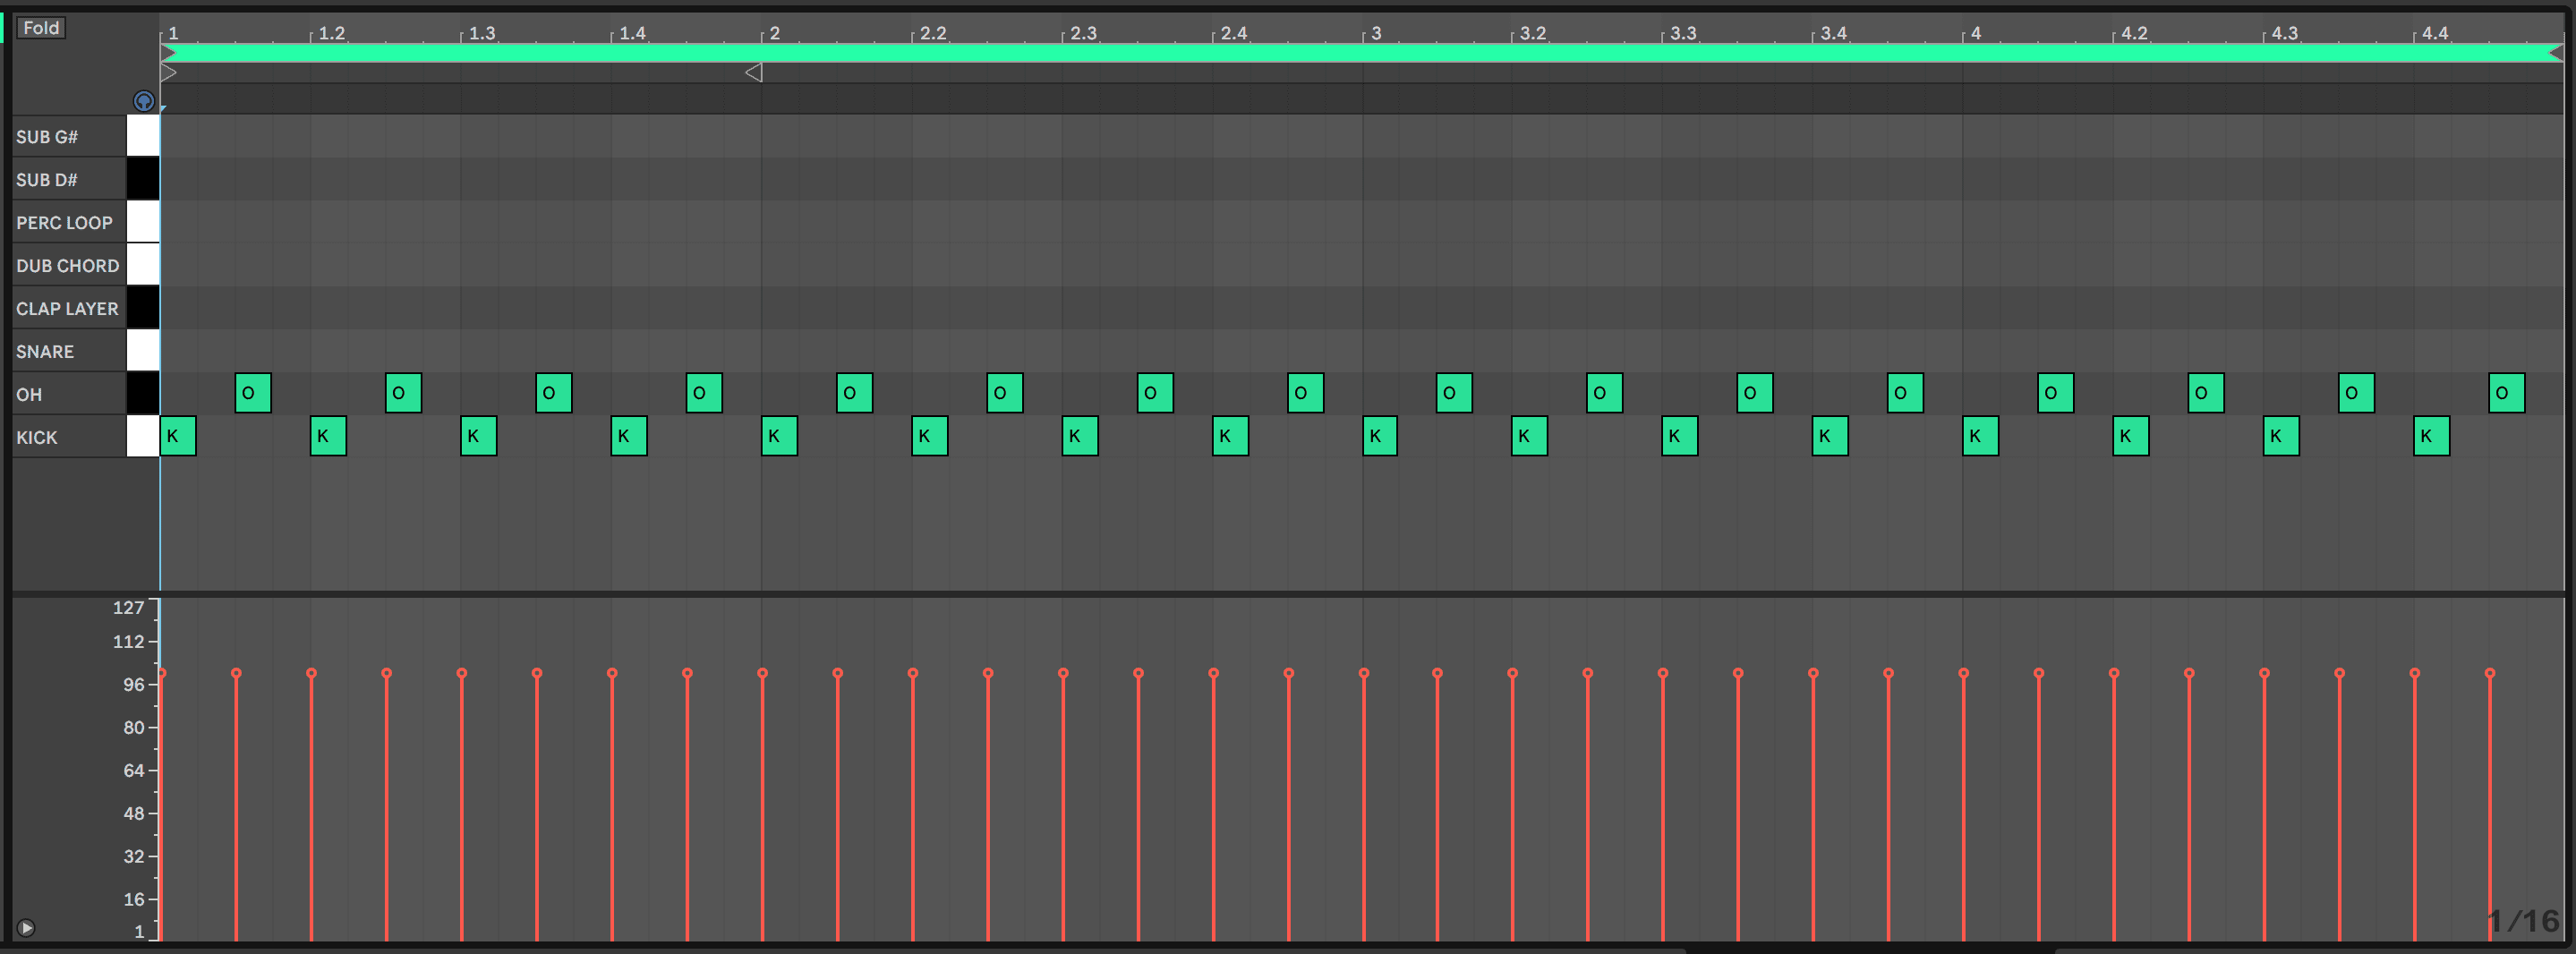
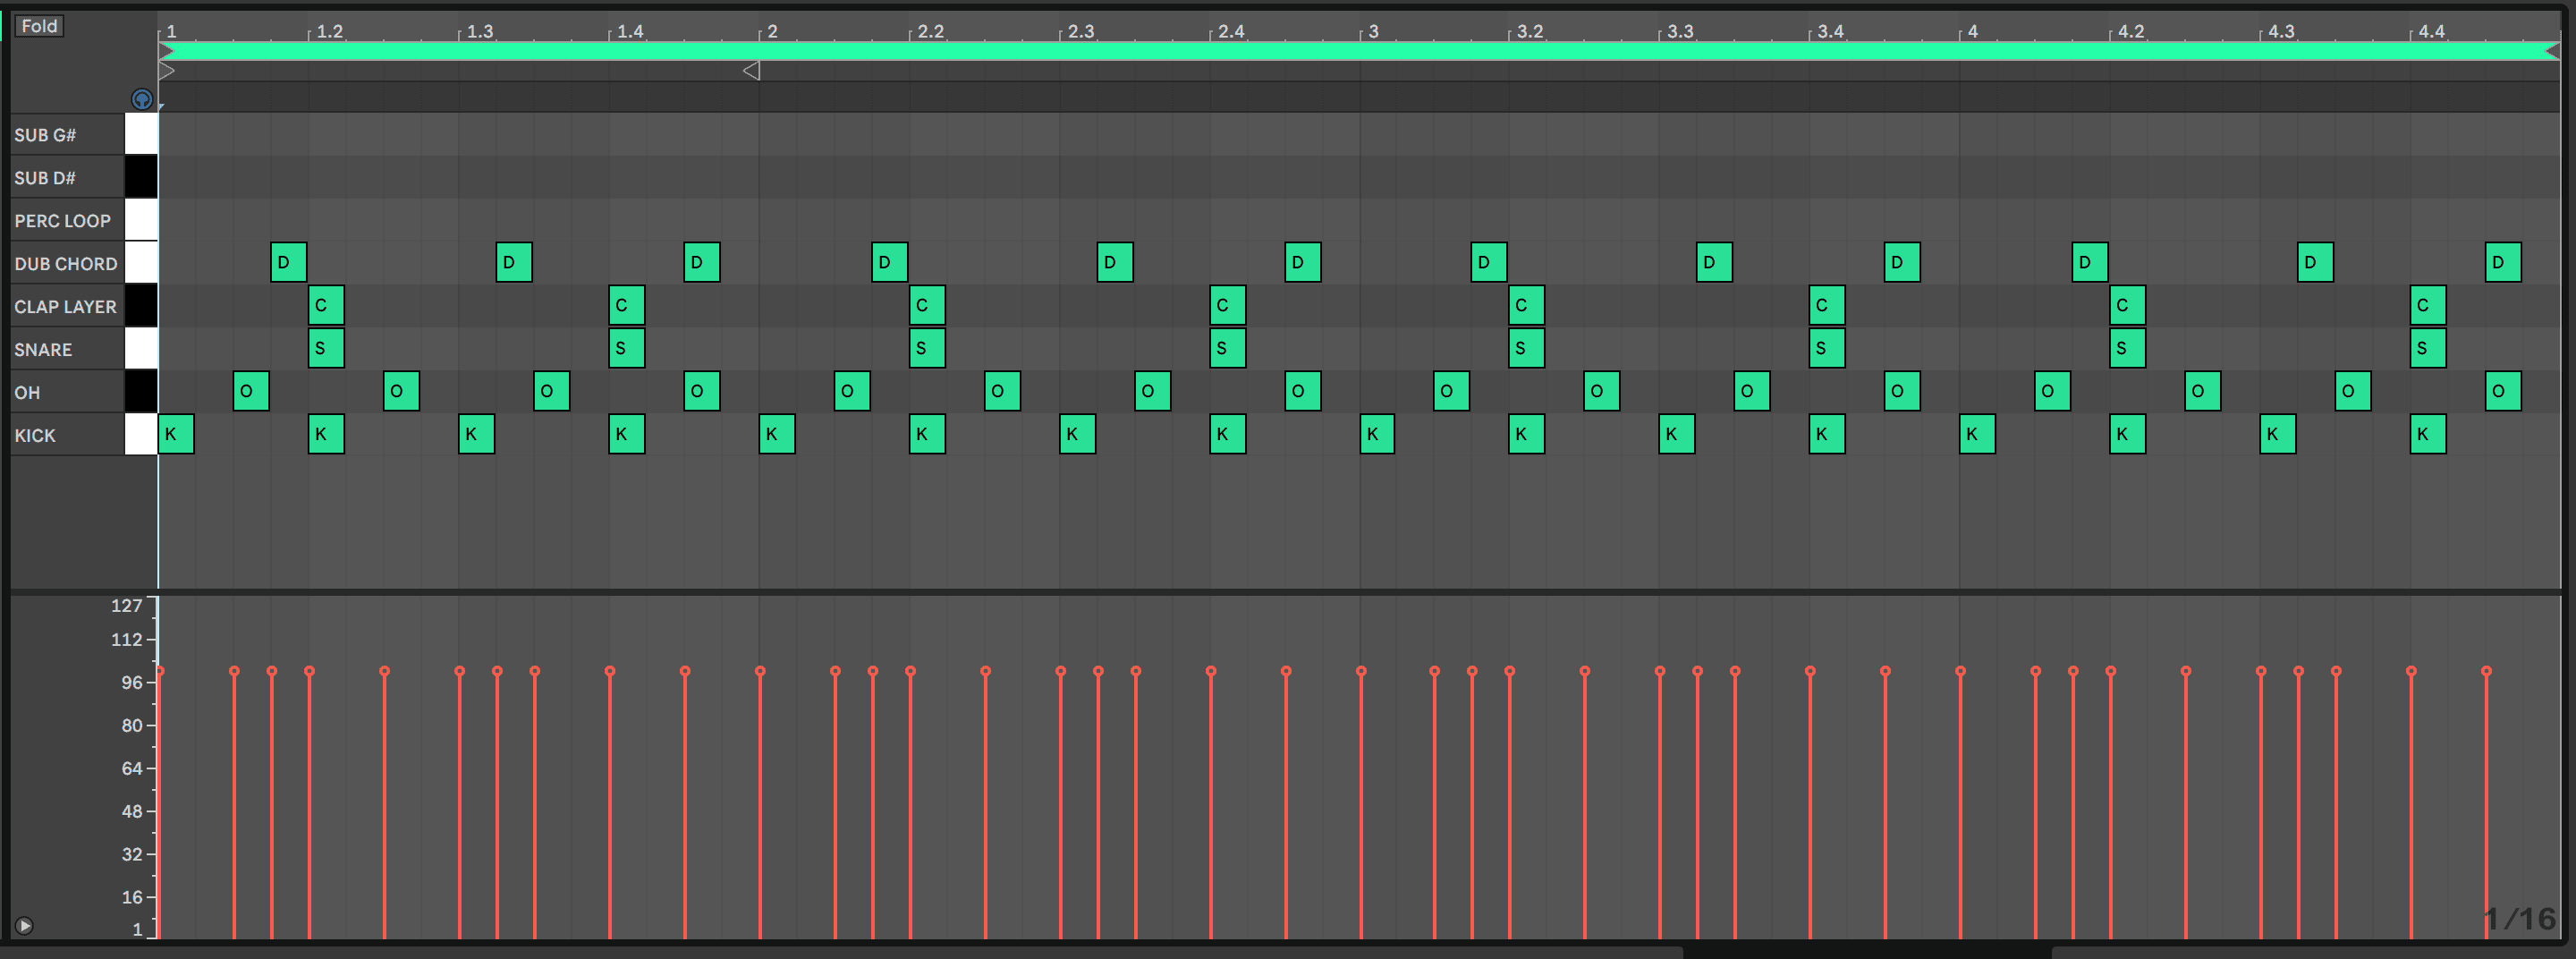
Step 1: Kick and Hat
The first step in laying down a vintage dub techno beat is the four-to-the-floor kick and the off-beat hat. The pattern is as straightforward as can be with minimal processing on the samples.
For the kick we used ‘zdt_kick124_clean’ from Sample Magic’s Dub Techno pack on Splice. It has a good thumpy transient as well as some subby low end that lacks sustain. This works out well because we are going to add sub bass in the final step.
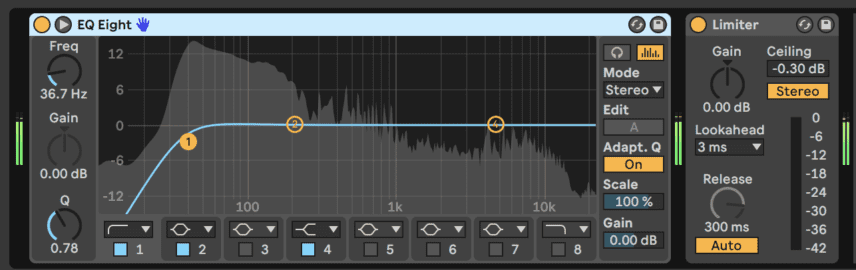
For the open hat we used ‘rit_oh_weurgh’ from Sample Magic’s Raw Industrial Techno pack on Splice. Use an EQ to cut the unnecessary low frequencies while boosting the top end. The rest of the beat’s elements mainly occupy the low and mid frequencies so it’s important that the hat’s more airy frequencies cut through!
Place Ableton’s Drum Buss audio effect after the entire drum rack to glue the parts together while also adding some low end and warmth via the Boom and Damp controls. A low Boom setting at 8% at around 37Hz and a Damp setting of around 8.5kHz should do the trick.
In this series we usually start processing the entire Drum Rack after all of the steps but the Drum Buss’ saturation and character is crucial to the final sound we are going for. As a result, we decided to experiment with producing the rest of the beat with the effect activated.


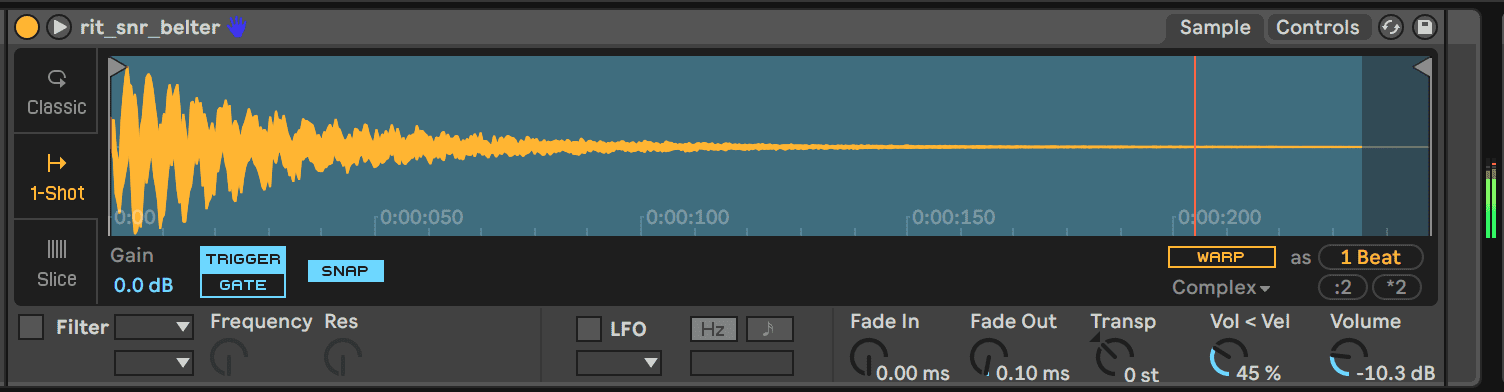
Step 2: Layered Snare
Next is the snare. We want the snare to be snappy without much low end but we also want a lo-fi character that compliments the distorted, noise-driven musical parts in the next steps.
Insert an 808-style snare into the Drum Rack and program a hit on every other downbeat. We used ‘rit_snr_belter’ from Sample Magic’s Raw Industrial Techno pack on Splice.
Here’s the snare in solo:
For the lo-fi layer insert a clap sample and use it to double up the snares. Pitch it up for a thinner sound, use Live’s Redux for some bit crushing and downsampling, and add an EQ to cut the lows until about 150Hz.
Here’s the clap in solo without the Redux effect and then with the effect activated:
The beat so far:


Step 3: Dub-Delayed Chords
Now for the most important element – dub chord stabs and delay madness!
Insert Live’s ‘Chord Dub Chop 24’ from Ableton’s Drum Essentials pack, program some syncopated hits and pitch the sample down -7 tones – this will get us an D# minor chord.
Here’s how the chord sounds with just the kick
Not exciting at all – yet!
Insert the Redux effect and lower the Bit Reduction all the way down to six. This will result in some very harsh noise that you’d think would be unusable but the Auto Filter will come to the rescue. Use the filter in bandpass mode so it cuts the muddy lows and the now-very-noisy highs. Make sure to set the slope to 12 instead of 24 and leave the cutoff frequency around 450.
In bandpass mode, moving the cutoff greatly changes the character of the sound and if this is done with a slightly higher resonance the result is new textures that sound great when run through dub-style delays.
Also, increase the LFO amount to around 10 with a slow rate to add a little more movement.
Here’s how the chord sounds with these effects and some filter cutoff automation:
For the delays, we added Live’s Echo with a 1/8 dotted delay followed by Live’s Filter Delay adding all kinds of different rhythmic echoes. To many, Filter Delay is the ultimate dub techno delay as you have total control over which frequencies of the three delay channels are let through via their individual filters.
Next, insert Live’s Reverb with a low decay time. Delays sound great when run through a bit of reverb.
Dub techno wouldn’t be dub techno without some sidechain compression to help the kick punch through all of the ambient textures so insert Live’s Compressor, enable sidechain and select the kick. Set the attack to its fastest setting and reduce the threshold to taste. Keep this compressor handy as we will be copy and pasting it to numerous other elements in the next steps.
Here’s the dub chord with sidechain compression in solo with the kick followed by our progress so far:


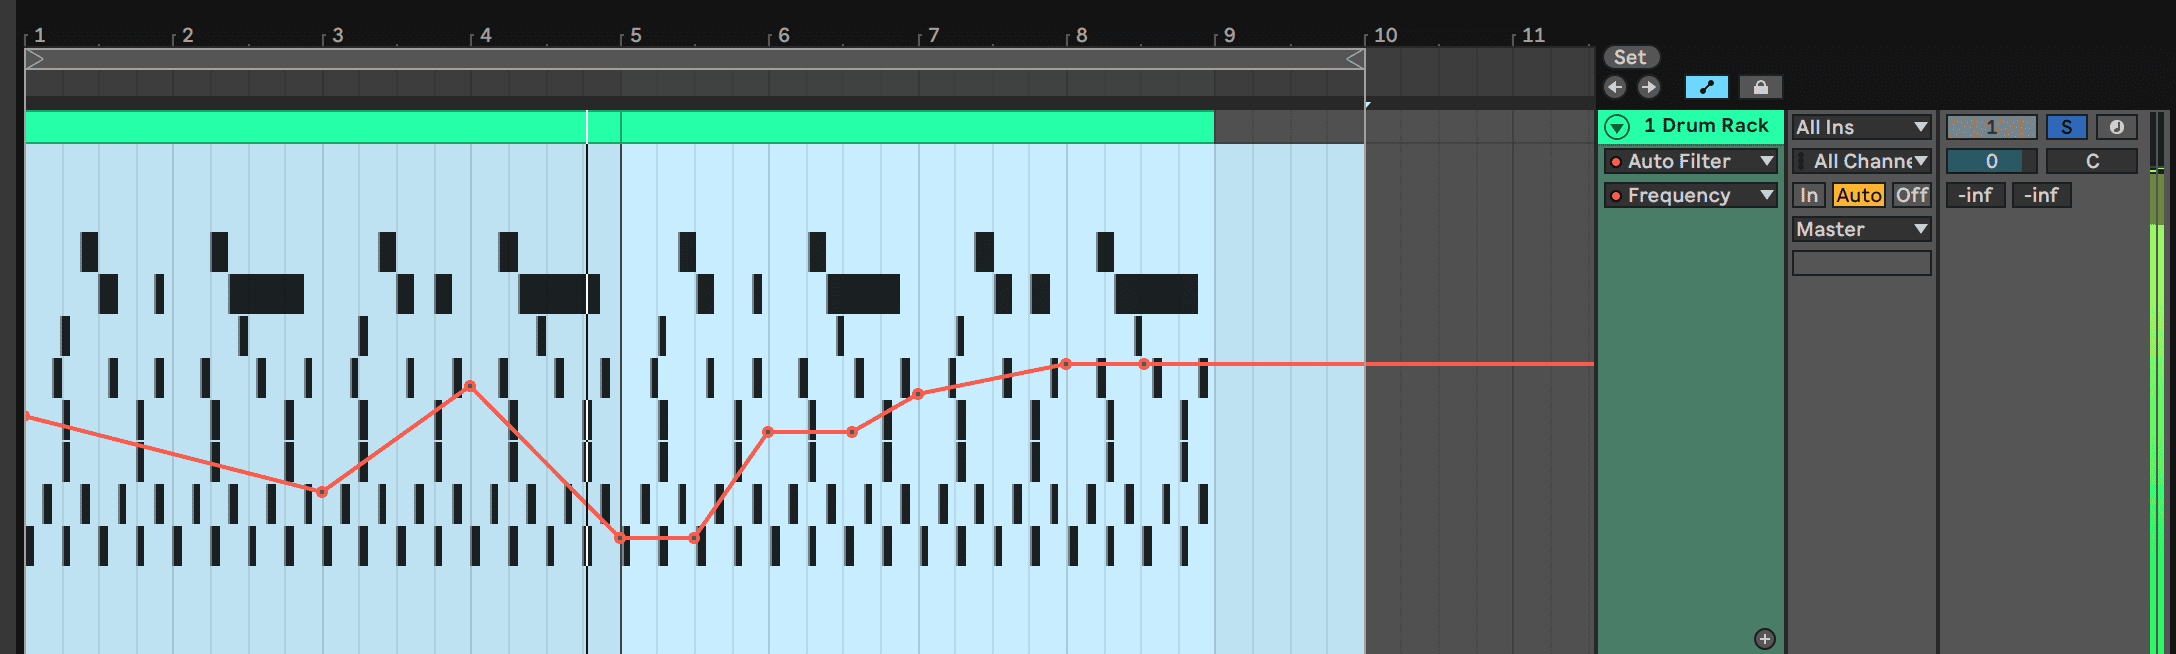
Step 4: Chord Layer
The goal in this step is to add some more emphasis to the D# minor chord by adding a rhythmic chord element.
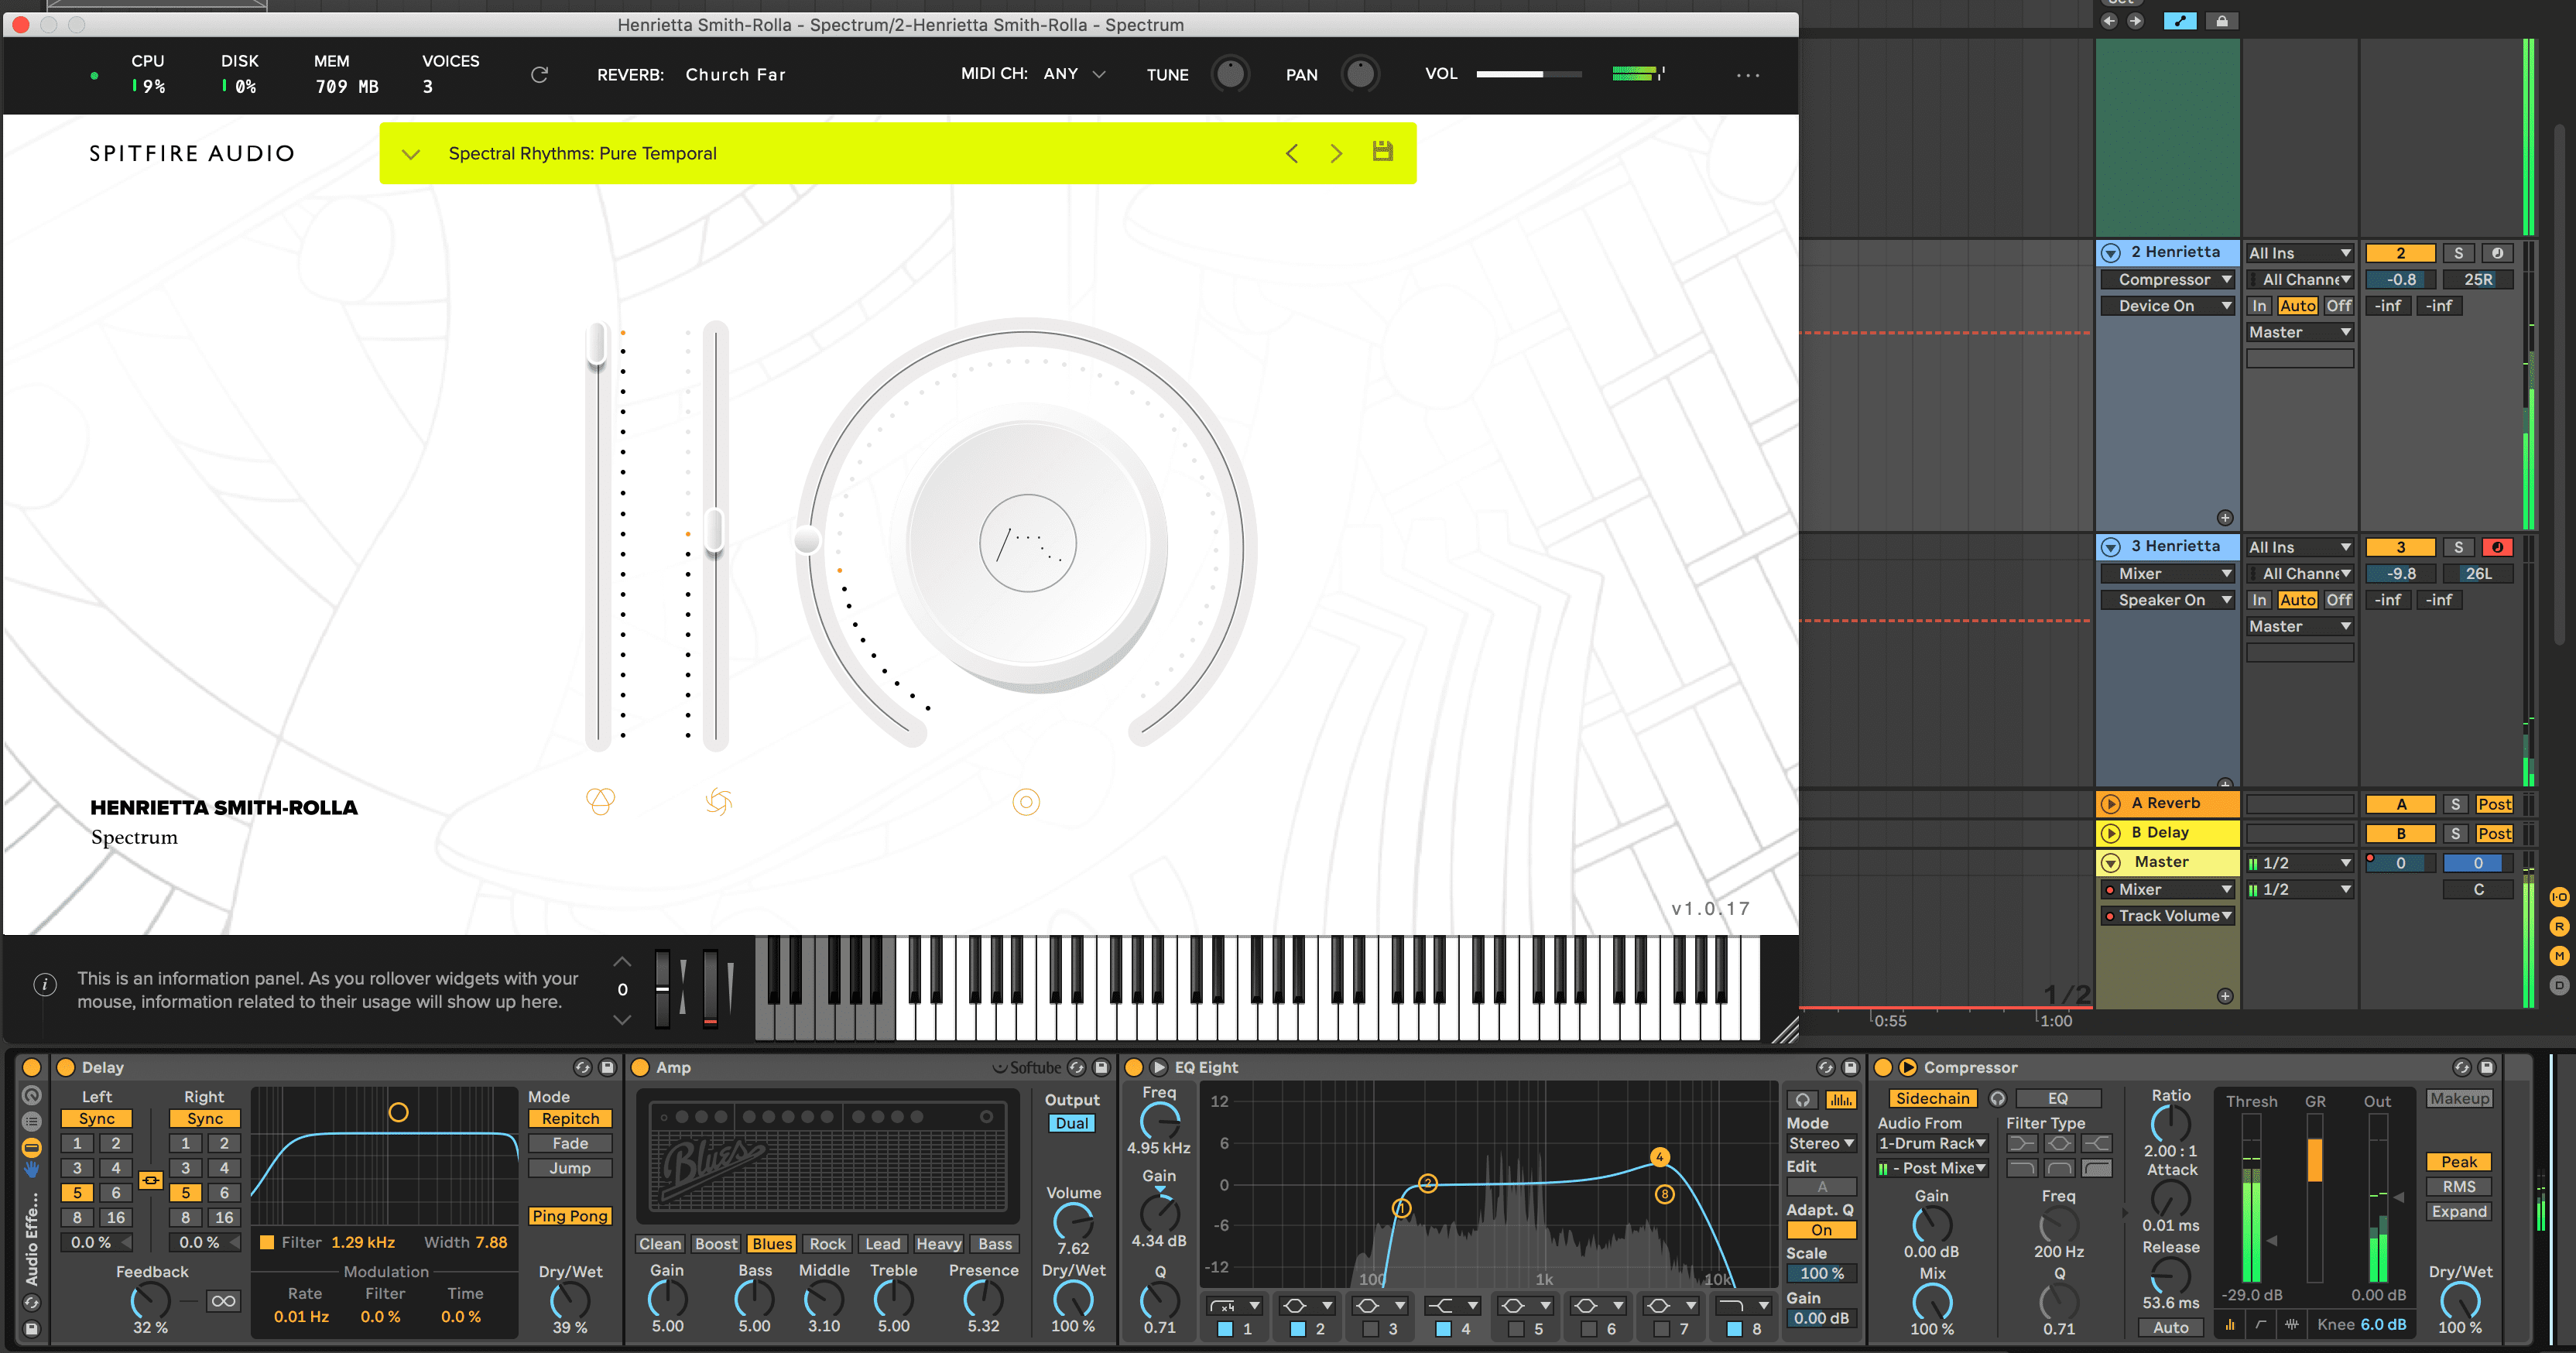
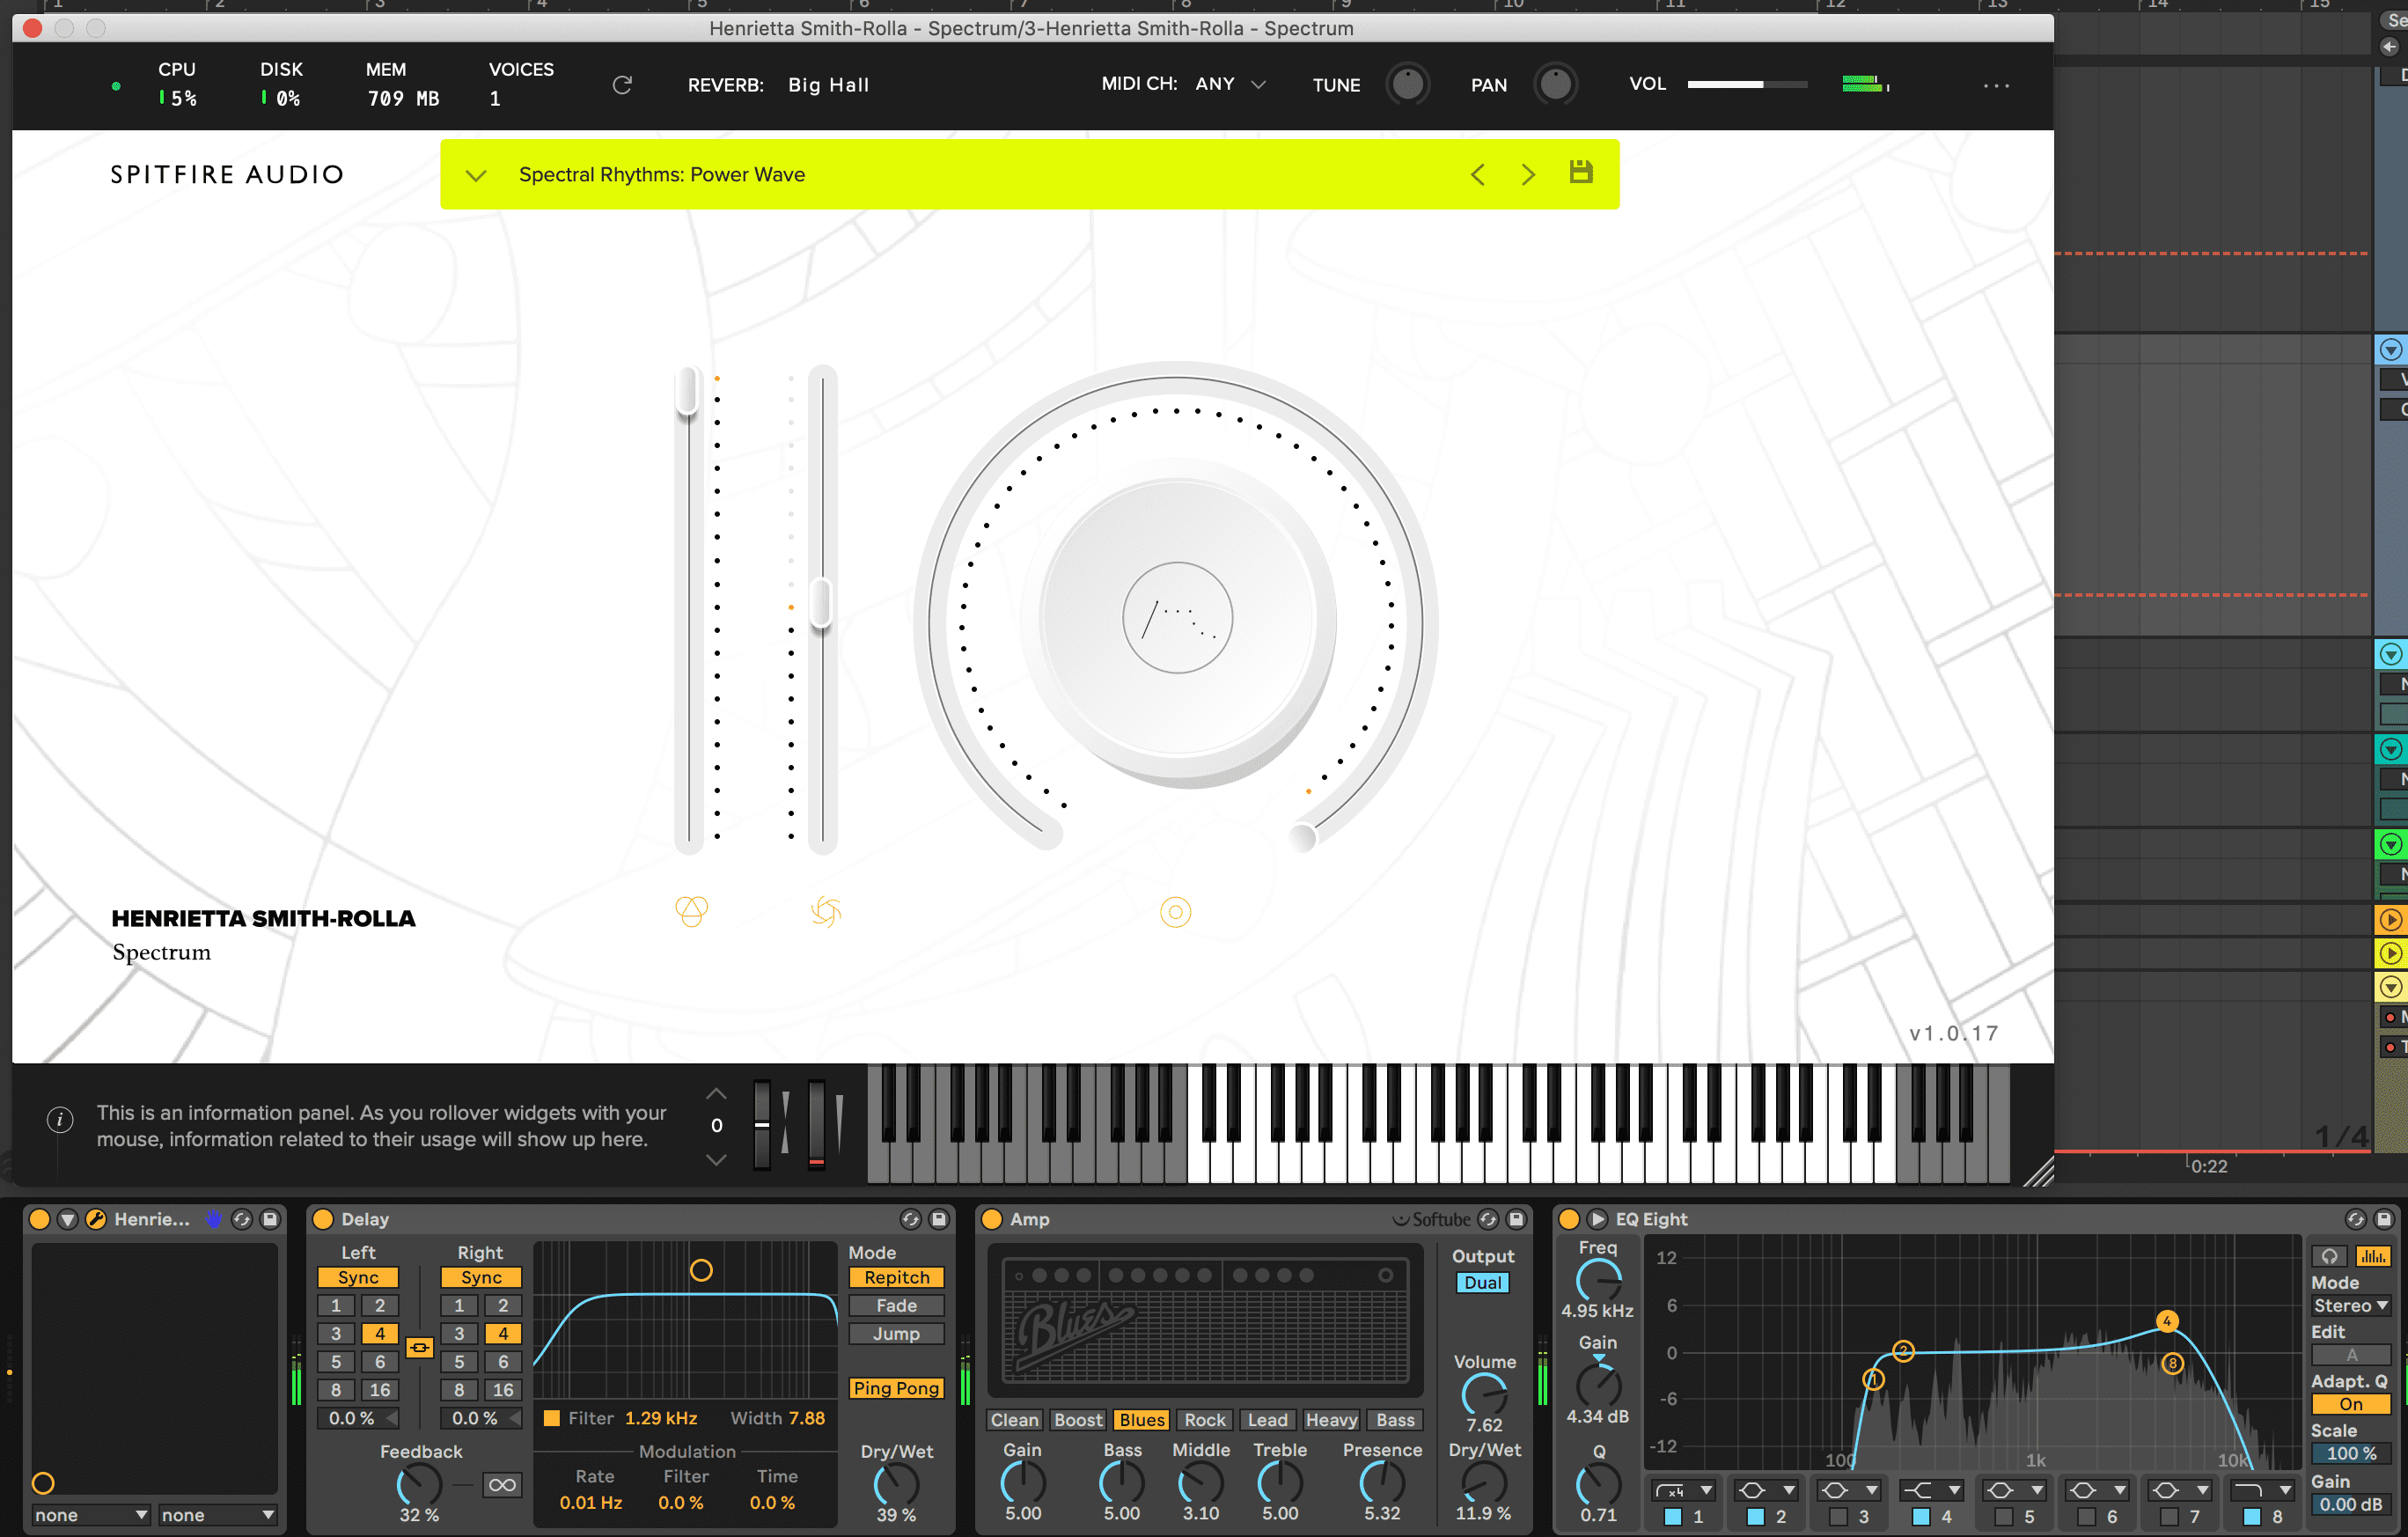
In a separate MIDI channel, load up a synth and program a sustained D# minor chord. We used Spitfire’s Spectrum, an instrument the British sampling wizards developed with Afrodeutsche, with its Pure Temporal preset. Spectrum has a good selection of ambient percussive chord and rhythm presets that are just screaming to be used for dubby tasks.
Here’s how it sounds without any processing:
To spice the sound up, add some 5/16 echoes via Live’s Delay and add grit and distortion via the Amp audio effect. Remember to set the Output setting in the top right to Dual so that the signal stays stereo.
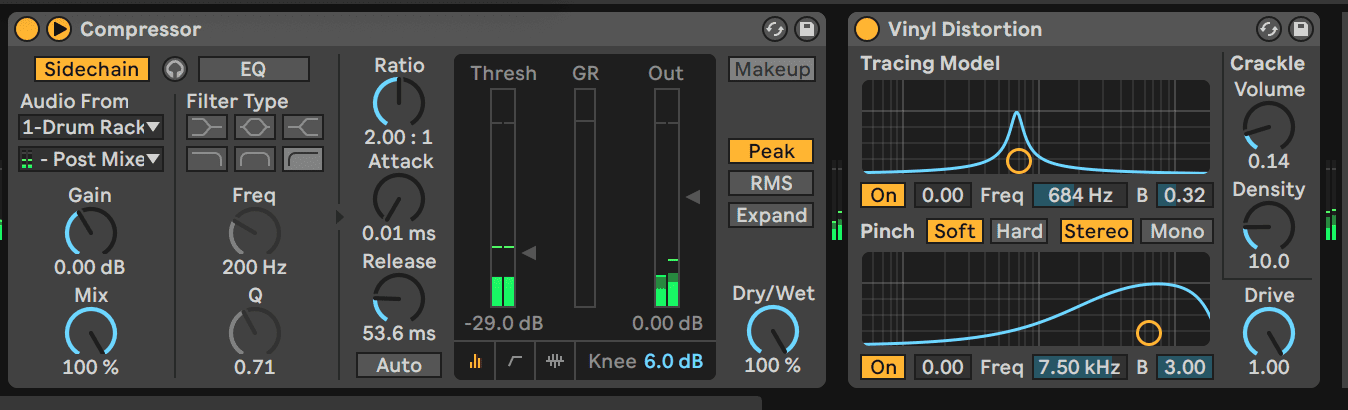
Next, insert an EQ to tame the noise in the high frequencies resulting from the amp and copy-paste the compressor from the previous step to sidechain these new chords to the kick.
Here’s the Spectrum part in solo and then with the other elements:

Step 5: Percussion
We’re going to add two elements of percussion to the beat. The first is a four-hit loop we extracted from the ‘ABWD_Percussion_Loop_26_145BPM’ sample from Audeobox’s Wait For It pack on Splice.
Here’s how these hits sound in solo:
The loop is in our BPM of 145 so program a couple hits exactly on offbeat 16th notes to keep everything quantized. This is by no means a rule but one of the hallmarks of dub techno is groove and movement resulting from delay instead of heavily swung drum parts.
As with the previous step, add Live’s Amp audio effect to distort the loop and then add any delay that you like. We used Live’s Echo on a 1/8 dotted delay setting.
Here’s how the loop sounds with these effects:
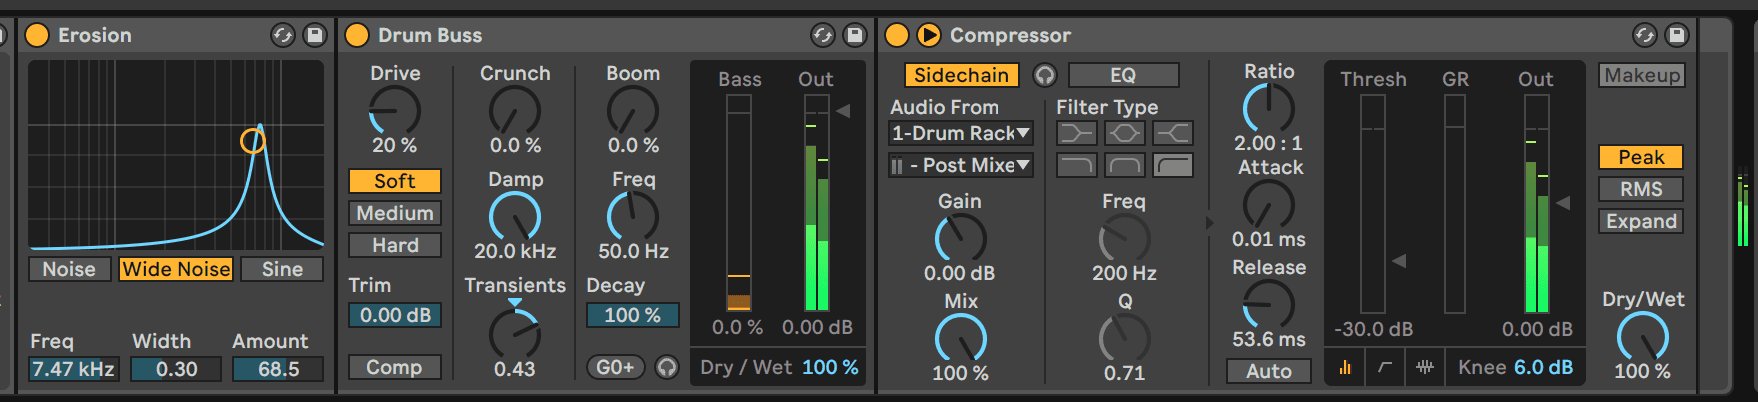
Next, insert Live’s Erosion and Drum Buss effects. Increasing the Erosion’s Wide Noise amount will add noise to every drum hit while increasing the Transients knob in the Drum Buss will bolster the weaker transients lost in the delays
Copy-paste the compressor from the previous step to make sure the kick cuts through this sound as well.
Here’s how the loop sounds with the kick.
For the next layer of percussion, insert a new audio or MIDI channel and use percussion loops or synth percussion presets. We again used Spitfire’s Spectrum with its Power Wave preset. This preset has a different percussive loop on every note so we held four notes down at various points in the beat for some rhythmic variation.
Here’s how the loops sound in solo without any processing:
As with the previous percussion, add a delay, the Amp effect, EQ to shape the sound and sidechain compression to bring the sound into noisier dub territory.
Lastly, insert Live’s Vinyl Distortion effect with the Crackle volume set to around 0.14.
Here’s the processed Spectrum percussion in solo followed by our progress so far:


Step 6: Sub Bass
The final element is a sub bass riff that we’re going to program using two differently pitched versions of one sub hit sample. We used ‘LSTSR3_Emotional_Bass_F’ from Laniakea Sounds’ Trap Soul & Melodic RnB 3 pack on Splice. It’s a pretty generic sub sample but we liked that it had some noise mixed in, fitting into our more lo-fi theme.
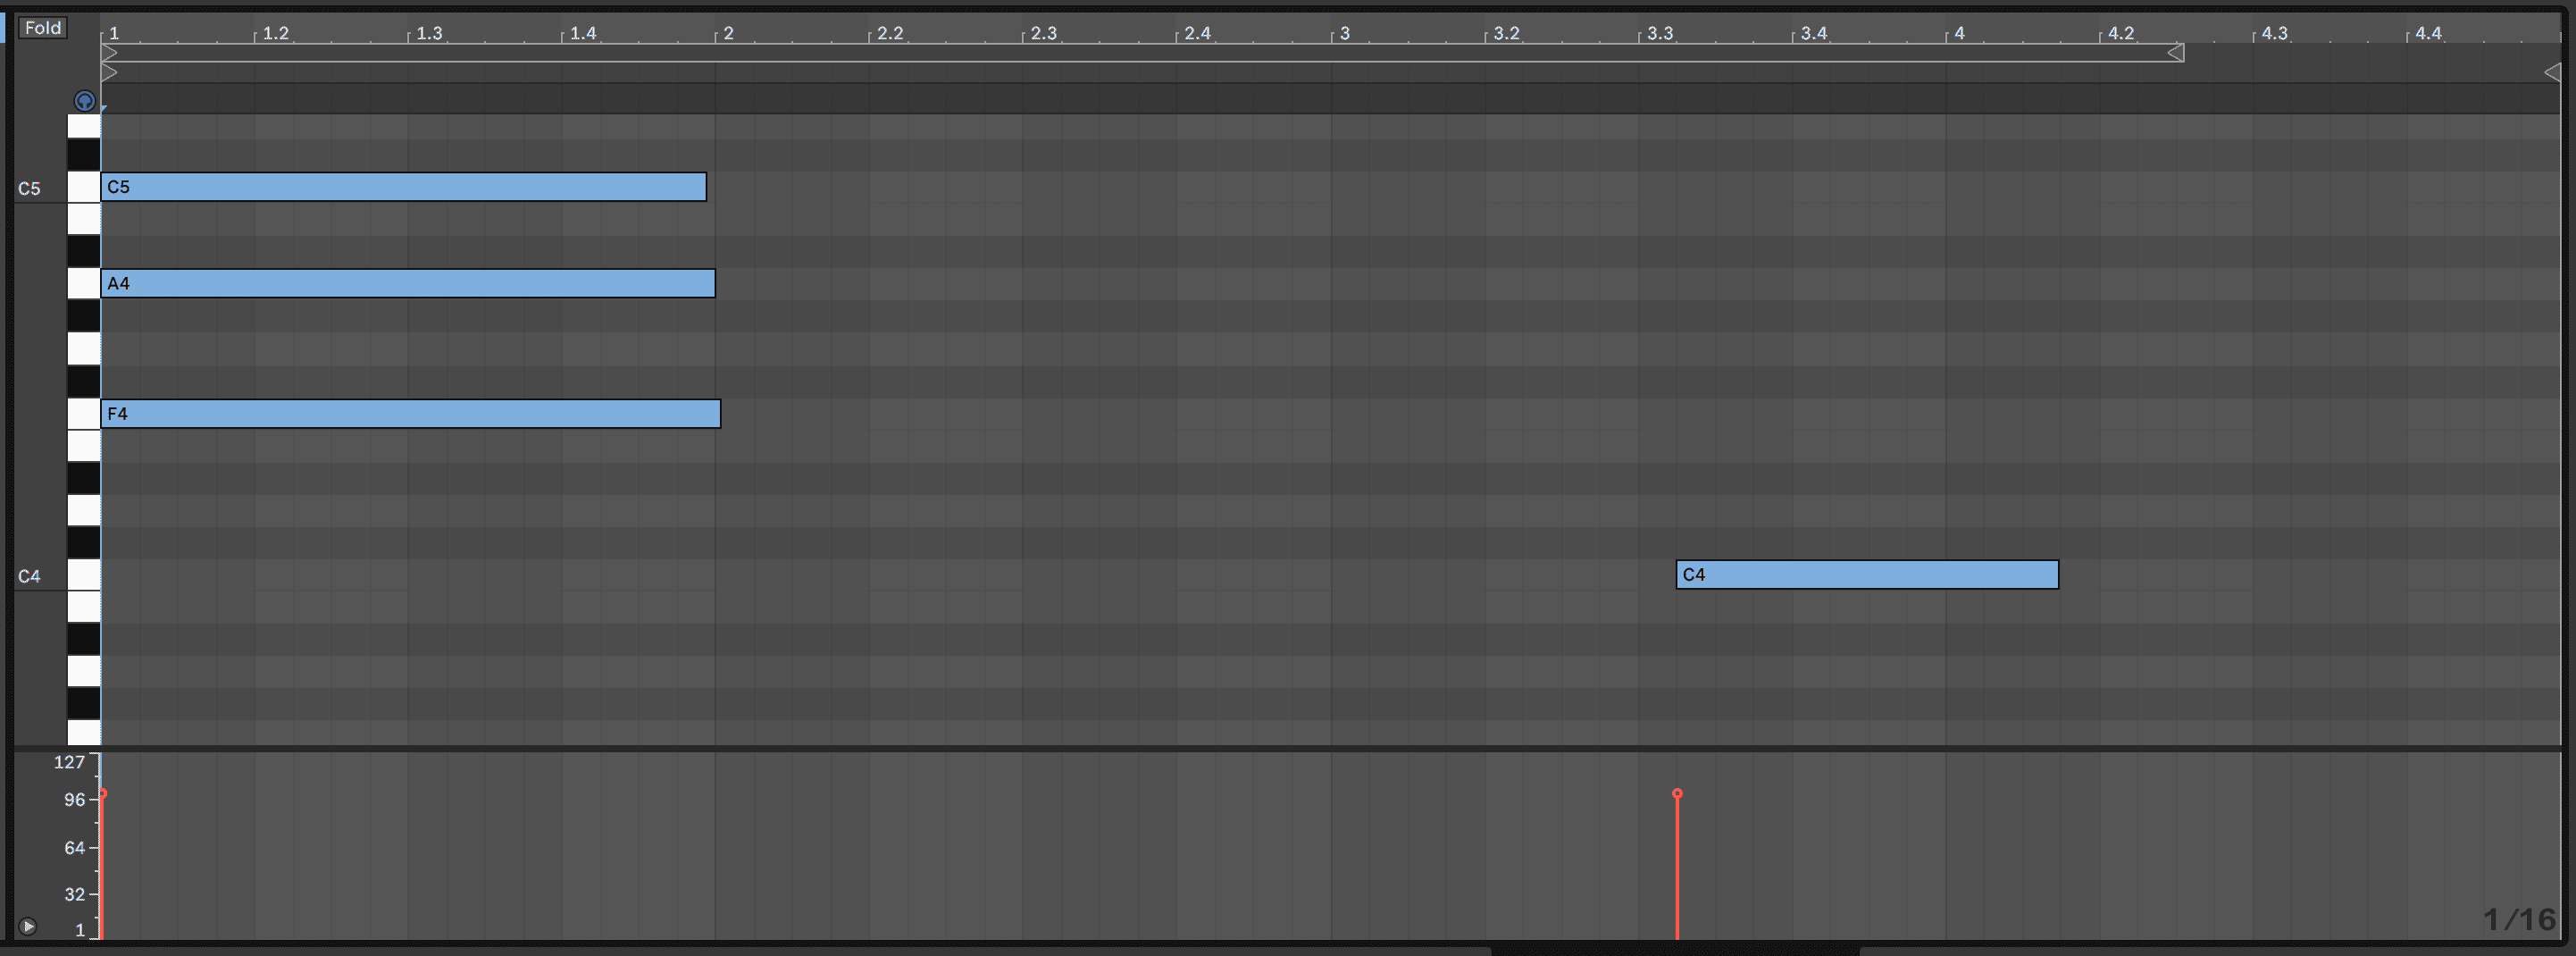
Insert this sample into two Drum Rack pads. For the first one, tune the sample down two semitones to get it to a D# note. For the second, tune it up three semitones for a G#.
In both Simplers, shorten the sample and set a short release time to have total control over the note lengths while drawing them in the piano roll.
Use the same sidechain compressor from the previous steps on both of these samples so they duck when the kick plays.
To control the very subby lows, add an EQ after the entire drum rack to reduce the frequencies below around 37Hz and use a limiter to prevent clipping.
Here’s the final beat: