
This channel is sponsored by
 Roland Cloud is your creative hub for Roland hardware and software. Access legendary recreations of Roland Classics, find new sounds for your favorite products, and download updates and companion apps to make music fast and easy. Visit Roland Cloud
In this tutorial, we’ll walk you through how to create dub-style dirty tape delays using standard plugins and a little feedback.
Before the widespread adoption of digital delays in the 1980s, if you wanted a delay on your track, you likely reached for a tape echo. These all-analogue machines had a loop of tape inside that passed over a record head and then a playback head. The distance between the two created a delay. Later units, such as the Roland Space Echo series, added multiple record heads for more delays. They were also capable of self-oscillation. Increase the feedback amount and the signal will be re-recorded again and again, picking up more dirt as it goes.
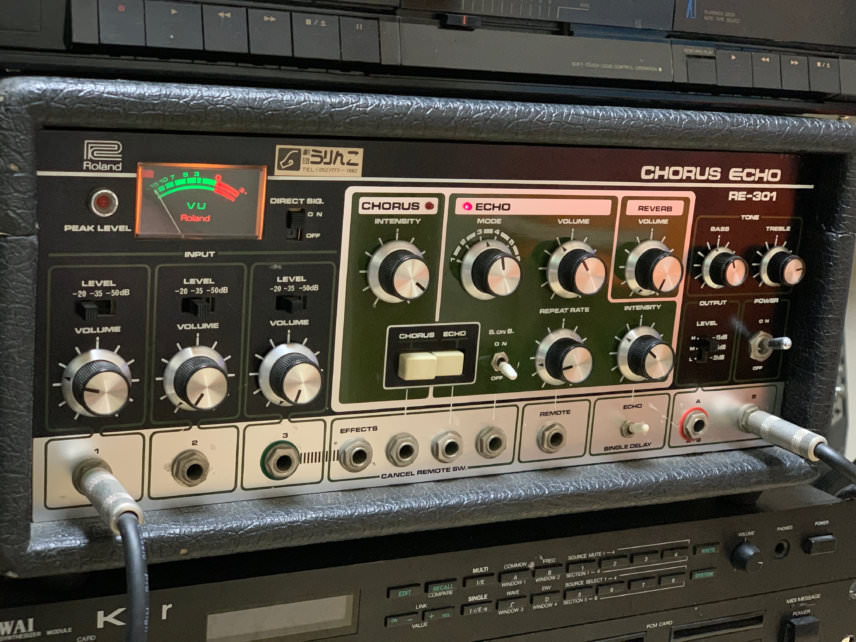
Dub reggae producers in Jamaica in the 1970s really pushed the machines to their limits and helped define what we think of as tape delay. Later, dub techno producers like Basic Channel brought the Jamaican techniques into the world of electronic music.
These days, original tape echo units are highly prized, with price tags to match! There’s no shortage of tape echo plugin emulations as well but it’s possible to mimic their characteristics using the standard plugins you likely already have in your arsenal. All of our samples come from the UNDRGRND Sounds pack, Warehouse Techno. Click on any image to see a larger version.
We’ll show you how to go from a dry, static delay like this:
To a feedback monster like this:
Let’s get reel.
Step 1
We start by loading up the loops ‘US_WT_130_Drumloop_Syncopation_stp’ and ‘US_WT_130_BassLoop_Filterup_C#’ into a 130bpm project in Ableton Live. For our dub techno stab, we go with ‘US_WT_Oneshot_Hit02’. Although we’re using Ableton Live, any DAW will work.
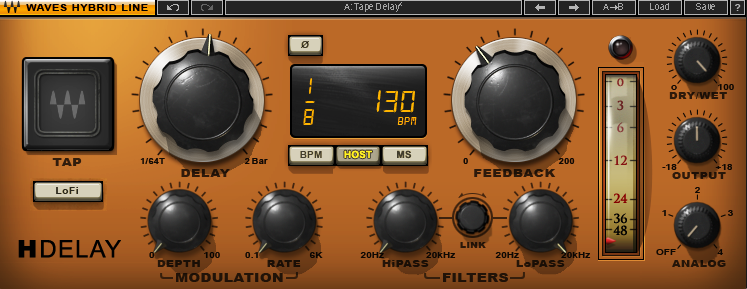
We create a new send track and drop in a standard delay plugin. We’re going with Waves’ H-Delay but don’t get hung up on that. Even a stock DAW delay will get the job done. We set the delay time to 1/8 and the feedback to about 30%. We don’t need much, as we’ll be adding our own feedback later. We can ignore all the other settings as we’ll be doing our own processing soon. We make sure the Dry/Wet knob is set to 100% wet, as our effect is on a send channel and not an insert.
Lastly, we turn up the send on the mixer.
We can hear a basic 1/8 note delay with no modulation or anything even remotely dub-like. That’s fine. There’s more work to be done.
Step 2
Next, we need to add some pitch wobble to our homemade tape delay. Also known as wow and flutter, pitch wobble is common in analogue machines with rotating components. Think turntables, tape decks, and even VHS players. When the motors start to wear out, small changes in speed can result in momentary imperfections in pitch. For engineers of the time, it was a massive headache. But for producers of the digital age, these imperfections can add character and vibe.
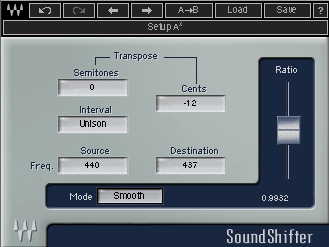
To achieve this, load a pitch shifter plugin after the delay. We’ve chosen Waves SoundShifter. We’re using the Smooth pitch shift algorithm to best emulate old motors on a tape machine.
As wow and flutter is often intermittent and unpredictable, we’ve drawn in pitch changes in a haphazard manner. How much wobble to use depends on how broken you want it to sound. We’ve gone for small, authentic changes but huge changes in pitch could be useful as well. Experiment and see what sounds right for your song.
Here’s the delay with added pitch modulation:
Step 3
Aside from the delay, another reason people love to use tape echoes is because of the saturation the machines add. There’s the saturation that comes from using magnetic tape, of course, but also just feeding a signal through a piece of electronics can impart musically pleasing harmonics. Let’s emulate this with a saturation plugin.
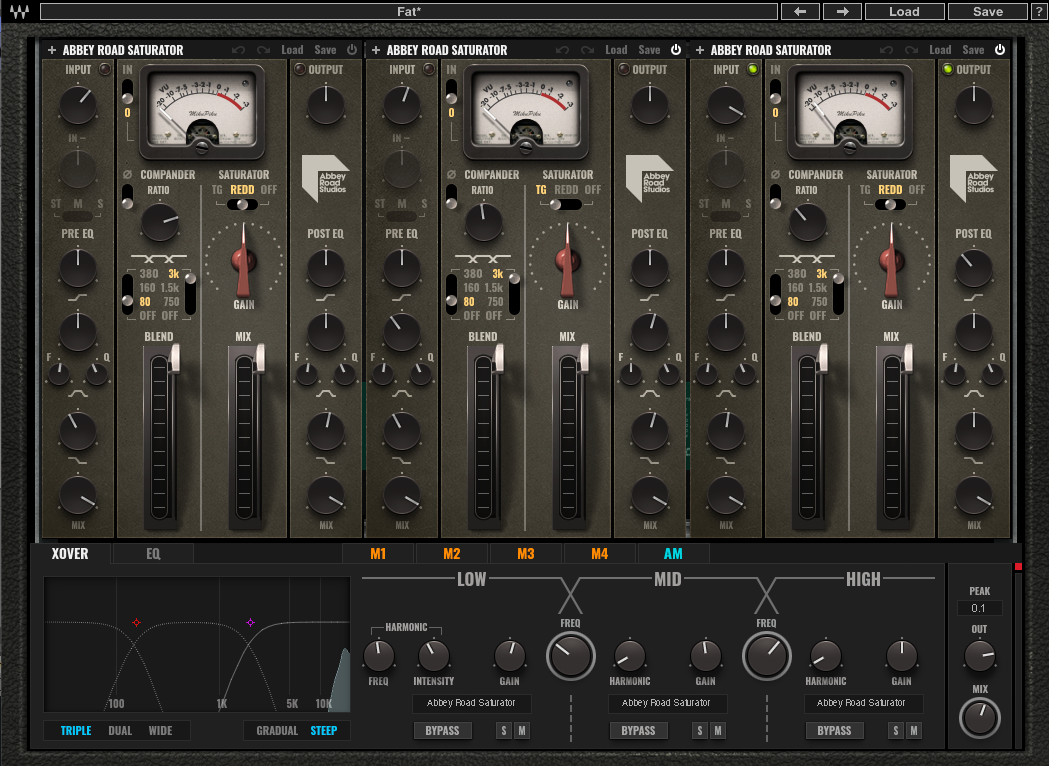
We place an instance of Waves’ MultiMod Rack multiband distortion plugin in the send channel next. We want to use a multiband unit as we want to keep our low end from getting too out of control. Don’t worry if you don’t have a multiband plugin, as we’re going to throw an EQ on it next anyway. Can’t be too careful.
Next, we load up the Fat factory preset, which gives us three Abbey Road Saturators across the frequency bands. We mentioned before that we want to avoid low-end mud, so we turn off the unit handling low frequencies. We also turn down the Mix knob to about 12 o’clock. Now our delay is a little more juicy.
Delay with saturation:
Step 4
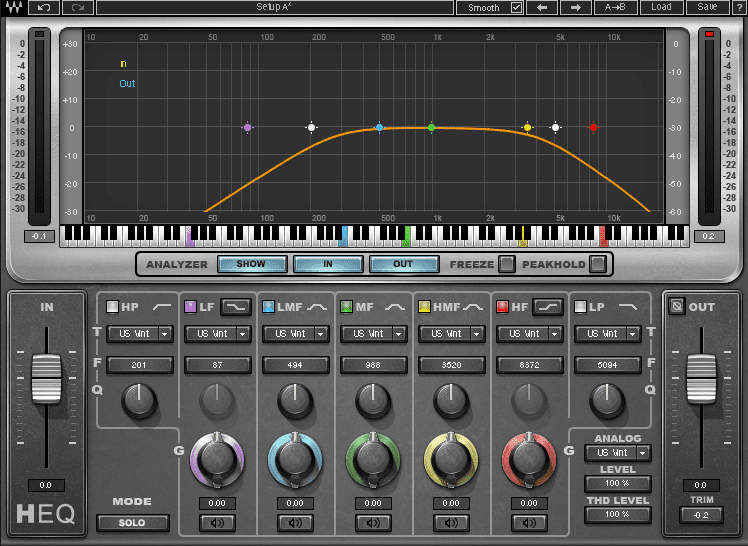
One of the hallmarks of analogue hardware is warmth, and this is true for tape echoes as well. Tape naturally rolls off highs so to create a realistic emulation, we’re going to need to dampen the upper frequencies. We’re using Waves H-EQ for this, but again, any EQ plugin will work. Place it next in the signal chain.
How much of the highs to roll off depends on a number of things. If you’re going for authenticity, you need to consider both tape speed and width. Tape speed is traditionally measured in inches per second (or ips), and the faster it is, the more highs it preserves. Width plays a role too. Half-inch stereo tape (that is, two-track) will have higher fidelity than half-inch 16 track tape, and much more than four-track cassette tape. There’s more to it but this is really beyond the scope of this tutorial. We play it by ear and cut highs around 5kHz.
We also roll off a little of the low end around 200Hz just to keep it from clashing with the other low frequencies in the track. Lastly, we engage the Analog button for extra warmth.
Top Tip: Tape also had a certain amount of unavoidable hiss. For even more authenticity, add a sample of low-level white noise to your project.
Our delay, now with EQ processing.
Step 5
So far, we have a very nice, warm delay, but it’s not particularly exciting, is it? It’s time to bring feedback into play. Let’s create a feedback loop to emulate the self-oscillation of tape echoes. Most any DAW should be capable of this. The details of how to do it may be different on yours so please consult your manual if you’re not sure.
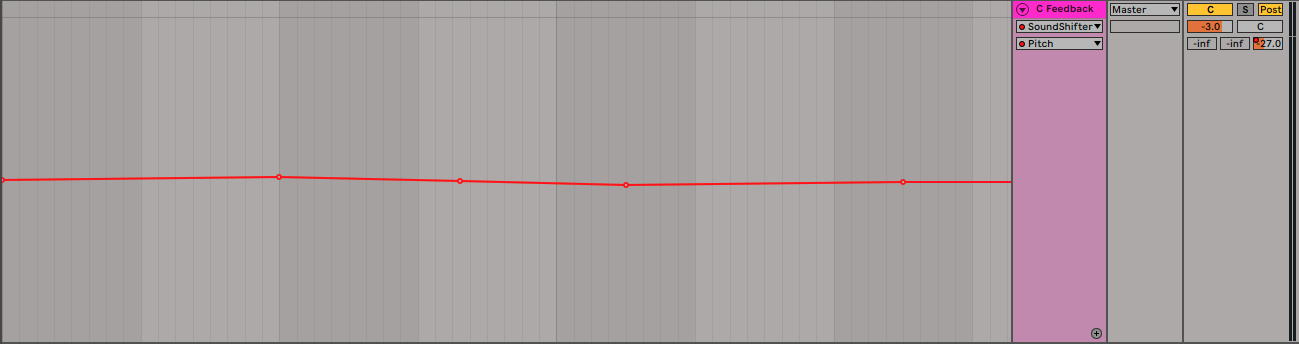
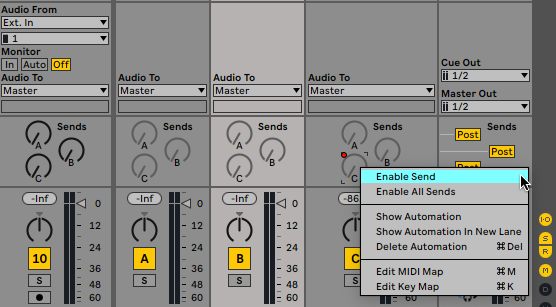
Before we start, it’s important to state that feedback can get out of control in a matter of milliseconds, so proceed slowly and gently to avoid damaging your ears, speakers, or both. First, let’s put a limiter at the end of our send channel with a hard ceiling of 0dB. We’re using Ableton Live’s stock limiter. Next, we need to create a loop by routing the channel back into itself. In Live, enable the send dial by right-clicking on it. Make sure it’s going to the same send as the channel where your delay is set up. Press play and slowly bring up the send dial. You should hear the delay feeding back into itself.
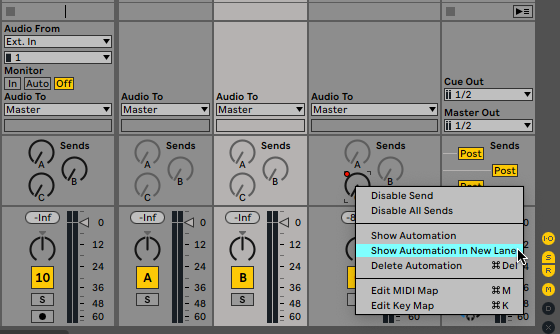
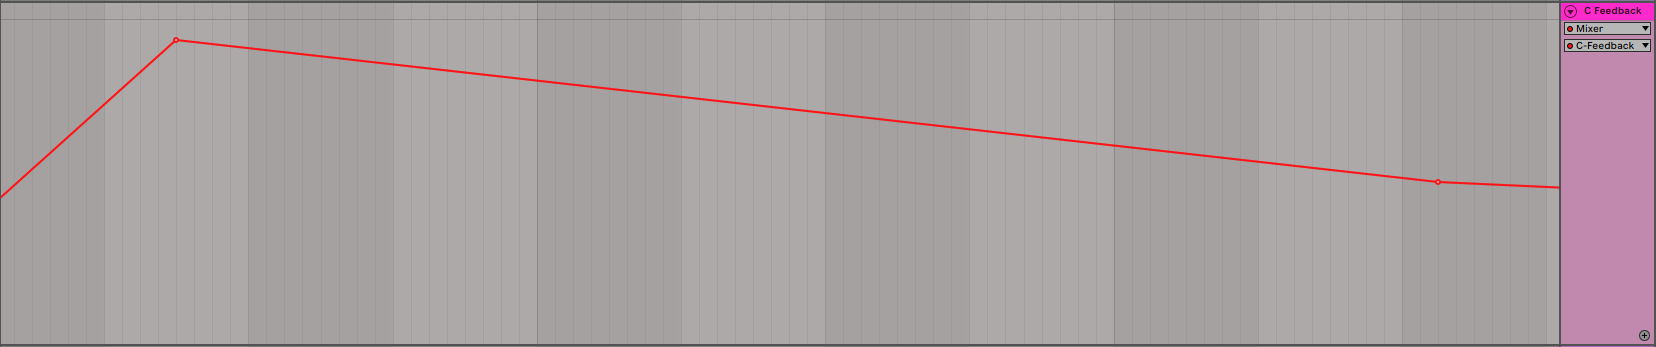
Let’s use automation to control the feedback over time. Right-click on the send dial again and choose Show Automation In New Lane. You can now draw in automation to control the amount of send over time. We’ve gone for a quick ramp-up and then a smooth decline across our eight-bar loop.
Feel free to automate your delay, change the timing (dotted eighth notes are great for dub), and play with the saturation amount for a dirtier sound. Happy dubbing.
Here’s the delay with feedback:
And here it is in the context of the song:
Tutorials is sponsored by
Roland Cloud is your creative hub for Roland hardware and software. Access legendary recreations of Roland Classics, find new sounds for your favorite products, and download updates and companion apps to make music fast and easy.