
This channel is sponsored by
 Roland Cloud is your creative hub for Roland hardware and software. Access legendary recreations of Roland Classics, find new sounds for your favorite products, and download updates and companion apps to make music fast and easy. Visit Roland Cloud
In this tutorial, we explore how to bring vintage hardware-style analogue warmth and saturation to your productions with plugins.
There’s no doubt that the shift in music production from expensive, physical studios to in-the-box practices has brought a wealth of benefits, from ease-of-use to the democratization of music-making. However, one thing that has largely disappeared in the switch to digital is analogue warmth, that certain colour that saturates recordings made with hardware. This is not necessarily a bad thing. There’s plenty to praise about the clarity and preciseness of working in the digital realm. The good news is, there are numerous ways to bring this magic to your productions should you want without having to blow your student loan money on outboard gear.
In old-school analogue studios, sound passes through a myriad of hardware units on its way to becoming a track. This includes (but is not limited to) microphone preamps, the mixing desk, and analogue tape. Each of these stages imprints a sonic signature onto the sound. This is what we mean when we talk about analogue warmth and saturation.
Before we go any further, we should define what saturation is. Essentially, it’s a subtle form of distortion that adds pleasing and musical harmonics to your sound. It can also add punch, presence and, at higher settings, even aggression. Saturation can come from tape, tubes, transistors, and other components embedded in hardware.
In this piece, we’ll test out how different kinds of saturation affect different sounds individually and at the buss stage. We’ll also see how applying small amounts of saturation at various stages across a mix can have a cumulative effect on the final product.
We’ll be using some samples provided by Touch Loops. These were professionally recorded so do note that there is already a small amount of colouring present. We’ll present each sound in before and after versions so you can A/B the difference. Also, we won’t add any extra processing such as compression or EQ—everything you hear will be strictly from the saturation process. Some of the examples can be very subtle indeed so we recommend listening on headphones. Lastly, click on any image to see a larger version.
We’ll show you how to go from this:
To this:
Let’s warm things up.
Type 1: General Saturation
One of the more popular ways to add analogue warmth to a sound is with a saturation plugin. These tend to model different kids of saturation and are great for general applications. We’re using Waves’ Abbey Road Saturator, a firm favourite here for adding warmth and increasing presence. Abbey Road Saturator models two different desks at the famous Abbey Road Studios, the tube-based REDD console and the transistor-driven, solid-state TG12345.
Let’s rough up a Rhodes. We place the sample ’95_C_Stage73Rhodes_03_TL’ from the Touch Loops pack Soulful Keys on an audio channel and then load up Abbey Road Saturator. Next, we turn the screw towards REDD to emulate the crunchy, tube-driven sound of the desk. We then up the gain to around 72 until it just starts to break up. The Compander function, which boosts high frequencies, is outside the scope of this article so we turn that off. Lastly, we decrease the output slightly to keep the audio level inline with the incoming signal and maintain good gain staging.
Top Tip: Although we’ve gone for stronger settings for demonstration purposes here, feel free to use saturation as subtly as you like. It’s all about building up the warmth step by step, as we’ll see later.
Here’s the Rhodes sample before saturation.
And here it is after. There’s a noticeable crunch in the highs now. (Note that we have exaggerated the effect here for demonstration purposes.)

Type 2: Microphone Preamp
Traditionally, most recorded sound was done via a microphone, and that had to pass through a microphone preamp (or mic pre) to have its signal boosted before entering the mixing console. Even instruments that were recorded directly, like bass guitar or synthesizer, were often pushed through a DI (direct input) unit, which would also pass through the mic pre. While many pres are designed to be as transparent as possible, tube-driven ones tend to colour the sound nicely. Let’s see how tube-style mic pre can warm up a bass sound.
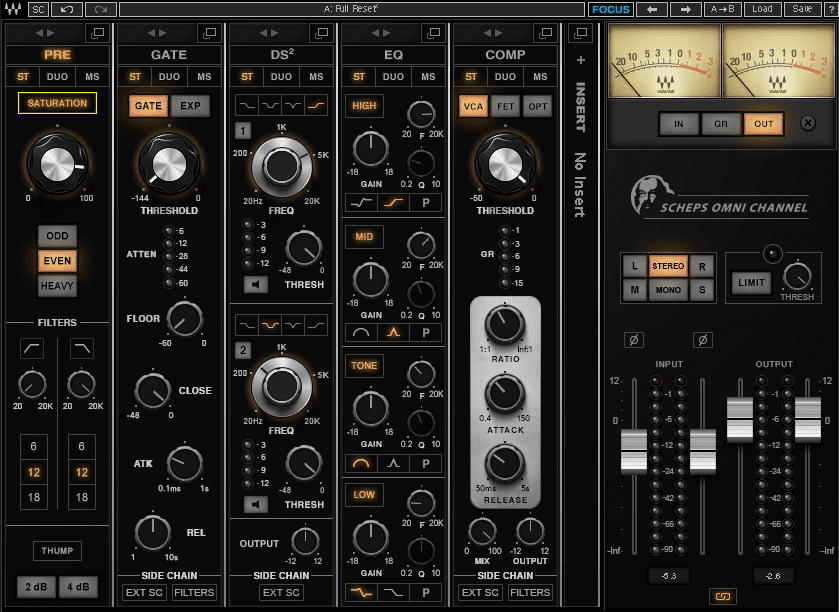
We start by placing the SH-101 plugin from the Roland Cloud onto a channel, programming an appropriate bassline, and then adding an instance of Waves Scheps Omni Channel. This is an all-in-one channel strip plugin. However, we’re only interested in the saturation of the mic pre stage, so we make sure everything else is off before turning out attention to the button marked Saturation. Scheps Omni Channel has three saturation settings: Odd, Even, and Heavy. Heavy does just what you’d think it would—add distortion—so let’s look at the other two instead.
Saturation produces harmonics. These harmonics are not random though. They are either odd (at harmonic intervals of three, five, seven, etc.), or even (at intervals of two, four, six, and so on). Tubes tend to generate even harmonics and solid-state transistors tend to generate odd. There’s a time and place for both kinds of harmonics, but for our track and material (namely, bass) the tube-style even harmonics sound warm and buttery. We push the knob up to about 85 and luxuriate in the warmth.
The SH-101 bassline before saturation.
The same SH-101 after a dose of even-order tube harmonics.
Type 3: Analogue Tape
Up until only a few decades ago, most all music was recorded to analogue tape. Every bounce up until the master added more and more tape saturation. We can replicate this process with tape plugins.
Given its natural compression and low-frequency boost, tape saturation is especially useful on the drum buss. We add a copy of Waves’ Kramer Master Tape plugin to a channel containing Touch Loops’ ’85_SteadyBeat_01_TL’ from the pack, Soulful Drum Grooves. This full drum loop can stand in for our drum buss.
We start with a tape speed of 15 IPS (inches per second). This gives us a full-frequency sound, though not as much of a bass bump as with the darker 7.5 IPS. We set the Bias amount to Over for a 3dB gain boost and improved sound, a record level of -6, and a playback level of +6. We also keep the Flux level low to mimic vintage machines. (Flux controls how hot the signal can be passed across the recording head.)
Here’s our original drum recording.
Here it is now at 15 IPS. There’s a little more punch and presence, especially in the high end.
For the sake of comparison, here’s the same loop at 7.5 IPS. There’s a slight dampening of the highs.

Type 4: Mixing Desk
The mixing desk sits at the heart of any analogue studio and is packed with circuits that can collectively warm up a signal. Let’s use a console-emulating plugin to get the same results in the box.
Waves’ NLS Non-Linear Summer channel plugin recreates three different consoles. We’re going with producer Yoad Nevo’s custom Neve 5116. We load an instance of the plugin onto every channel to create a cumulative effect. The plugin also has an accompanying buss version, so we place that on the master channel.
On the channel strip plugins, we dial in varying amounts of drive depending on the sound at hand. This will give us a more upfront, analogue sound. The volume needs to be appropriate for each channel, so we check that across the board. We also engage the Noise button, which injects emulated console noise into the signal. Over on the buss plugin, we make sure it’s also in Nevo mode, turn up the drive to about 9, turn down the trim a bit to compensate, and hit the Noise button for authenticity’s sake.
Here is our mix so far with no added console plugins.
Here it is with the console plugins working. The effect is subtle.


Type 5: Integrated Use
Lastly, let’s replicate how a hardware-based studio would work, with a console, mic pre, and tape plugin on each channel. Our separate channels each have an NLS Non-Linear Summer set to Nevo mode, a Scheps Omni Channel with saturation, and an instance of Kramer Master Tape to emulate tracking to analogue tape. Additionally, the master channel has the NLS Buss as well as another Kramer Master Tape, representing the final, two-track master stage.
Here’s the full mix with all plugins in bypass.
And the same mix with full analogue emulation. There’s quite a bit more presence and detail as well as punch. Remember, no additional EQ or compression has been added.
Tutorials is sponsored by
Roland Cloud is your creative hub for Roland hardware and software. Access legendary recreations of Roland Classics, find new sounds for your favorite products, and download updates and companion apps to make music fast and easy.