
In this tutorial, we look at how to use the technique of reamping to add size and character to dry sounds—both inside and outside your DAW.
At its most basic, reamping is a production technique where you send a previously recorded dry track through amps and effects. These two signals can then be blended together in parallel as needed. This is popular in the world of recording, as it allows the producer and engineer to get a clean take of a guitar or other instrument that can then be further treated with distortion, chorus, and other effects.
This is all well and good but what are the benefits for us electronic musicians? Some of us may be using guitars in our productions but if not, why bother? Aside from the convenience of having a clean track with which to audition different effects, the main thing we’ll be exploring today is air. By sending our audio out into a room (either physically or virtually), we’re able to add an additional element of size and character to our part.
Reamping was a common trick used by Depeche Mode on their mid-‘80s albums like Black Celebration to help them compete with stadium rock tracks on the radio. While they had Hansa Studios and all its amazing gear at their disposal, the good news is you don’t need an expensive setup to reap the benefits. Working in the box, a good amp simulator will get the job done. Out of the box, a practice amp and a basic microphone are all you need to get some air moving. Failing that, you can even just use the phone you already have.
Reamping can take us from this dry synth lead:
To something with more of a distinct tone, like this:
In The Box
Let’s start by reamping this quick and dirty Roland Cloud SH-101 lead in the box. While it would be easy to just slap an amp sim on the channel and forget about it, that wouldn’t give us nearly as much control over the final sound.
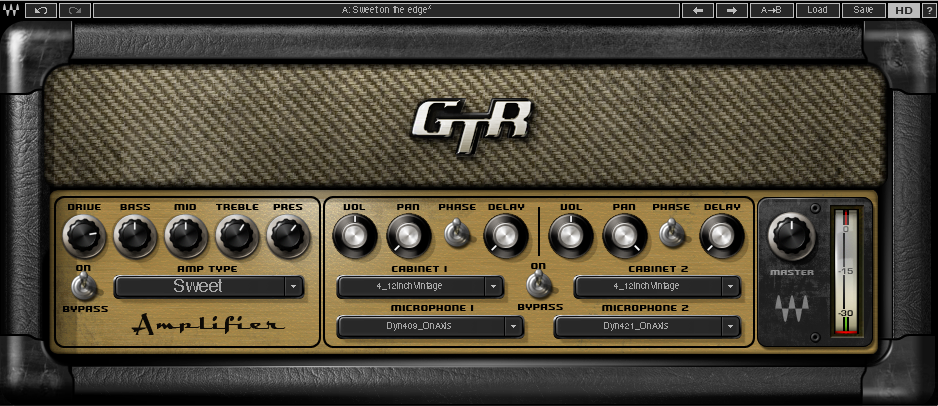
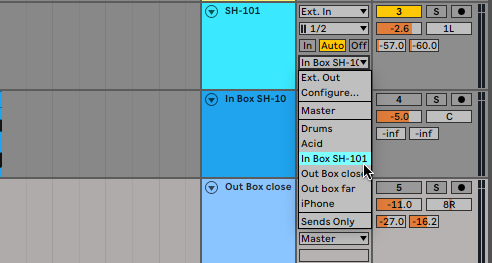
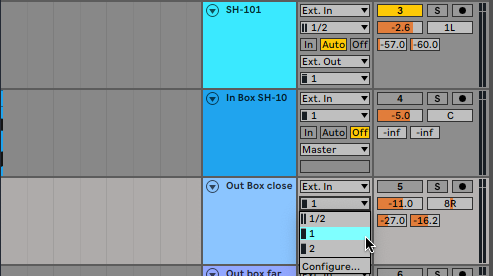
First, we place an instance of Waves GTR3 Amps on our SH-101 channel. We want to record the affected lead onto a new channel, so we create an audio track, call it ‘In Box SH-101’, and then send the audio out from the SH-101 channel into the newly created audio track. Now, by arming the new track, we can record the processed lead as audio.
GTR3 Amps has a number of different amp and cabinet types. While distortion is entirely possible when reamping, we’re after a cleaner tone. We select the Sweet on the edge preset and try out different microphones until we reach a tone that we like. We’ve decided to go with on-axis mic placement, as off-axis can be a little bassy.
After recording, we disable the amp plugin on the original SH-101 track and make sure that audio is routed back to the master fader. Now we can adjust the volume of the two tracks to get a blend that sounds good. We also push the newly recorded audio back by a few milliseconds to adjust for latency.
The original audio:
The unblended reamped sound:
And blended with the original audio:
Out Of The Box
Technique 1
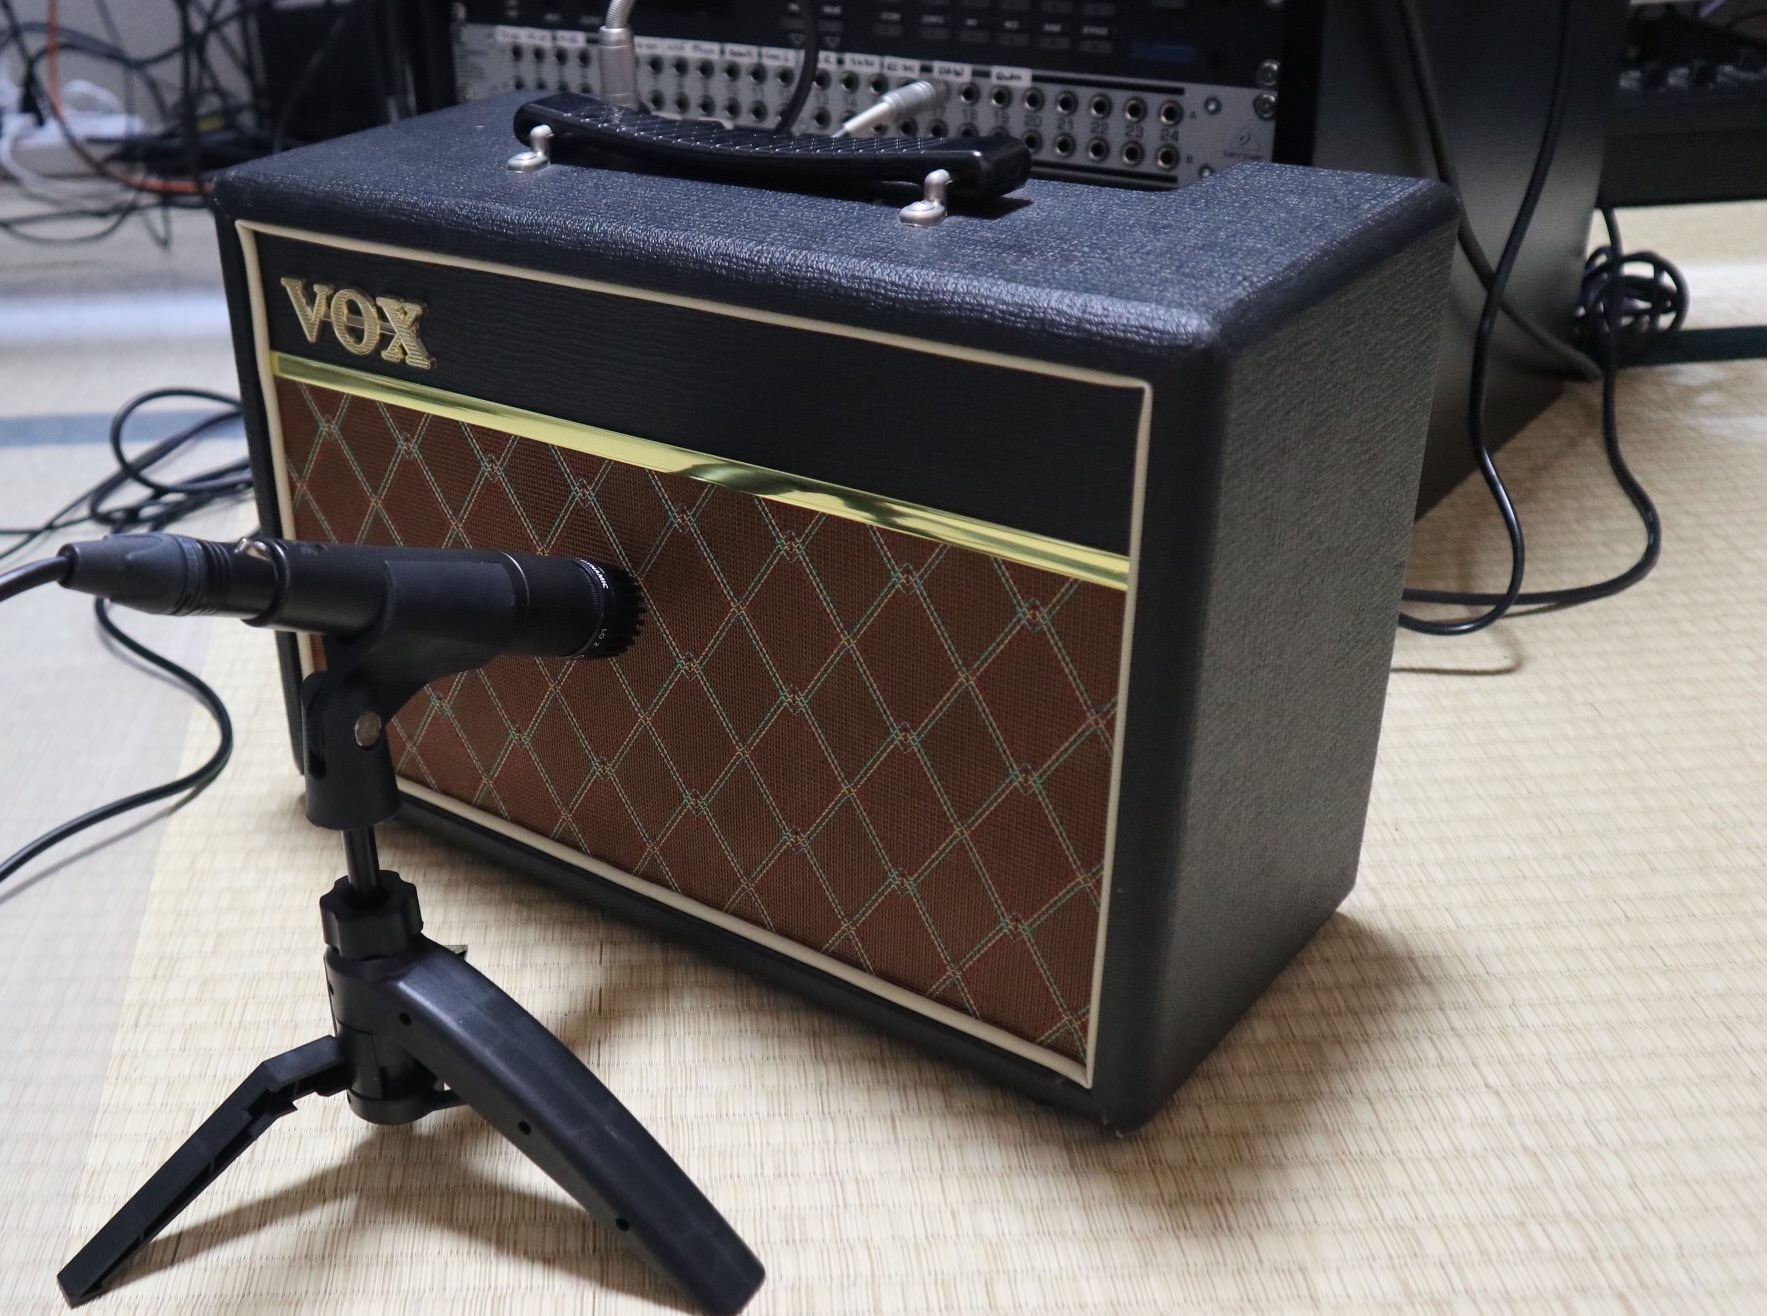
Traditionally, reamping is done by routing the unaffected signal out through an amplifier in a room. Hence the name, reamping. Let’s use a cheap Vox practice amp, the Pathfinder 10, and an entry-level Shure SM57 microphone to get similar results.
First, we set up the amp and microphone. We point the microphone directly at the speaker rather than off-axis, as we liked the tone we got with the GTR3, above. The Shure SM57 works best when driven hard and up close, so we start with a close-miked setup.
Next, we need to get the audio out of the computer and into the amplifier. The specifics of how to do this will depend on the audio interface you’re using and how many outputs it has. We’re using a first-generation Focusrite Scarlett 8i6. As it has two pairs of stereo outs, we have outputs three and four permanently routed to a patchbay. With this configuration, all we have to do is run a cable from the bay to the amplifier. If you don’t have a patchbay or even just one set of outs, you’ll need to run a cable from one of those outs (remember, guitar amplifiers are mono).
Let’s look at the microphone next. Run the mic cable back into the audio interface. You’ll need a microphone preamp or phantom power to bring the microphone signal up to line level.
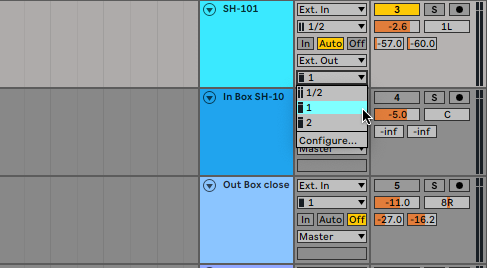
Before we go any further, make sure that your speakers are powered off so you don’t create a feedback loop. You may also want to sum your source signal to mono so you don’t lose anything when it passes through the amp. In Ableton Live, solo the source channel and set it to External Out and channel 1. You should now hear the sound playing through the amplifier.
Next, let’s record the microphone. Create a new audio track and make sure it’s set to External In and channel 1. Arm the track for recording, press play, and you should be capturing the source sound through the amp and microphone. You may also need to make some adjustments in your audio interface routing application to make sure the signals are going where they need to.
Once you have your new audio recorded, blend it back in with the source signal.
Top Tip: Experiment with mic distances for more of a ‘room’ sound.
The close-miked sound:
The close-miked sound mixed with the original:
The reamped sound with microphone far away:
And mixed with the source signal:
Technique 2
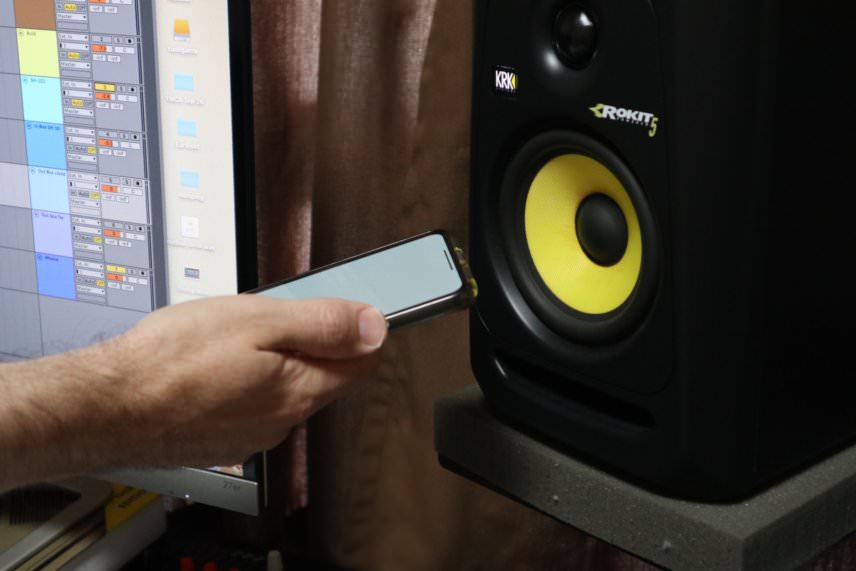
You don’t need an amp and microphone to try out-of-the-box reamping. All you really need is a smartphone, as we’ll see in this technique.
Load up an audio recording app on your phone and point the microphone at your studio monitors. Aiming your phone at the woofer will result in a bass-heavy sound while pointing it at the tweeter will give you a thinner, higher sound. As with the above technique, varying the position of the phone as well as the distance from the speaker will alter the results.
After capturing the audio, send the file to your computer and drop it into your DAW. You may need to do some editing to the file to get it to fit exactly. Warping can help with this. Now, play the two files at the same time and adjust the faders until you have a blend that you like.
Once you’re happy with your reamped recordings, you can add effects to them as usual. You may want to EQ them as well to emphasize certain frequencies. Dynamics tools like compression and transient shapers can help bring out the ‘room’ sound as well.
The sound as recorded on an iPhone XS Max and the Hokusai 2 app:
And blended with the source SH-101:
Here’s our sound in context. It features a drum loop, US_WT_130_Drumloop_Unity_stp, from Warehouse Techno by UNDRGRND SOUNDS, and a mix of out-of-the-box reamped signals.