
In this gain staging walkthrough, we show you step by step, how to improve your mixes, keeping them clean and punchy while avoiding distortion.
Gain staging is an oft-neglected and misunderstood part of mixing, yet in practice, it’s quite simple to do and can help to ensure that your mix is energetic and ready for the mastering engineer. In this tutorial, we’ll take a look at what gain staging is and how we can use it to improve our mixes. As this topic can get quite complex quickly, we’re going to keep it relatively simple and easy to understand.
We’re using Waves plugins throughout this tutorial but you can emulate with native plugins built into your software of choice. For high-quality emulations, however, Waves H-Comp is a particularly strong choice.
What exactly is gain staging?
In simple terms, gain staging is managing your volume levels throughout your mix. This includes instruments, effects, and anything else that is making a sound or contributing to it.
Before we get into it though, let’s look at the differences between gain staging in the analogue and digital worlds, and how this might affect your mix.
Analogue Vs. Digital Gain Staging
Analogue gain staging
In the analogue recording world, every component adds noise to the signal. Source instruments, outboard components, the mixer, tape, it all contributes to the noise floor, that low level mix of white noise that becomes audible when the music signal is too low. On the other hand, when a signal is pushed too hard into analogue components, it distorts. A little distortion can be a good thing, creating pleasing and musical harmonics. Analogue-modeling plugins are good at recreating this. But when pushed too hard, the distortion becomes unmusical and harsh. Analogue gain staging, then, is maintaining a signal that is loud enough to mask the noise floor (known as the signal to noise ratio) yet not so loud that it distorts.
Digital gain staging
When working within the digital realm, things are a little easier to manage. There is basically no noise floor to worry about (unless you’re recording vocals or instruments). It’s the other end, however, we need to be particularly careful of.
While analogue will allow for some “good” distortion before it becomes ugly, digital has no such stage. Digital clipping is harsh and will ruin your song. The highest level a WAV file can handle is what’s called 0dBFS, or zero decibels full scale. The meters on your DAW display decibels full scale for this reason. Our ultimate goal is to keep our mix from going over this upper limit of 0dBFS and clipping. We also need to maintain enough headroom to give us room to work.
Let’s go step by step through the creation of a signal chain and see how we can manage this. Remember, click on any image to enlarge.
Step 1
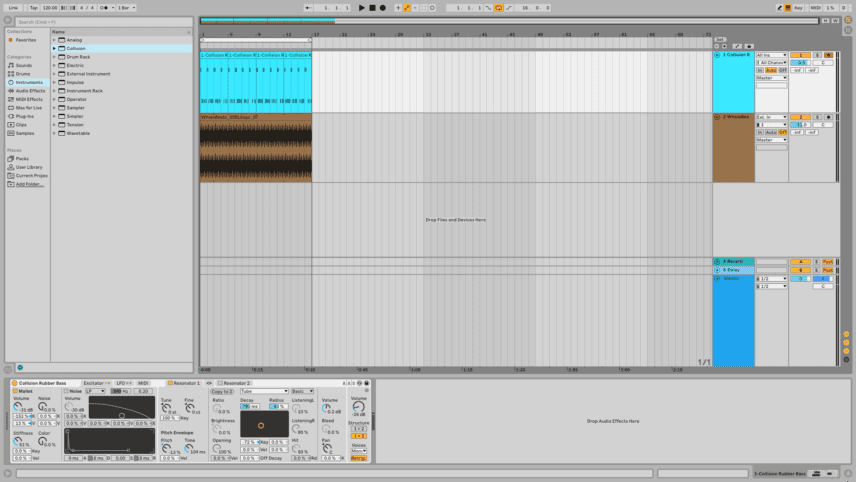
Good gain staging starts right with the creation of an instrument. Lace an instance of Collision on a MIDI channel, program a bassline, and turn down the volume right away to -28dB.
To make sure we have enough headroom to work with, it’s a good yardstick to keep your mixer channel peaks between -15dBFS and -18dBFS. This may sound low now but your mixes will thank you for it later. If this seems quiet to you, you can always turn up the volume on your audio interface.
Why not turn down the mixer fader? The mixer fader controls the levels of everything on that channel. It makes more sense to turn down the instrument rather than the destination of that instrument plus everything else it’s passing through.
For the purpose of this tutorial we’ve dropped in a drum loop on Track 2 from Samples From Mars – 909 loops.
Step 2
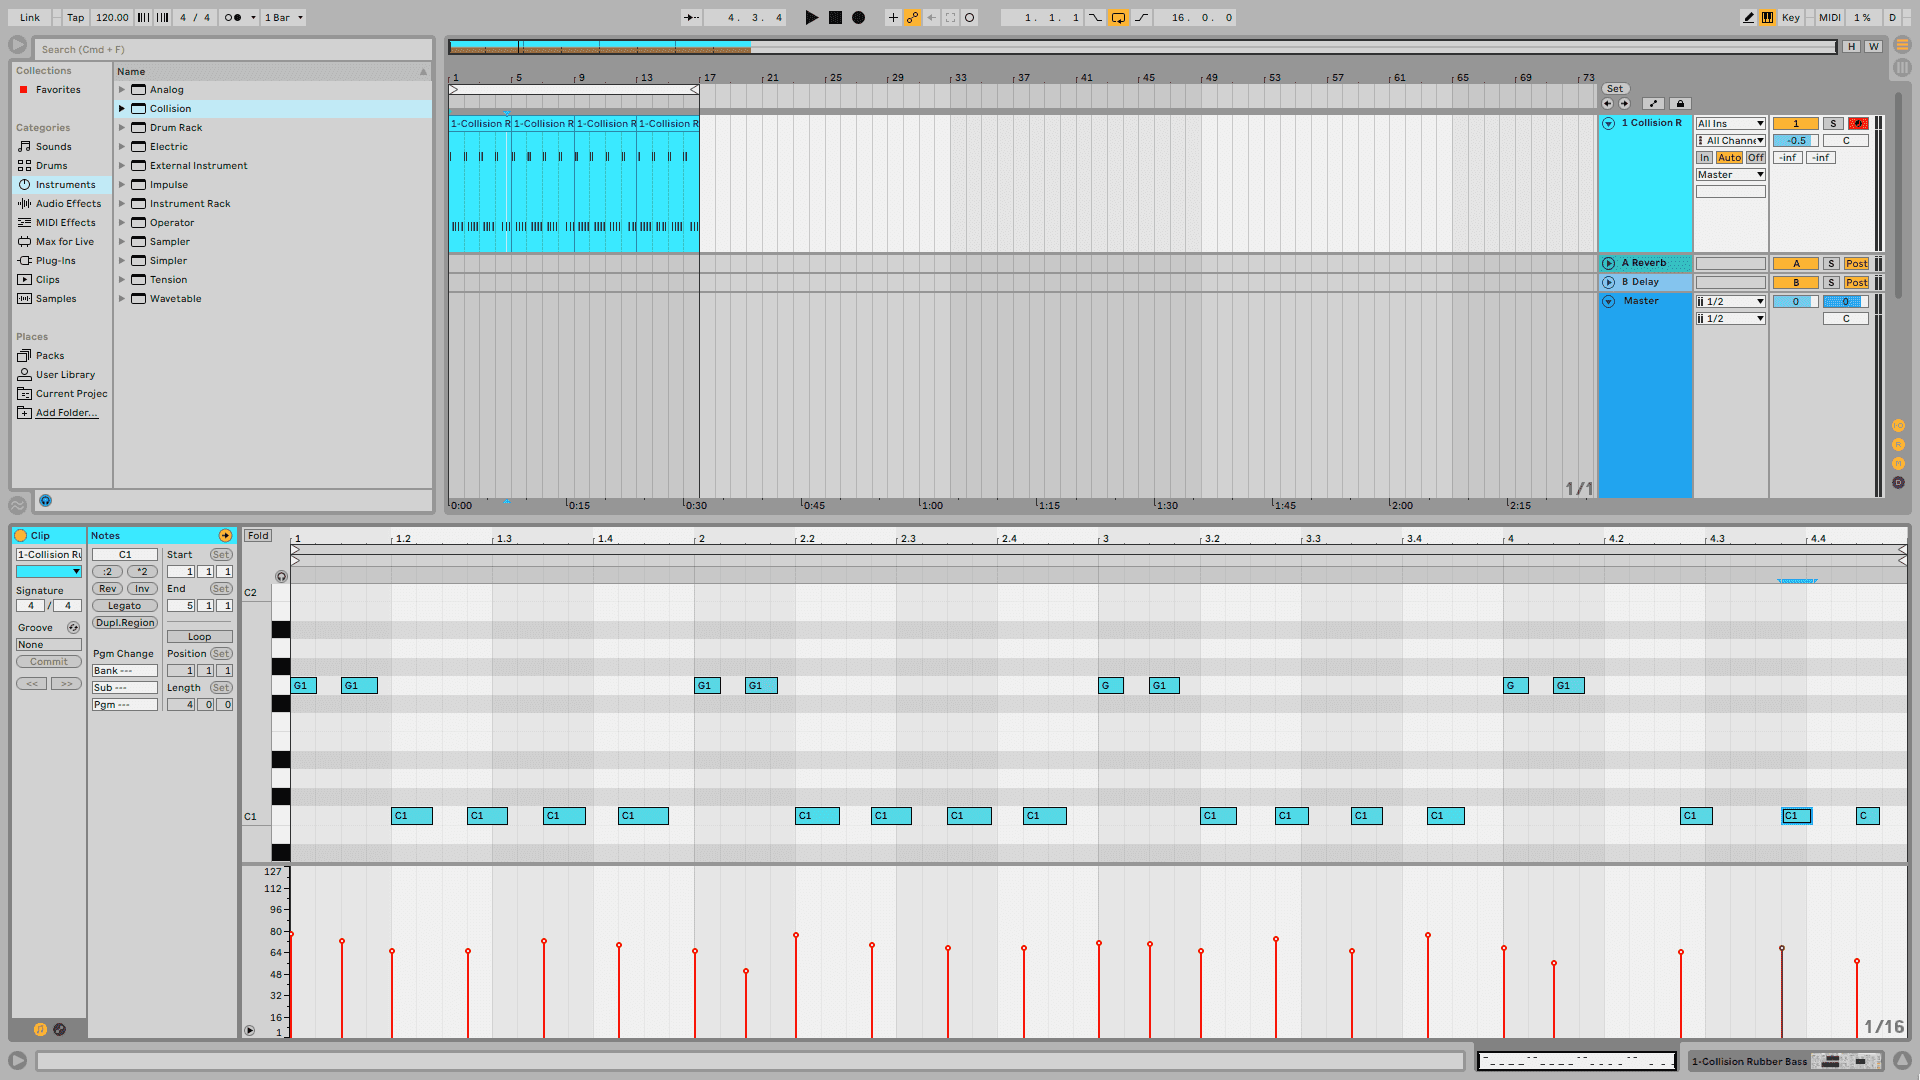
To make sure you’re getting an even amount of signal with no errant peaks, double check your programming. Make sure that the velocity is relatively even, with no especially loud notes that can eat up headroom. A good rule of thumb is to keep velocity under 100. This way you can always push it up a little if you want accents. If you program everything at the maximum of 127 there’s nowhere higher to go.
Another benefit to this is compressors and other dynamics plugins will respond more smoothly and not be tripped up by stray volume jumps.
Step 3
Now we can start adding effects plugins, staying mindful of signal level at each step in the chain.
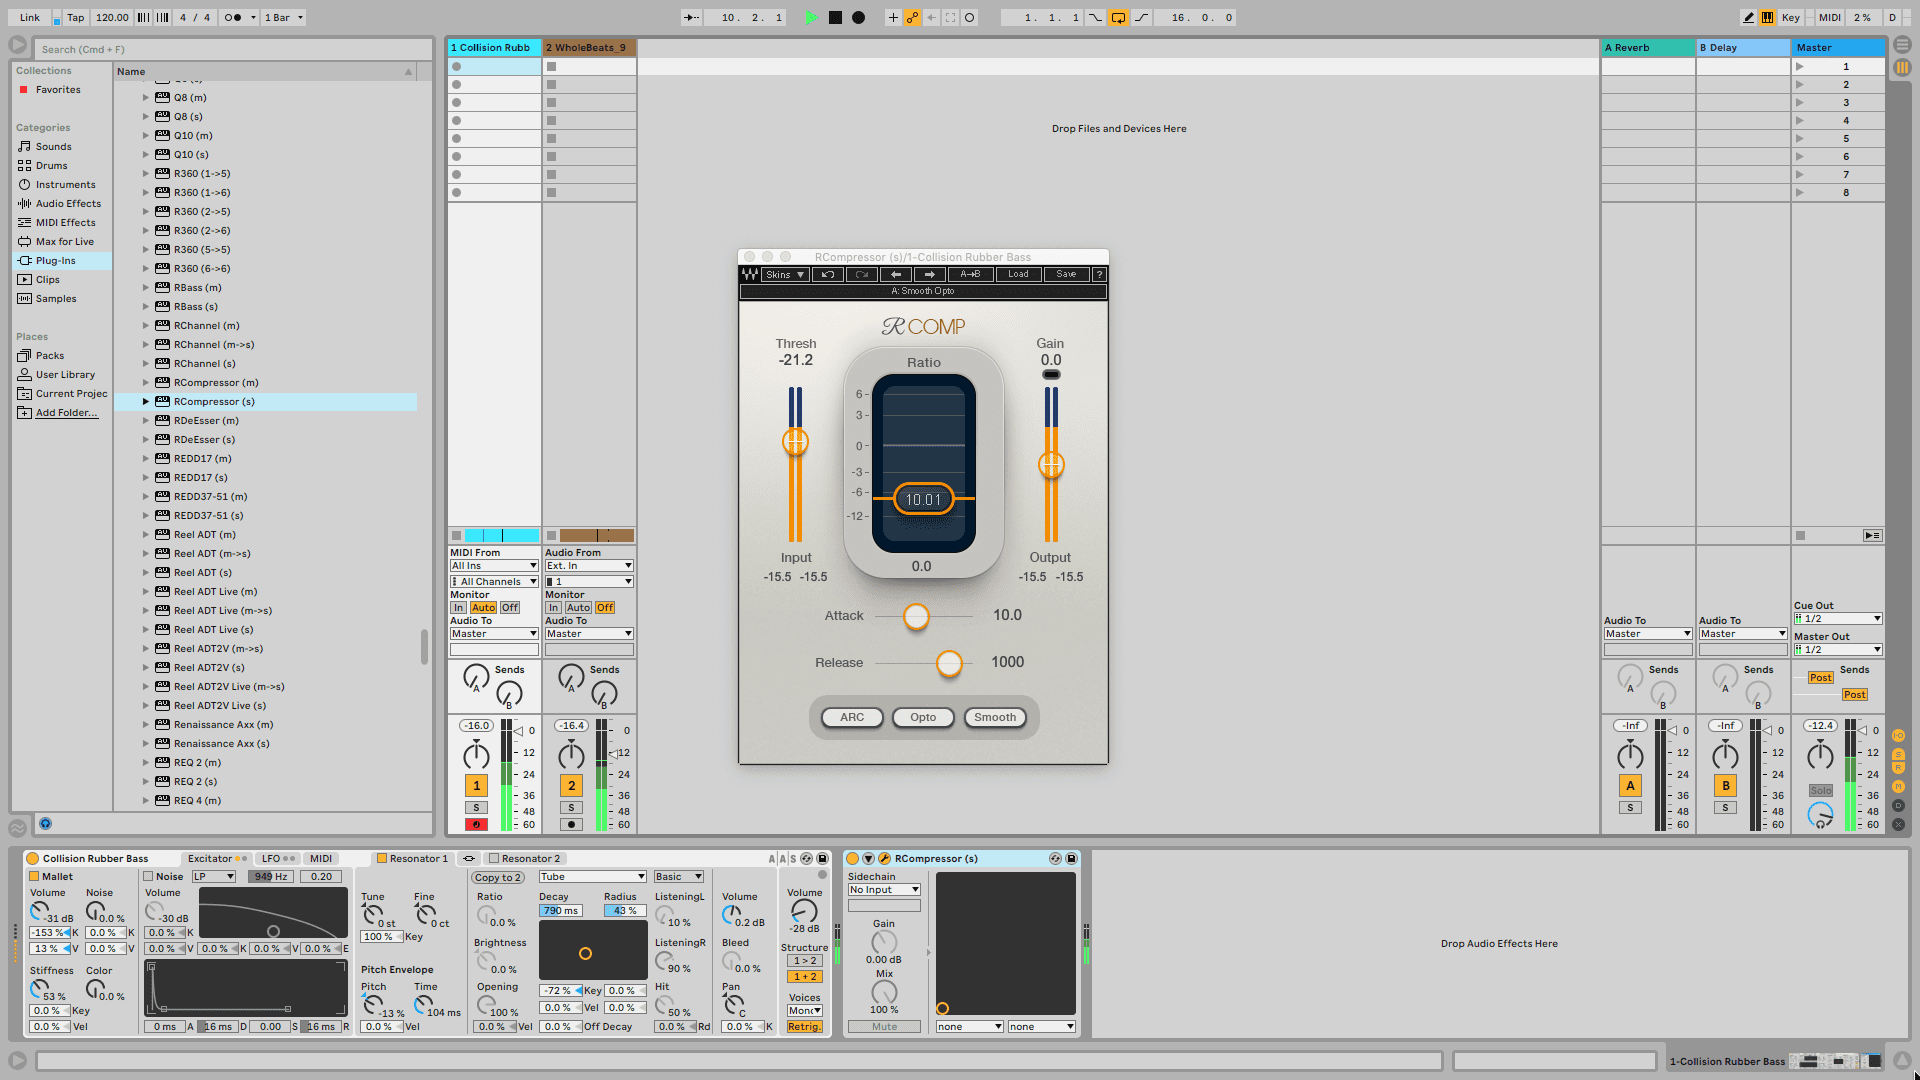
Add a Waves Renaissance Compressor to the signal chain and use preset Smooth Opto. The R-Comp helpfully shows us that the signal is entering and leaving the plugin at the same level. This is called unity gain and it can be useful to keep this in mind when building signal chains.
Step 4
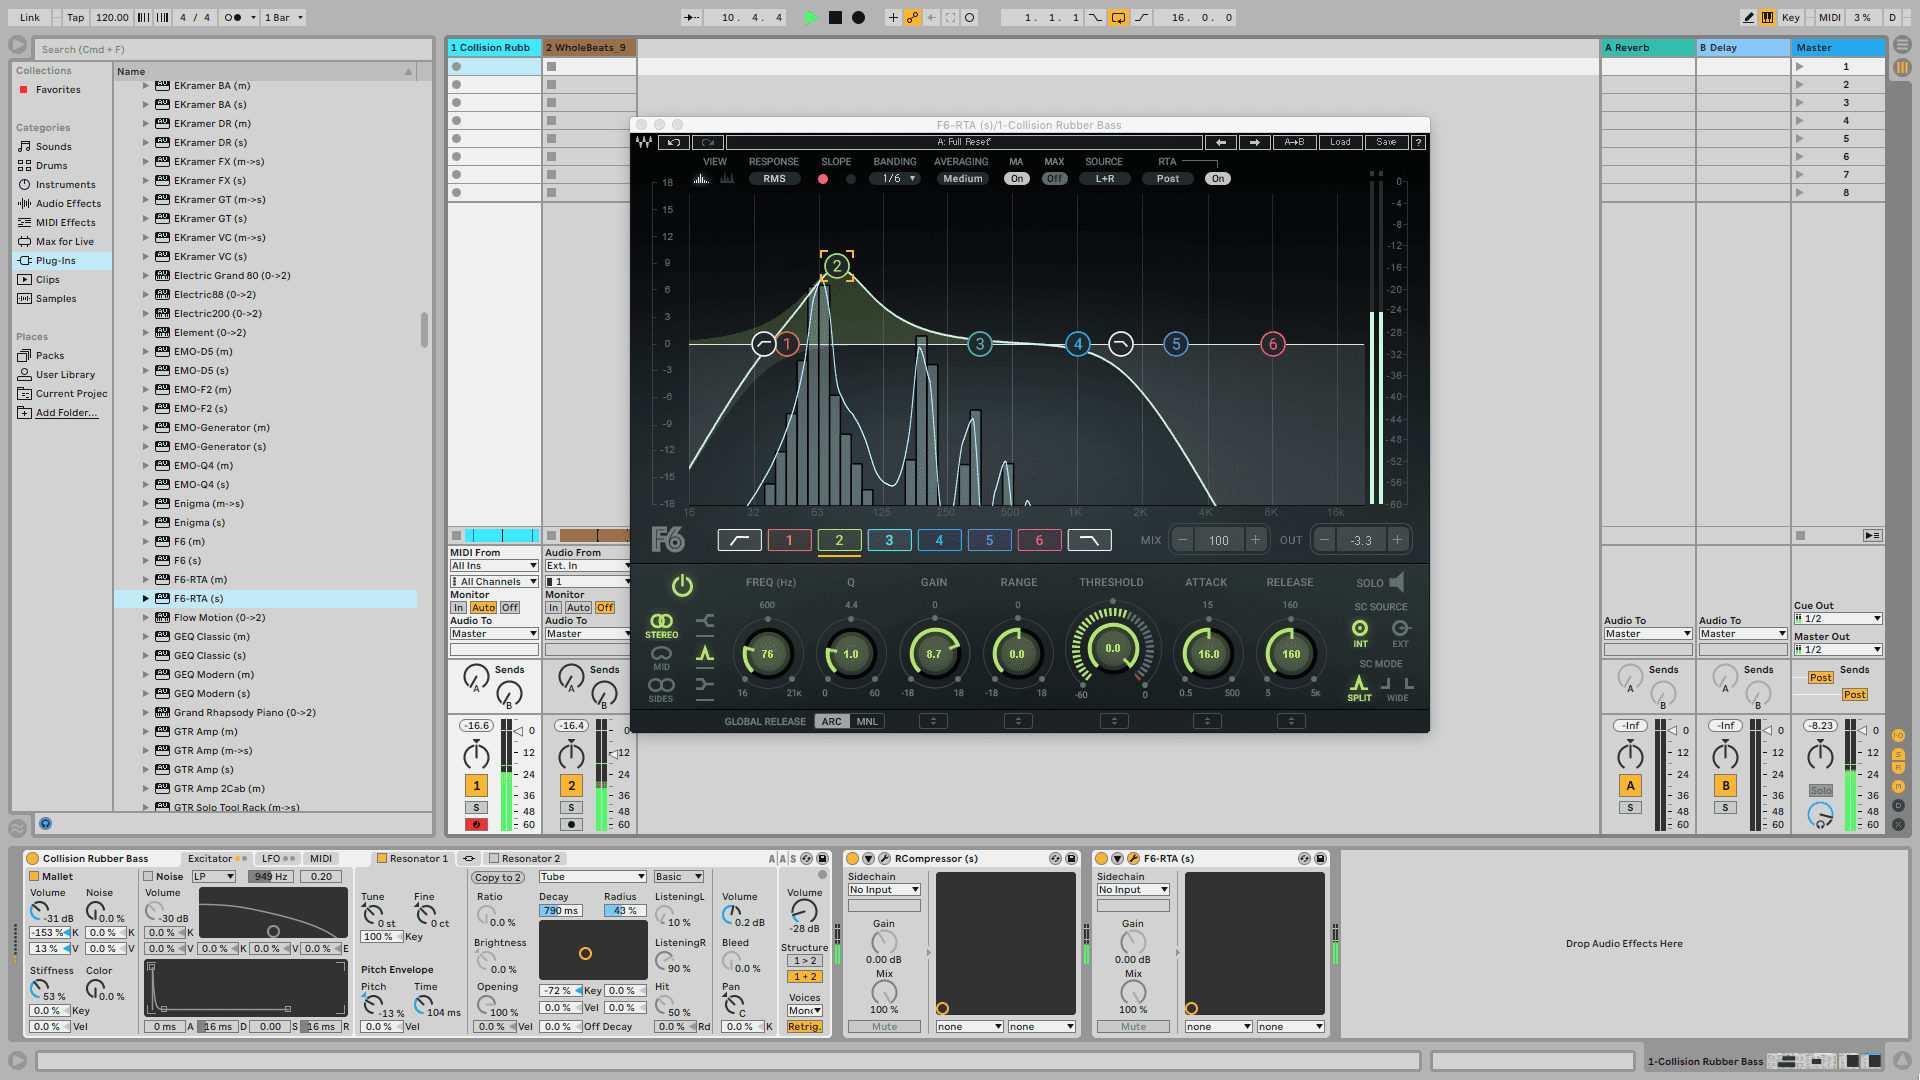
Our bassline could use a little tonal shaping so let’s apply EQ to the signal. Add a Waves R6 Floating-Band Dynamic EQ next in the signal. Add a low shelf at 35Hz and a high shelf at 1587Hz. This has cut some of our signal volume. Next apply a boost of 8.7dB at 76Hz. This is a rather large boost and not the best practice for EQing but it will illustrate our point. Before EQing the signal was peaking at around -16dB on the channel fader but after our liberal boost, we’re looking at peaks of -13.3dB. To compensate we would reduce the gain on the EQ by around -3.3dB.
There’s too much bass because of our example so bring the bass boost down to 2.9dB and raise the gain to 1.4dB to bring our signal back to 16dB before moving on to step 5.
Step 5
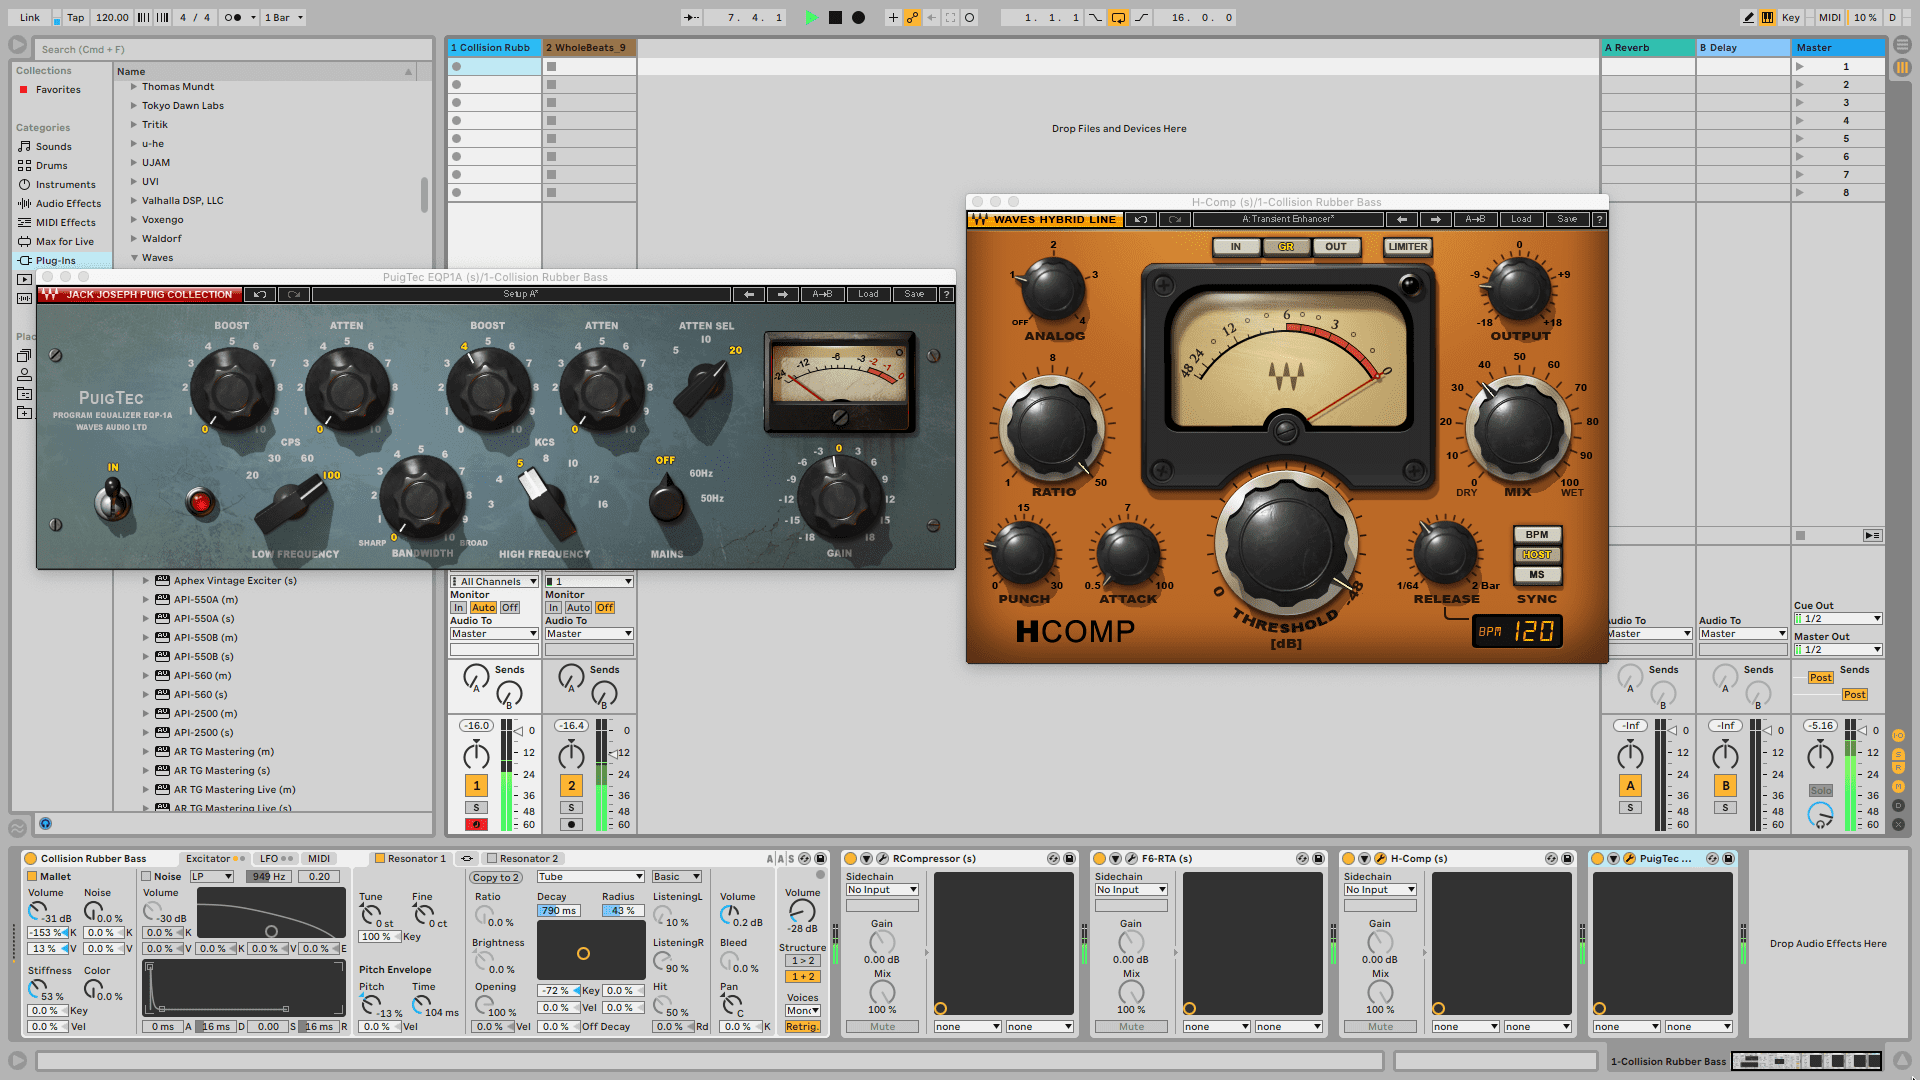
Continue to add effects plugins and monitor the signal at each step. Add a Waves H-Comp Hybrid Compressor, set it to the Transient Enhancer preset, and hear how the signal level increases. Use the plugin’s output to turn down the signal to -11.1dB. Our sound now has added punch but we have added no extra headroom so we still have room to work.
Our bass sound could use a little emphasis in the highs so add a Waves PuigTech EQP1A next, set the high-frequency knob to 5kHz and boost 4dB. By boosting we have added volume to the signal so dial back the plugin gain by -1.1dB. As we can hear, we have significantly shaped the tone and dynamics of our bass without sacrificing any headroom.
You can keep track of peaks by watching the level meters across the plugin chain. This is relatively easy to do in Ableton Live thanks to the meter on each plugin frame.

Step 6
Lastly, make sure your master fader isn’t peaking any higher than -3dB. Mastering engineers prefer 3 to 6dB of headroom to work so make sure your master channel is staying out of the red too.
Remember that to human ears loud sounds better but there’s more to a great mix than just volume. Leave in some space for the mastering engineer to do his job.
Best Practice
Gain staging is not difficult to do, it’s more of a habit to get into. Make it a best practice to turn down your instruments and effects in your signal chains, and your mixes will be much better for it. By leaving plenty of headroom, you’ll have more room to work and your mixes will in turn become more energetic and powerful. Your mastering engineer will be happier too.