
For many of us, distortion conjures up sonic images of guitar heroes from Tony Iommie to Dimebag Darrell. But what about dance music? In this article we look at how screaming walls of noise are being put to good effect on today’s dance floor.
Saturation, fuzz and overdrive are just some of the various intensities of distortion employed to inject warmth into often dull digital signals. By adding significant character and amplitude to specific frequencies, distortion can shape extreme and harsh frequencies into essential mix tools. With the resurgence of analogue gear, and the popularity of textural genres like Lo-Fi and “Business Techno”, producers are finding more and more ways to use distortion in their music. One recent example appeared in last month’s studio feature with Sept, where the producer discussed A/B testing between the software and hardware version of the popular Rat 2 pedal. It was therefore with fortuitous timing that Waves has released a new range of plug-ins designed as creative tone manglers for the modern producer last week. We’ve loaded them up with one thing in mind and one thing only…to unleash distorted chaos!
For the purpose of this article, we are going to reverse engineer, step by step, how we made the following loop:
The five steps, in order, that we will run through are:
- Kick drum
- Higher frequencies
- Drum bus
- Orchestral one shot
- Master channel
Setting up the Project
Often, producers are discouraged from using distortion as everything gets very loud and gets loud quickly! The channel and the master bus begin to clip and you’ll see plenty of red meters. However, a popular solution is actually very simple: put a limiter on the master channel as well as on each individual track. This will prevent the clipping and you’ll wrestle back control of your project. Before we continue, it’s worth mentioning that distortion and over saturation is a hugely divisive mix technique and plays a significant role in the ‘The Loudness Wars”. Our suggestion: learn as many techniques as you can and use them how you see fit.
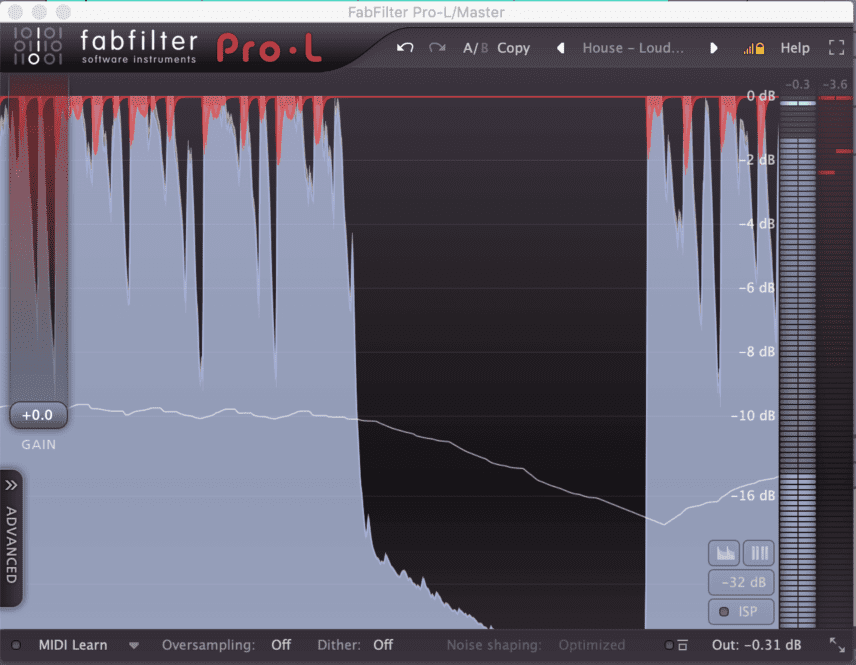
Now you can go a step further. Add an EQ before the limiter on each of the individual channels and roll off the low-end. With the limiters in the chain, even if you add illogical amounts of overdrive, for example a whopping 10db or more, you will only hear new and different textures rather than ear-melting master bus breaking distortion! We’re now all set.

Part 1: The Kick Drum
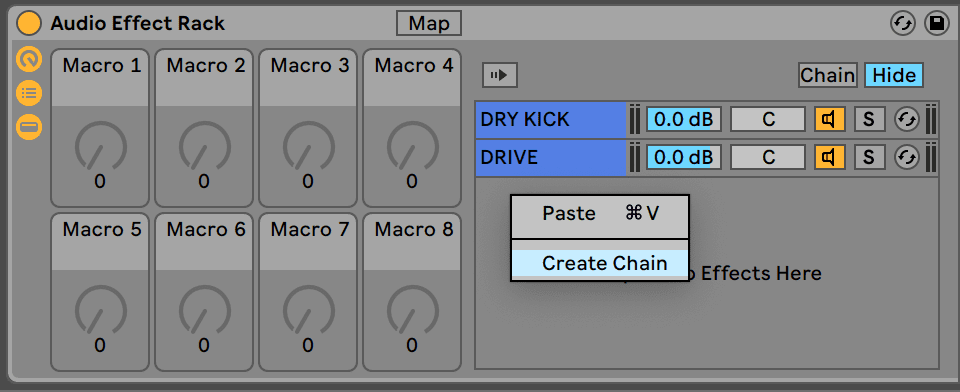
Fundamental to any serious club tune, it’s important to make it stand out. For inspiration we are referencing “Scorched Earth Policy” by Selective Response. To achieve this type of sound, you will need to use parallel distortion – a technique which is easy with Ableton’s Audio Effect Rack.
What is parallel distortion? Listen closely to the reference: there are two sounds making up the kick sound; a dry kick and a driven kick being played in “parallel”. The driven kick is ducking when the dry kick plays which gives the sound that ducking effect. Together they are working to help the combined kick sound punch through the mix.
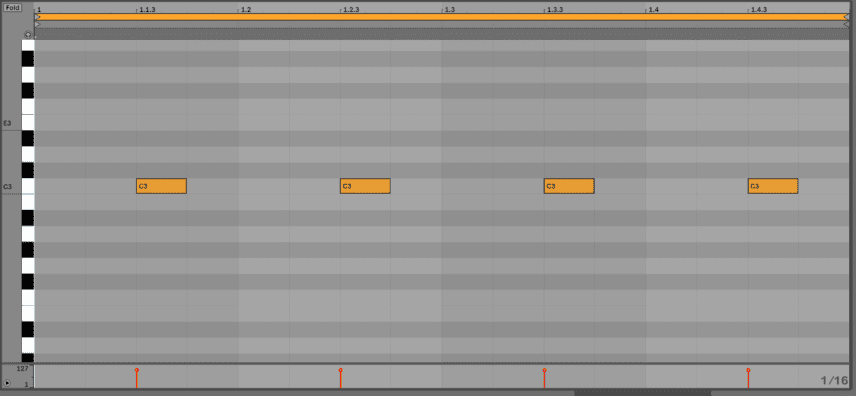
To recreate something similar, set your project tempo to 130bpm and program a four-to-the floor pattern. We used Ableton’s Kick Loop RK 4 128 BPM from their Punch and Tilt Factory Pack.
Step 1
Create two chains in the Audio Effect Rack. Set one to channel the Dry Kick and the other the Drive signal.
Step 2
Start with the Dry Kick. Add an EQ to reign in the sub frequencies. Roll off up to 80Hz and experiment to taste. Add in Live’s Saturator plug-in to provide bite.
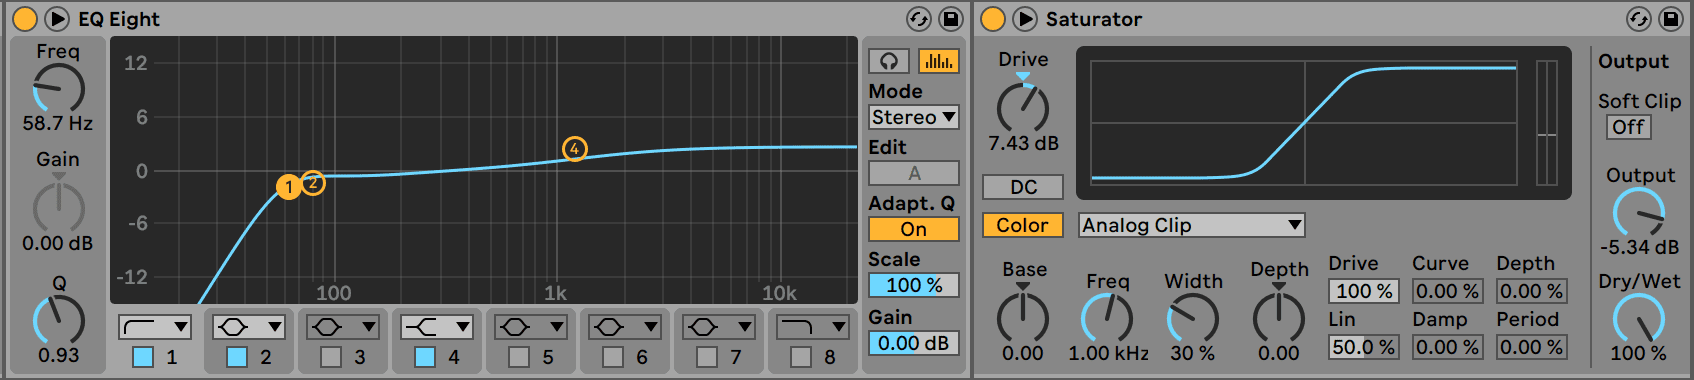
Set the Drive to 7dB and account for this by reducing the Output by around 5dB. With drive/saturation plug-ins this is a common method to get more character from your sounds while still keeping levels under control.
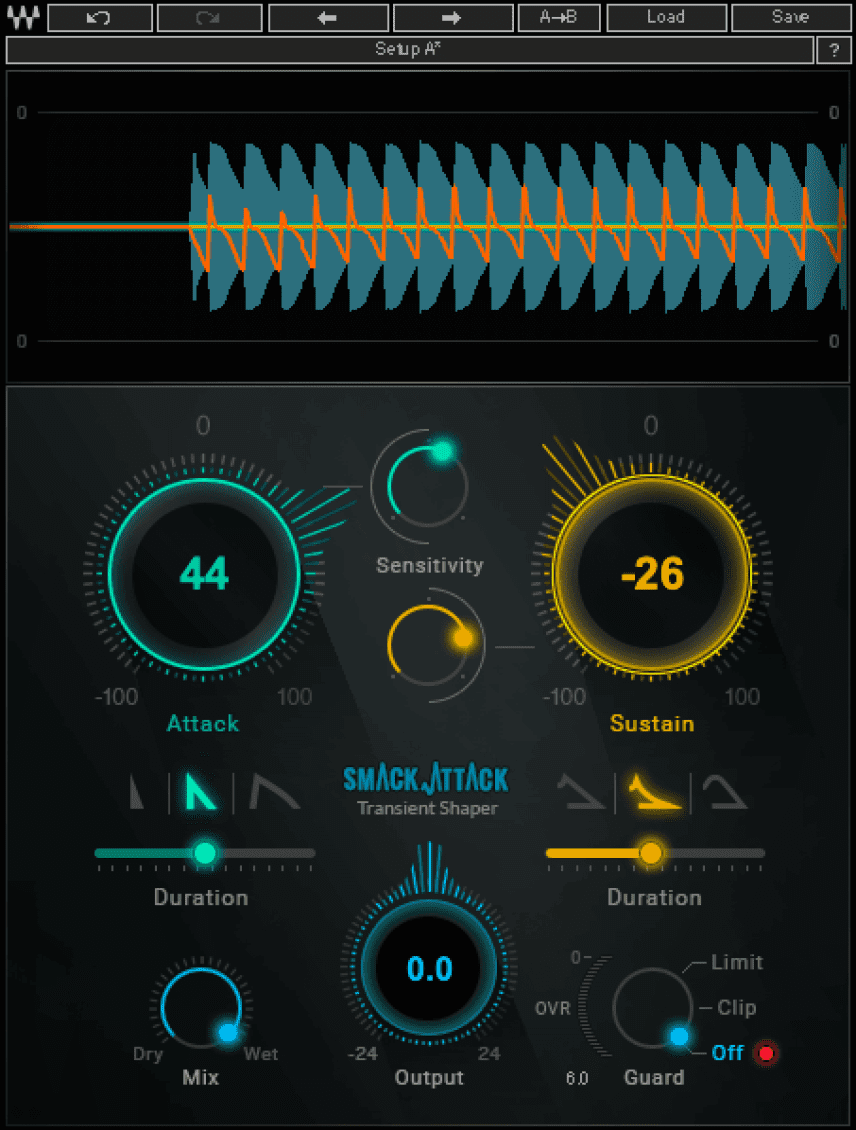
Next, add a transient designer. Something like Waves Smack Attack is a good option and will accentuate the kick’s attack while simultaneously lowering the sustain of the sub frequencies which helps with unwanted overlapping notes.
Here’s how the Dry Kick should sound:
Step 3
Next let’s look at the Drive chain. As the name suggests we need to get creative and Waves’ MDMX TubeScreamer is a good choice for the “meaty” sound we’re going for. This plug-in responds well to bass and kicks and the parameters allow for easy and creative distorted manipulation. In some ways, it’s ready made for the sound of today.
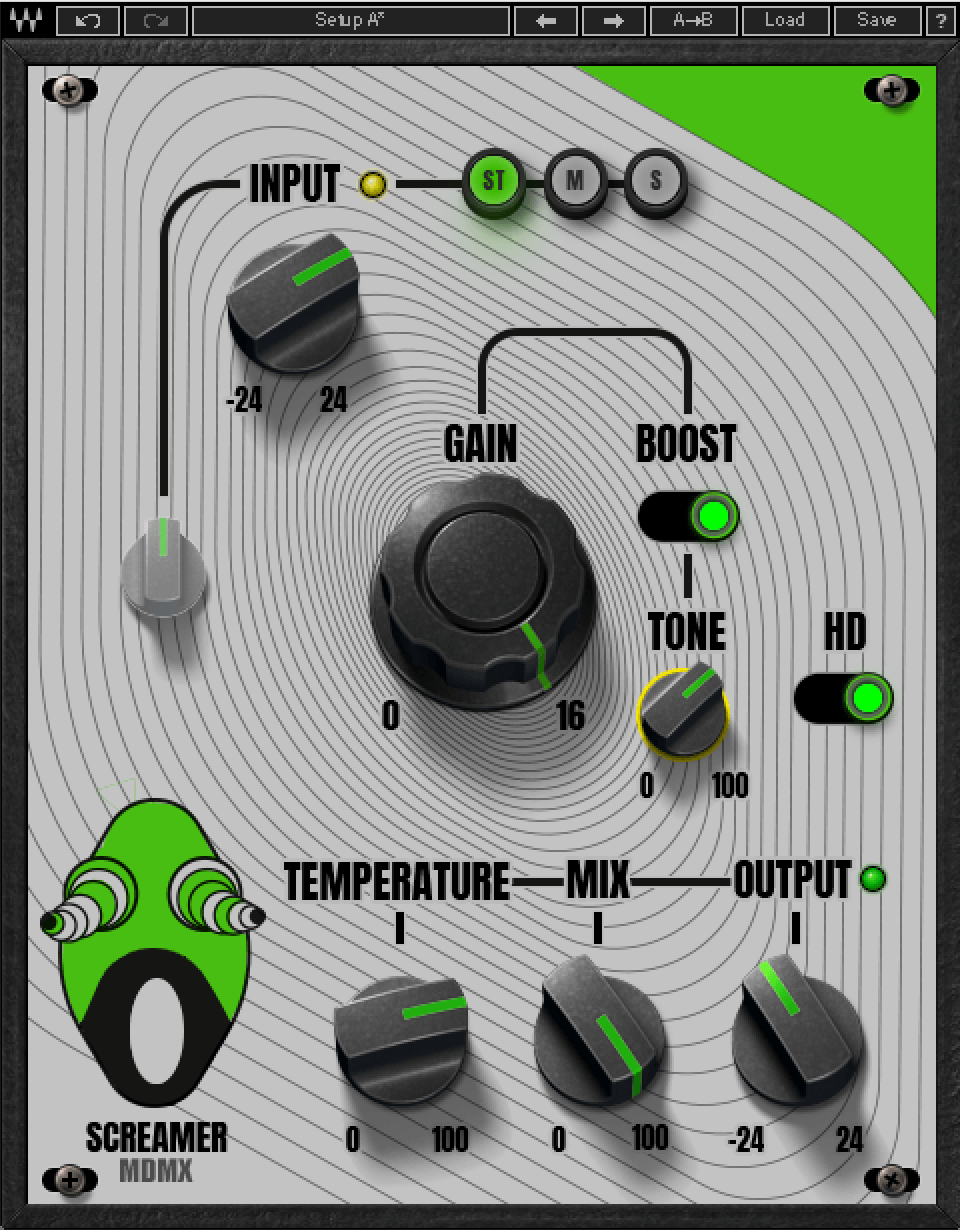
Add a filter to the chain before the MDMX and an EQ after the MDMX. The filter’s role is to decide which frequencies are allowed through the TubeScreamer. The EQ’s role is to cut the “sub warfare” as these frequencies are already being provided by the dry chain. Everything in it’s right place.
Now insert a Compressor. Live’s default Compressor does the job, and sidechain it to the kick channel. This will make sure that the Drive Kick ducks when the Dry Kick is playing. There is no perfect sidechain compressor setting so experiment with the Attack, Release and Threshold parameters until you find a tail that you like! To help get started, copy our own settings below.

Here is how the Drive channel should sound played back solo:
Here is how both chains sound together. Notice the ducking effect:
Step 4
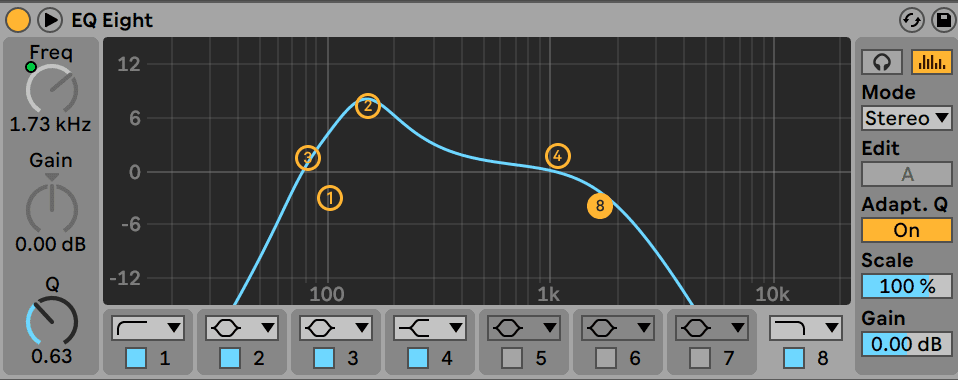
The Drive chain is a bit bright for our taste. Load up EQ Eight and apply a low-pass filter as well as a high-pass filter. Remember that you can make drastic changes in the EQ to add more character to your drive. This is because you have your pre-placed limiters to protect you! It’s recommended to reference every step without active limiters to be absolutely sure the sound is not being pushed so hard that its uncontrollable later in the mix.
Top Tip: Distortion compresses signals and reduces dynamics. It can in that sense be used as a form of compression. Mixing in the dry signal, as we have with the parallel distortion, is one option to retain the punch and transients that can be lost with an over compressed (or over distorted) signal
Part 2: The high frequencies
With our kick in place, we turn our attention to the higher frequencies. We have used Slamdunk Top Loop 128 BPM from Ableton Drum Essentials Factory Pack. It sounds like this:
It is a good sample, but it sounds too clean in the context of our track. We want to add texture, movement and neatly place it within the mix.
Step 1
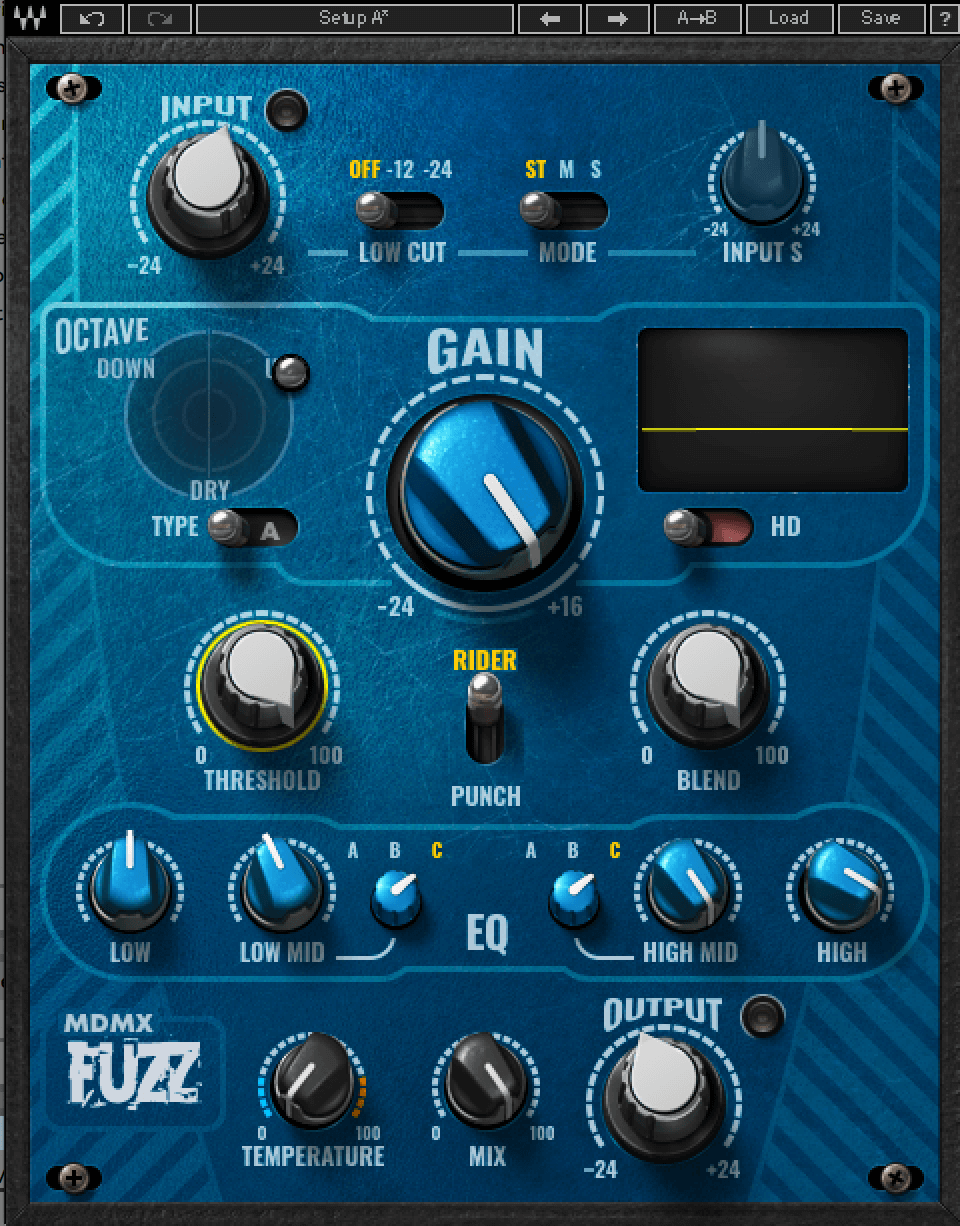
Insert a saturator/distortion plug-in like Waves’ MDMX Fuzz. This Fuzz plug-in offers…um…Fuzz…which is a different variety of distortion. Fuzz can be anything from lightly driven grit to deliberate clipping of the waveform producing something close to a square wave. Using EQ to get the beast under control is pretty much essential and MDMX Fuzz has EQ built in.
This plug-in has two characteristics that make it ideal for drum processing. The first is the Octave parameter which provides control over the mix between a dry signal with another octave either higher and/or lower. The “Up” drive is very sharp and creates a noise-like layer with punchy transients.
The second is the “Blend” and “Threshold” parameters. Blend is a mix control and Threshold works similar to a noise gate and tells the plug-in which transients to respond to.
Here is the how the sample sounds with our MDMX Fuzz active:
Step 2
To add movement, automate the “Threshold” parameter. With “Blend” set to full, the noise-like layer generated will sound less like drum transients and more as if you are increasing the decay on a snares ADSR.
Here is our sample played back with the kick drum and the MDMX Fuzz Threshold automated:
Part 3: The drum bus
The drum bus is where you can really scuplt a sound and change the identity and nature of the track. With all drum parts running through one distortion plug-in inserted on the drum bus, there is unity, a common sonic character and plug-ins can really shine when applied to a group of instruments. Try anything on a drum bus – experiment, experiment and experiment some more!
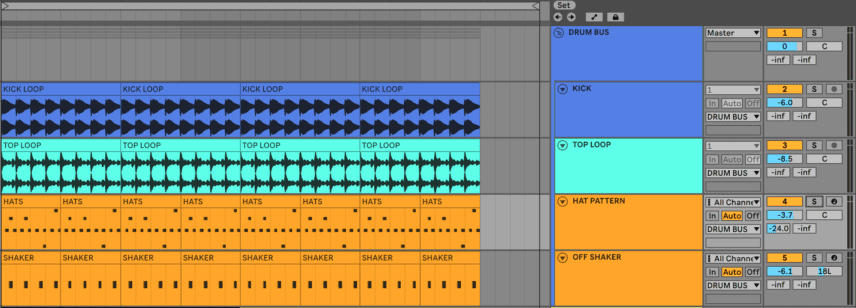
Before we delve into the drum bus, add a hi-hat and shaker loop. Any one-shot will do it. For the hi-hat we sampled the EMU Planet Phatt and for the shaker “A-Shaker 1” from Ableton Drum Essentials Pack.
Here is how the above part sounds played back with just the kick:
Step 1
Route the kick, the loop in step 2 and the hi-hat into a group track. To do so, select them all and press Command G.
Step 2
For the drum bus saturation, we have used Waves’ Berserk Distortion plug-in. Released during Black Friday, we’ve taken to it for its variety of distortion curves and parameters. If nothing else, the density knob is especially good for adding more chaos! And its chaos we’re looking for..! With the Berzerk Distortion’s Mix Knob set to 100% we have the chaos we’re looking for:

Remember, while it is clearly very very heavily distorted it’s not clipping because of our limiters.
Step 3
To achieve a more usable sound, gradually automate a reduction on the mix knob. Here are the drums with Berzerk’s Mix knob automated anticlockwise across the eight bar pattern.
When driving the drum bus, or indeed any part, spend some time finding the sweet spot. It’s subjective what that exactly is but you’ll know it when you feel it and after-all music should be all about feel.
Part 4: Orchestral one shot
Theres a distorted life beyond drums! Why not try it on an orchestral one shot? Our reference here is the sound at 3.10 in this genuine monster of a Peder Mannerfelt remix by Perc. Using these kinds of hits and samples out of context creates contrast. And just because it’s an orchestral hit doesn’t mean that it can’t be mangled with noise, grit and saturation.
We used Orchestral Hit – “Hit 3” from Soundpacks.com’s Free Orchestral Hits Sound Pack. It sounds like this:
Step 1
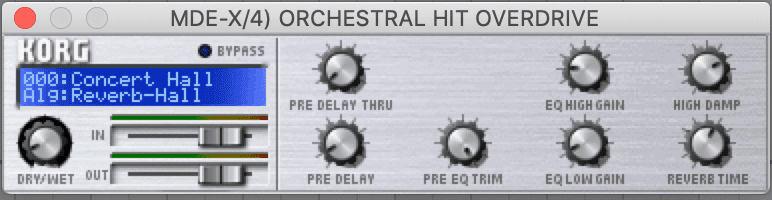
First add an EQ to cut the lows and apply reverb for ambience. Korg’s MDE-X is the reverb of choice but you can use anything. Ableton’s Reverb is more than fine.

Step 2
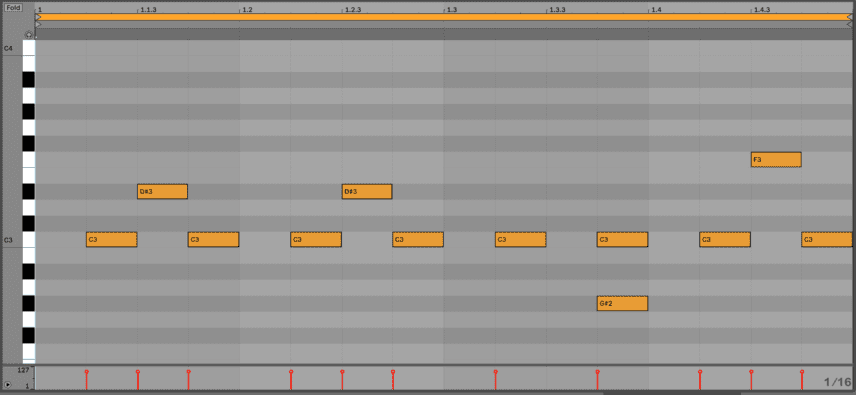
Draw in a MIDI Sequence. Here’s what we made.
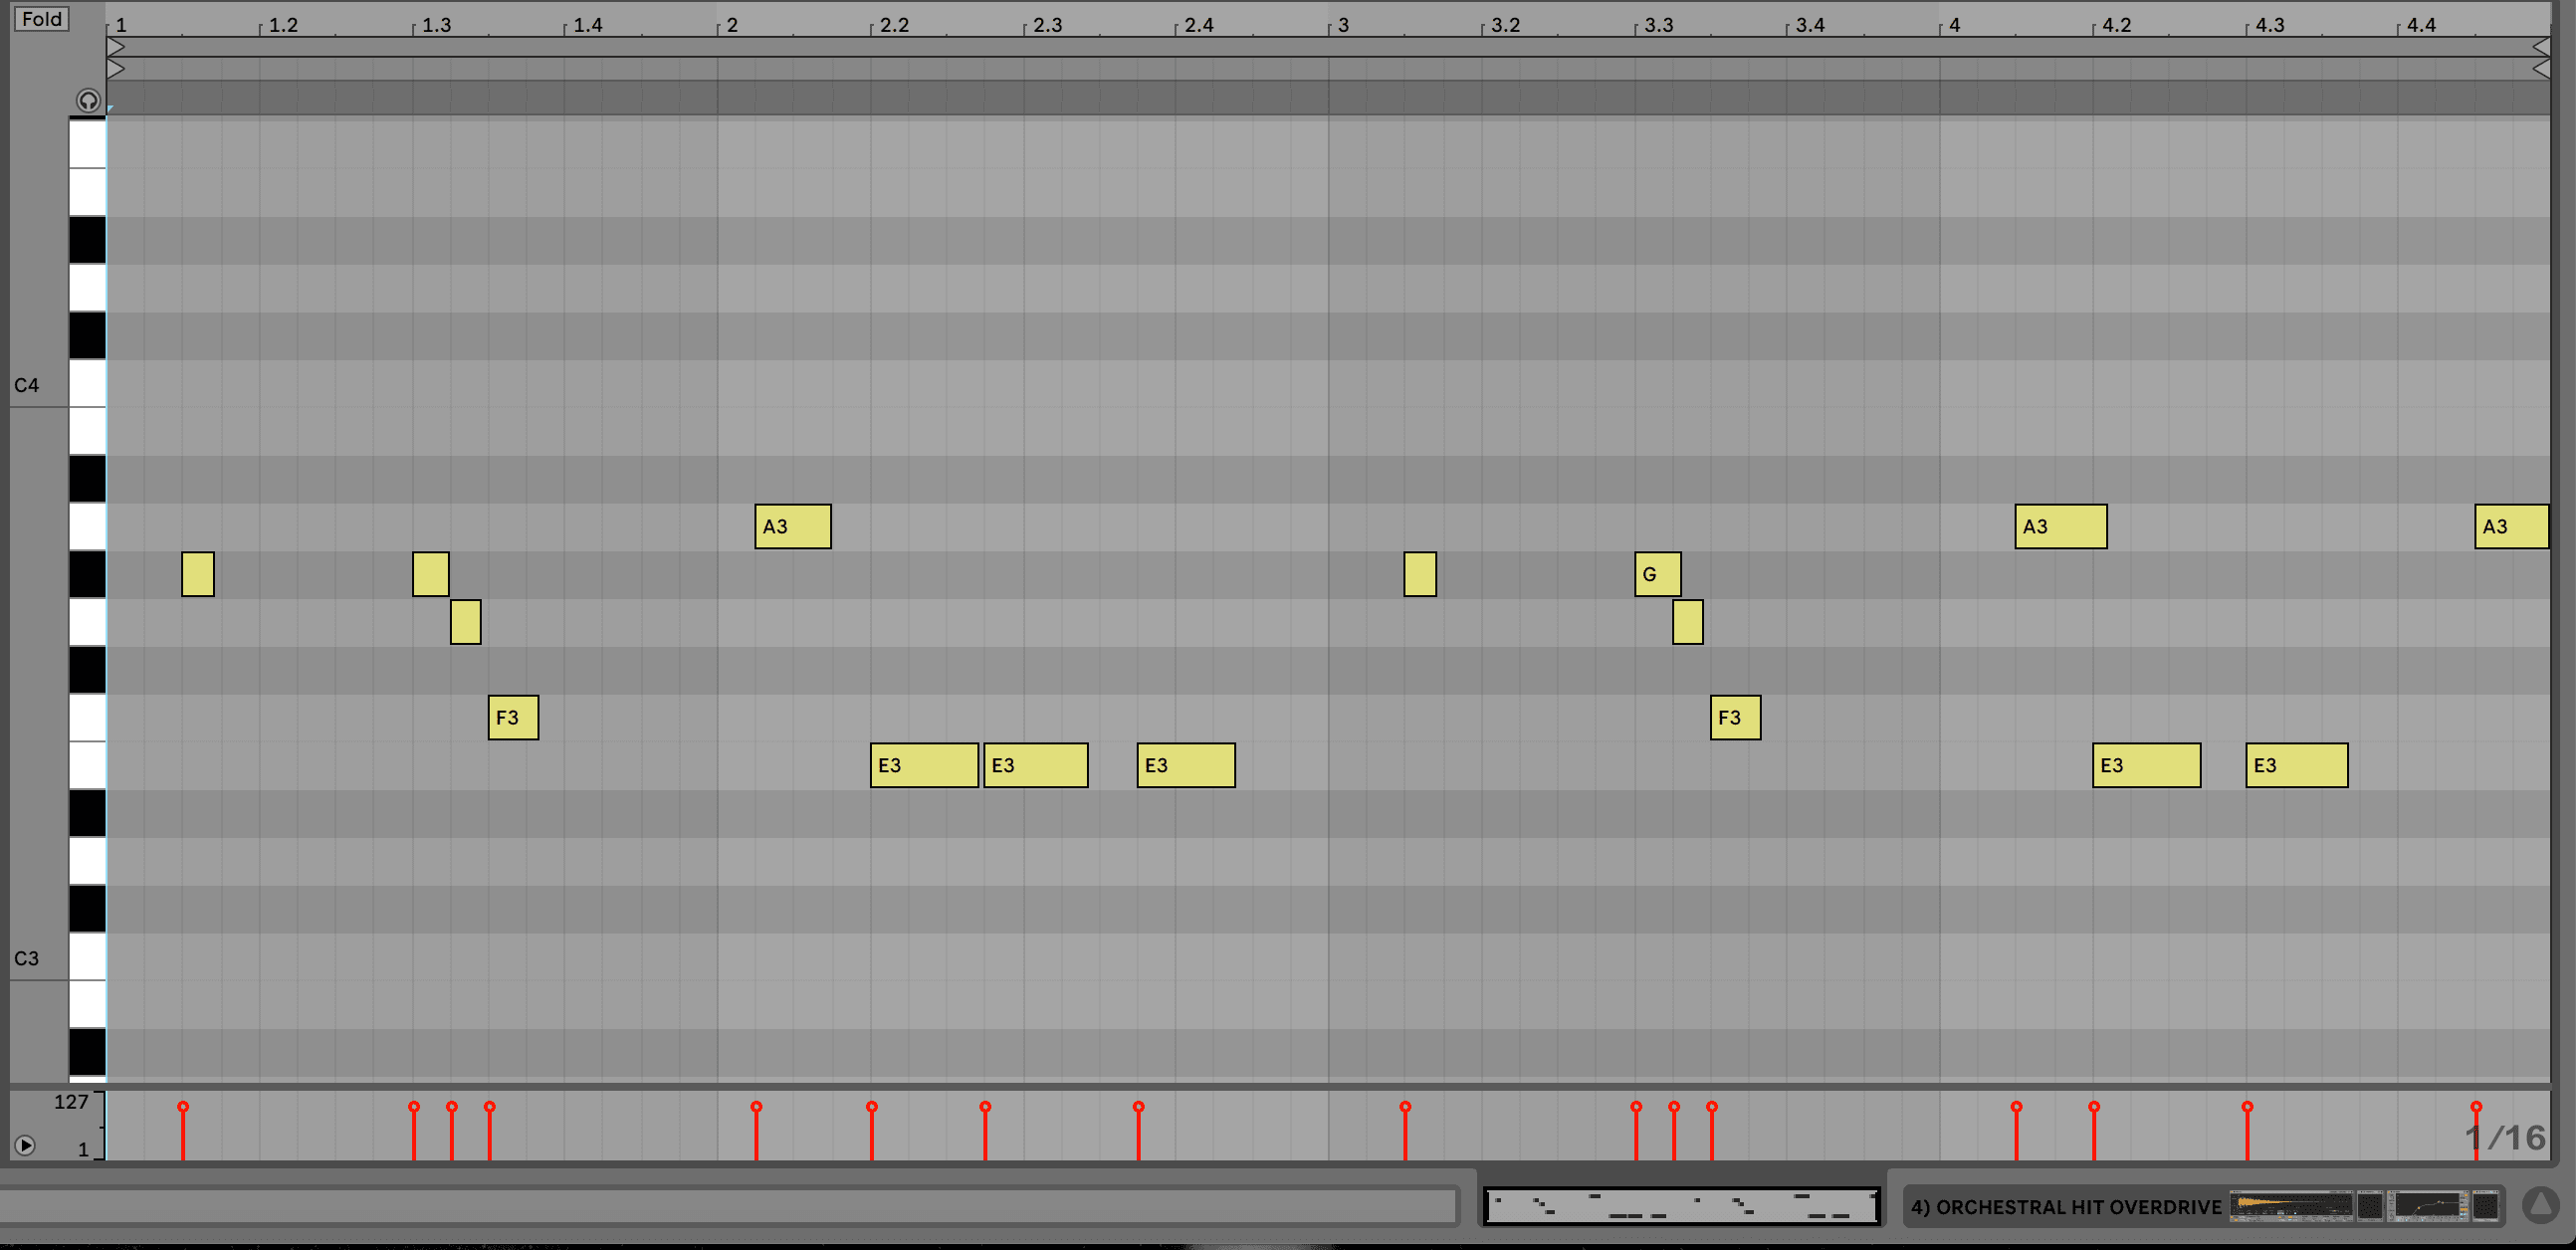
It should sound like this:
Step 3
Now add drive. We’ve gone with Waves’ MDMX Overdrive. We felt overdrive, a warmer and more subtle form of distortion, will be better suited for this case.
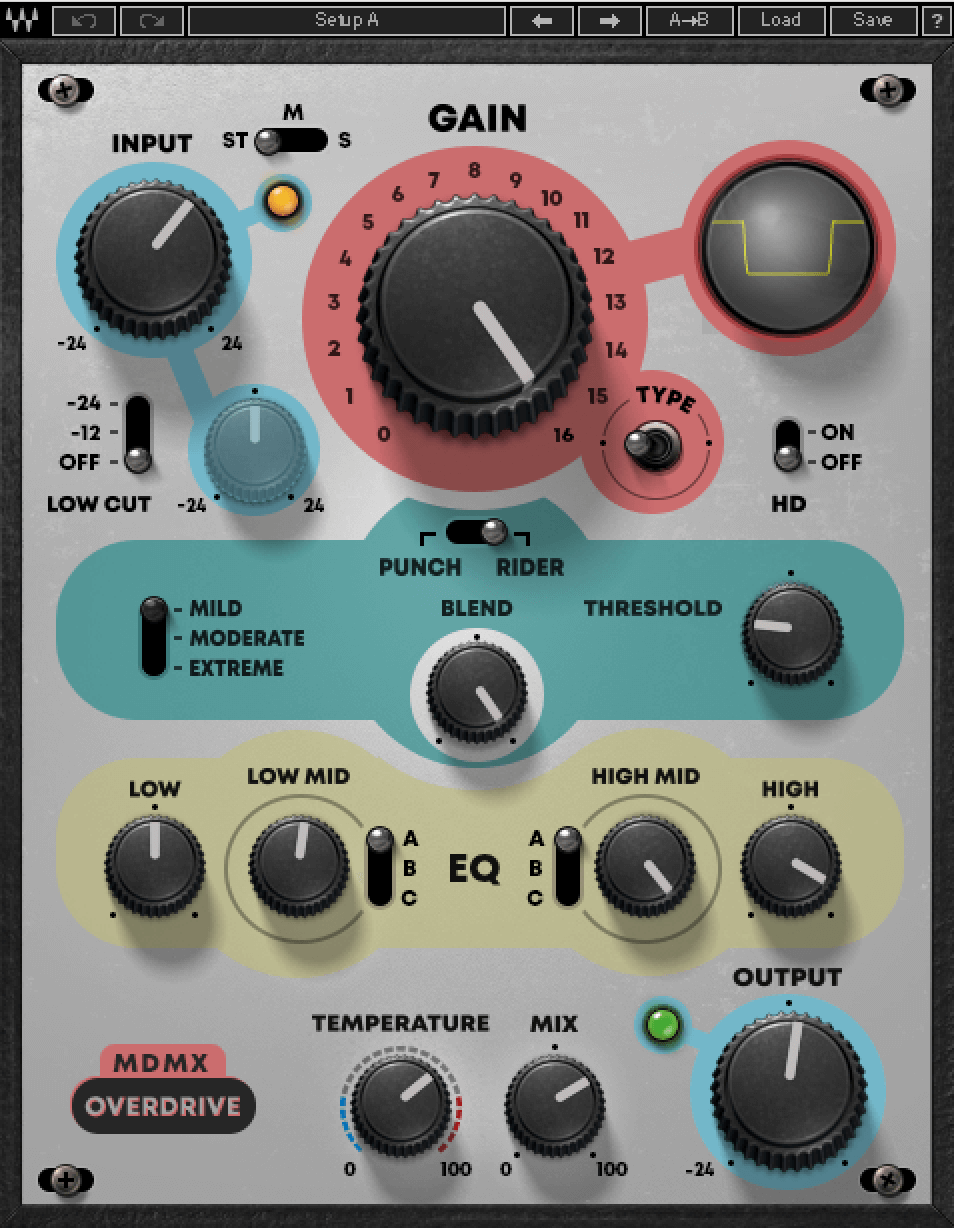
The plug-in settings are pushed to the extreme with Gain pushed all the way to 16, Input increased by several dB, and the High-Mid/High on the EQ turned clockwise almost as far as they can go. Make sure to also to reduce the Mix knob or you’ll find your levels peaking. The sample now sounds like:
To recap, here is our full progress so far:
Part 5: The Master Channel
Saturating the master channel adds a final dose of character and energy to all parts. Many producers turn to tape emulation plug-ins on the master to give their track a vintage sound. Tape saturation models the sound in way that gives a little analogue mojo to the cool digital signal.
Waves have history with the iconic Abbey Road studios as well as with tape simulations such as the J37. As part of their latest release, the company have given us both with the Abbey Road Saturator. This plug-in’s “Drive” and “Gain” controls allow you to push the signal very hard with no or minimal clipping. It’s the sound of classic tubes and transistors, driven hard from subtle to extreme, and excited by the ultra-rare EMI TG12321.
The ratio knob is very versatile, giving you a choice between saturating and fattening the low-end or making the top-end brighter.
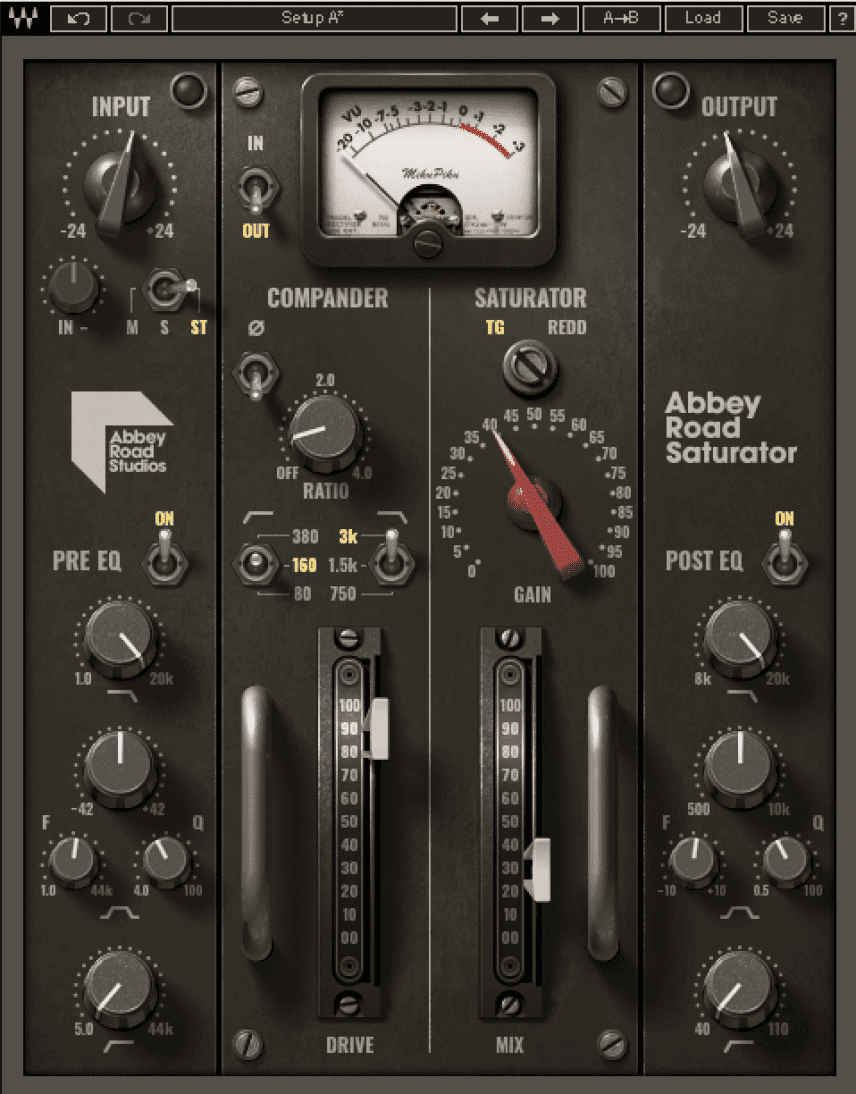
This is where the idea of “no rules” truly applies and you can drive your track to your heart’s desire. You can also increase the gain on your limiter on the master channel to make the track louder.
Here is the final result. For many this is arguably taking it too far! To back off the distortion, lower the Mix and/or Gain knobs. But remember, rules are there to be broken!