
This channel is sponsored by
 Roland Cloud is your creative hub for Roland hardware and software. Access legendary recreations of Roland Classics, find new sounds for your favorite products, and download updates and companion apps to make music fast and easy. Visit Roland Cloud
In the first installment of a new series, we mix a microhouse beat using Waves plugins in Ableton Live.
For most of the history of recorded music, writing and mixing were two different jobs. With the rise of the bedroom producer however, now we’re expected to do it all ourselves. Just when you have a handle on making the music you also have to become an expert on how to get it all sitting perfectly together. Don’t worry if you find it difficult – that’s because it is! And that’s where this new tutorial series comes in.
Mixing is a new series in which we mix tracks of various genres using stems provided to us by artists. If you’re interested in submitting a beat, we are looking for 8-16 bars of 24-bit bounces with the loudness level at no more than -15rms. We will not accept stems that already sound like a finished and mixed track. You can send your submission to editor@attackmagazine.com and make sure to also include a short artist bio, a few photos of you in your studio, and a SoundCloud link.
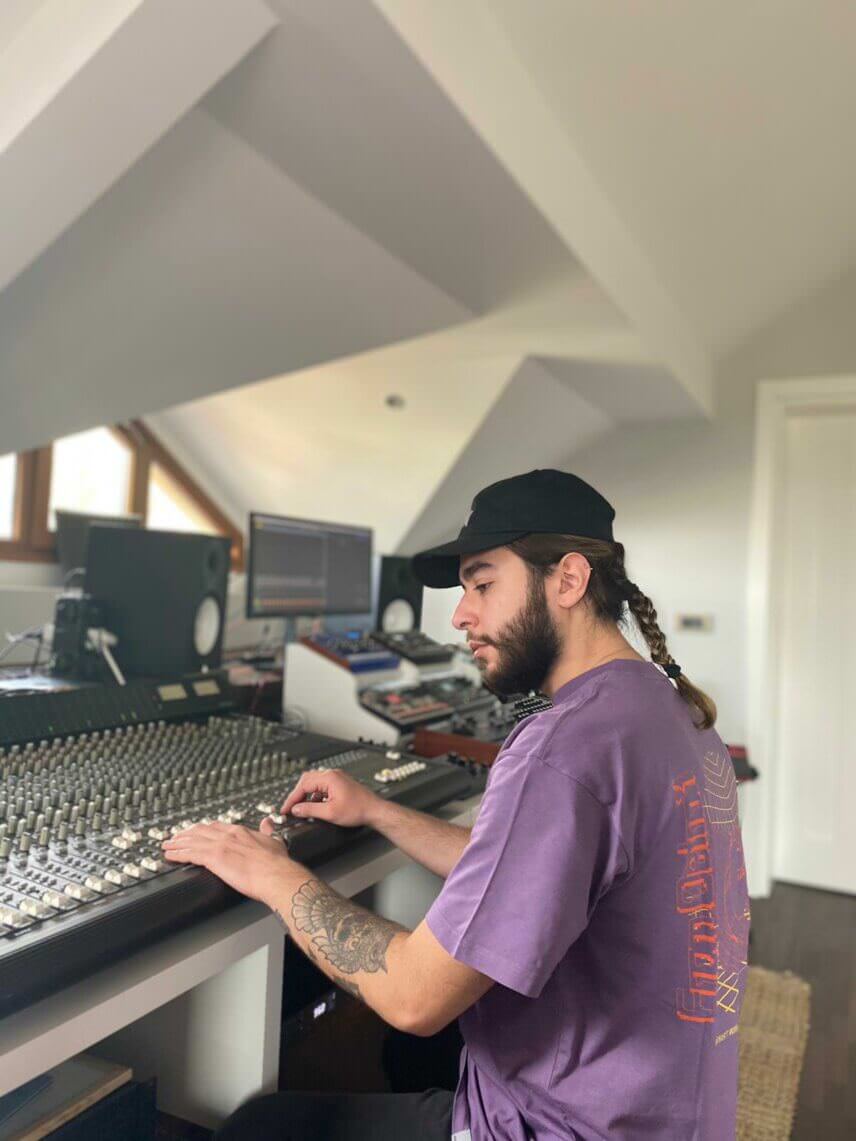
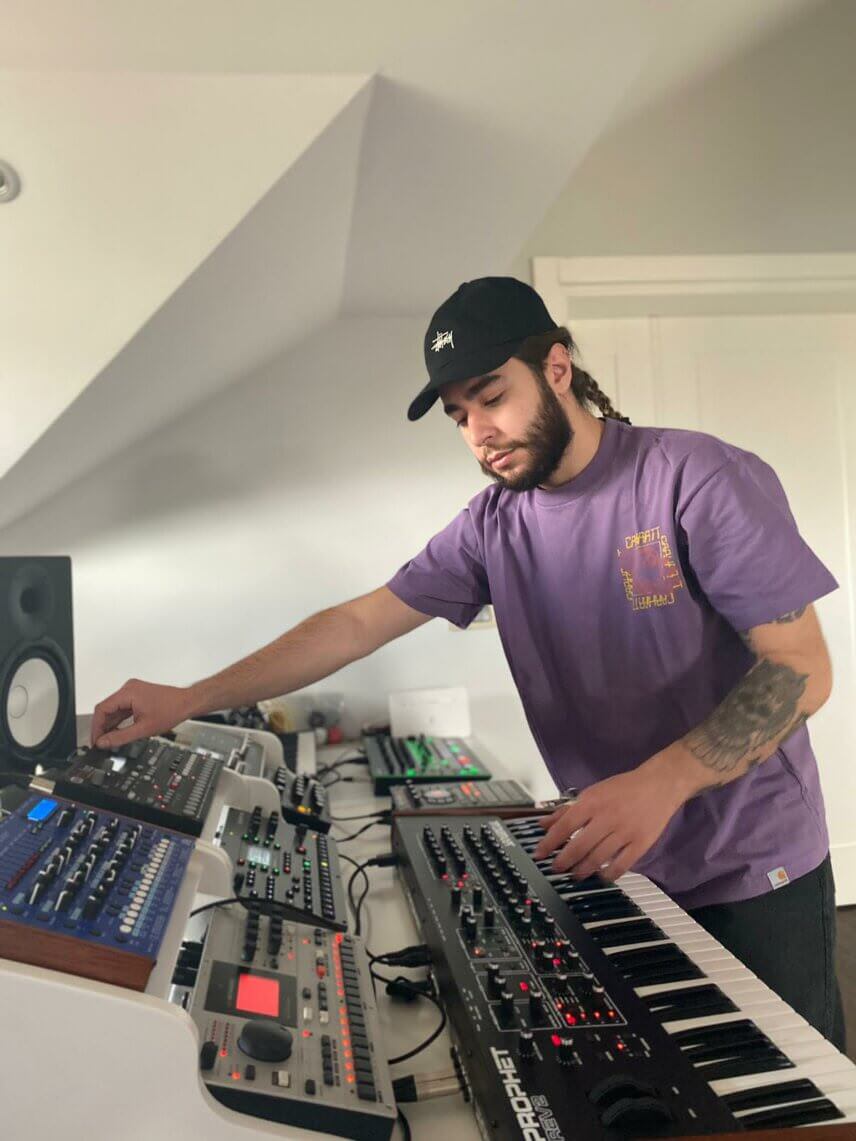
This installment’s stems have been provided by London-bred, Istanbul-based DJ/producer Timekeeper. Specializing in the minimal and hypnotic Romanian sound, Timekeeper produces his tracks using an army of Elektron hardware as well as a Prophet REV2 and Softube’s line of modular plugins.
Here’s the unmixed beat we were provided:
And here’s our final mix:
Step 1: Preparation
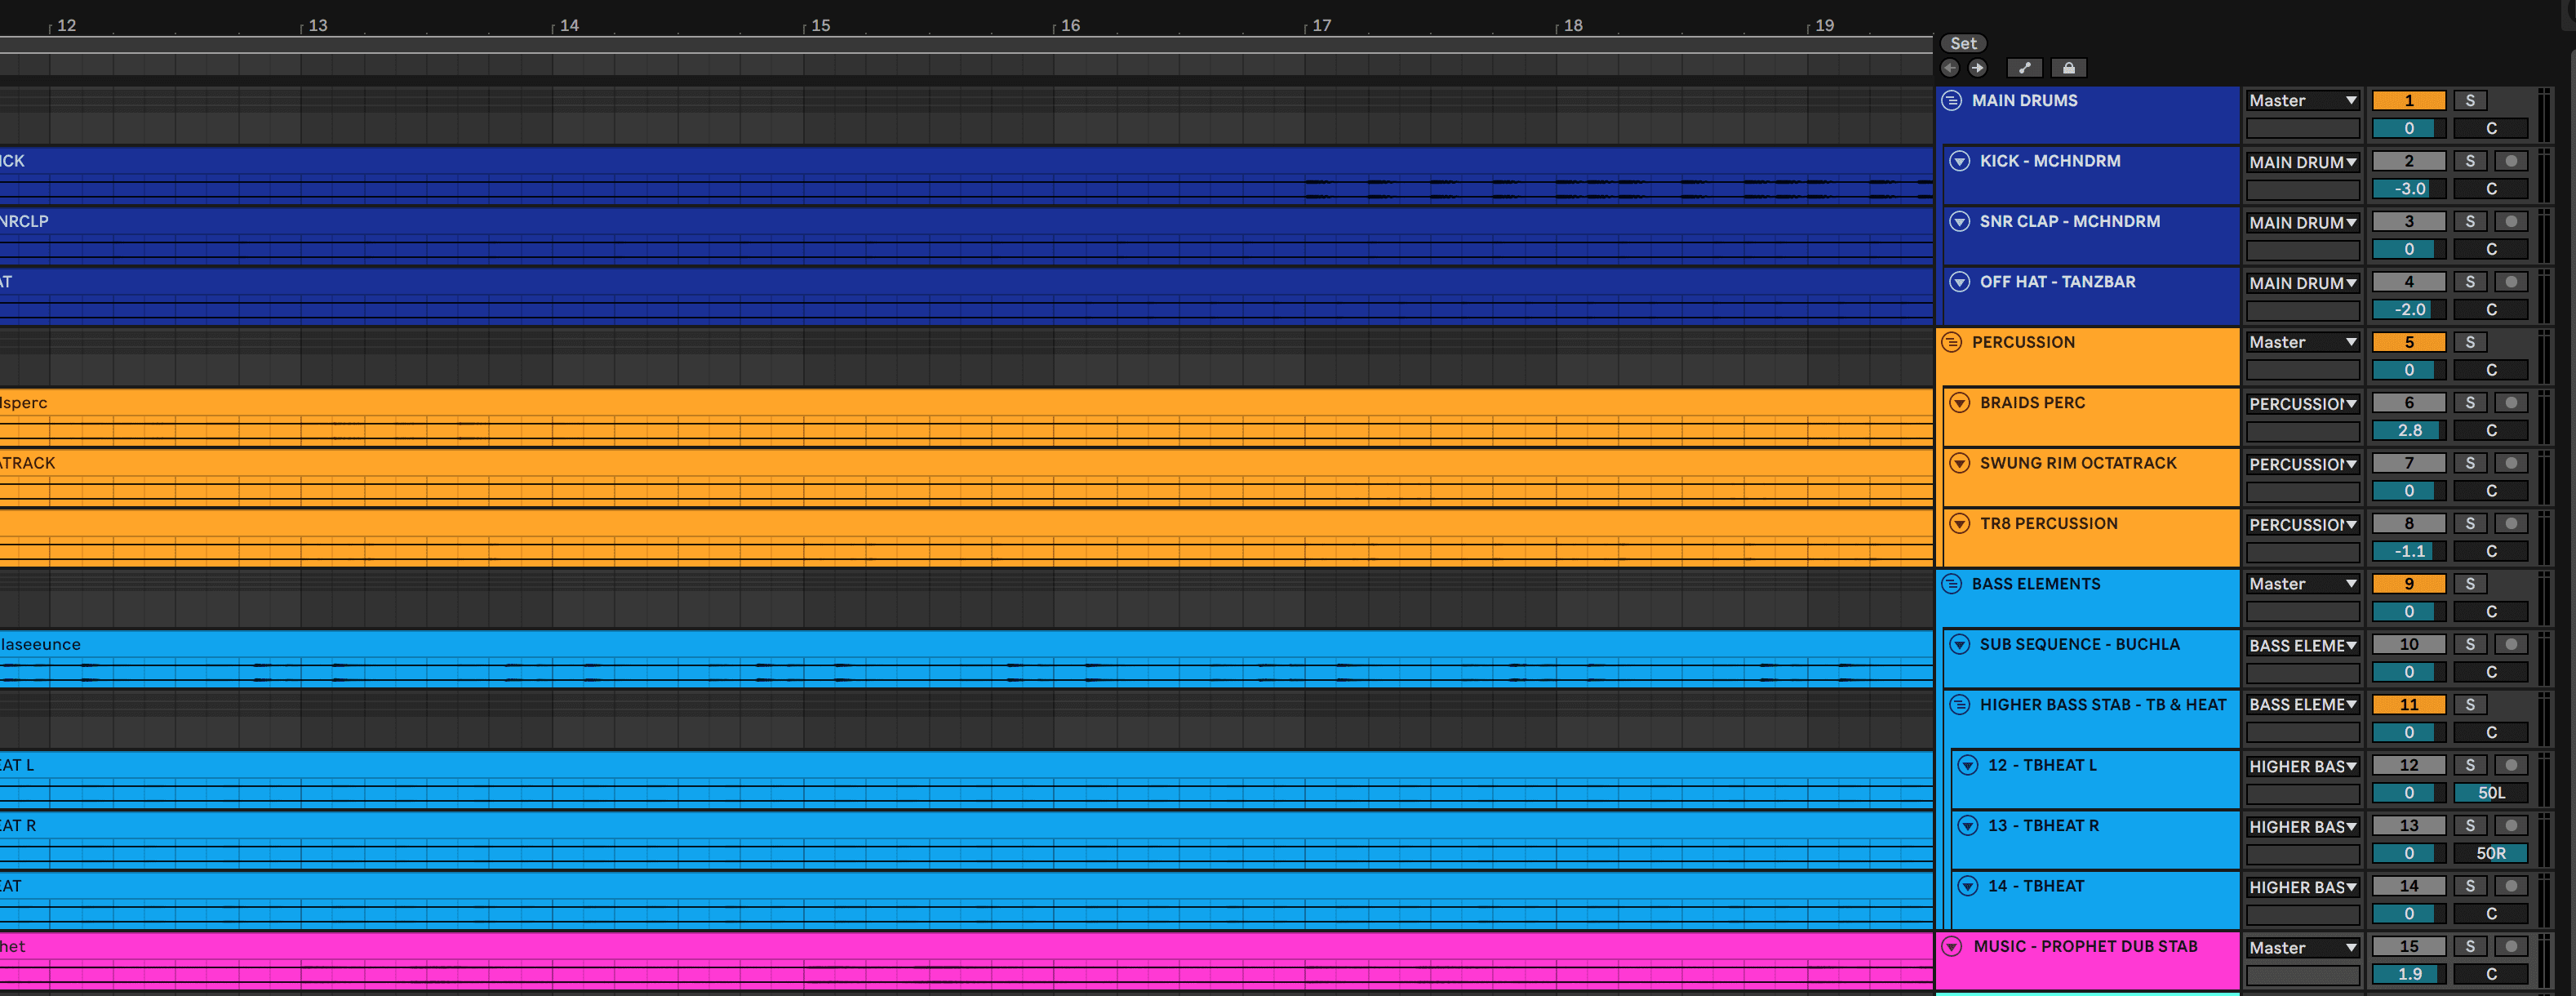
The stems we received include:
- Three main drum stems (a kick, a layered snare-clap and a hi-hat)
- Three percussion stems (modular percussion, a swung rim shot and a Roland TR-8 top drum loop)
- Four bass stems (a sub riff and three layers for a bass stab)
- One musical element (a dubby stab from the Prophet REV2)
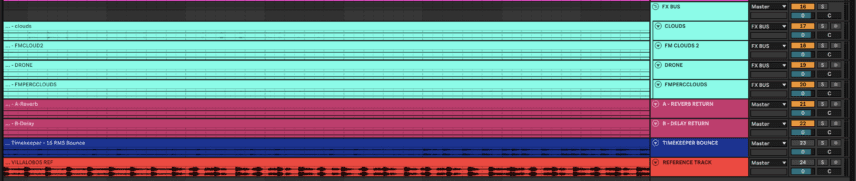
- Two return channel bounces (The reverb and delay return stems from the original session)
- A bounce of the track with all elements included
We also asked for a reference track to listen to during the mixing process. Timekeeper sent over Ricardo Villalobos’ remix of Julia Govor’s ‘Open Possibility’.
Having a reference track ready in your session while mixing is crucial because the reference will often have the answer to any dilemmas you are facing. Some examples are:
- Is my main hi-hat too loud and does it have enough sparkly top end?
- Is my kick punching through the mix enough or is it too subby?
- Does my mix sound wide enough and is the sub-bass really being felt?
If you are mixing someone else’s song, it’s also a good habit to regularly check the original bounce provided by the producer to make sure that you have not drastically changed any elements. There is a fine line between mixing and creative mixing, with the latter sometimes entering production territory.
With all of the above in mind, we organized the session by grouping stems in different categories, colour-coding them to make navigation easier and placing the original bounce and reference tracks at the very bottom so we could listen to them in solo easily at any time.
Step 2: Main Drum Elements
The first category of stems we’ll take a look at are the kick, off-beat hi-hat and layered snare clap.
Here’s how these three sound without any editing:
Let’s start with the kick.
It has a good transient and solid low end but we want to get some more attack and punch out of it. Parallel processing can be a good way to achieve this so instead of processing the kick directly, create a return channel and used Send A on the kick to route -5dB to this channel.
The idea is to create a lighter, more attack-heavy version of the kick on the return channel in order to slightly mix it in with the original.
On the return channel, insert Waves’ Scheps OmniChannel, dbx 160 compressor and any EQ.
In Scheps OmniChannel make sure that only the Gate and Compressor modules are activated. In the Gate, set the Floor and Attack knobs to their lowest values so no audio information is lost.
Then, by lowering the Close and Release settings and experimenting with the Threshold you can create a version of the kick that has less sustain and a sharper transient. The punchy sweet spot in the Threshold is usually somewhere between 12 o’clock and 2 o’clock.
In the compressor module, lower the threshold until you get a gain reduction of around one or two db and make sure to set a high attack time so that the transients still cut through.
The goal with the dbx 160 compressor is to add even more punch. With kicks, it can be a good idea to start with the Bass Drum preset and then tweak the threshold until you get about seven or eight decibels of gain reduction.
You’ll notice that we have some unfriendly and harsh sub frequencies resulting from the upward compression and added volume. The solution is simple: an EQ high pass at 50Hz! You can even cut more low end from the return channel to separate it more from the original kick.
Now we have lowered this return channel’s volume to around -12dB and blended it with the kick. Here’s how the kick sounded before, followed by how it sounds after our parallel processing:

The next stem in this category is the snare-clap and here’s how it sounds in solo:
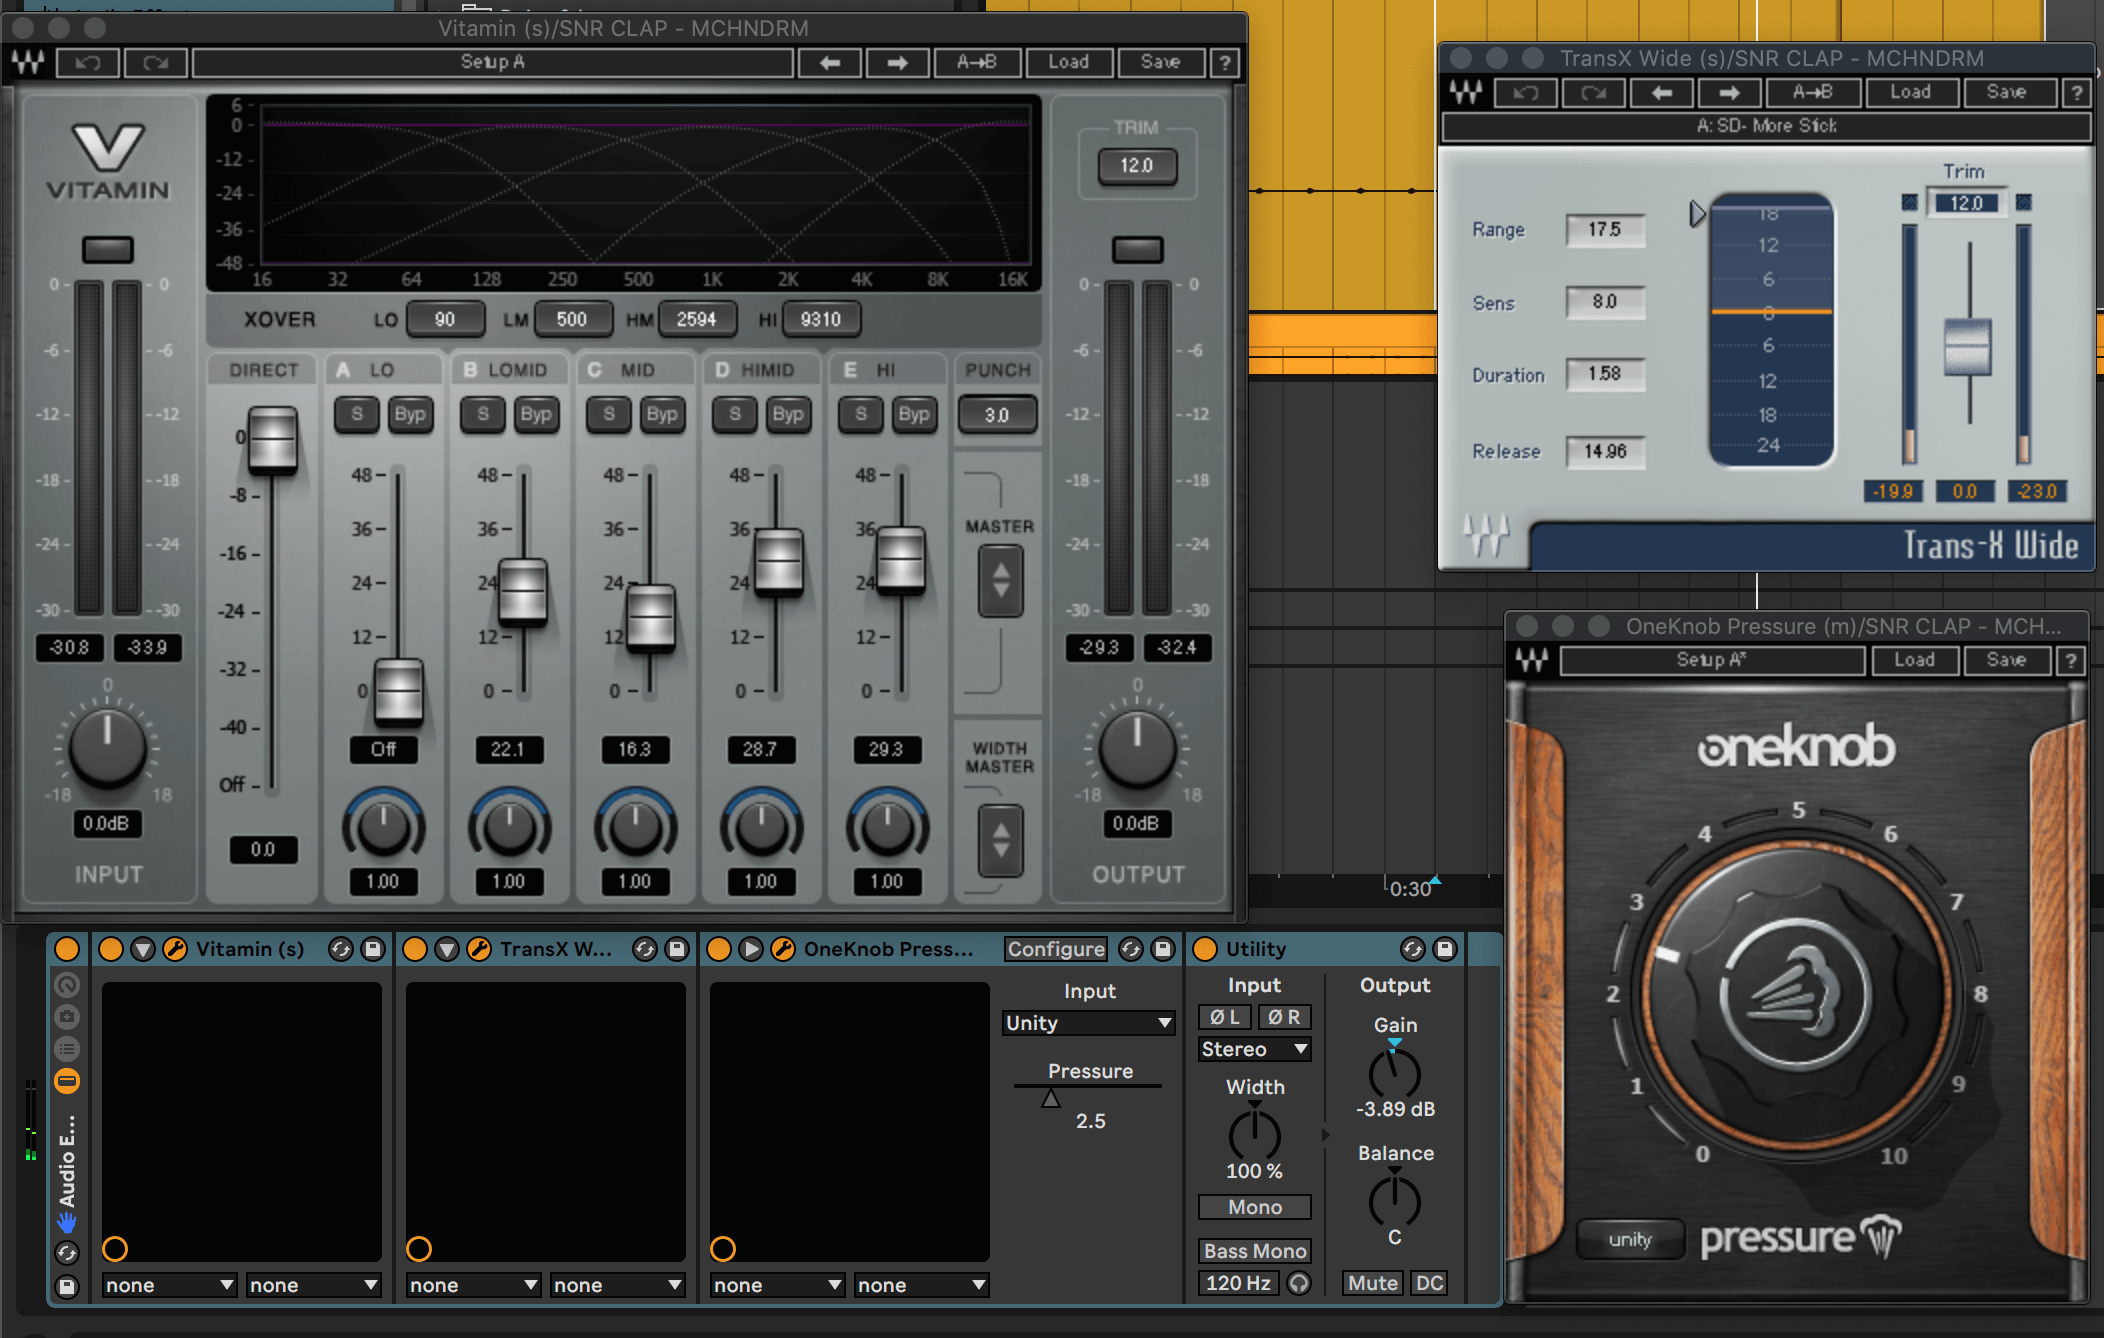
This one definitely needs some brightness and snap and for these tasks we’ve inserted Waves’ Vitamin, Trans-X and OneKnob Pressure plugins to the channel.
Vitamin is a multi-band harmonic enhancer used for tone-shaping and its fast results make it a great alternative to an equalizer. In this case, use it to gently bring out the low-mids while increasing the HIMID and HI bands all the way to their halfway-points for a brighter tone.
Trans-X is a superb transient shaper and its presets do the job right away – we used the SD – More Stick preset in this instance to make each hit snappier.
OneKnob Pressure is a quick solution for a more transient-heavy parallel compressed sound and it works wonders with drums or percussive samples. Simply increase its level to between 2 and 3 to get a subtle effect.
The last main drum element is the off beat hi-hat and here’s how it sounds in solo:
The off-beat hat is one of the main driving rhythmic elements in microhouse so we have to ensue that it is being felt as much as possible – while still keeping its level under control.
To do this, we’ll saturate it and then bring up the frequencies we want to enhance instead of simply increasing the volume.
Insert Waves’ Berzerk distortion plugin and Scheps Parallel Particles.
Use Berzerk’s bass ampdist preset with the Buzzed wave for some subtle saturated character. This will also increase the gain quite a bit so lower the mix amount. We left it at around 38%.
Parallel Particles is similar to Vitamin in that it is a straightforward enhancer as opposed to an EQ. It emulates engineer Andrew Scheps’ processes of EQing, saturating and compressing via four different character knobs. The Bite character works great on hats and snares to make them brighter so we raised this to about one-third of its maximum value.
The processing is subtle, apart from the increase in gain, but the added saturation and brightness will make sure that the hat cuts through the mix.

Here’s how the three main drum elements sound before the above steps and after:
Step 3: Percussion
There are three percussion stems and the first is a modular percussion loop from Softube Modular’s emulation of Mutable Instruments’ Braids. It already sounds good so we left it as it is:
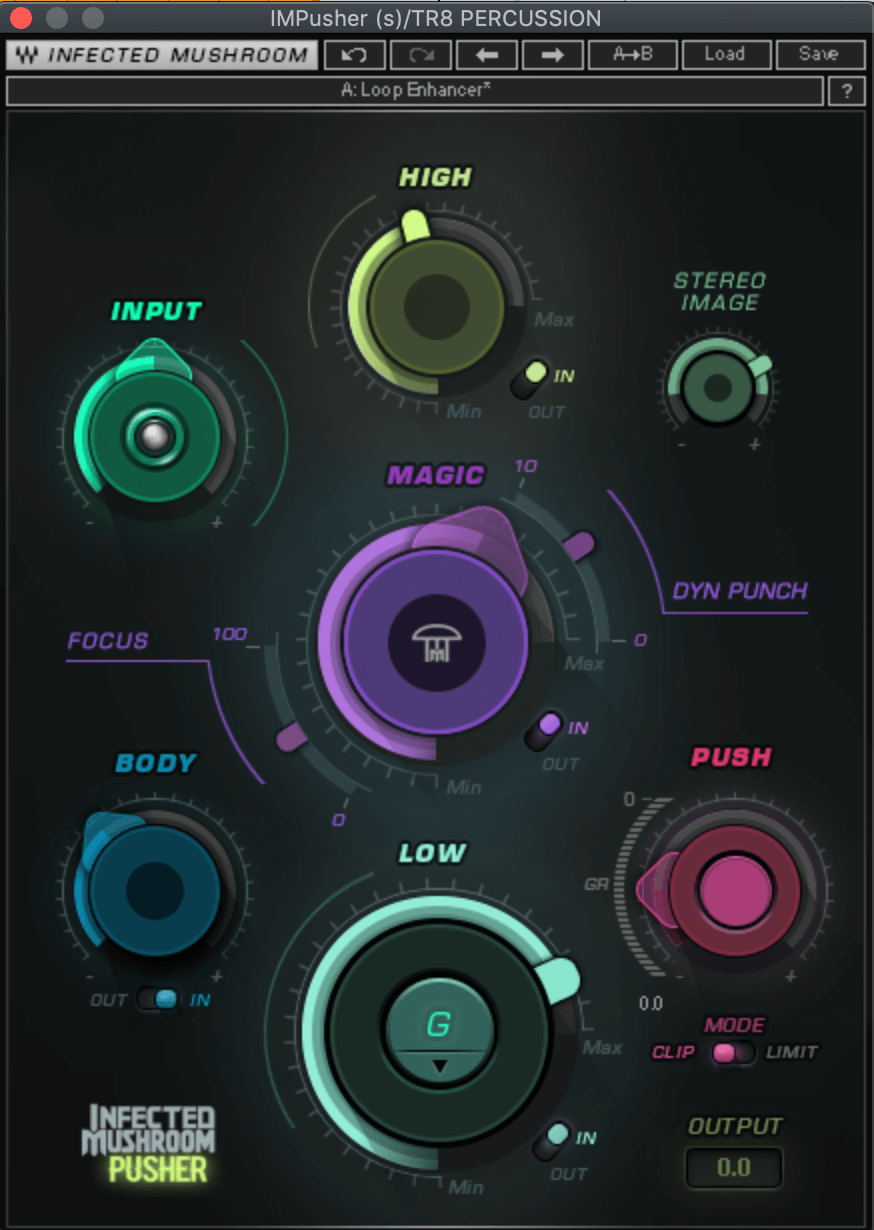
The second is a top loop from a Roland TR-8 drum machine. Here’s how it sounds in solo:
We wanted to feel more of the reverb on the clap while also adding some brightness and low-mid body. A one-stop solution for this is Waves’ Infected Mushroom Pusher sonic enhancer. Increase the Body and High parameters to add low-mids and brightness while using the stereo image control to add more width to the sound, bringing out the reverb.
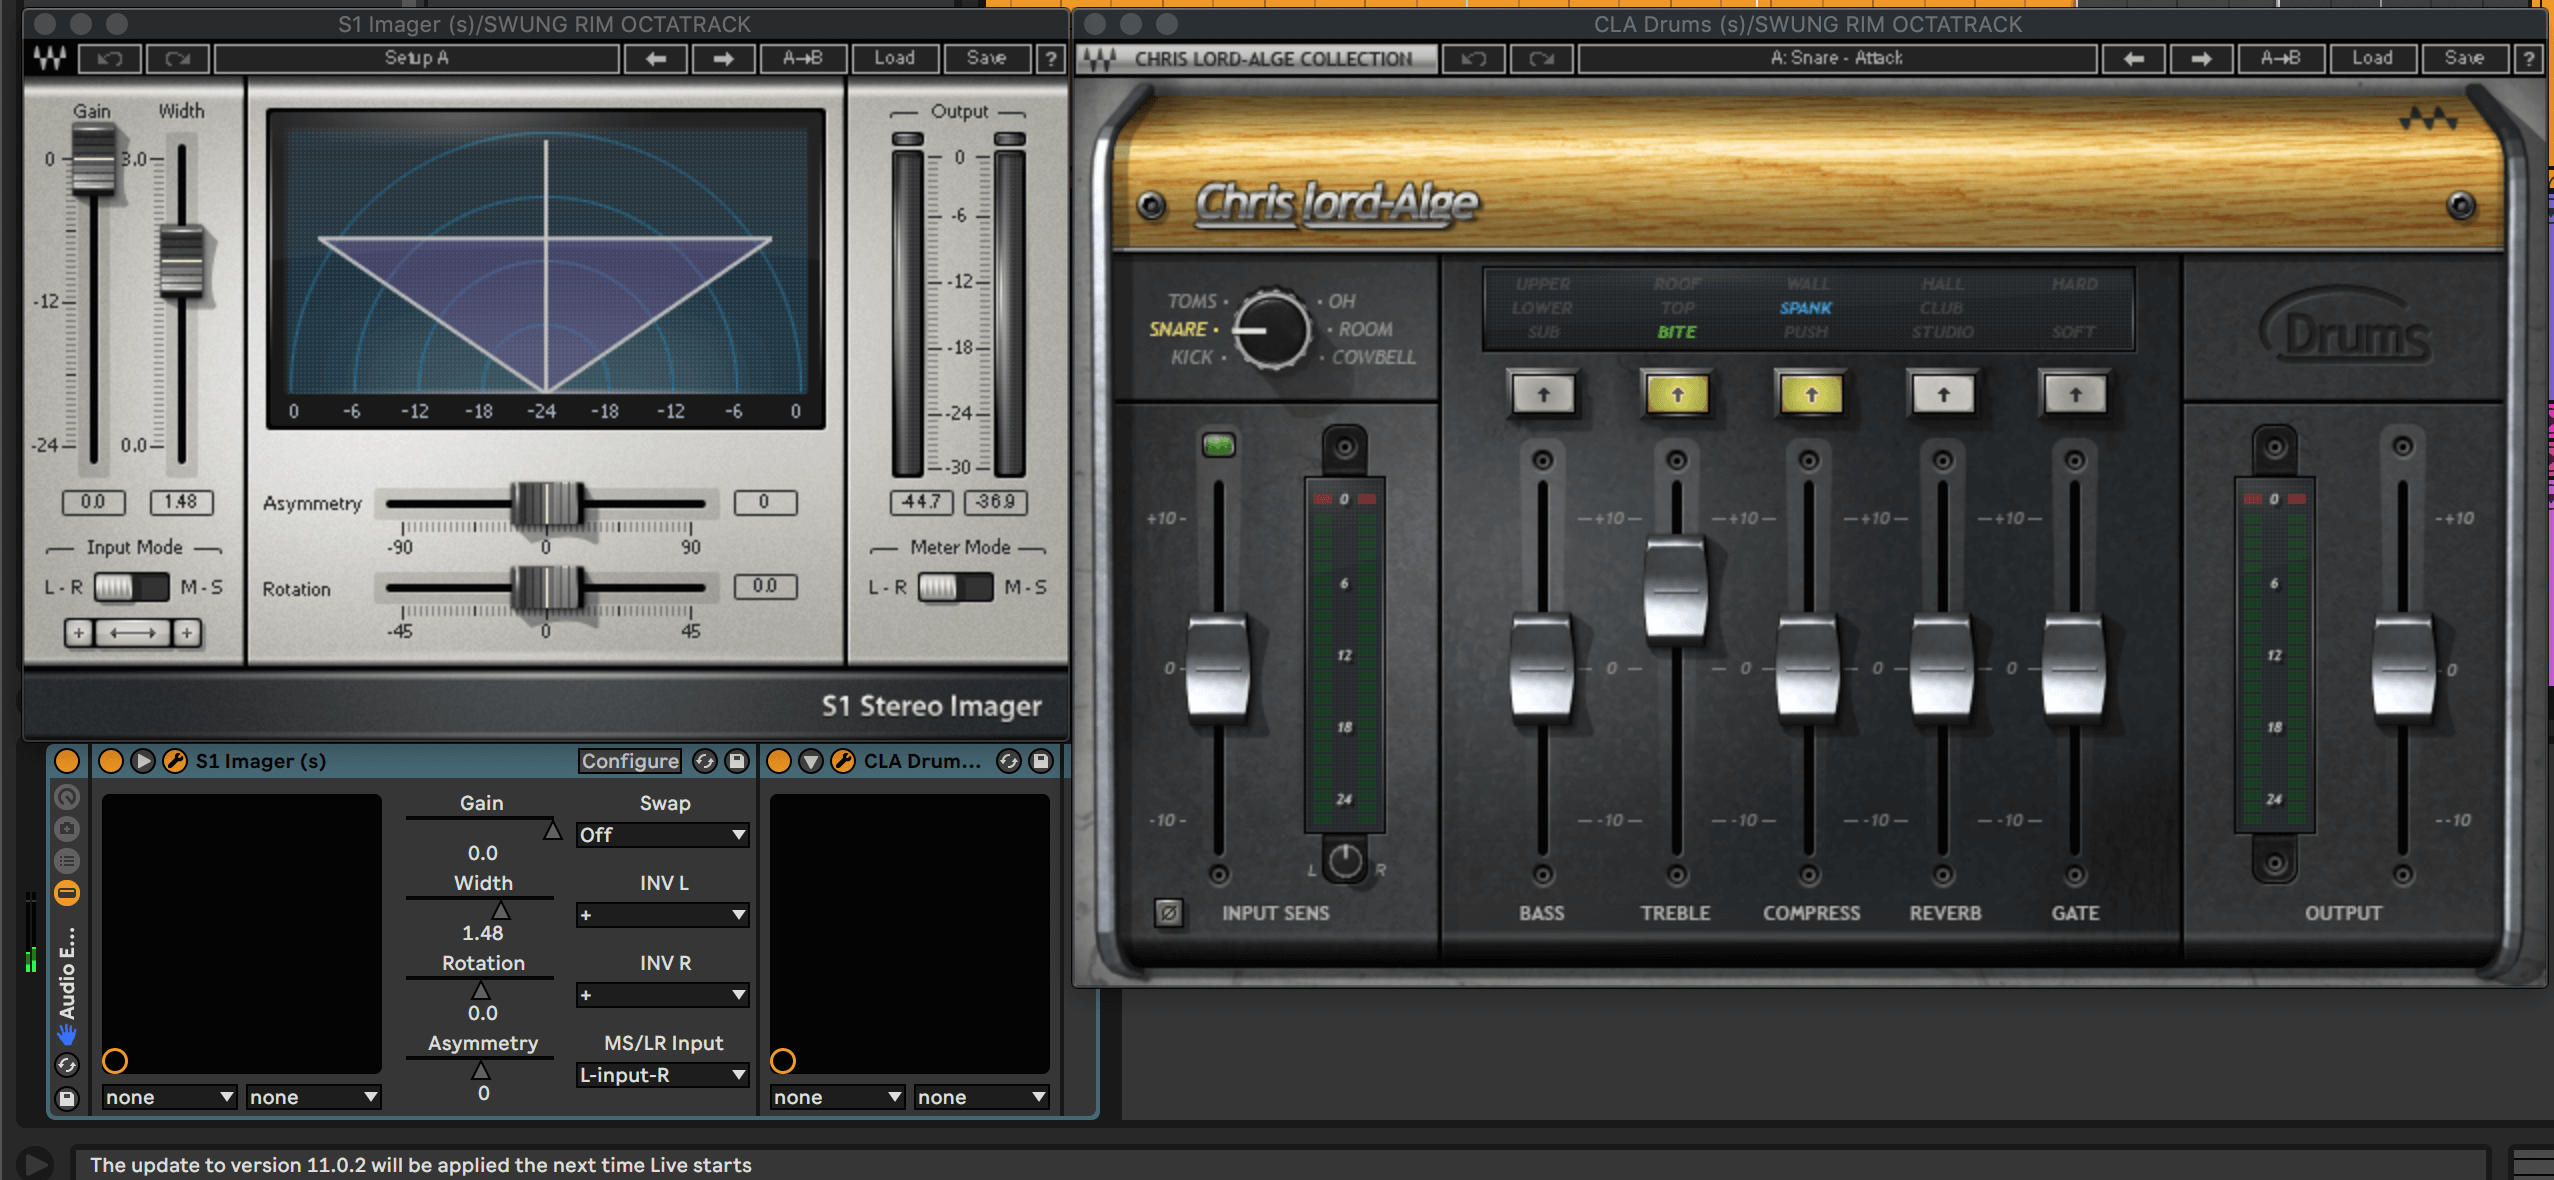
The last percussion element is a swung rim shot part:
As with the TR-8 percussion, we want to bring in some more brightness and width. With this sound, we can exaggerate our processing more because it is lower in the mix. Insert Waves’ S1 imager and CLA Drums plugins.
Increase the S1’s width parameter to around 1.49 and in CLA Drums set the plugin to the Snare Mode. Enable Bite mode on the Treble fader and Spank mode on the Compress fader and increase the Treble parameter to taste.
Here’s how the percussion elements sound with the drums:
Step 4: Bass Elements
There are two bass elements in the track. One is a sub loop and the other is a layered stab.
The stems include stereo, left and right versions of the stab. For the two L and R stems, make sure to pan them all the way left and right respectively. The panned stems really make the sound wider and it is great for the overall mix when the producer has hard-panned elements like this.
We’ll leave the stab untouched and focus on getting as many lows as possible from the sub loop made with Softube’s Buchla 259E emulation. We really want to make sure this sub works in harmony with the kick so we’ll mix it with the kick also playing. Here’s how the sub and kick sound together in solo.
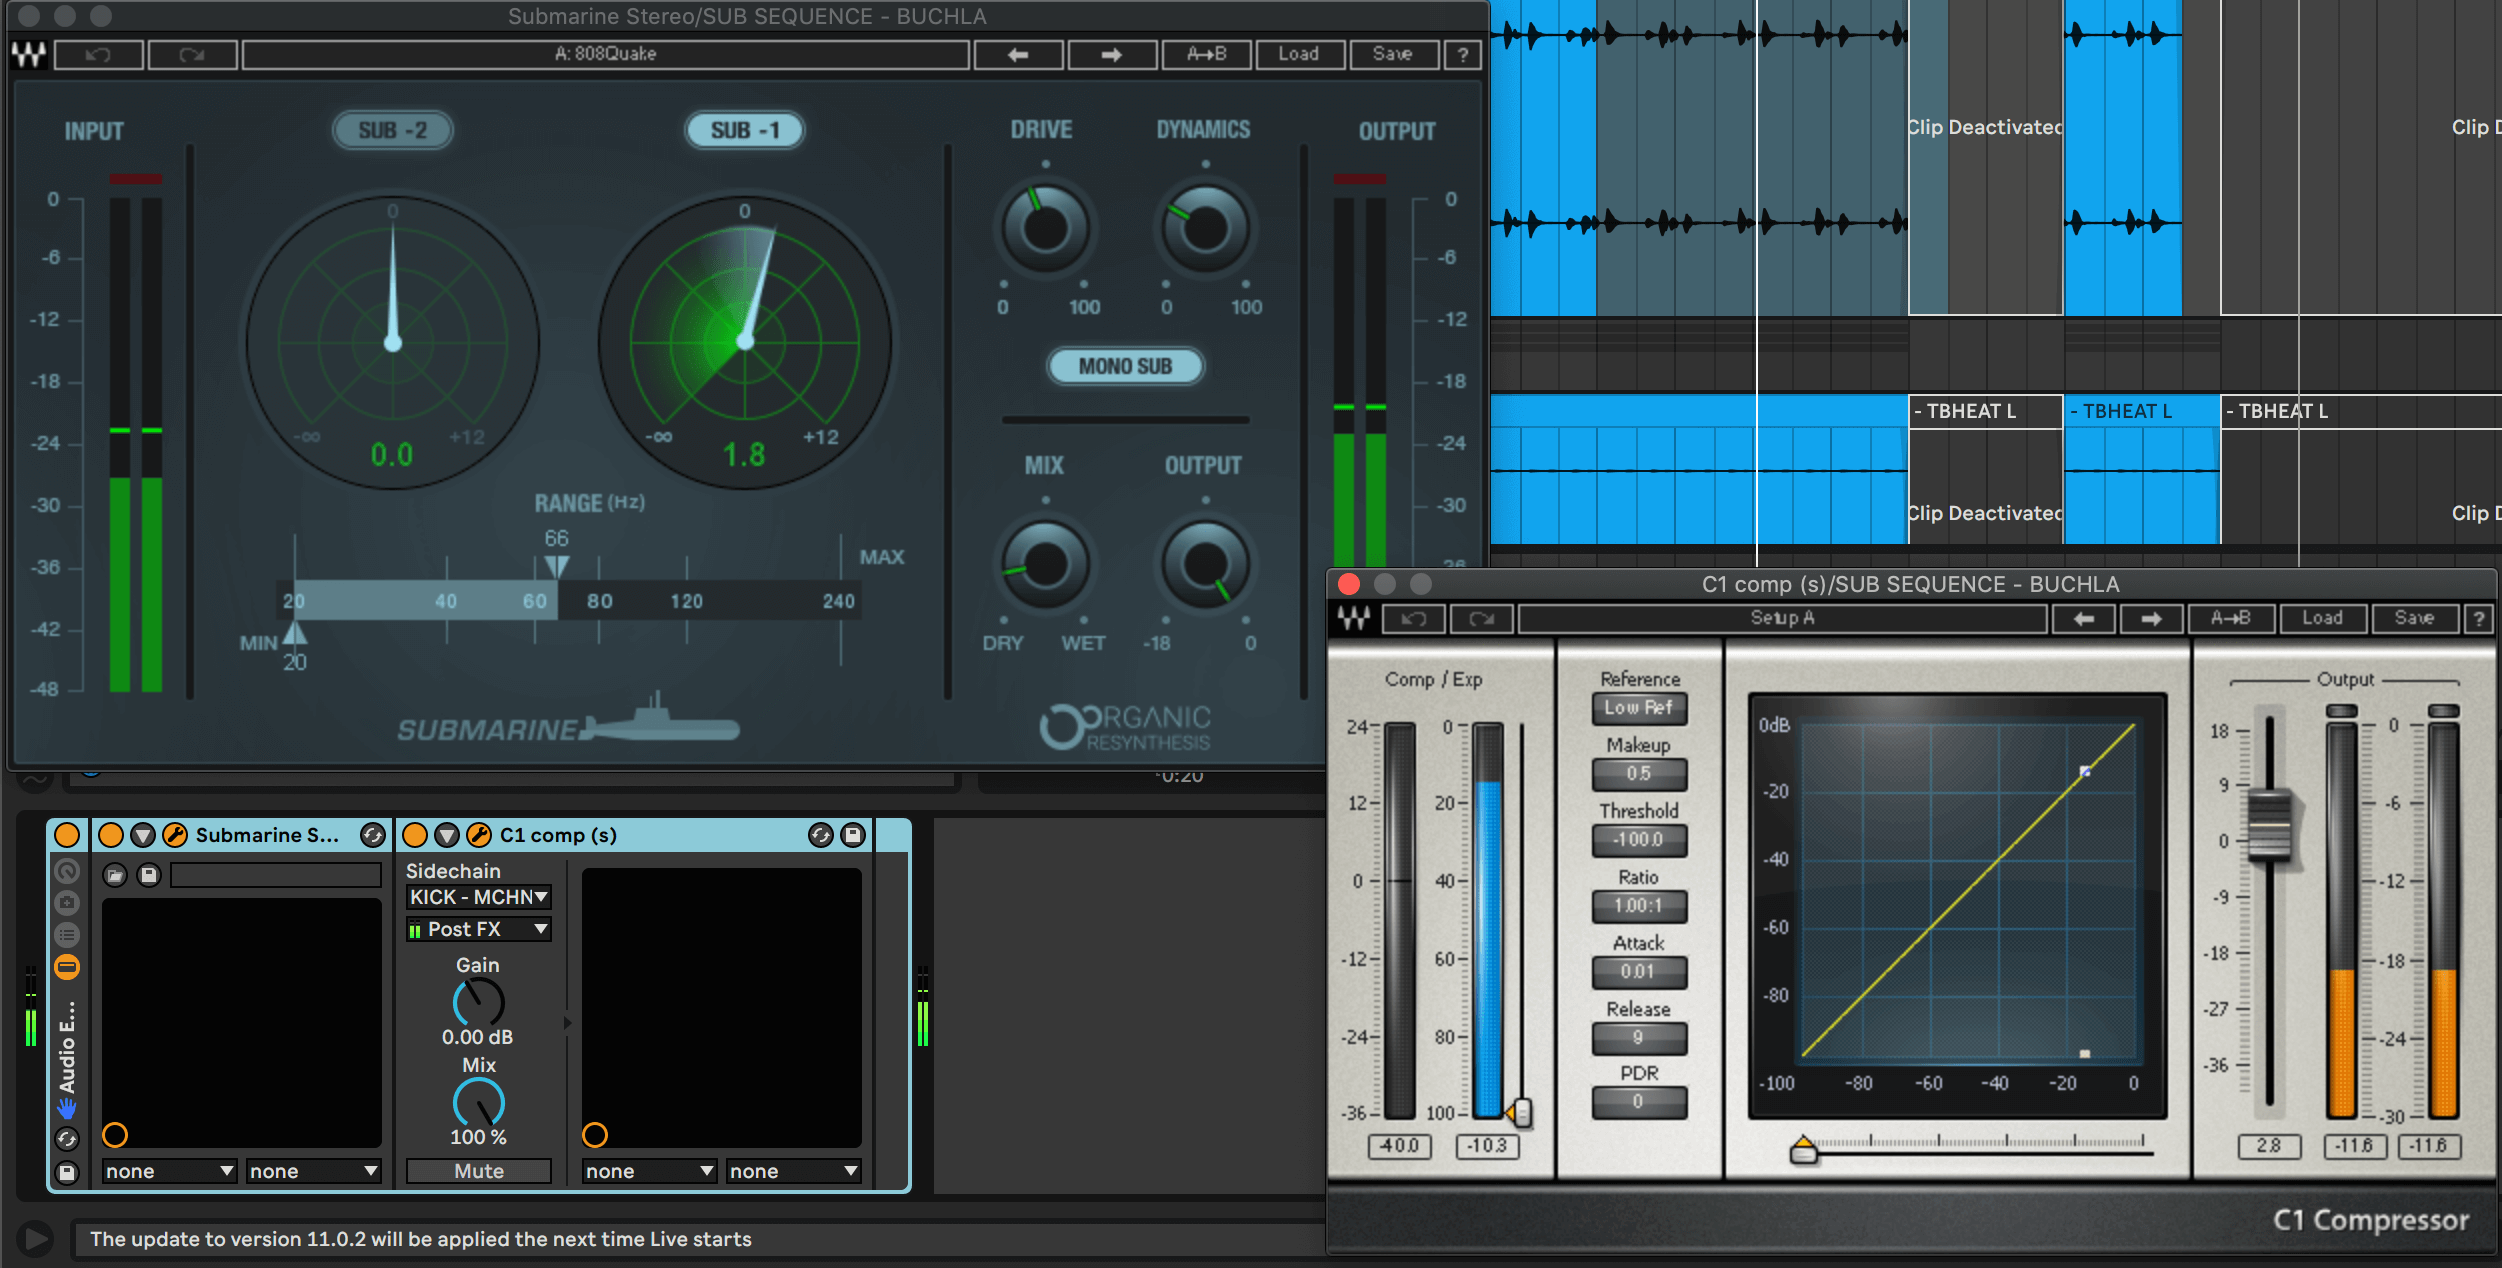
After comparing the kick and sub with that of the reference track, it isn’t hard to notice that the reference is more bass-heavy. A quick way to enhance sub frequencies without messing with the original signal too much is Waves’ Submarine plugin.
If you’re new to the plugin, experiment with the presets and always lower the mix amount because if you do not it will definitely add too much sub! We used the 808 Quake preset with the Dry/Wet at around 15%.
We also added Waves’ C1 compressor in sidechain mode with the kick as the input so that the sub ducks when the kick hits. Lower the threshold to taste and set a fast attack so the sidechain compression kicks in immediately.
Here is the kick and sub in solo:
And here are all of the elements we have mixed so far playing together:
Step 5: Musical Elements and FX
This track only has one musical or harmonic element and that is the Prophet Rev2 stab. Here’s how it sounds in solo:
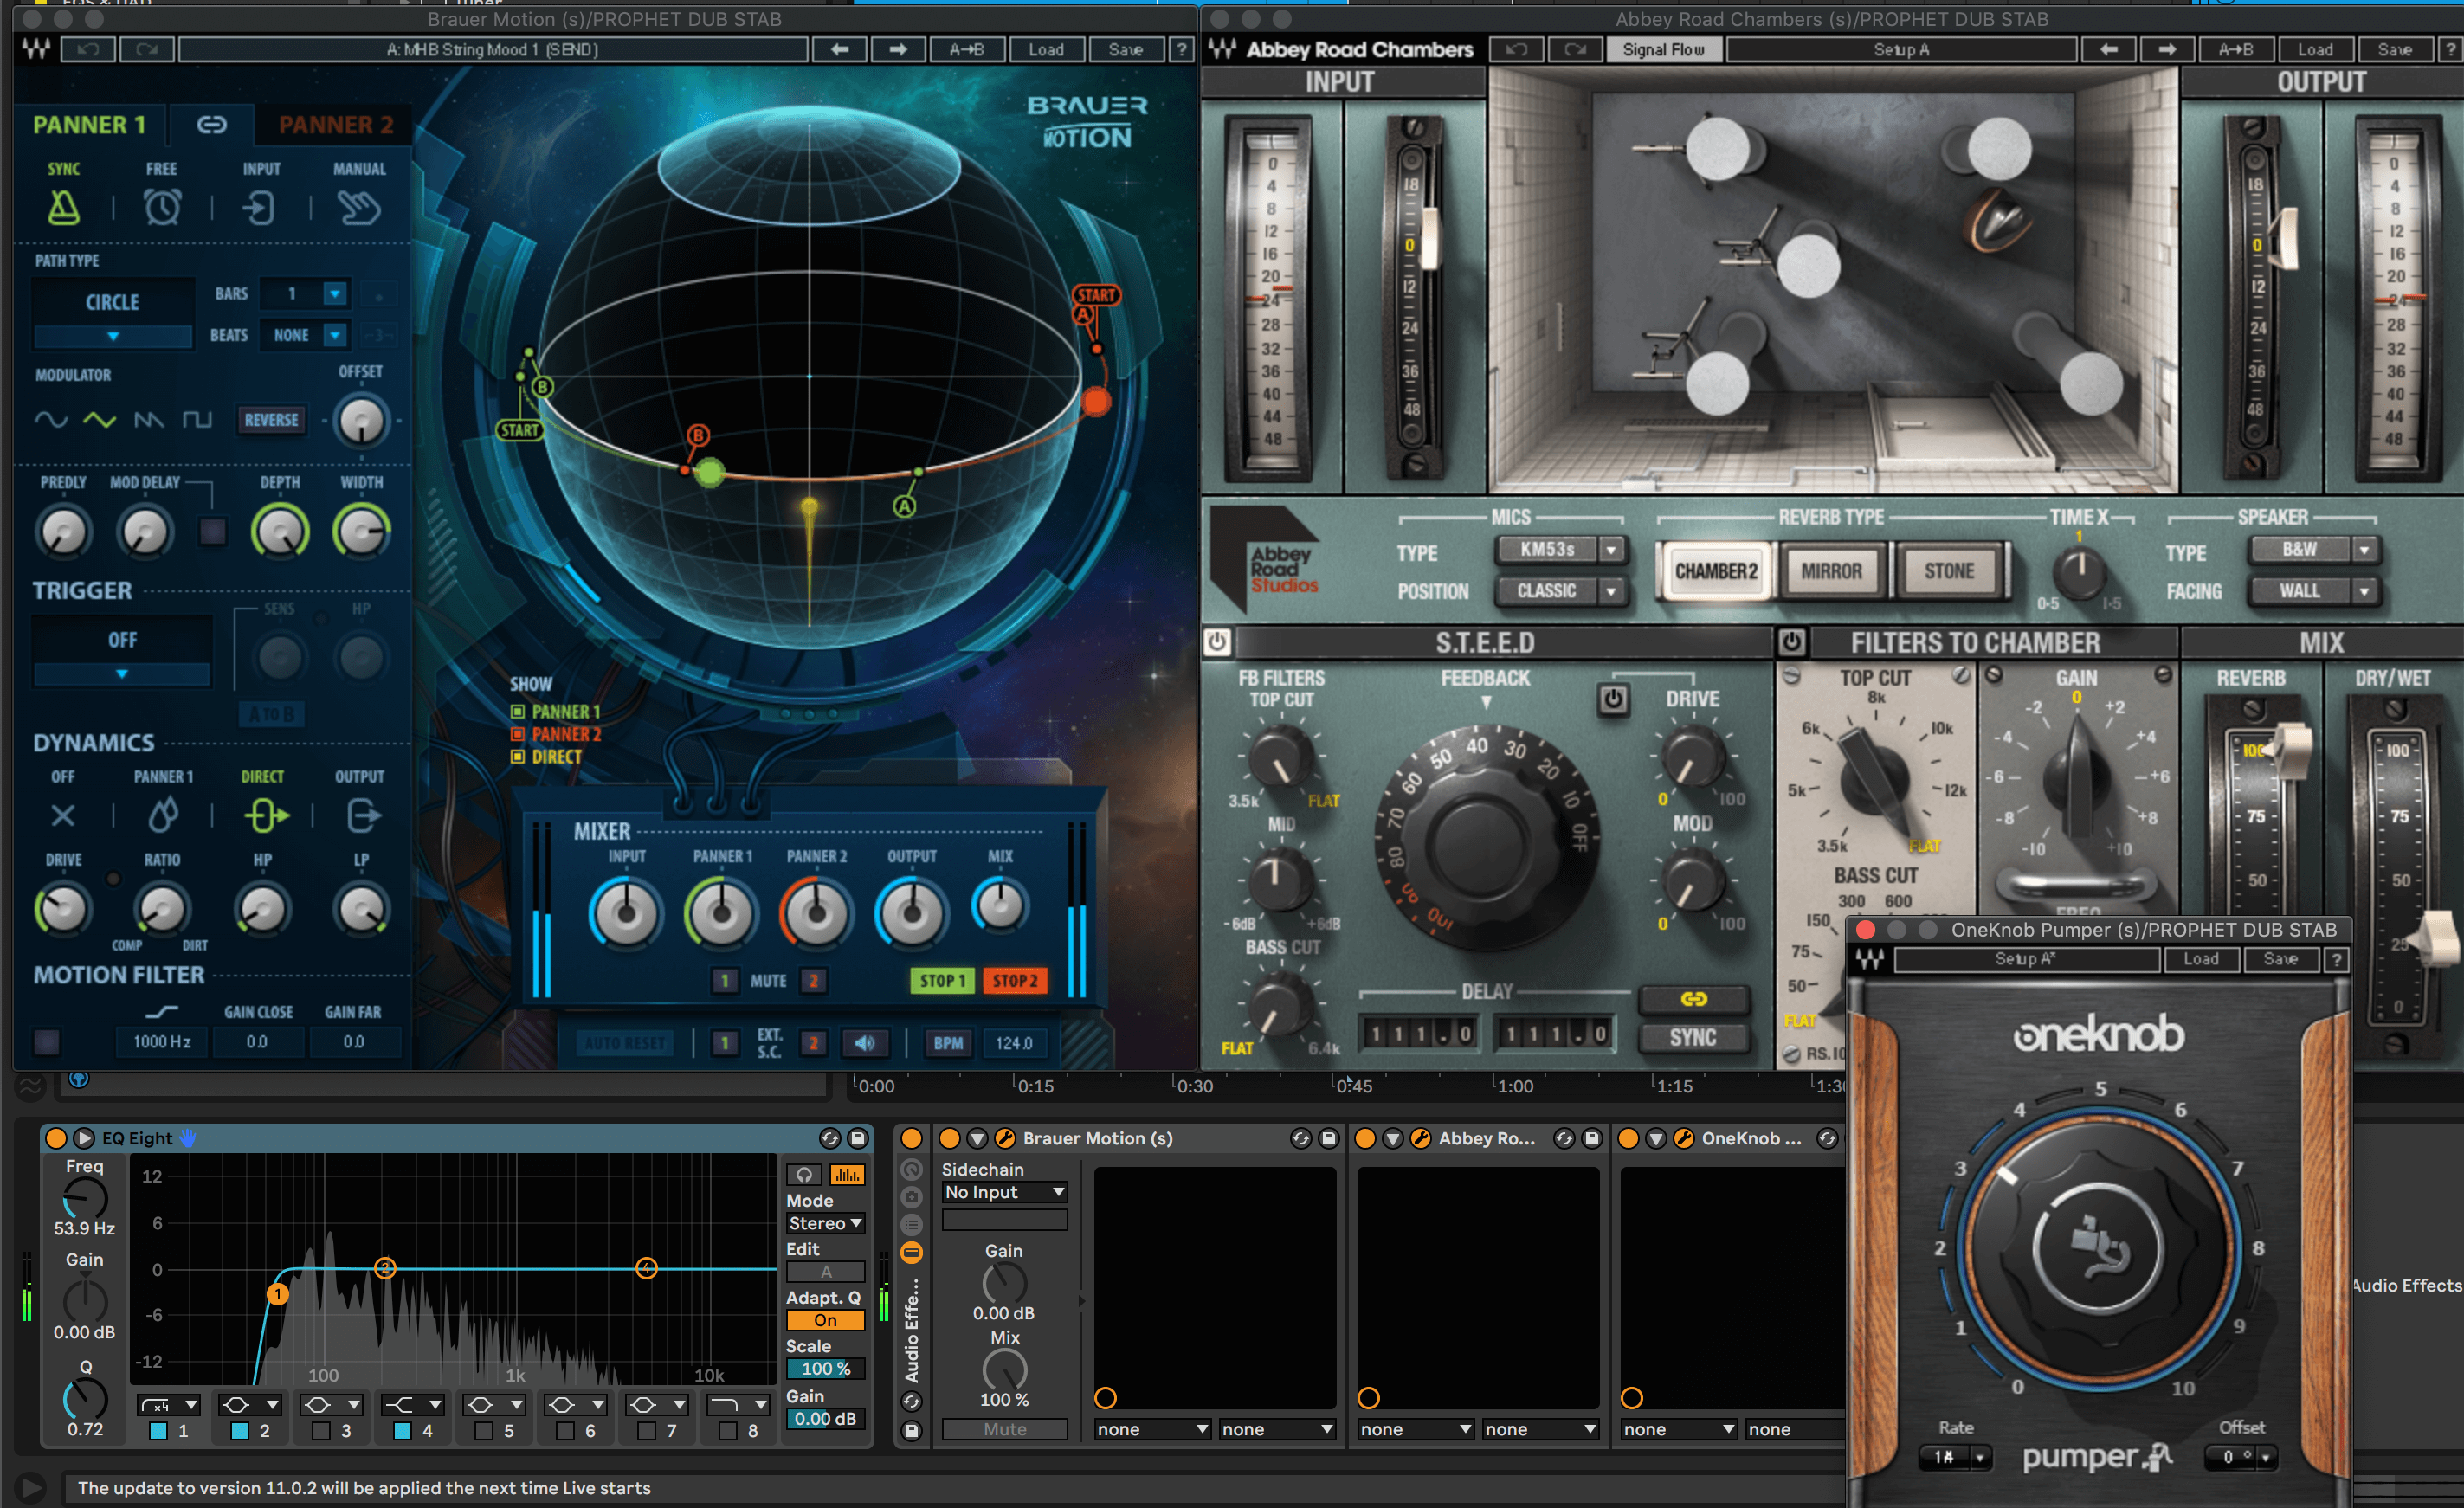
First, cut the unnecessary subby frequencies below around 54Hz with an EQ. Next, insert Waves’ Brauer Motion, Abbey Road Chambers and OneKnob Pumper plugins.
Brauer Motion is great for adding some stereo panning motion to any part – even some subtle movement will make your mix seem wider. Make sure to keep the mix amount low. We used the MHB String Mood 1 preset and left the mix at 50%.
With Abbey Road Chambers the goal is to add a bit more ambience and wetness to the sound so we used its default setting and lowered the Dry/Wet to 25%.
The OneKnob Pumper is a shortcut to sidechain-style ducking so we used it to make sure the stab drops in volume when the kick hits.
We grouped our four FX stems in a group as we decided to process them together instead of individually. Here’s how they sound in solo:
The goal is to add some more body and brightness while also giving the sounds additional width to separate them from the other elements at the crowded center of the mix.
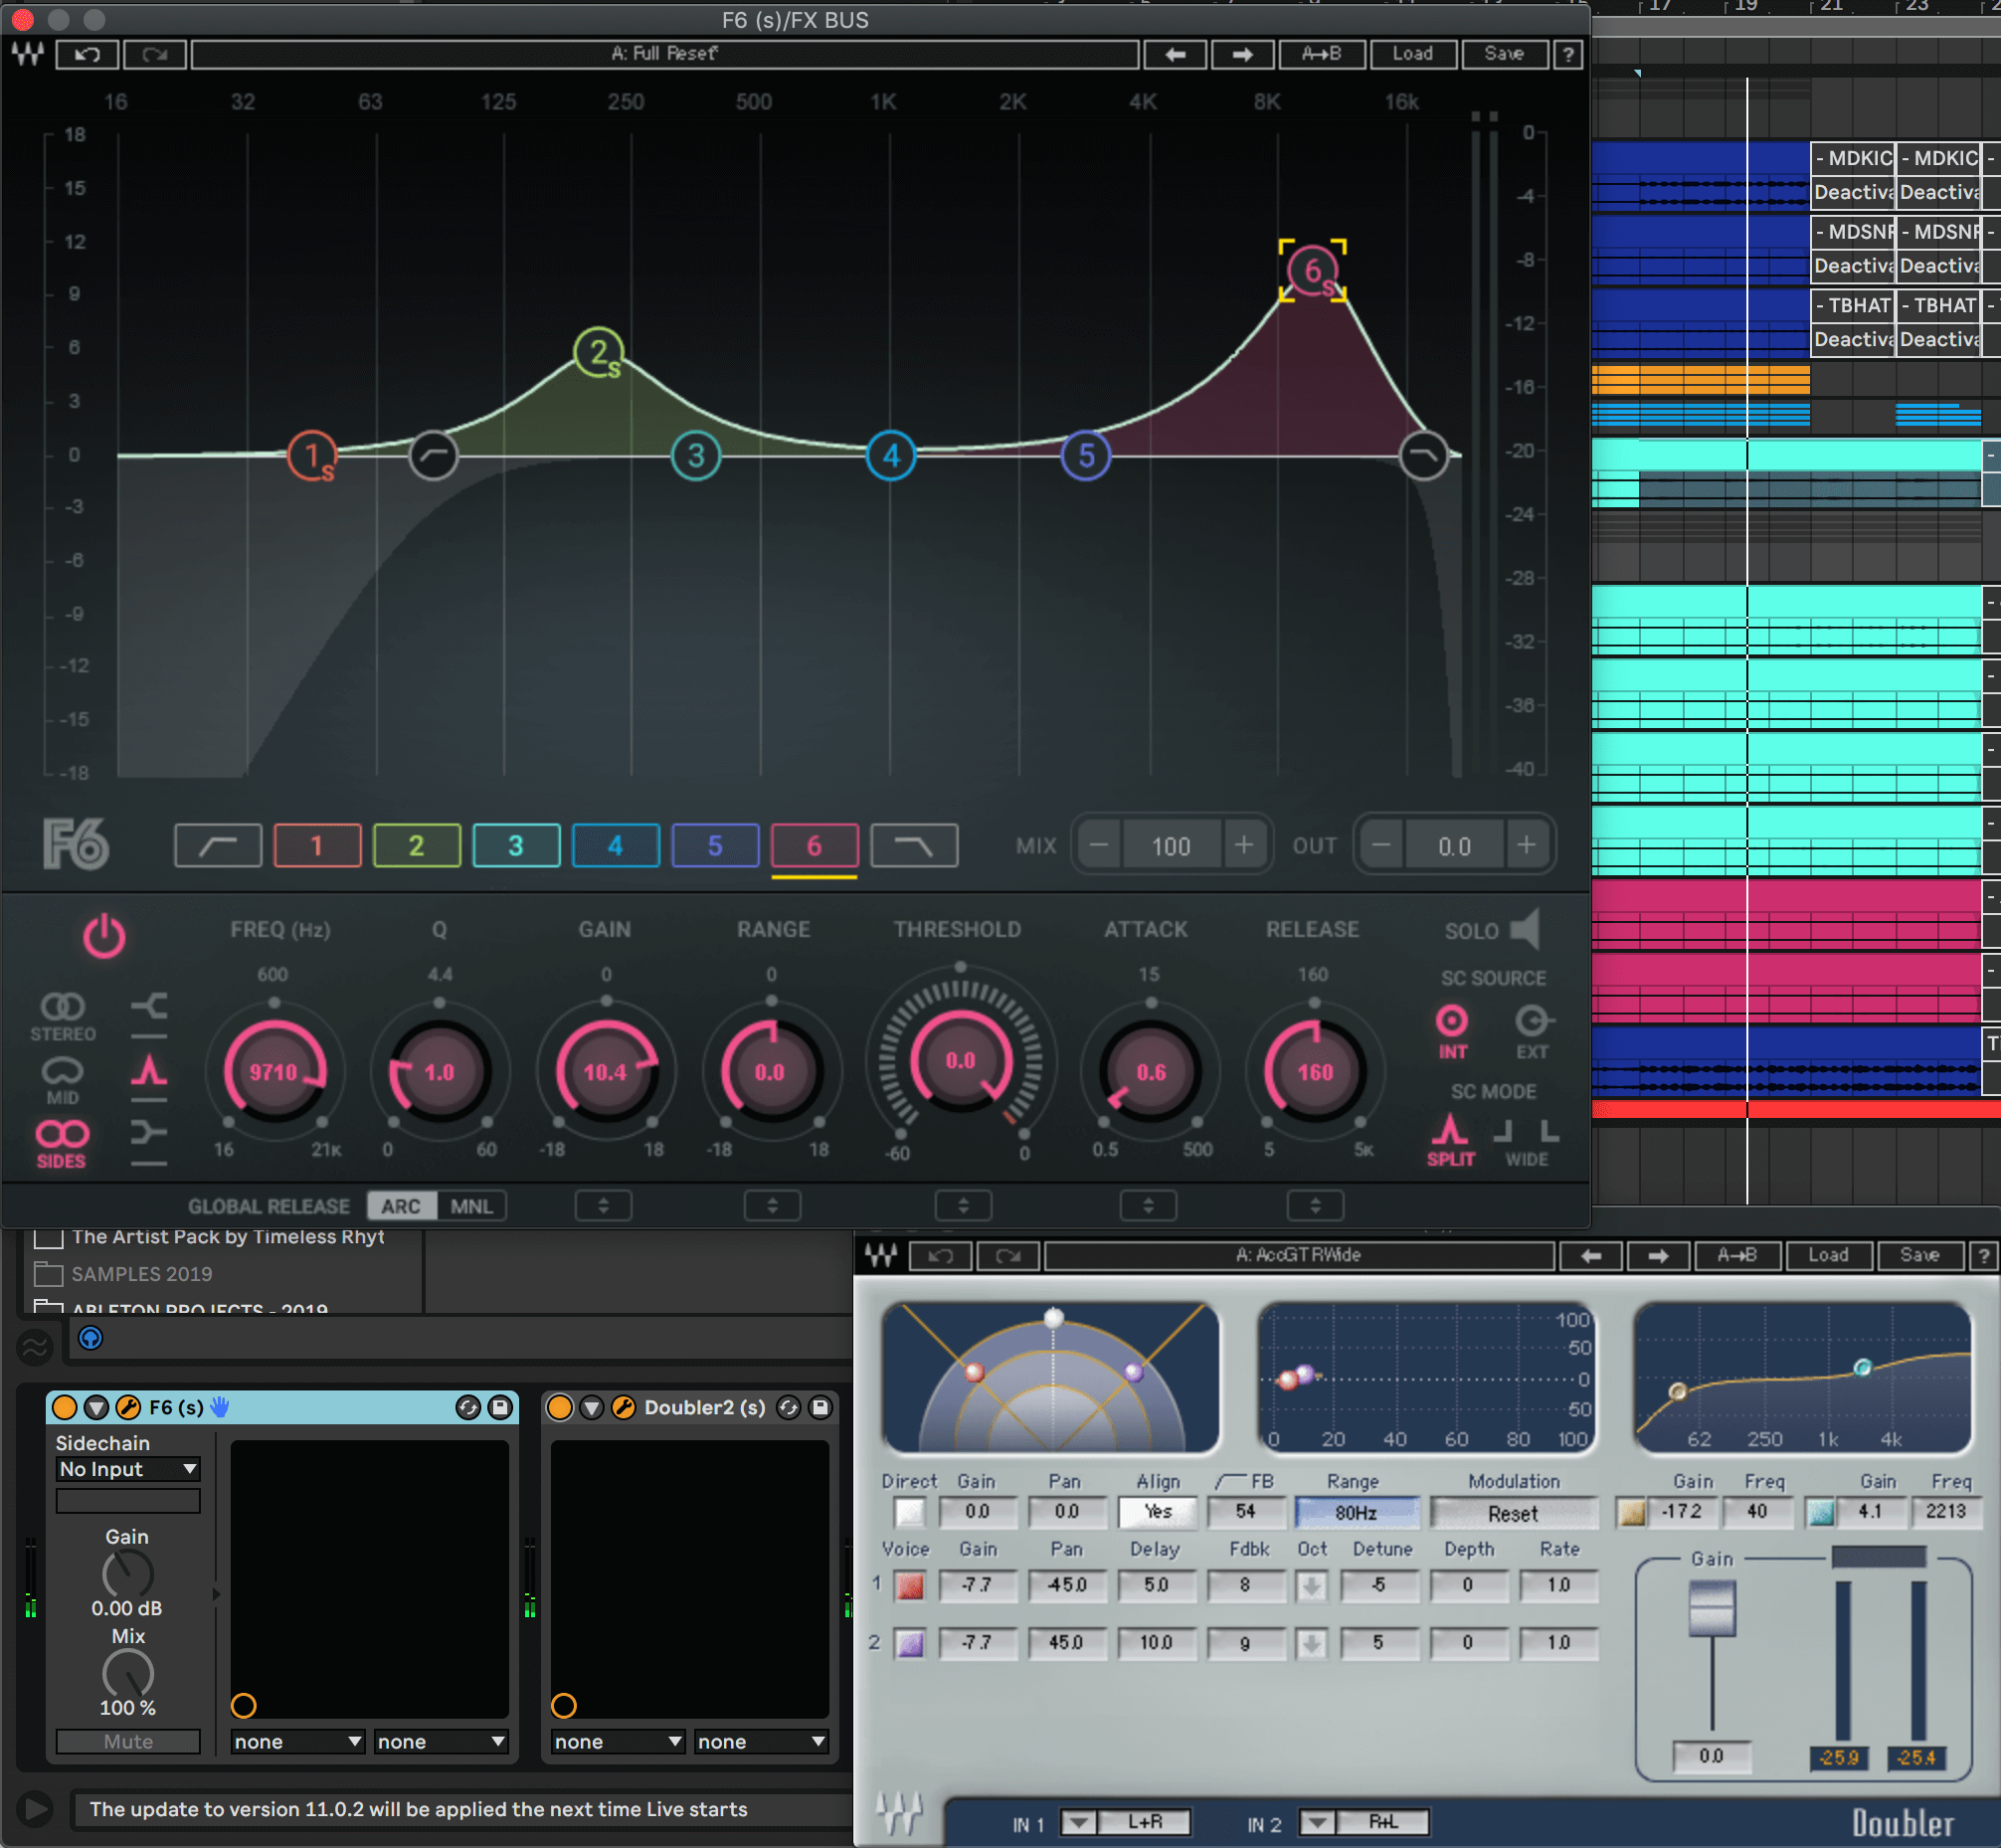
Insert Waves’ F6 EQ and Doubler plugins. We chose the F6 because it allows for mid-side processing, as each band has the option to only affect the sides of a signal i.e. the S in M/S.
Using two bands in Sides mode, make large boosts at 200Hz and 9.7kHz. A normal stereo boost at 200Hz will almost always add mud but when you only boost the sides in this frequency range you get more body. The boost at 9.7k makes everything feel wider as the bright harmonics start to open up. This makes them more evident in the mix.
Doubler is a chorus plugin that copies the signal and places it slightly ahead or before the original signal while also subtly changing the pitch to separate the two signals more clearly. We used the AccGRTWide preset.
Here are the full 16 bars with our progress so far:
Step 6: Master Channel Processing
The final step is some basic mastering on the master channel. This is where you really want to go back and forth with your reference track to check aspects of the mix like general levels, dynamics (i.e. is everything too compressed or are the transients cutting through enough?), brightness, width and low-end impact.
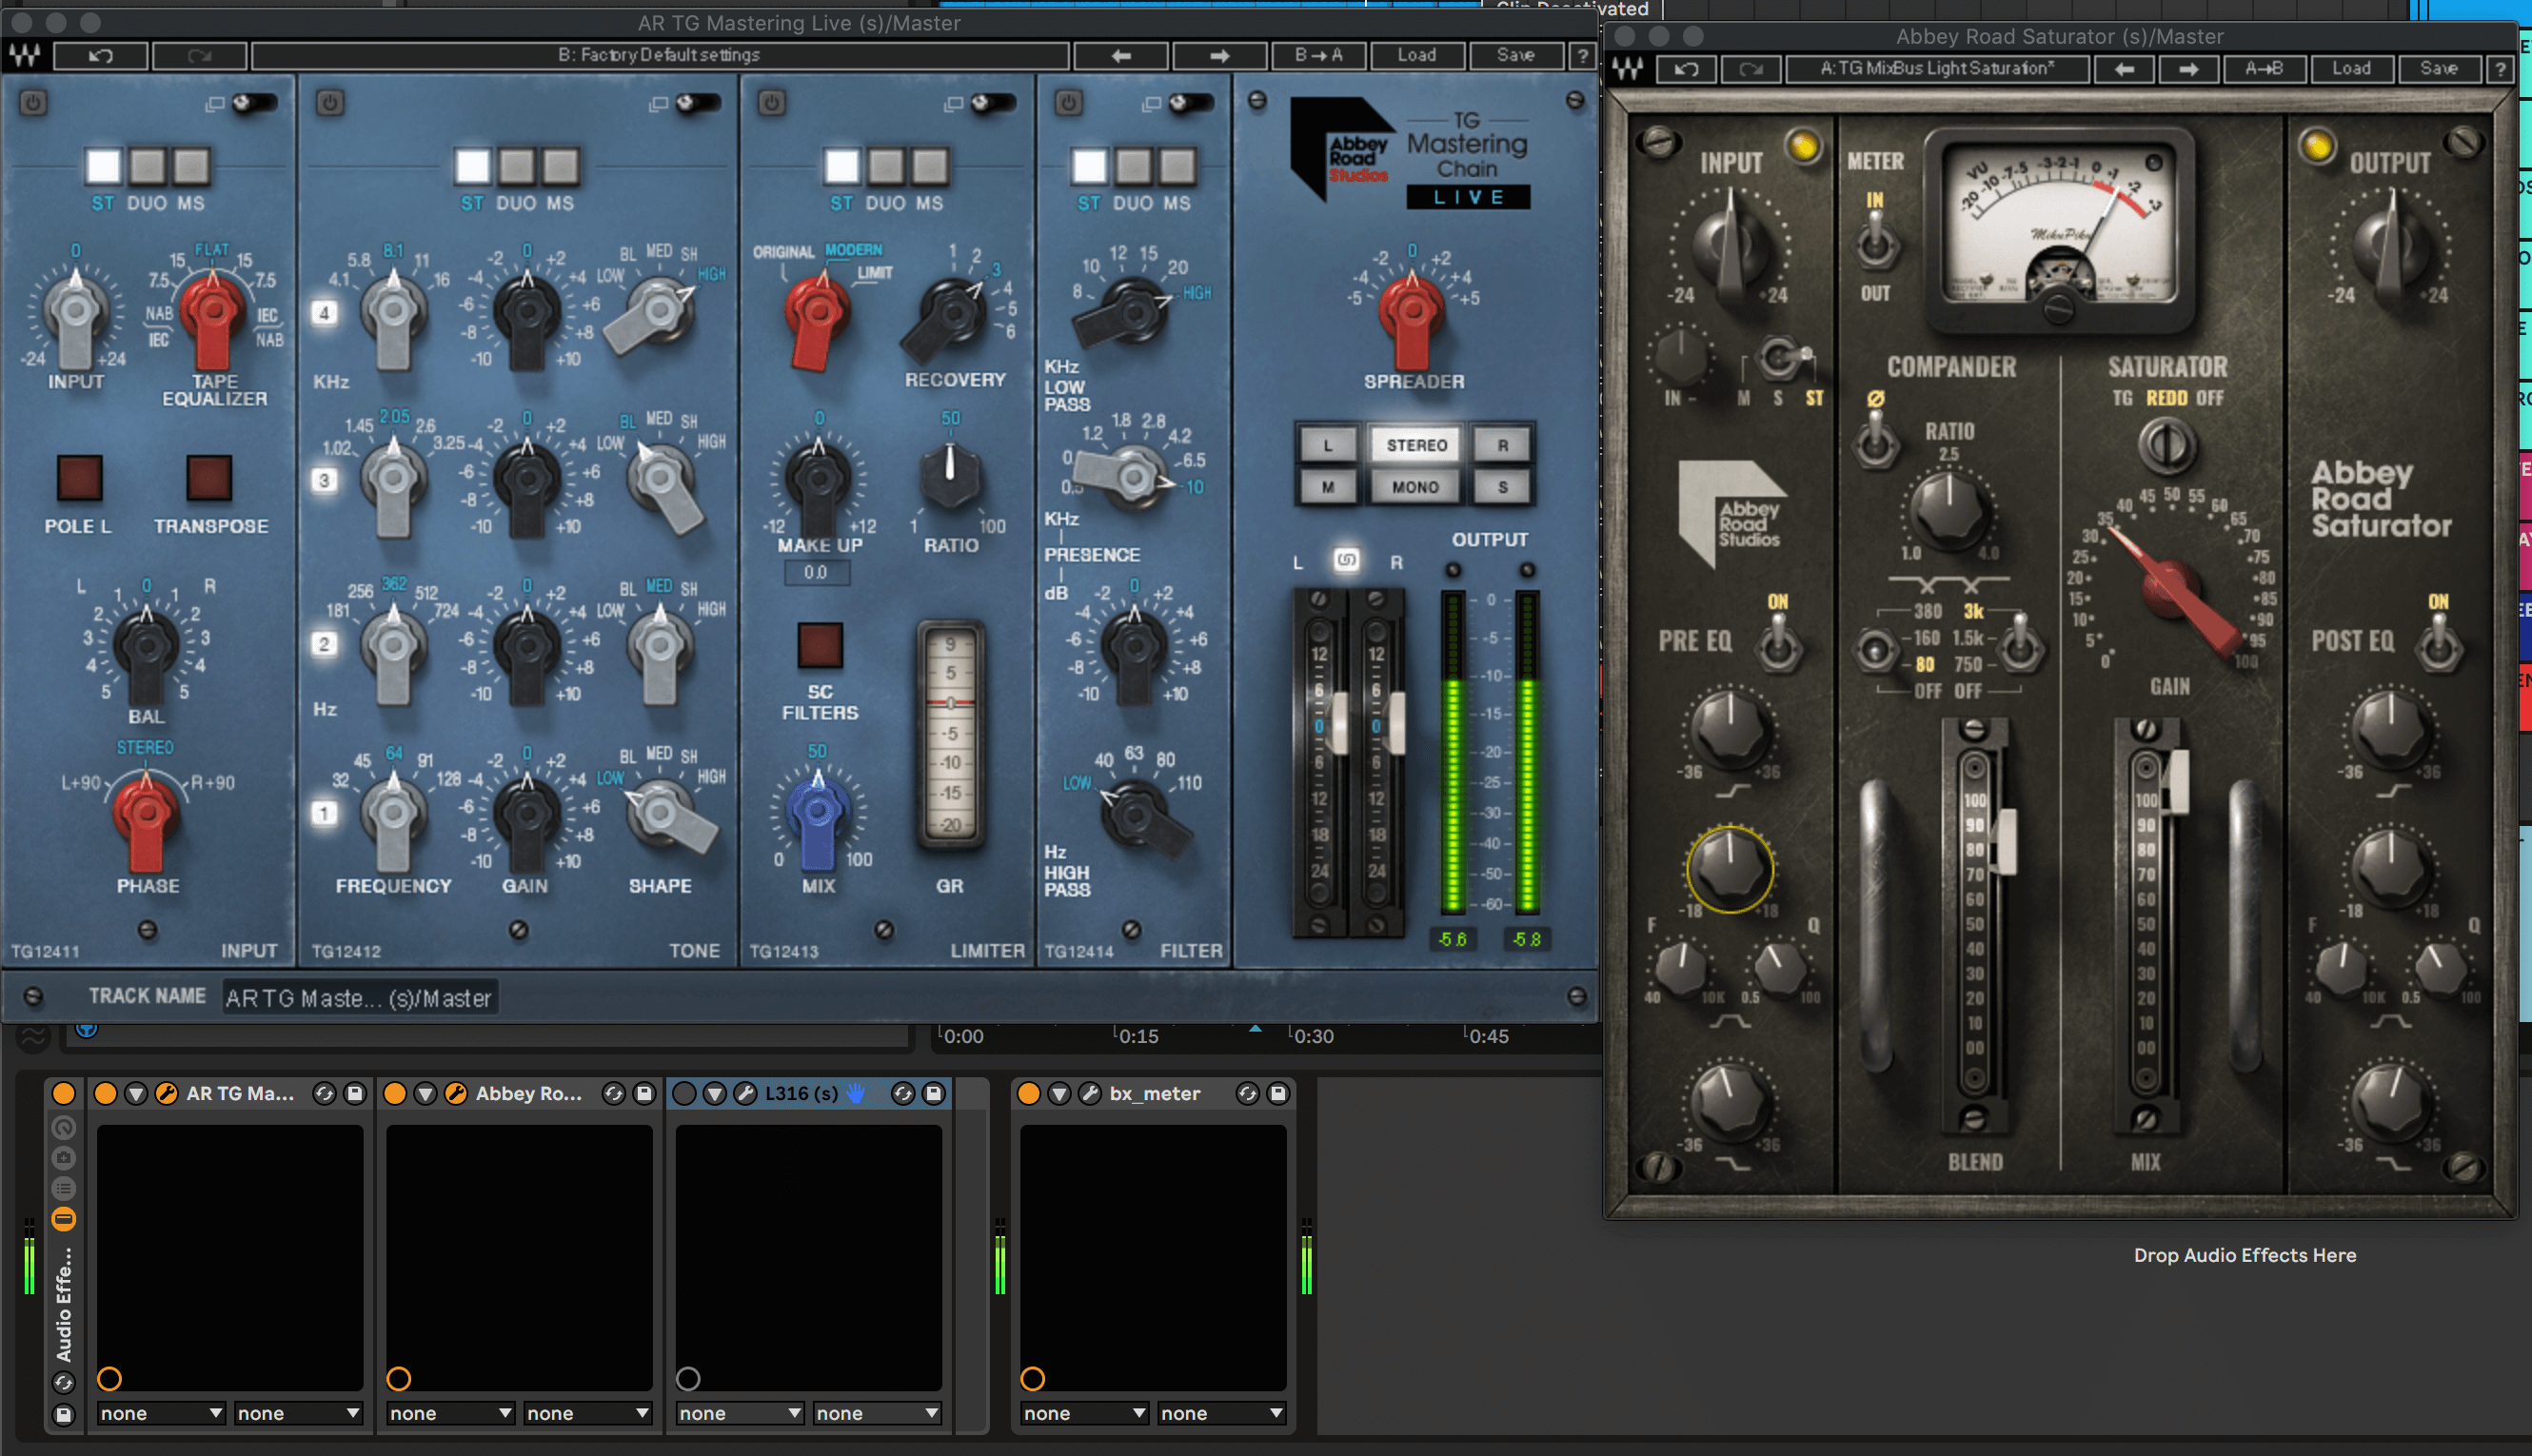
Insert Waves’ Abbey Road TG Mastering Chain, Abbey Road Saturator and L3-16 Multimaximizer plugins on the master channel, as well as a metering plugin to monitor RMS loudness levels. We used Plugin Alliance’s bx_meter.
In TG Mastering Chain, make sure that only the third limiter module is powered on and increase the Mix parameter until you get about 5dBs of gain reduction in the GR meter. This module’s compression sounds great.
In the top right of the plugin, bring the red Spreader knob to +2 for some general width. This is one of our favourite in-the-box knobs ever for enhancing the stereo field.
Abbey Road Saturator is a weapon of a plugin that can bring new life to a track through saturation and sonic enhancement. We used the TG MixBus Light Saturation preset and lowered the blend to around 80%. If the track distorts while the plugin is active try bringing down the red gain knob.
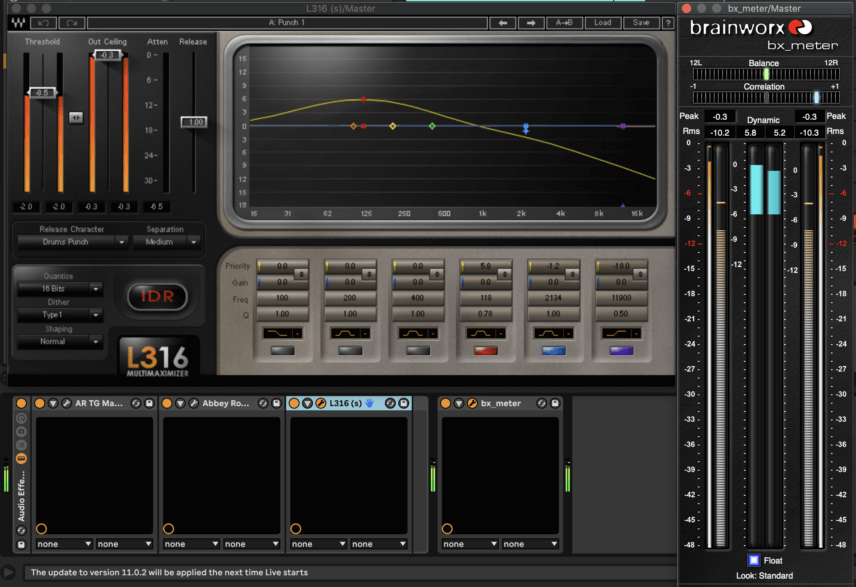
It’s time for the limiter and Waves’ L3-16 is perfect for getting that last bit of punch – which is why we simply used its Punch-1 preset. This mainly limits the low end.
Bring the threshold down until your meter shows that you’re hitting a peak of -0.3 and a loudness of around -7 to -6rms.
Here is the final result:
*Attack Magazine is supported by its audience. When you purchase through links on our site, we may earn an affiliate commission. Learn more.
Tutorials is sponsored by
Roland Cloud is your creative hub for Roland hardware and software. Access legendary recreations of Roland Classics, find new sounds for your favorite products, and download updates and companion apps to make music fast and easy.