
In this tutorial, we look at how to make track elements pop without losing mono compatibility.
Mixing is a tricky thing. To make our tracks sound full and alive they need to have widescreen presence and three-dimensional depth for headphone and stereo listening. However, they also have to be rock-solid down the middle when they’re collapsed to mono on club sound systems. We’ve talked before about how to get mono-compatible width but how about depth? That’s what we’re going to explore today.
Traditionally, the way to add perceived depth has been with reverb. Reverb tricks our brains into thinking the sound exists in a three-dimensional physical space. However, it also makes things sound far away. If this is our intention then hey, no worries, but what if we want both presence and perceived size? Compression is one way to do it when using reverb. We can also artificially widen the signal with a stereo enhancer but this can result in phase issues, particularly when summed to mono.
Thankfully, there’s a way to get realistic depth without sacrificing mono compatibility. Billed as a spatial Processor, Mathew Lane’s DrMS allows for the usual mid and side tweaking but it also gives you control over some aspects of the stereo spectrum that are pretty unique to the plugin. We talked about it before, so check out our review for a full rundown of the functions. Today, we’re going to use it to make a TB-303 bassline pop and also exploit its sound design capabilities on some percussion – all while maintaining mono integrity.
We’ll go from this:
To this more present acid techno track:
Remember to click on any image to see a larger version. OK, let’s get stuck in.
Step 1: TB-303 Signal Chain
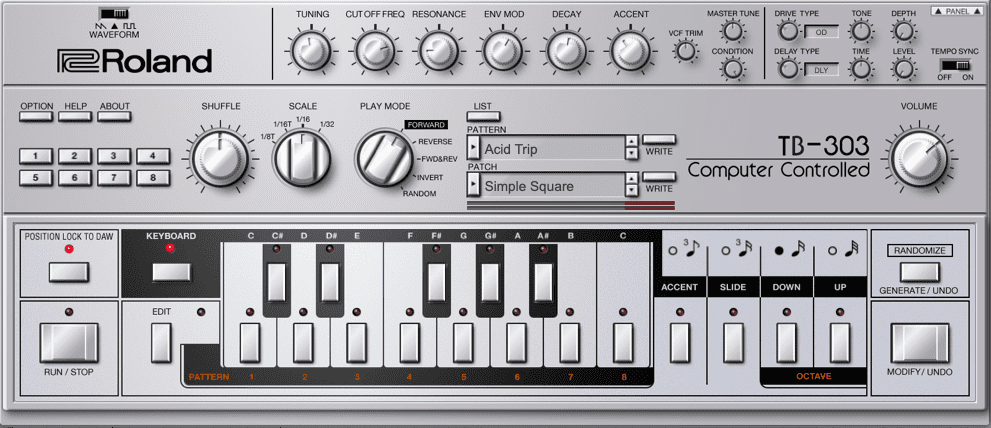
We start by creating a signal chain with the Roland Cloud TB-303 as the main instrument. Our chain starts with the TB-303 and then goes through u-he Presswerk compressor to even things out and bring up the overall volume. After this, Ableton Live EQ Eight cleans up the lows and boosts the highs. After that, it passes through Soundtoys Decapitator for saturation, a stock Utility plugin for checking mono compatibility, and the free iZotope Ozone Imager 2 at the end so that we can keep an eye on our signal width.
Here’s the bassline so far. As you can hear and see, it’s entirely mono (or mid) with no side information at all.


Step 2: TB-303 Depth Adjustments
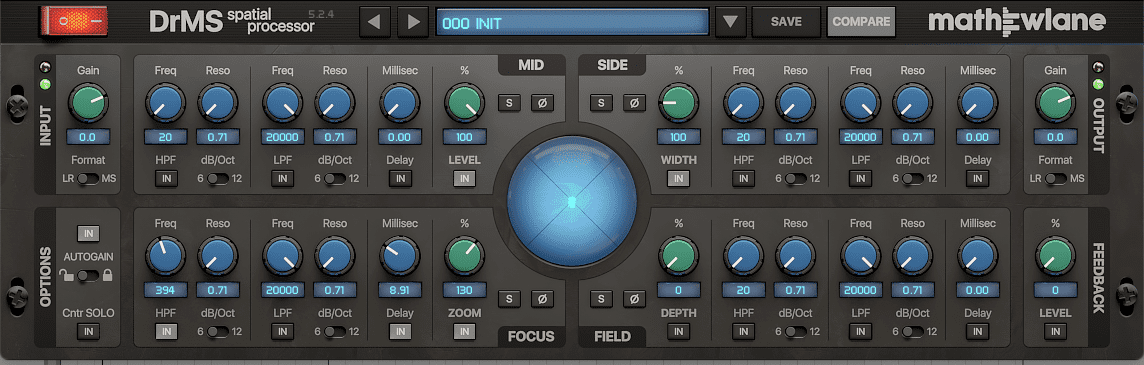
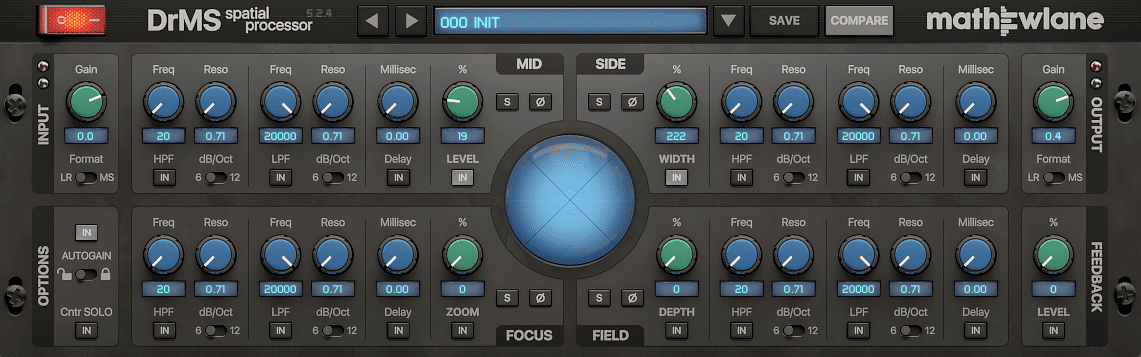
Next, we add DrMS to the TB-303 signal chain between Decapitator and Utility. We can ignore the top section of the plugin as we don’t want to adjust the mid or side content. There’s no side content to play with anyway. Instead, we turn our attention to the bottom row, specifically the Focus section.
Focus allows us to take mid sound and push it out into the side, creating width where there was none before. We can use the Zoom dial to do this. First, we click the In button to engage the parameter and then start turning up the dial. It’s not as simple as cranking it up, though. As it’s introducing some phase issues, we need to also use the Delay knob next to it to help centre the image and make it sound natural. Again, we turn it on by pressing In and then work the dial, going back and forth between Zoom and Delay until it sounds full and centred. We settled on a Zoom percentage of 130 and millisecond delay of 8.91. Every sound will be different so make sure to listen carefully when making these adjustments.
DrMS also allows us to focus the frequencies affected by the Zoom with two filters. We want to make sure the bass is clean and mono-safe, so we shelf off frequencies below around 44Hz with the HPF.
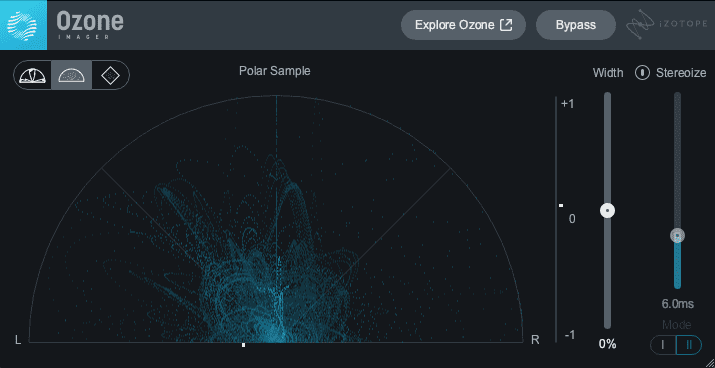
A look at Imager 2 shows us how much wider our sound is now, yet it still sounds natural. It’s also beautifully mono-compatible.
Here is the processed bassline. Note that we’ve exaggerated the effect to be more apparent. In most cases, you probably wouldn’t go so wide.
Compare it again to the original signal:
Let’s sum the processed TB-303 to mono and make sure we won’t lose anything on a club system. It checks out.

Step 3: Topper Sound Design
DrMS isn’t just for thickening sound. It can also help with sound design thanks to its feedback function. Let’s use this to add interest to a topper.
We start with the sample, “mt2_128_drum_loop_race_cym.wav” from the Modular Techno 2 pack on Splice. It’s nice but we want to give it a bit more presence in the mix without it sacrificing its delicacy.
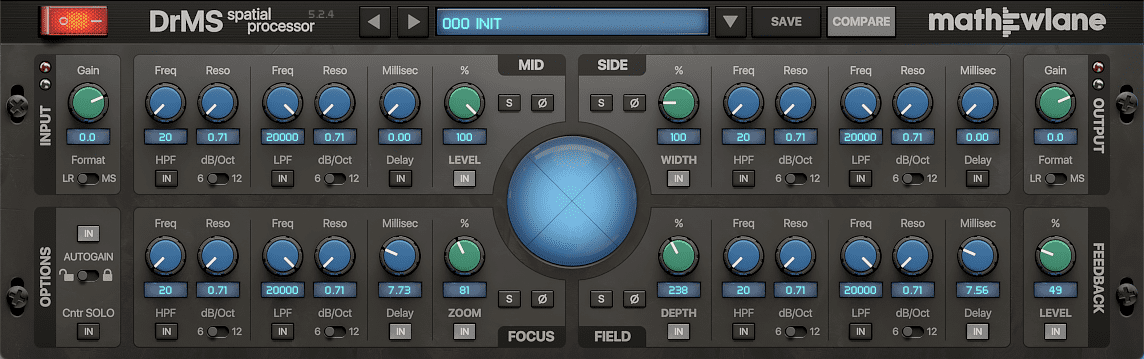
We drop DrMs onto the track and use the Zoom and Delay dials in the Focus section to widen the sound a little, settling on a delay of 7.33ms and a Zoom of 81%. This time, let’s also get the Field section involved, which pulls side information back into the mids. We raise the depth to 238% and bring up the Field delay to 7.56 ms.
Finally, we can use the overall feedback setting to introduce some slapback delay into the centre of the sound. The Feedback knob at the far right controls how much audio is fed back from Focus into Field and vice versa. It’s a sensitive effect so be careful how much you introduce. We don’t want to overwhelm the sound, just make it a little more interesting. A setting of around 50% does the trick.
Here is the original sample:
Now processed with DrMS:
And finally tested in mono:
Step 4: M/S Pad
We want to add a pad next. We’ve made it using the sample, ‘mt2_128_kiy_loop_mars_pad_Bmin.wav’ from Splice’s Modular Techno 2 pack. We’re using Live’s Glue Compression to add sidechain motion. It’s nice and moody but there’s too much happening in the mids now that we’ve enhanced the TB-303 and topper. To address this, we can use DrMS as a basic mid/side processor and push the sound out into the sides.
This time, we’ll only be using the top row. In the Mid section, we use the Level dial to reduce the amount of signal present in the mid (or mono) region. Next, in the Side area, we can increase the Width to spread the pad out into the sides of the stereo spectrum.
Now we’ve created space in the mix for the bass and topper while not losing any of the pad. Of course, this will not be mono-compatible but that’s a sacrifice we’re willing to make for a good listening mix.
Here is the pad before mid/side processing:
And after:
Here are both the bassline and topper in the context of an acid techno song featuring additional samples from Splice’s Modular Techno 2 pack, with reverb and delay also applied.