This channel is sponsored by
 Roland Cloud is your creative hub for Roland hardware and software. Access legendary recreations of Roland Classics, find new sounds for your favorite products, and download updates and companion apps to make music fast and easy. Visit Roland Cloud
Delay and reverb aren’t just for imparting a sense of space. In this tutorial, we use them creatively to add atmosphere to a mix.
Reverb and delay are indispensable to any mix. They’re often thought of as spatial effects because they do just that – bring a feeling of space to a mix. While this is undoubtedly useful, this is not their only function. They can also be used creatively to bring atmosphere to a track.
Today we’re working on a mid-tempo track. Although it’s melodic, and we like the source sounds we have assembled, we really want to bring out the atmosphere in the song through reverb and delay. This is not aimed at the dancefloor but rather home listening, so we can get a little wild with the settings. We’ll be using Modnetic and Diffuse by Surreal Machines in this tutorial but you can get similar results with other plugins. Likewise, our DAW is Ableton Live but any DAW will work.
We’ll be using samples from Splice’s Organic Electronics pack. As always, click on any image to see a larger version.
We’ll be going from this promising start:
To this finished, atmospheric track:
Step 1: Percussion
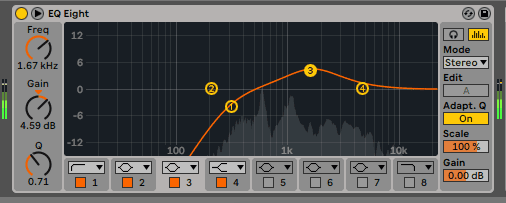
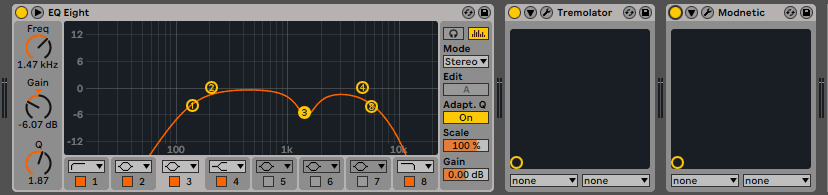
We have a drum loop that we like, ‘JVIEWS_percussion_loop_turned_to_the_sun_drum_106.wav’. It’s a little busy so we’ve tightened it up with Native Instruments’ Transient Master. To this, we’re going to add a percussion sound, ‘JVIEWS_percussion_bamboo_snap.wav’, placed over the first snare of every bar. Using EQ Eight, we can carve out the lows below 300Hz and give it a good-sized boost of 4.6dB at 1.6kHz to bring out its tonal characteristics and help it stand out against the percussion loop. It’s not very animated though. Let’s use tape delay to address this.
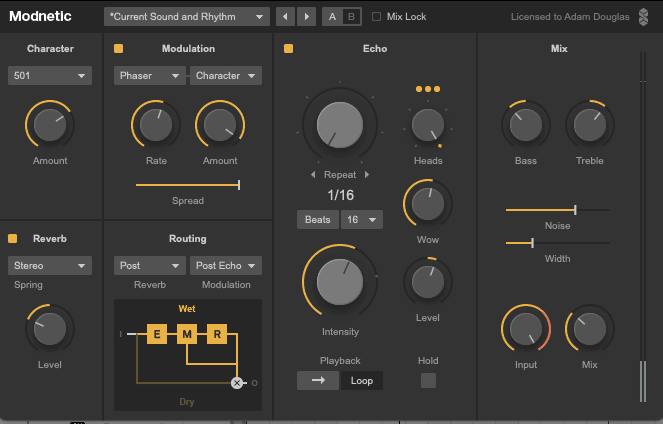
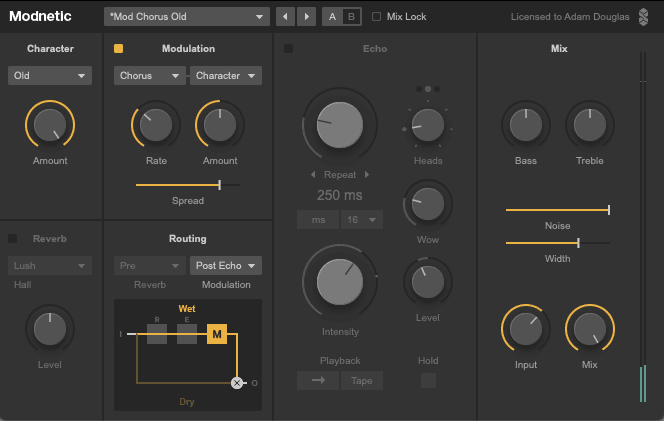
Using Modnetic, we can create 1/16-note rhythmic repeats that sync to the beat. While groovy, it’s not got that mojo yet, so let’s do some tweaking to the sound. First, we can use the built-in spring reverb to add a wet, drippy sound that really works well with the boosted mids. Turning the Level knob into the negative creates a more subtle effect. We also add some colour with the Character knob set to 501 a.k.a. the Roland RE-501 tape delay.
Let’s next use modulation to give the echoes some movement. We’ve gone with the Phaser (set to Character model), with a medium rate, lots of depth, and full stereo width.
Finally, we adjust the EQ to favour the highs, crank up the Input to overload it, and dial back the mix until it’s a good balance of dry and wet.
To help the percussion sit with the drum loop, we put them both on the same bus and use another copy of Modnetic (with delay turned off) to saturate it.
Here is the percussion sound untreated:
With delay:
And in context with the beat with saturation engaged:
Step 2: Melody
For our main melody, we have three guitar-chord samples, ‘JVIEWS_tonal_one_shot_heaven_hit_C.wav’, ‘JVIEWS_tonal_one_shot_heaven_hit_E.wav’, and ‘JVIEWS_tonal_one_shot_heaven_hit_D.wav’. We’ve arranged them into a chord progression. The samples are already fairly processed although we’d like to process them a bit more, especially to help them sit in our mix.
The first order of business is to reduce the width. We plan to use the full stereo image of the song later so, using the stock Utility plugin in Ableton Live, we reduce the width to 50%. It is a bit narrow but we’ll fix that later with more reverb.
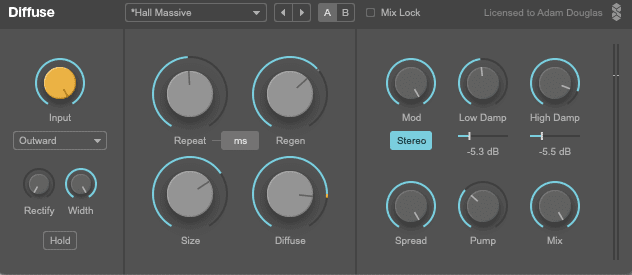
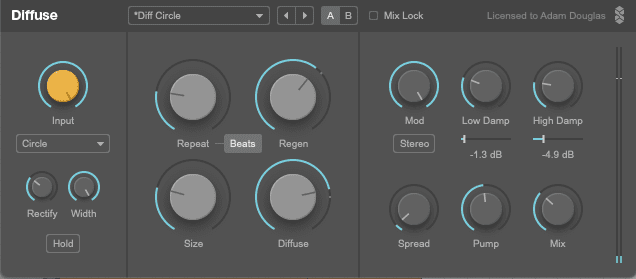
Rather than swamping it with an insert reverb, we place Surreal Machines’ Diffuse on a send and route the guitar chords to it. Diffuse models digital reverb hardware from the 1980s as well as analogue delay from the 1970s. It’s a hybrid affair so it mixes both of these together. Let’s use it to create a washy ambience that combines elements of both delay and reverb.
As we’re going for a creative effect more than a realistic spatial one, we can get experimental with the settings without fear of making mistakes. Larger Size and Diffuse settings create reverb-like effects so we dial in judicious amounts of both. For the delay part, a repeat rate of 518ms with plenty of Regen (feedback) works a treat.
We also want a lot of modulation so we crank the Mod dial. As we reduced the width of the original sample earlier, we will want to spread out the reverb with the Width dial at the left of the plugin. This works in tandem with the Spread dial at the right, which adds different pre-delays to each side of the stereo spectrum. A little Pump helps it move.
Speaking of pumping, we really want to get this moving so next, we add a Glue Compressor to the channel and sidechain it to the main audio loop. Now the reverb effect pumps in time to the rhythm.
Guitar chords before reverb:
And after:

Step 3: Arpeggiator Synth
Next, we’re going to add an arpeggiated synth line. We also want this to have a big, atmospheric reverb but one slightly darker in tone to contrast the guitar progression. Note that we have this panned slightly to the right to help separate it from the guitar.
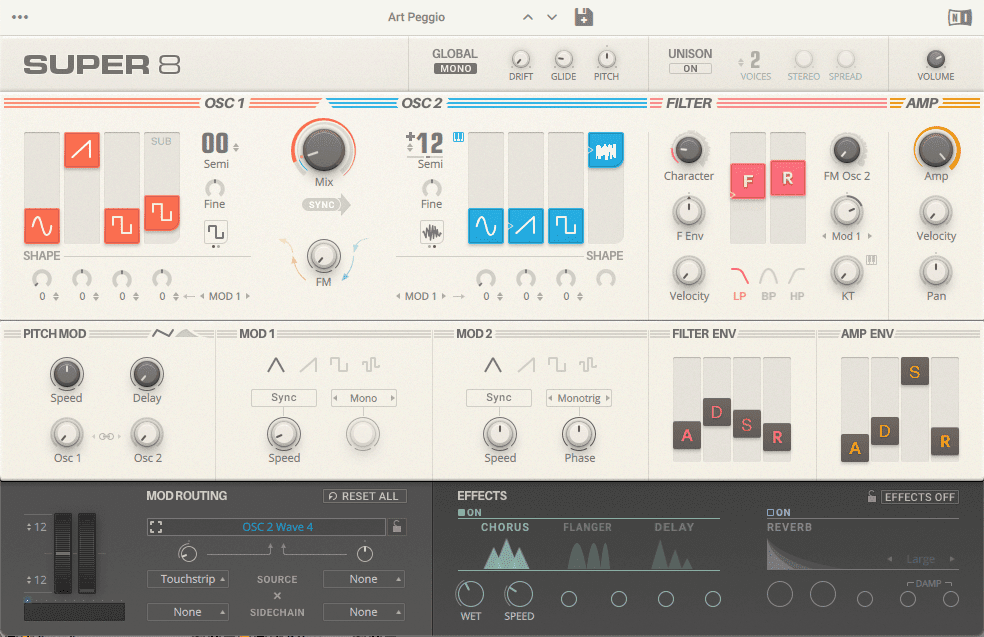
We start with Native Instruments’ Super 8 playing a tight synth lead triggered by Live’s Arpeggiator. We place another copy of Diffuse after it in the channel as, unlike last time, we do want it to be fairly swamped in reverb.
This time, we use a smaller Size but a larger Diffuse. A repeat rate of 4/32 and plenty of Regen keep things interesting. This creates a vibey, washy delay with hints of reverb. Again, we go for maximum modulation, a good amount of Pump, and full Width. We also bring in Rectify, which adds ‘80s-style digital artefacts to the signal. We can use the damping controls to lower the highs and darken the reverb, creating contrast. Finally, we dial back the mix amount to taste – around 35% works well.
Top Tip: To create this effect using stock plugins, place a reverb after a delay with an EQ at the end.
Finally, we send the signal to another send channel, this one with a copy of Modnetic loaded up with just a chorus. With its spread fully wide, this modulates and smears the synth and reverb across the stereo spectrum.
Here is the original synth:
And with reverb and additional chorus:
Step 4: Background Kalimba
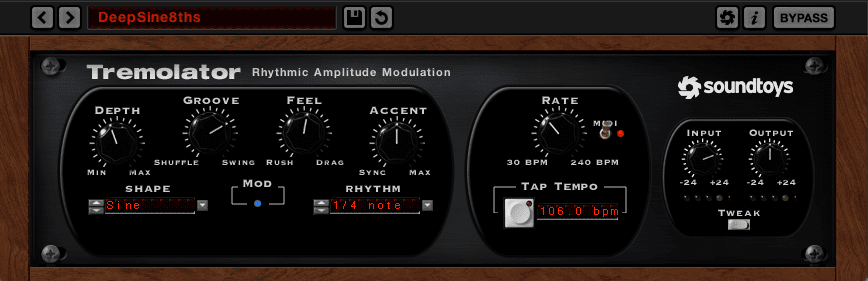
For the final element, we have a nice kalimba loop, ‘JVIEWS_tonal_loop_vintage_kalimba_130_E.wav’. The original sample has plenty of lo-fi vibe and slowing it down from 130bpm to our project tempo of 106 has given it some nice, grungy artefacts, but it’s also a little hot in the mids, so we add EQ Eight to the channel and cut 6db at 1.5kHz. We pan it slightly to the left so it has its own space in the mix. Some 1/4-note volume modulation courtesy of Soundtoys Tremolator gives it a woozy feel. Tape delay would be perfect on this.
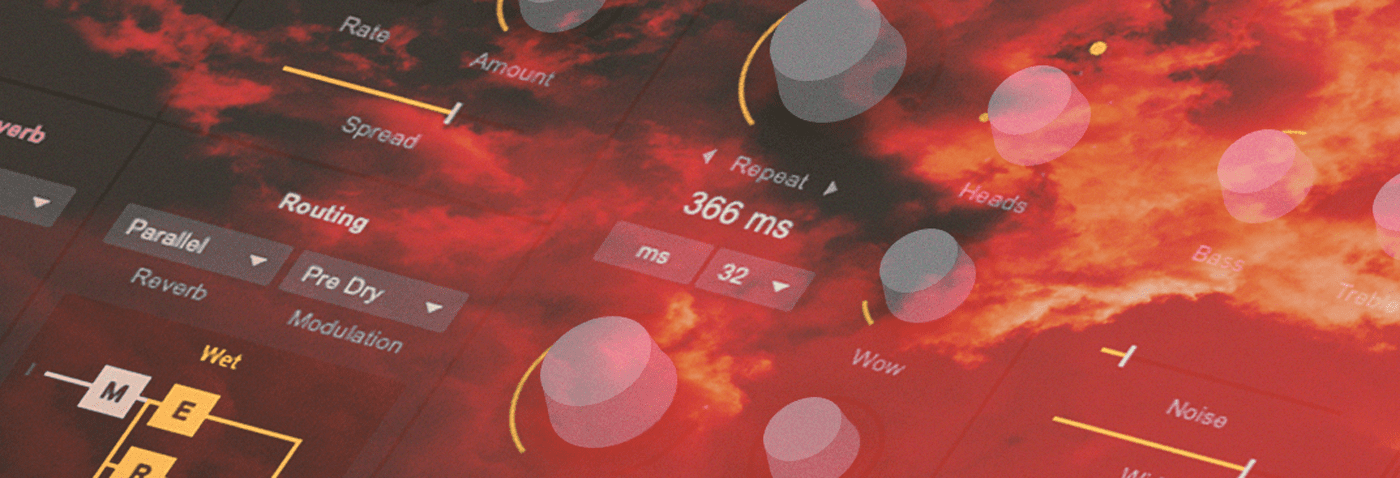
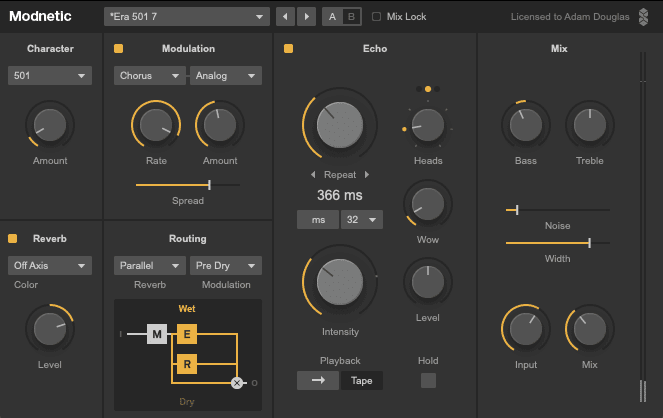
We call up another instance of Modnetic. We go with repeat settings of 366ms, a good amount of Intensity (feedback), and a little Wow to warble the echoes. Note that we’re only using one tape head this time. Modnetic can go up to three heads for denser repeats.
We plan to bury the kalimba loop in the mix and use it more as a soundbed so we really pile on the effects. We give it plenty of saturation using both the Character section (501 again) and a non-reverb impulse response in the Reverb section (Off Axis). Finally, we go with a very fast chorus. To make it blend in with the other effects, we send a little to the reverb bus.
Here is the original kalimba:
And processed:
Here is the full mix with the kalimba in the background.
Tutorials is sponsored by
Roland Cloud is your creative hub for Roland hardware and software. Access legendary recreations of Roland Classics, find new sounds for your favorite products, and download updates and companion apps to make music fast and easy.