
This channel is sponsored by
 Roland Cloud is your creative hub for Roland hardware and software. Access legendary recreations of Roland Classics, find new sounds for your favorite products, and download updates and companion apps to make music fast and easy. Visit Roland Cloud
Harness the power of the Shepard tone to create a riser that never peaks.
Risers are a tried and tested way to ramp up tension in a track. They’re usually used to transition from one section of a song to another or to help a breakdown reach peak excitement before the drop. They’re often made by slowly raising the pitch of a sound, reaching a crescendo at the moment of release. But what if that release never came? What if the pitch just kept rising forever?
This is a Shepard tone. The pitch doesn’t actually rise endlessly. It’s an audio illusion achieved by overlapping multiple rising tones with some clever volume fades to hide the stitches. It’s a favourite of film composers and sound designers (check out Hans Zimmer’s soundtrack for Dunkirk to hear it in action) but it also works a treat on the dancefloor.
In this tutorial, we’ll show you how to program a Shepard tone in a techno track for maximum minds blown. We’re using Ableton Live but the theories used can apply to any DAW. As usual, click on an image to see a larger version.
Here is the Shepard tone in action:
Step 1
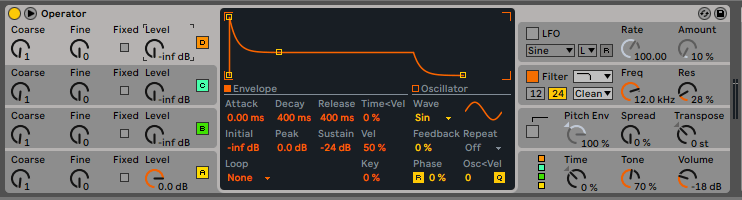
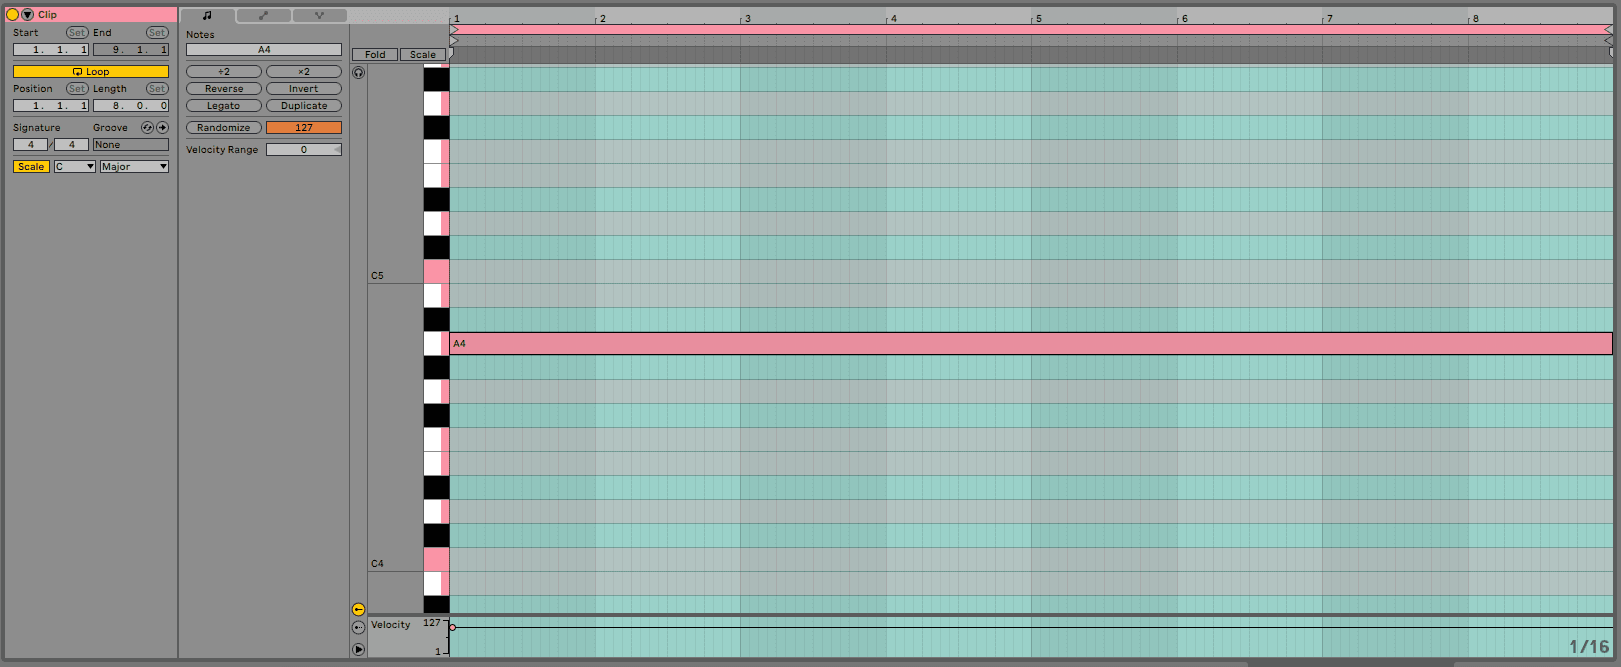
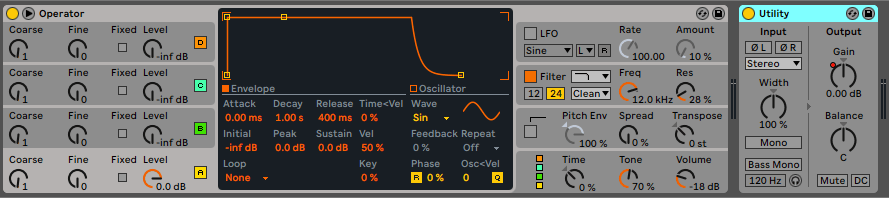
Create a new project in your DAW. Start with an instrument that can play a pure sine tone. Shepard tones are traditionally made with sines. We’re using Ableton Live’s Operator. Create a MIDI region across eight bars and draw in an A4 note that plays across all eight bars. We’ve chosen A as it’s the root note in A minor, the most common key for dance music, but really any note will work.
Step 2
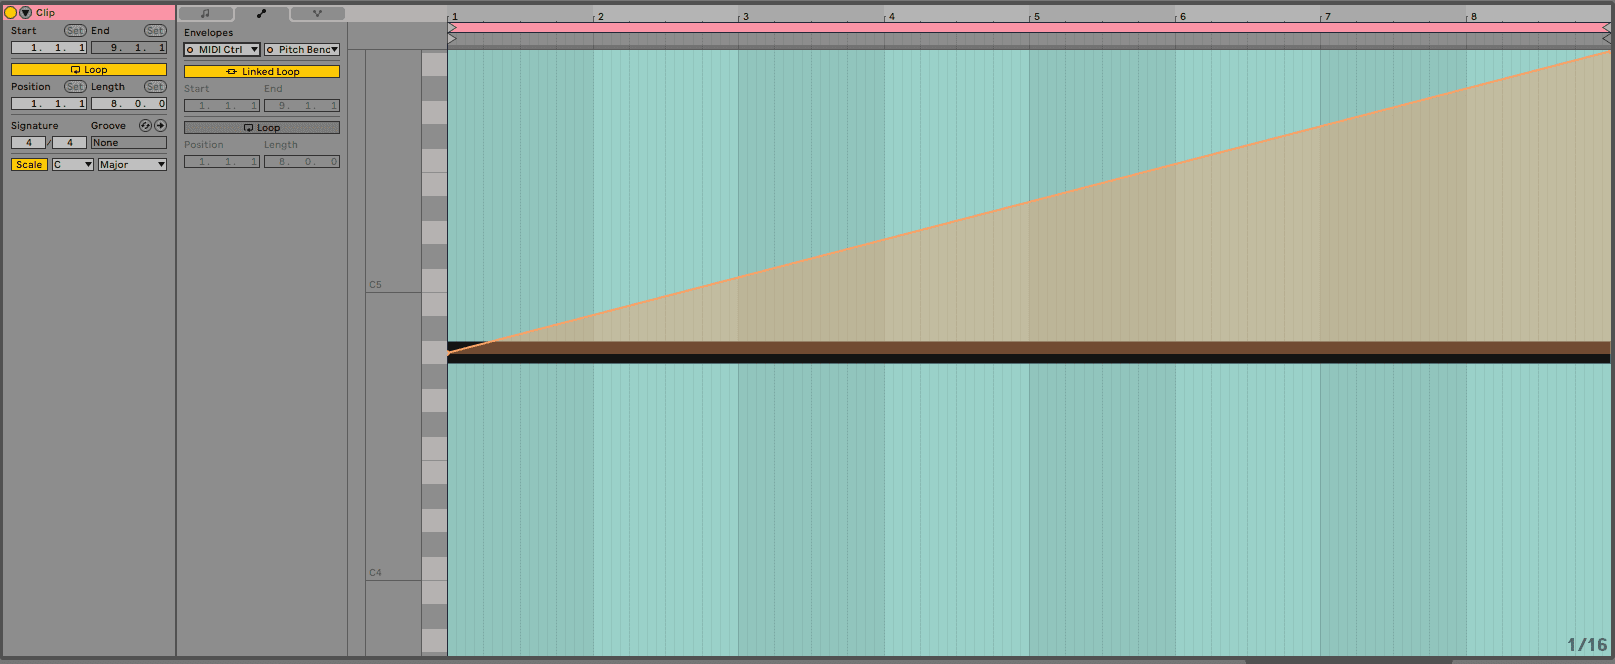
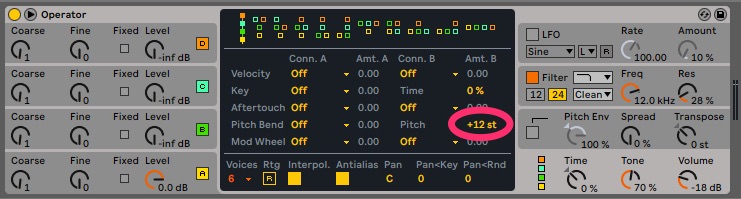
Next, we want to automate the pitch so it rises for a full octave across the eight bars. Double click on the MIDI region, click on the automation tab inside the MIDI track, and then choose MIDI Ctrl and Pitch Bend from the drop-down menus. Draw in automation so the pitch rises from zero to 8191. Note that this is MIDI information, not semitones. To make this correspond to 12 semitones (or an octave), we need to change the pitch bend range in Operator. Click on the lower-right section of the panel to reveal the global controls. Raise the Pitch amount under Pitch Bend to +12 st. Now when you play the note you should hear it rise an octave across the eight bars.
Top Tip: Create a pitch drop for an endlessly falling tone.
Step 3
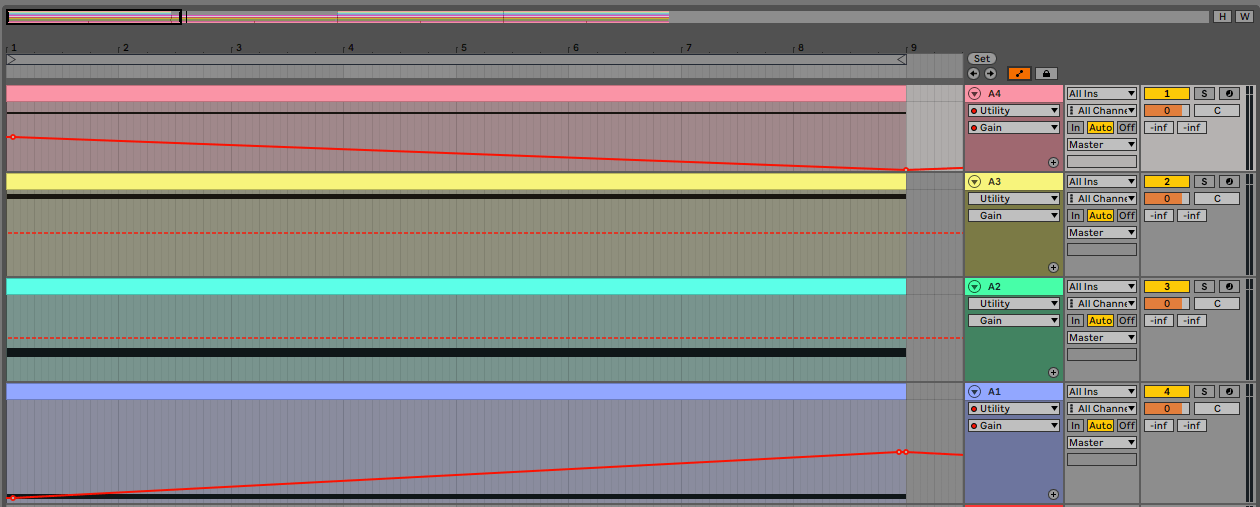
For the Shepard tone to work, we need at least three notes. We’ve gone with four, as it gives it a fuller sound. Duplicate the track three times, and lower the note by one octave each time. In the end, you should have the following notes playing: A4, A3, A2 and A1.

Step 4
We’re going to add volume automation to the first and fourth (or the highest and lowest) notes next. This way, the highest and lowest points of the sound will be hidden while the middle notes will always be audible. Although you can automate the volume, we prefer to work with the Utility plugin, as it keeps the volume fader free in case you need to make adjustments later.
Add a copy of Live’s stock Utility plugin to the channels with notes A4 and A1. Click on the Gain knob, then activate Automation by clicking on the Automation logo at the top right of the DAW. Choose Utility from the first drop-down menu and Gain from the second. On the A4 track, draw in automation so the gain decreases across the eight bars from 0.00db to -inf. Do the reverse on the A1 track so it fades in from -infinity to 0.00db.
Finally, turn on loop and give it a listen.
Step 5
It sounds like a Shepard tone now but there’s probably an annoying click at the loop point. This is because the phases of the sine waves are not matching up between the beginning and end of the note. We can cover this with effects.
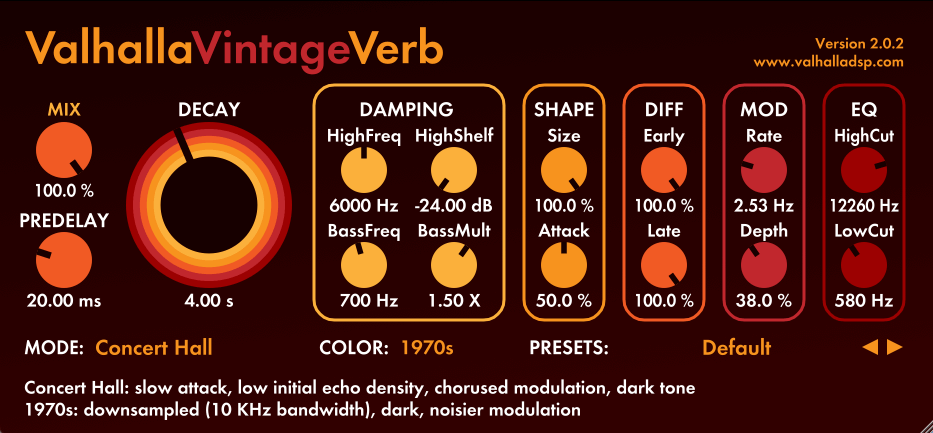
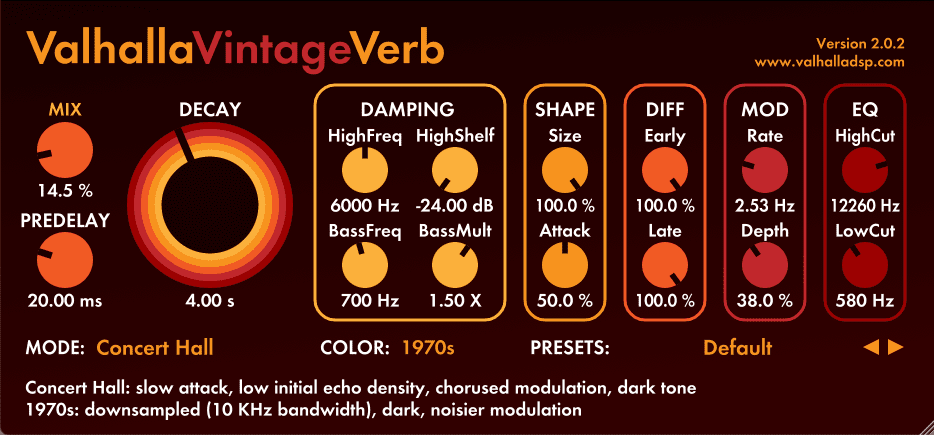
Group the four note tracks into one bus and place a reverb plugin on the channel with mix amount set to full wet. We’re using Valhalla Vintage Verb but anything will work. The reverb masks the click.
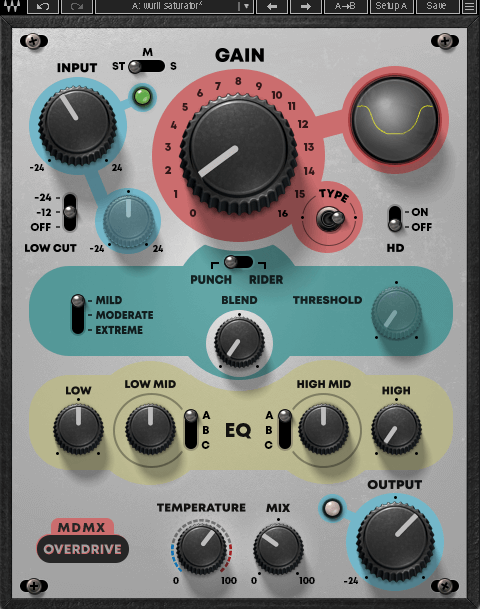
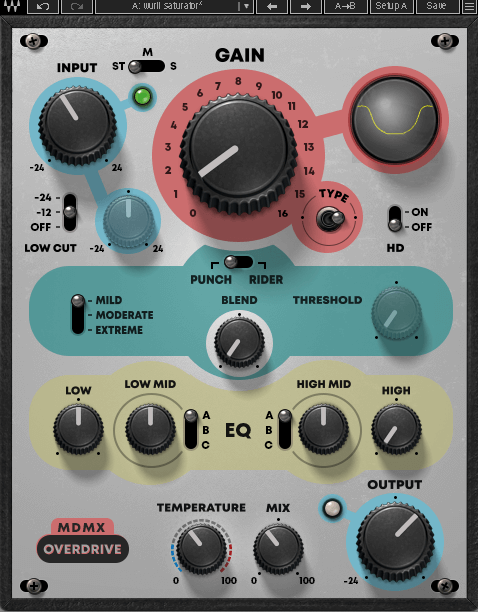
You can also add a distortion to the channel before the reverb (or after if you’re feeling adventurous). Waves MDMX Overdrive works nicely. This will rough up the simple sine waves and give the Shepard tone some character.
Step 6
You could stop there but let’s try doubling up the Shepard tone. Duplicate the whole group but this time, replace each instance of Operator with one set to a different preset. We like the movement in Broken Mono Synth. Remember to adjust the Pitch Bend range to +12 semitones on each one.
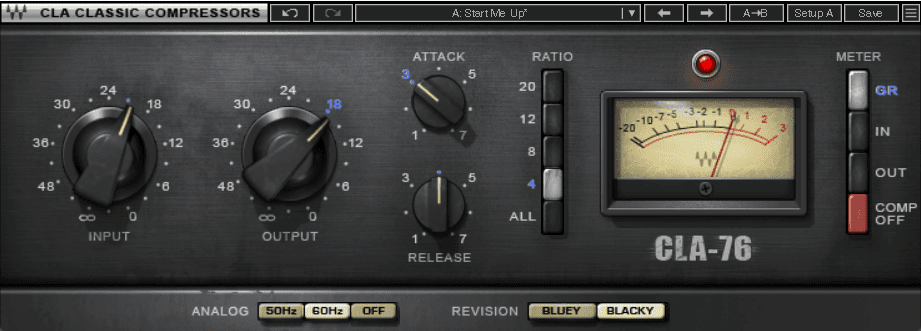
We’ve gone for a similar effects chain as before, using MDMX Overdrive and Valhalla Vintage Verb again, although we’ve dialled back the wet/dry to let more of the Operator’s character come through. We finish the chain with Waves CLA-76 compressor to help it sit in the mix with the other Shepard tone.
Top Tip: Experiment with different types of oscillator waveforms and effects to create unique Shepard tones.
Here is the second Shepard tone on its own:
And now layered with the first:

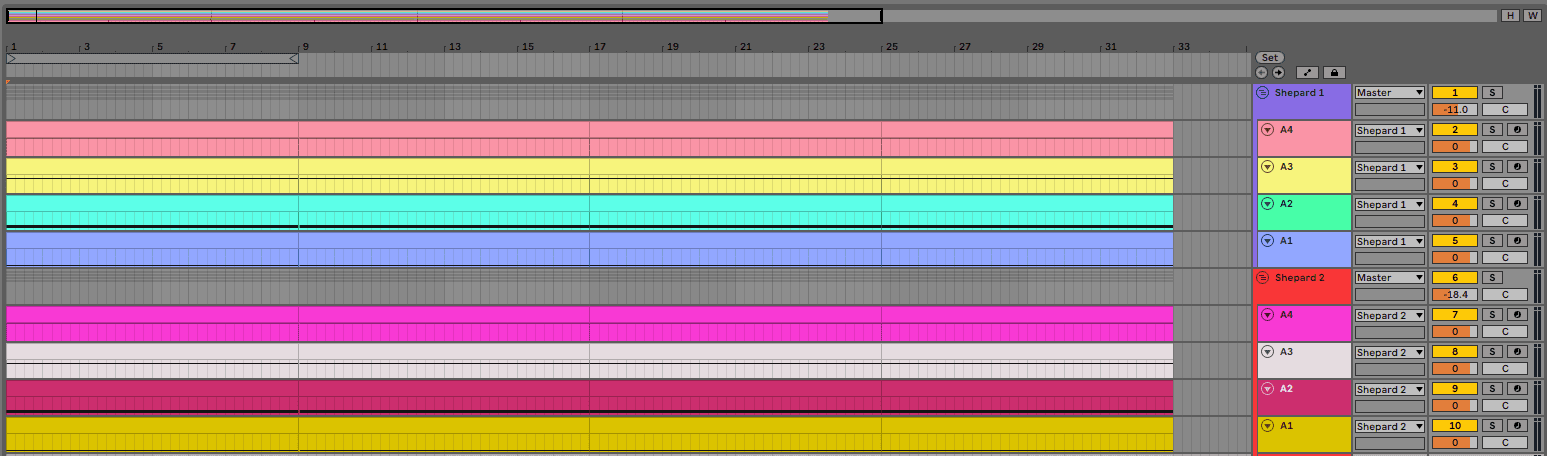
Here are the two finished Shepard tones, now laid out into 32 bars. We’ve added some filter risers made with Waves Element and Ableton’s stock Phaser-Flanger, and also included two Splice drum samples, ‘rt_drm127_art_stp.wav’ and ‘rt_drm130_york_top.wav’ from the Raw Techno pack, as a beat.
(Main image originally by Grin – Own work, CC BY-SA 4.0, https://commons.wikimedia.org/w/index.php?curid=3804638)
Tutorials is sponsored by
Roland Cloud is your creative hub for Roland hardware and software. Access legendary recreations of Roland Classics, find new sounds for your favorite products, and download updates and companion apps to make music fast and easy.