
In this tutorial, we use K-Devices’ Max for Live device Hexo to generate stacked polyrhythmic arpeggios that contain multiple time signatures with constantly evolving movement.
Though released in 2014, Nils Frahm’s track ‘Says’ has continued to stand the test of time and was also recently featured in the space adventure film Ad Astra. One of the defining elements of the ambient track is the use of multiple-layered arpeggio loops and repeating melodies that have contrasting timings. This is particularly evident around the 06:40 mark when the more treble-heavy arp parts began to play a more prominent role in the pattern that was repeating from the beginning.
What gives the rhythm a driving feature – despite the fact that there are no drums – are the polyrhythms within the arps and melodies. Polyrhythms are fascinating and something we have covered before citing Aphex Twin as an example. The basic idea is creating dynamic patterns where some arpeggios are playing different time signatures – for example, one of the arpeggiated notes repeating once every seven 16th-notes, with the others repeating every eight 16th-notes.
Many sequencers offer polyrhythmic options but today we’ve opted to use K-Devices’ Max For Live device Hexo . Max For Live is a pandora’s box of goodies and we’ve been impressed with K-Devices before. Their most recent Hexo is powerful, intuitive and sounds great. Here’s what we’re creating today:
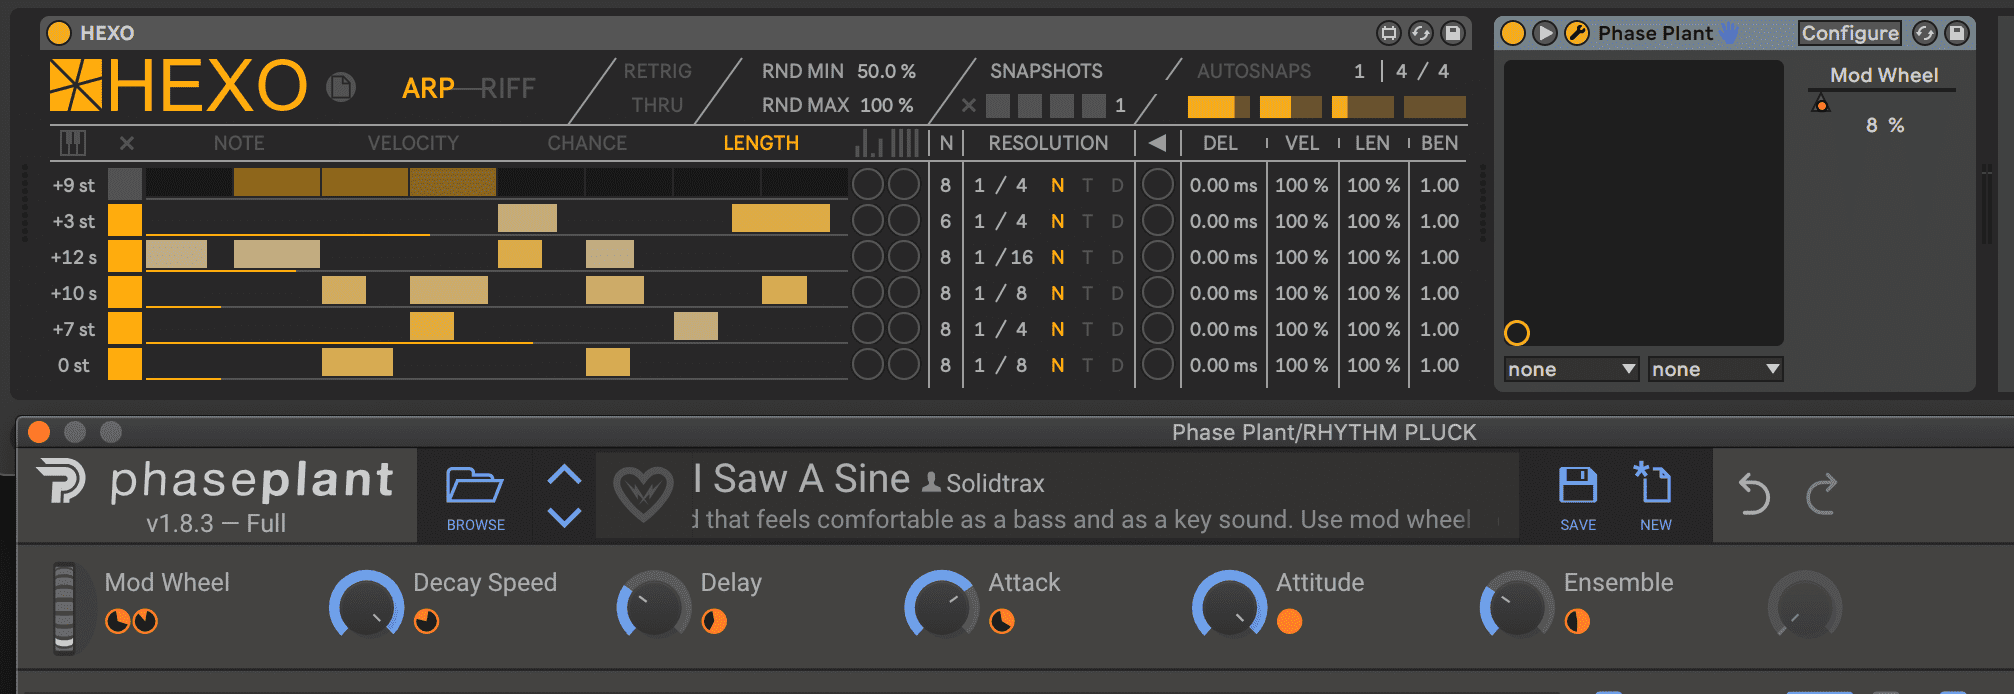
Quick Overview of Hexo
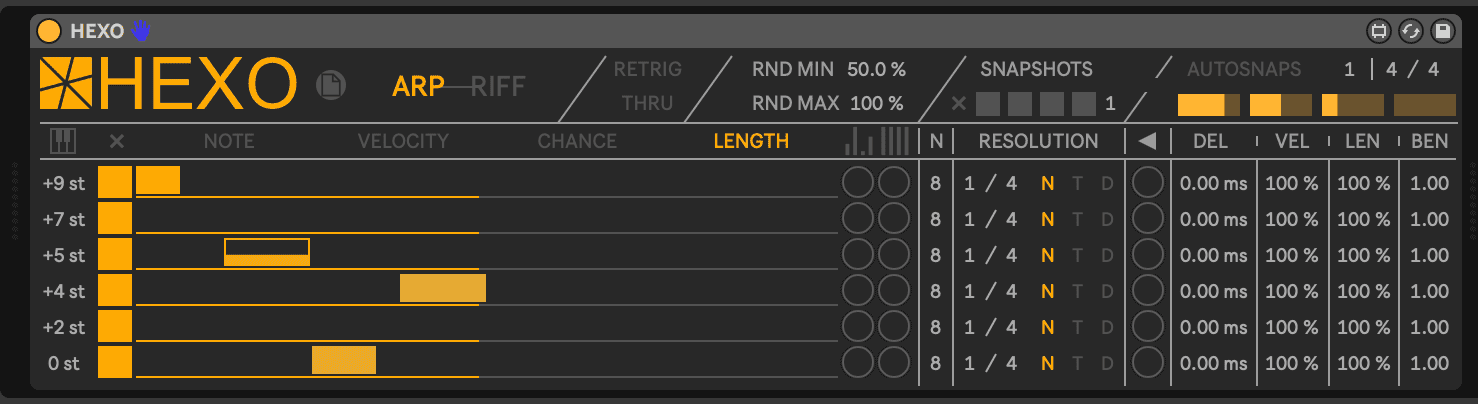
Hexo’s grid is formed of six channels that each represent a note that will play a certain number of semitones above whichever note is sustained in the piano roll. With arps you usually want to use notes that would be commonly found in chords, for example:
- +3 st or +4 st – the minor 3rd or major 3rd
- +7 st – the perfect fifth
- +10 st or +11 st – the minor 7th or major 7th
The grid allows you to program notes, edit their lengths or velocities and determine their chance of occurrence. There’s also a handy set of random buttons (the circles to the right of the grid) that randomize either the note, velocity, chance or length of the notes in the selected channel.
There are many more parameters and settings but the key two we’re going to use are the N and Resolution parameters. Resolution lets you choose the speed of the steps in each channel (for example 1/8 or 1/4 or 1/16th notes). The value under N lets you choose how many steps there will be in the channel.
Simply changing the N value from 8 to 7 or 8 to 6 will inject polyrhythms and syncopation into your sequence because the overall pattern will be different every time it loops!
Sequencing Poly-Arps
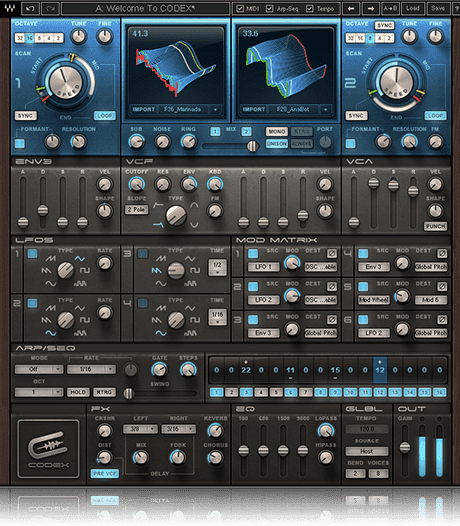
We’ll start with a basic pluck sound, using Waves’ Codex synth’s Chaotic Good Pluck preset. To launch the sequencer program a sustained C3 note in the piano roll. This could be any note you choose but we’re going to use the key of C minor so C works perfectly.
Set your channels to the desired semitones – we used the minor 3rd, fifth, minor 7th, add 9 interval as well as another high minor 3rd at +15st. If you’re unsure about which notes to choose you can always experiment with random notes and add a scale MIDI device to lock all notes to a key.
Set the resolution for all channels to 1/16 so that we are working with 16th-notes. The next step is hitting play and experimenting with adding notes, editing velocities and changing the N value of certain channels. For example, we changed the +3st channel to 9 steps, the +10st channel to 10 steps and the +14 channel to 7 steps. This results in loops that are never the same.
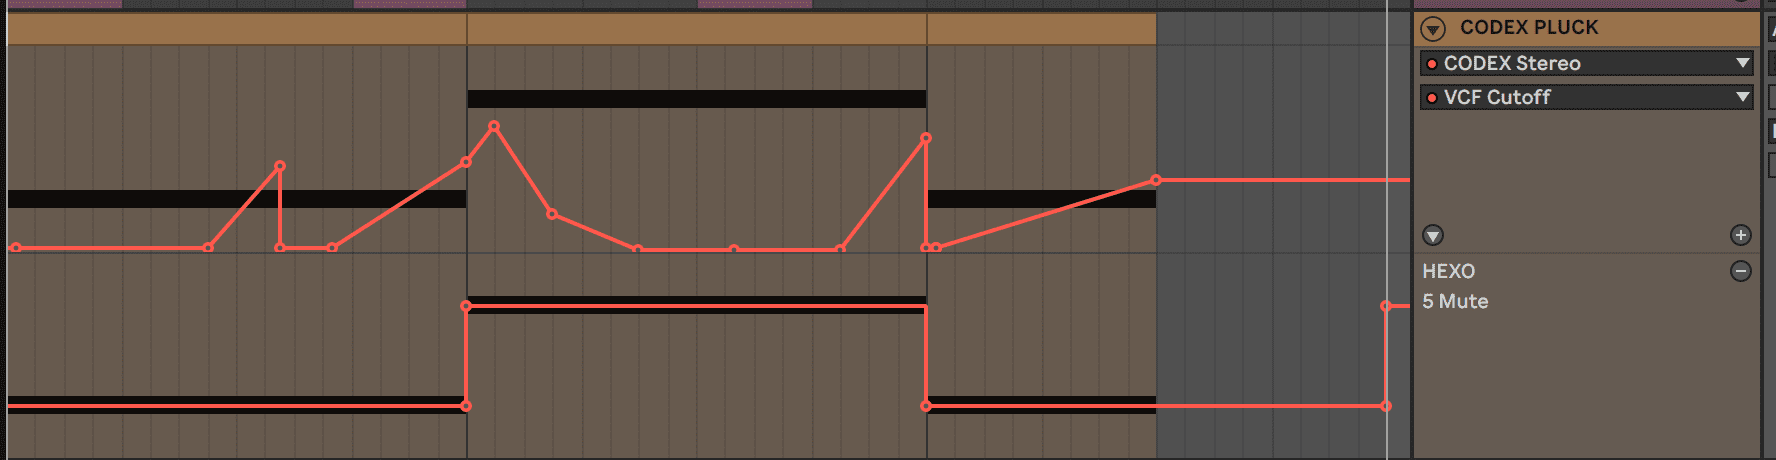
You can get even more creative by changing the chance parameter of notes (so that they only occur sometimes) and automating channels to come on and off. We automated the +14st channel to be active only between bars five and nine for example.

Arps can sound robotic without automation and effects so we also wrote in some filter cutoff automation and delay via Native Instruments’ Replika XT.
Here’s how this sounds:
With different notes catching each other at different times you get all sorts of patterns and combinations, making for a very dynamic arrangement.
To make it more like a progression you can change the note in the piano roll after a certain number of bars, so we added a sustained F3 note after four bars:
Syncopated Ambience With Single Notes
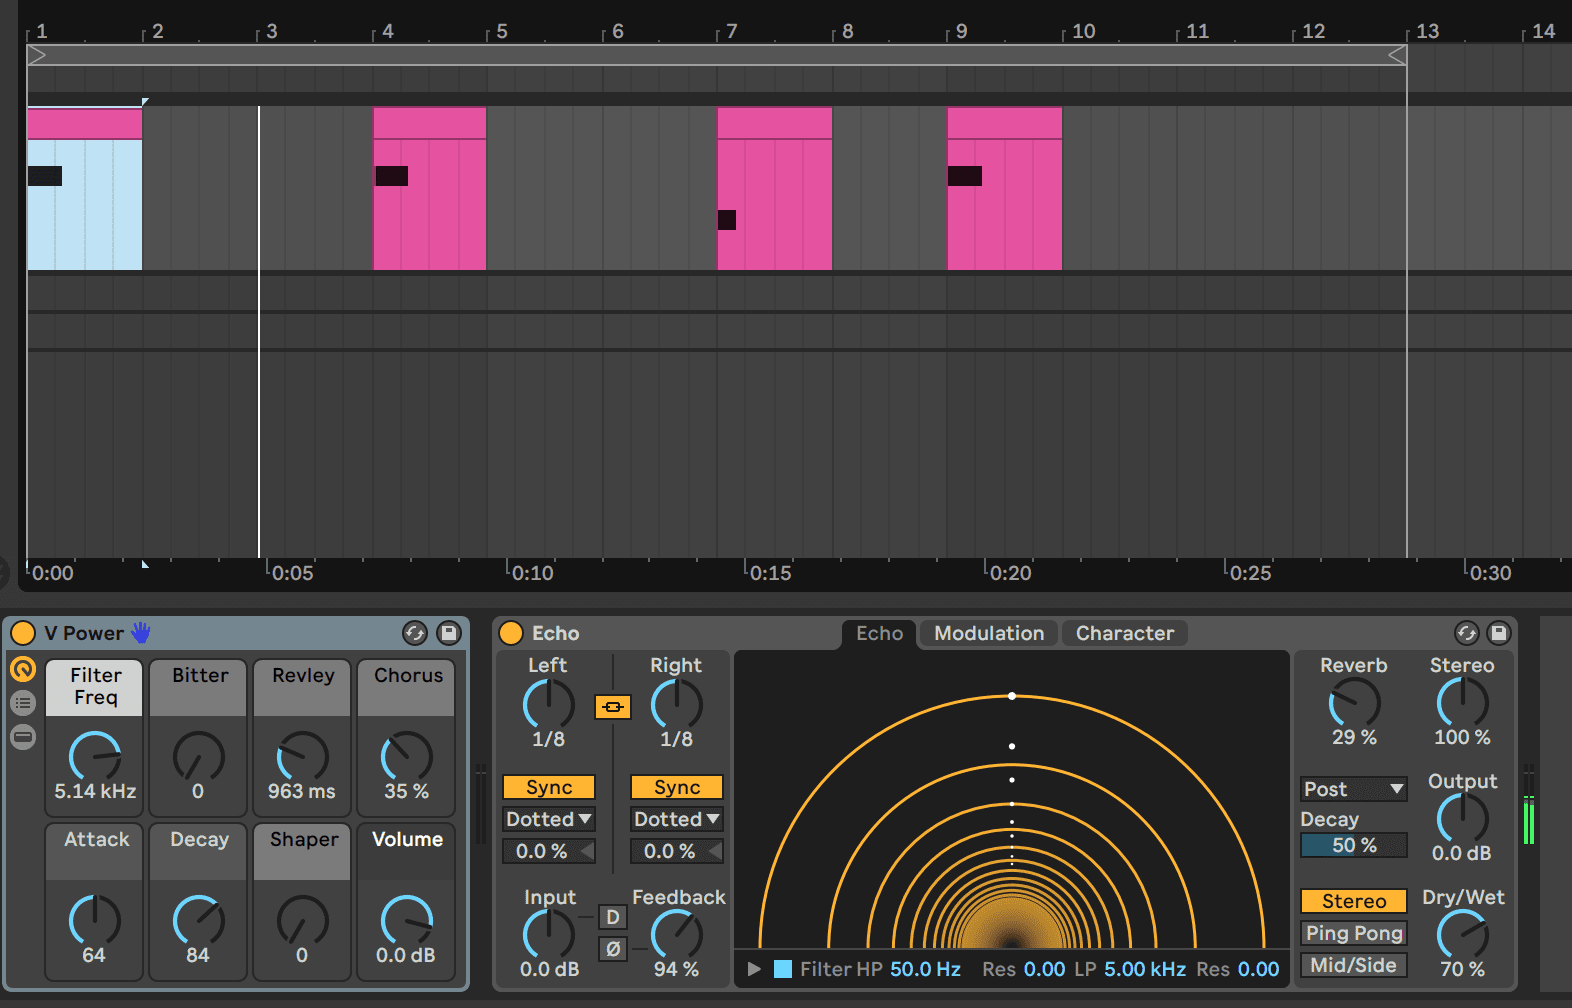
Before programming another arp part with Hexo we can quickly borrow another syncopation technique from Says by Nils Frahm. This is programming scarce single notes and running it through delay to add even more rhythms.
We used Ableton’s V Power Simpler preset from the Skitter and Step pack, added the Echo audio effect’s default setting with increased feedback and programmed only four notes over the audio from the previous step.
Here’s how the two parts sound together:
Hexo-Randomization
For the next part load up a more ambient and soft lead sound. We used Arturia Pigments 3’s Soft Chimes preset and copy-pasted the Hexo device from the first pluck arp channel to this one. Copy pasting the device to new channels and then randomizing the parameters with the circle buttons in the grid can truly speed up workflow.
You can set a range for the randomization of the main four parameters (note, velocity, chance and length) at the top of the device with the RND MIN and RND MAX parameters.
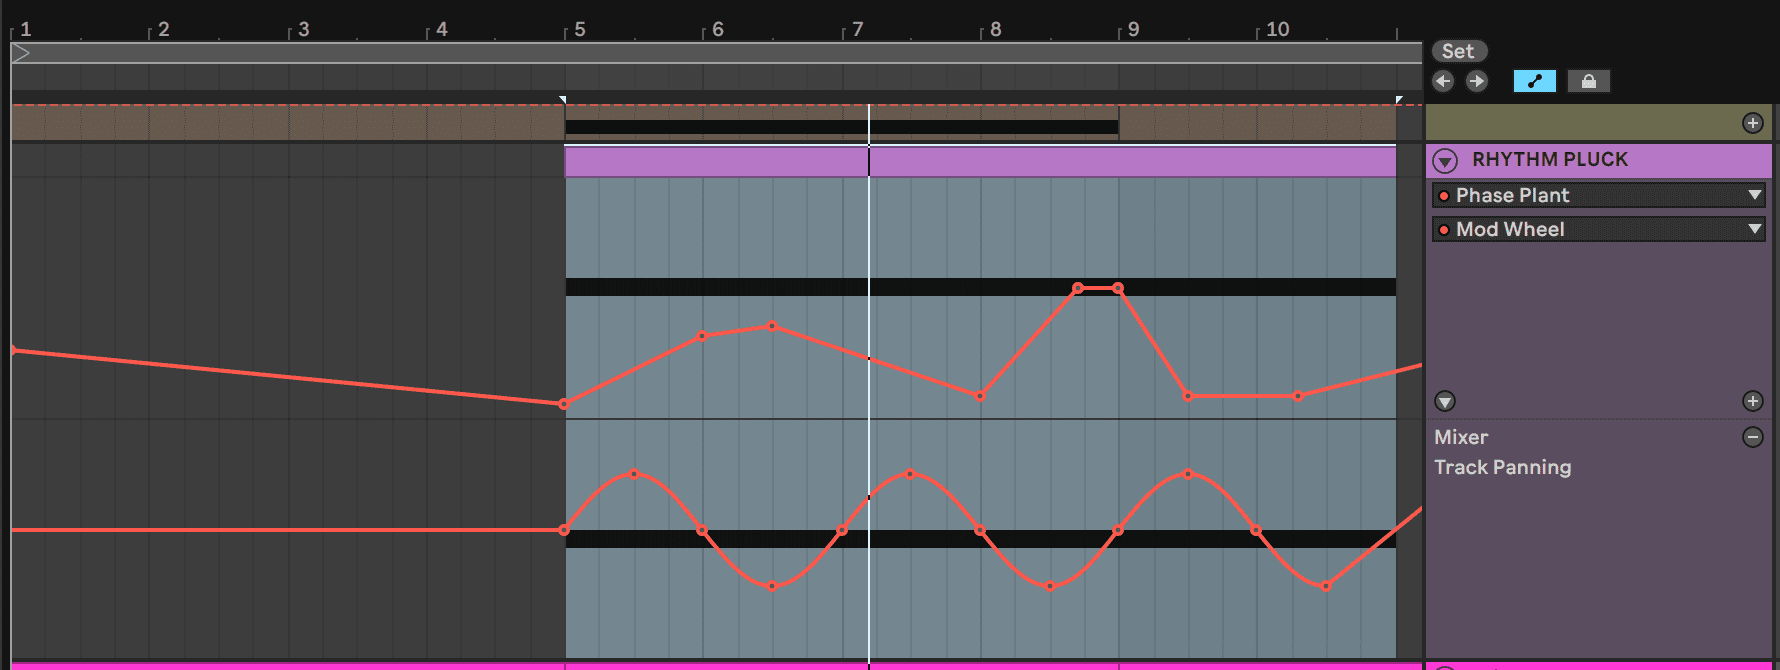
Be sure to change some of the N values as well as notes and velocities in the grid so that the parts are not exactly the same. Automation can again be used to add character and we automated one of the macros in Pigments to increase and add a pad layer as time passes.
Here’s the chimes part in solo followed by our progress so far:


Poly-Resolution
For the final part add yet another plucky sound with a lower cutoff so that it does not clash with the first pluck part. We used Kilohearts’ Phase Plant synth’s I Saw a Sine preset. This time, in Hexo change the Resolution value of each channel slightly so that all of the channels are not playing 16th-notes. Having a variety of speeds can result in great patterns!
Also make use of the randomize feature for velocity and note length in each channel to give each note different expressions, thus adding a human feel. It’s a good idea to set the RND MIN value to around 50% because lower values can make notes too quiet.
To keep up the tradition of automation, automate the cutoff or any other parameters to taste. We also automated the panning to constantly go between 25L and 25R for the sound to move around the stereo field. The preset’s internal delay effect also adds width, as well as a driving rhythm.
Here’s how the pluck sounds in solo:
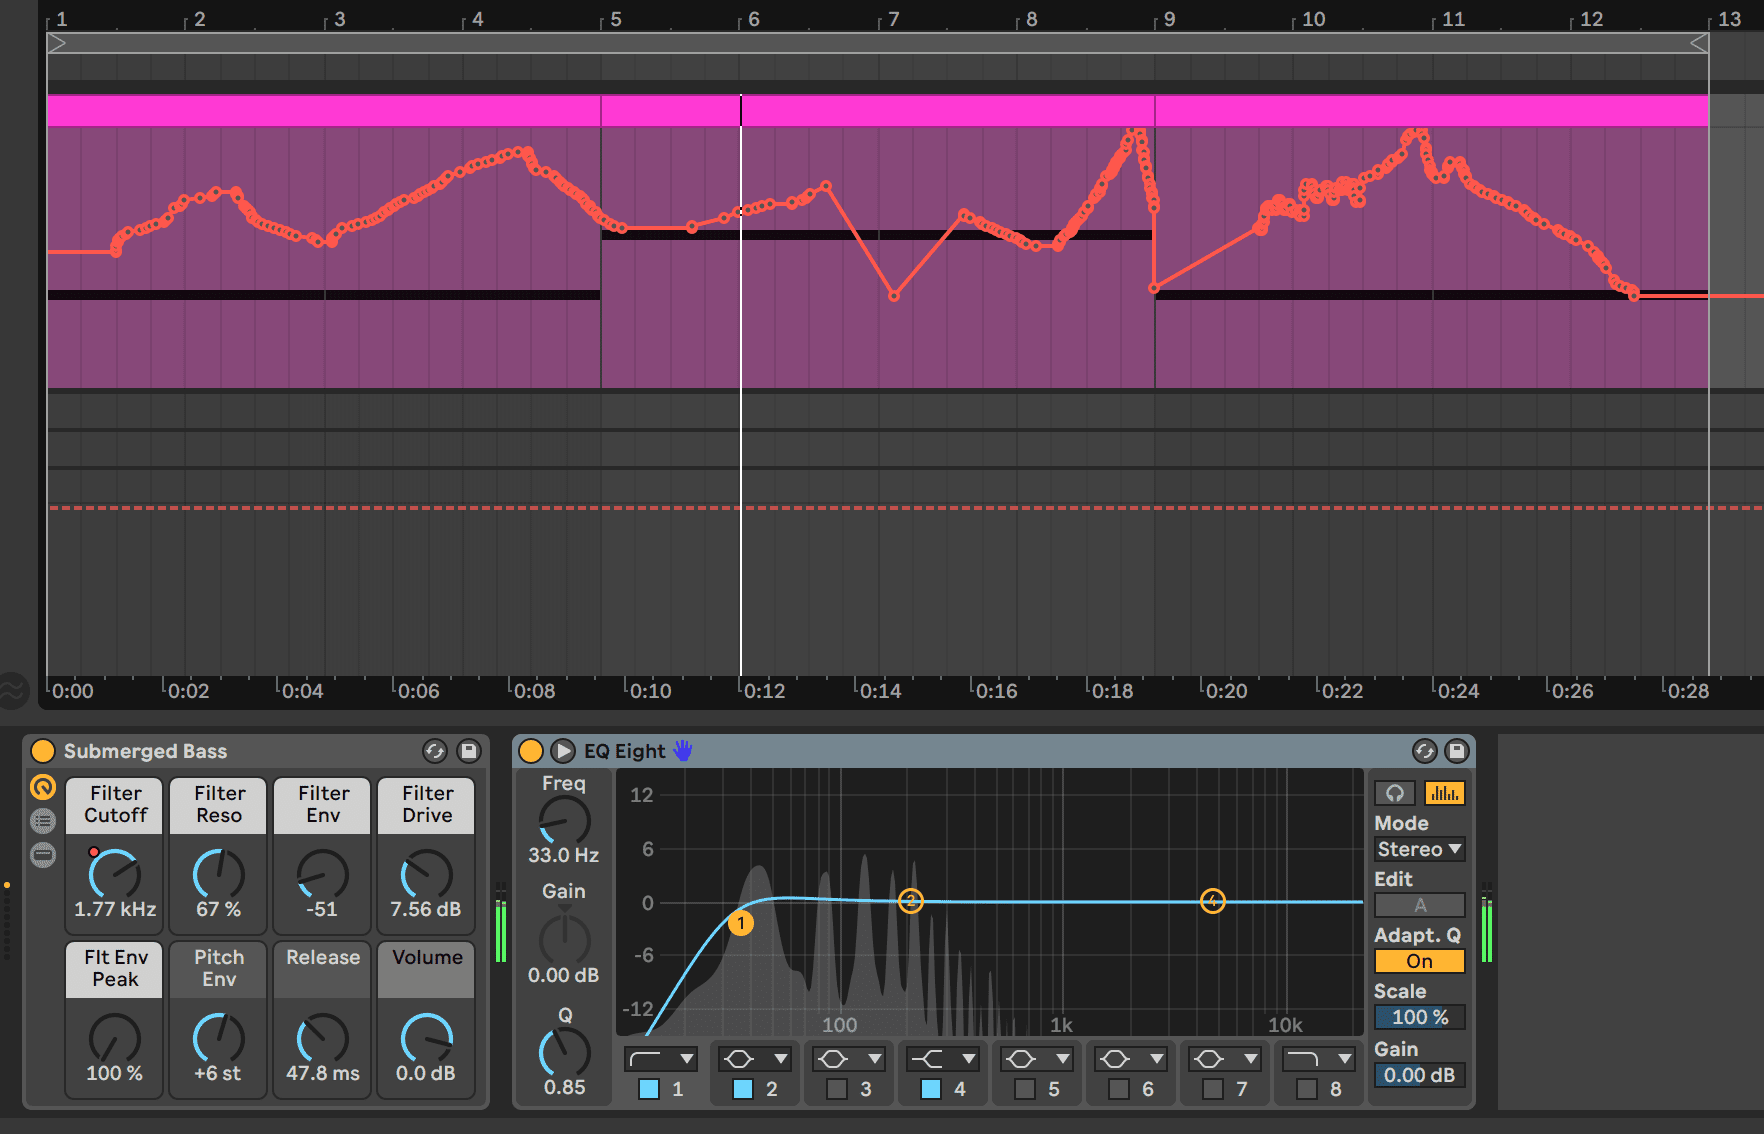
Some low end is always needed so we also programmed in a bass part using Ableton’s Submerged Bass preset and it’s simply playing the root notes with some cutoff modulation.
Here’s the end result, with the new set of plucks coming in later in the part to add energy:
For more tutorials on Polyrhymths follow our Passing Notes series.
This content is supported by K-Devices. If you want to read more about content funding on Attack Magazine and how we can continue to provide content to you for free, visit our content funding page for a breakdown of our editorial policy.