This channel is sponsored by
 Roland Cloud is your creative hub for Roland hardware and software. Access legendary recreations of Roland Classics, find new sounds for your favorite products, and download updates and companion apps to make music fast and easy. Visit Roland Cloud
In this quick tutorial, we demonstrate how to use compression to get a big reverb without the wash.
Who doesn’t love a huge reverb? It can bring instant atmosphere as well as add gravitas to even the smallest of sounds. And let’s face it: everything sounds better with reverb. From vocals to pads to effects, reverb can turn a dull sound into one full of life.
Reverb was traditionally used to add space to a mix. The more reverb you introduce, the further back it pushes the sound. In some cases, this is just what we want. But just as often what we want is an upfront sound accompanied by a wall of reverb. How to get that balance right?
Thankfully, we can use compression—specifically sidechain compression—to carve out a space in all that, well, space.
We’ll go from this swampy mess:
To a sound that is upfront and clear, like this:
We’ll be using Ableton Live but the theory applies to any DAW. As always, click on a picture to see a larger image. Let’s get to it.
Step 1
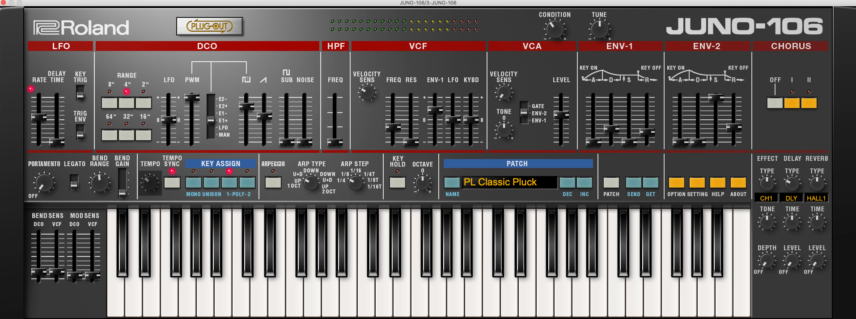
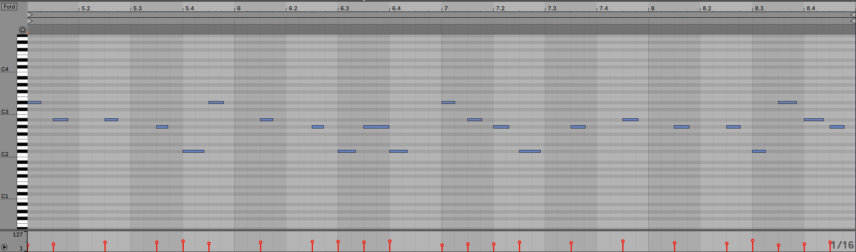
We start by programming a melody for our plucky sound. We’ve gone with something from the Roland Cloud Juno-106. We added Ableton Live’s Compressor after it with just a little bit of compression to keep things in line.
It’s a nice sound but extremely dry. We want to use a big reverb to fill out the space around it while still retaining its transients.
Step 2
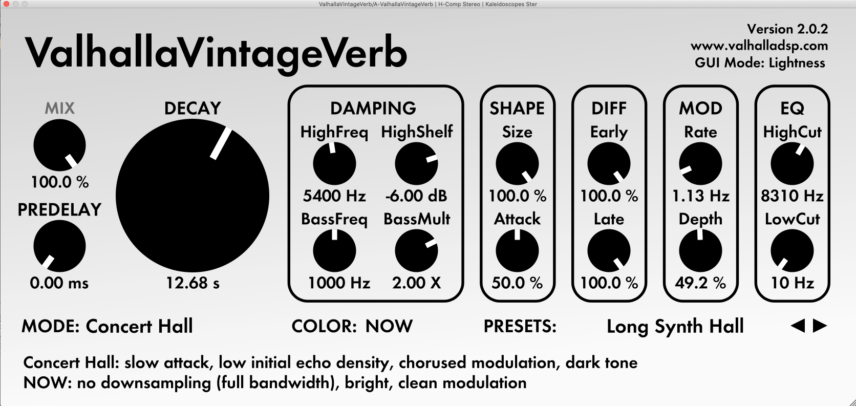
While it might be tempting to slap a reverb across the MIDI channel after the instrument plugin, we want a little more control over things than that will allow. Instead, we use a send track, replacing the stock Live reverb with Valhalla’s VintageVerb. This our go-to plugin for giant reverbs. We settle on the Long Synth Hall preset, as it’s suitably lengthy.
As we’ve placed it on a send track, we make sure to increase the mix to 100%. Next, we can adjust the send amount in Live’s mixer. We want a cavernous reverb sound so we increase the send amount to +5dB. It’s lovely but our pluck is getting a bit lost in the maelstrom.
Step 3
Traditionally, the way to prevent transients from becoming submerged in reverb was to adjust the predelay settings. We can try that with our reverb but because the tail is so long (almost 13 seconds!) it’s not helping much.

Step 4
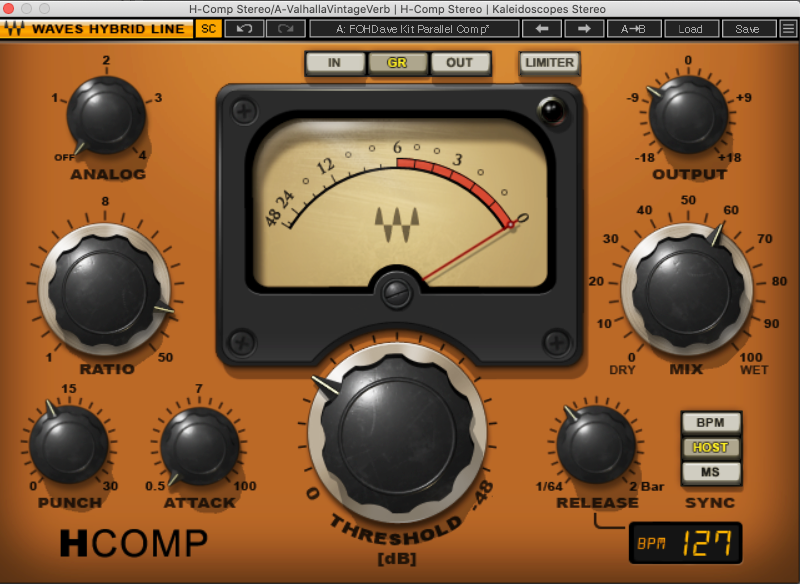
Let’s use sidechain compression to give us some room to breathe. First, we turn the predelay down to 0. Next, we place an instance of Waves H-Comp after the VintageVerb. We call up the FOH Dave Kit Parallel Comp preset as we want something a little heavy-handed.
Right now it’s just squashing the reverb but this hasn’t made our pluck any easier to hear. Let’s turn on the sidechain to address this. Hit the SC button on the plugin and select the appropriate MIDI channel from the sidechain dropdown menu in Live’s plugin GUI. Now you should see (and hear!) the compressor working in time to the plucks.
We make some additional adjustments until it sounds good to our ears. We’ve put our threshold at around -13dB, with an extremely fast attack, moderate release, and fairly heavy ratio. We can also dial back the amount of wet/dry. Parallel processing allows us to start heavy and then back off until we have a good mix.
Step 5
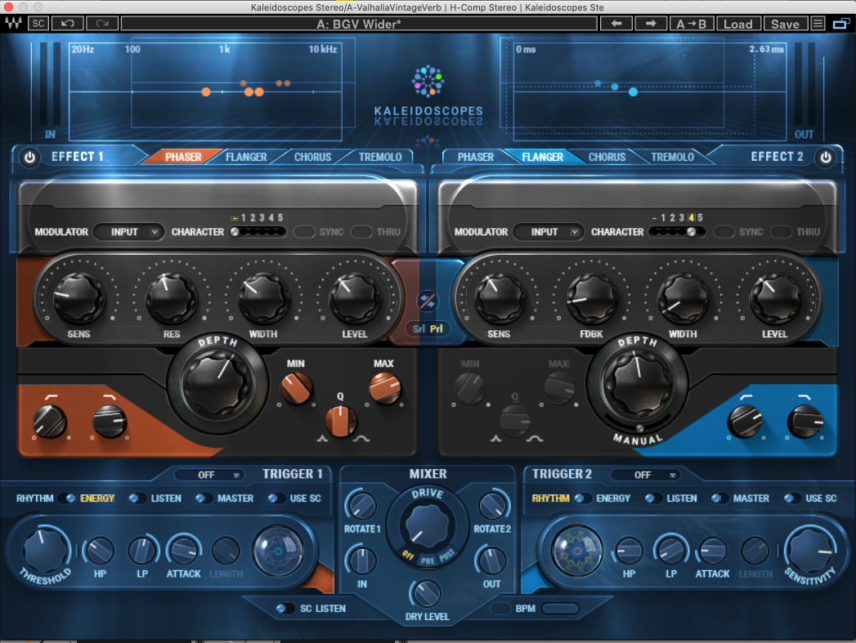
Lastly, let’s get things moving with a bit of modulation. We call up Waves Kaleidoscopes modulation plugin, slotting it in after the compressor, and choose the BGV Wider preset. We don’t need a lot of effect, just enough to give it a dreamy vibe, so we turn the Dry Level knob to -5.5.
Now we have a suitably grand and lush reverb that still allows the pluck’s transients to poke through.
Here’s our big reverb sound in context with an electro-style beat and FM bassline.
Tutorials is sponsored by
Roland Cloud is your creative hub for Roland hardware and software. Access legendary recreations of Roland Classics, find new sounds for your favorite products, and download updates and companion apps to make music fast and easy.