
In this tutorial, we look at three techniques that will ensure that your wide mixes still sound good when collapsed to mono.
It’s the stuff nightmares are made of. You spend weeks working on a new track and finally get the opportunity to debut it in a club on a nice sound system. You’ve made sure your kick and bass are hitting separately and clearly, everything is balanced, and your mix is nice and wide. You cue it up, ready to see those hands in the air, when the bass all but disappears, leaving huge, gaping holes where the pressure was supposed to be. What happened? Lack of mono compatibility strikes again.
While a wide mix can sound great on headphones, car speakers, or your studio monitors, it’s an entirely different story when played back on a mono system. Phones, tablets, and especially clubs are often mono, so any ultra-wide stereo imaging effects will at best just disappear, and at worst result in all kinds of nasty comb filtering.
The good news is, it’s not that difficult to mono-proof your mixes so that they sound good in both stereo and mono environments. Here, we’ll look at three different ways to mono-proof your track and ensure that you don’t end up with big holes where your bass was supposed to be. We’re using Ableton Live but any DAW will get you the same results. As usual, click on any image to see a larger version.
Here’s what we’re aiming for:
Technique 1: Ultra-Wide Bass
Before starting, place the Live Utility plugin on your master channel so you can audition your track in mono at any time. This will be essential, as it will tell you what your mix will sound like in a mono environment.
You may have heard that bass should sit right down the middle of your track. This is true for two reasons. First, club systems are often in mono and even if they are not, the sub certainly will be. Additionally, vinyl-cutting lathes require the heavy bass information to sit in the middle of the groove or it can physically push a turntable’s needle out. The latter may not be as important in the digital 21st century but the former most definitely is. So how to get a Cinerama-style bass sound that won’t lose power in the clubs?
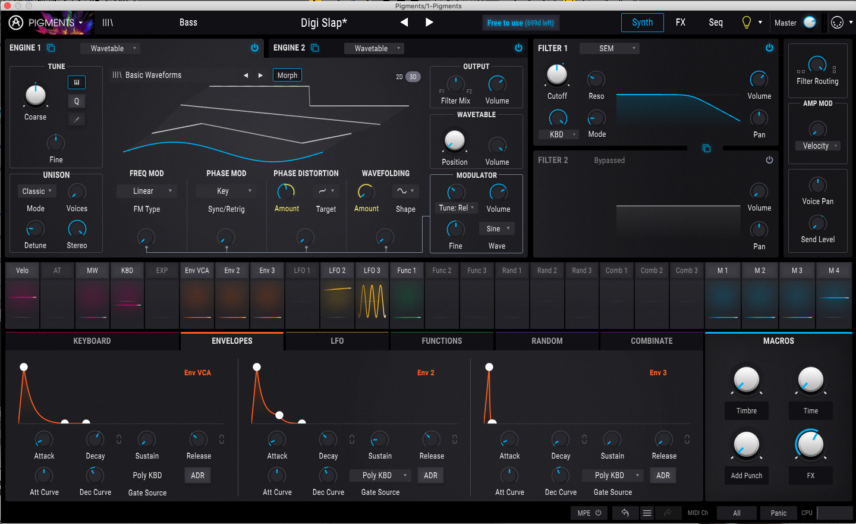
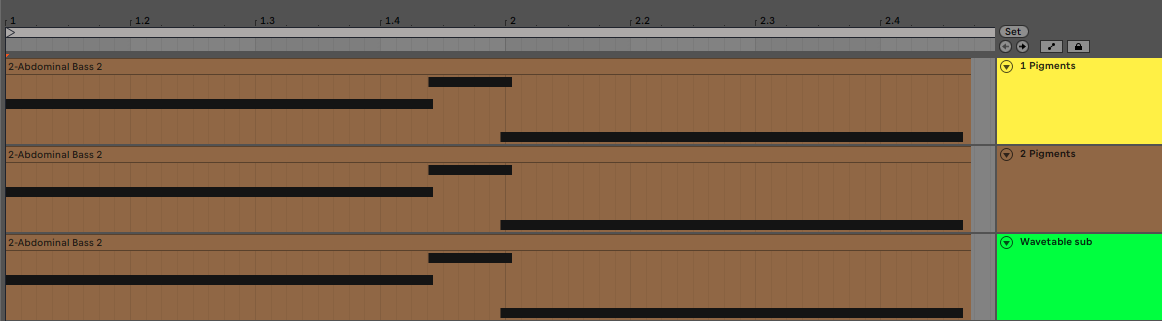
Start by loading up two instances of the same instrument and pan them apart from each other. Make sure you choose comparable but unique bass sounds. We’ve gone with Arturia Pigments and the Digi Slap preset on the left, and the Digipunch sound on the right. It may be tempting to go with the same sound in each channel but they’ll cancel each other out when summed to mono. Even modified versions of the same preset can result in phase cancellation. Make sure that you add a Utility plugin to each channel and hit that Mono button—you don’t want any errant stereo information ruining your hard work.
As we mentioned before, sub weight absolutely has to be in mono, so create a third channel and load up a sub-bass sound. We’re using Live’s Wavetable and a triangle wave sub. Now copy the same MIDI notes across all three channels so they’re all playing in unison. Lastly, add an EQ to each channel of the panned instrument and roll off all frequencies below 200Hz or so.
For some final touches, we send our panned bass patches to Waves’ Abbey Road Reverb Plates on a send, with an EQ to cut lows and prevent mud and rumble. We make sure to check our mix in mono as well using the Utility plugin on the master channel.
Bass in stereo:
And in mono:

Technique 2: Haas Hack Snare
Next, let’s use a modified version of the Haas effect to safely add width to a snare. Create two audio tracks and add the same snare sound to each track and pan them hard left and right. We’ve chosen Snare 909 Hard 1 from Ableton Live. Add a copy of the Utility plugin to each channel and make sure they’re both set to mono.
Next, load a copy of the freeware plugin Sound Delay by Voxengo onto one snare track. This will let us delay the onset of one of the samples. Next, engage the Mono button on the master Utility plugin so you’re auditioning in mono. On Sound Delay, increase the delay in millisecond increments. Keep going until you don’t hear any more comb filtering (basically like a phaser effect without the modulation). We settled on 20ms.
Lastly, create a third audio track and duplicate the snare sample on it. Make sure it’s in mono as well. Now when we collapse to mono, we won’t lose any of our snare. We’ve added Waves’ Kramer Master Tape to the centre snare to give it a little colour. We can also add some reverb to our panned snares as well to enhance the feeling of width.
Top Tip: This trick will work for any sample. Try it with claps, crashes, or risers.
Haas snares in stereo with no center channel:
The same panned snares summed to mono:
Now with the third, centred snare in stereo:
And lastly, the three snares in mono:


Technique 3: Mid/Side Lead
Mid/side processing can give us quite a bit of control over our imaging, not just in terms of position but EQ and transient shaping as well. Let’s see how we can use it to help a lead sound sit in the mix in both stereo and mono.
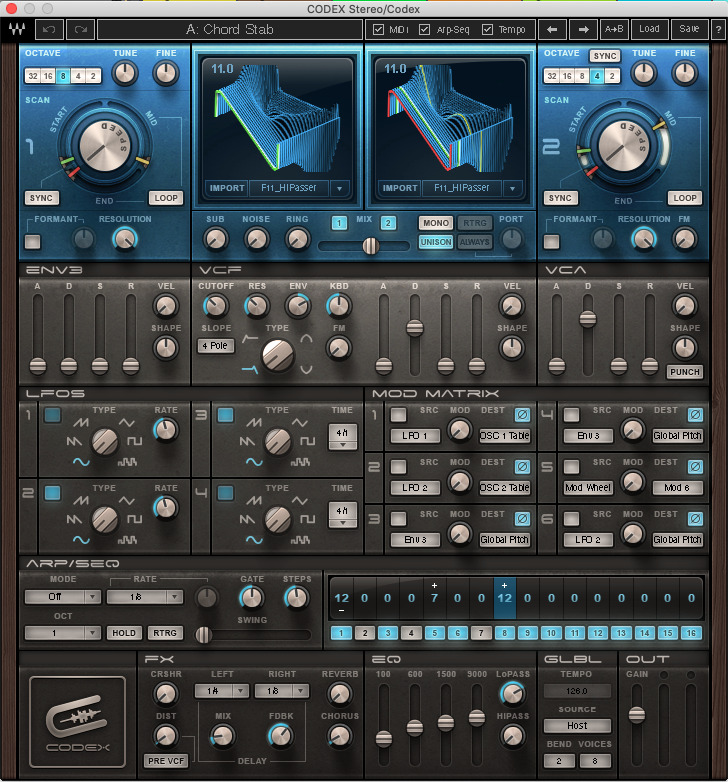
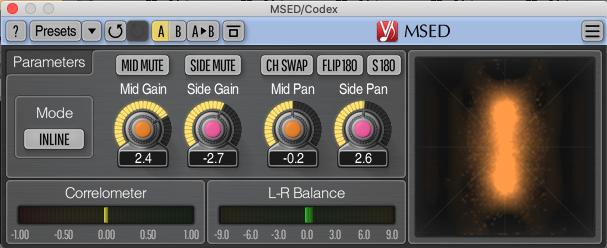
We start with an instance of Waves Codex and program in a lead sound. It has some nice stereo movement already but we’d like to get a little more control over it. Accordingly, we add Voxengo’s free MSED plugin to the channel. With this, we can adjust the gain for the mid (mono) and side (stereo) sections independently. We boost the mid by a few decibels as we want to make it more prominent in our mono mix. We also turn down the sides as well to avoid cluttering our already wide mix.
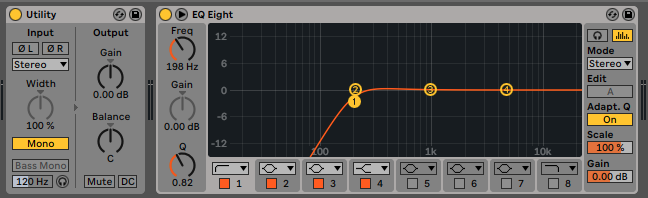
Next, we’d like to fine-tune the frequencies a bit, so we add a copy of Live’s EQ Eight and put it in mid/side mode. This way we can EQ the mono and stereo frequencies individually. We cut the lows in both to make room for our bassline but give the side high frequencies a healthy boost to help them stand out.
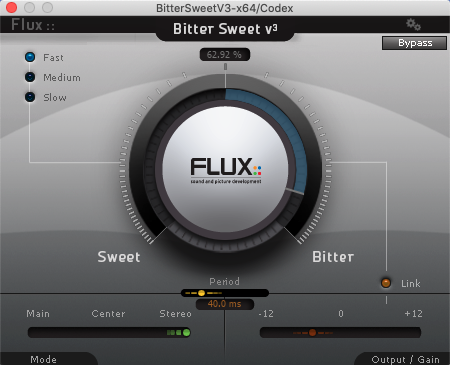
We’d like to add some definition to the sides, so we load up a copy of Flux’s free transient shaper, Bittersweet v3. We put it into Stereo a.k.a. side mode, and crank up the Bitter. This enhances the transients only on the sides. It can now hold its own in the mix better and sounds good in both mono and stereo.
The lead sound in stereo:
And summed to mono:

Lastly, here’s our mix in stereo and mono featuring a drum loop from the UNDRGRND Sounds pack, Warehouse Techno. Note that normally we wouldn’t recommend having so many sounds pushed out the side like this. For the sake of focus, it’s best to choose one sound to highlight and leave the rest within the normal stereo spectrum.
The full mix in stereo:
And summed to mono:
Lead image photo taken by Ingo Schulz on Unsplash.