This channel is sponsored by
 Roland Cloud is your creative hub for Roland hardware and software. Access legendary recreations of Roland Classics, find new sounds for your favorite products, and download updates and companion apps to make music fast and easy. Visit Roland Cloud
In this Tutorial, we program a chord stab and look at how to use advanced filter modulation to create dynamic effects in a breakdown.
It would not be a long shot to say that filters are probably the most commonly modulated effects in dance music. The cutoff opening before the drop, driven resonance resulting in squelchy rhythms, filter envelopes giving a patch its entire character—all of these are part of the daily routine of a producer. What is less common, however, is the use of these tools for rhythmic fills. In this tutorial, we are going to use a wide variety of filters on a custom chord stab patch, drums, a bass sequence and even the master channel to explore how filters can be used for fills and other effects.
As always, click any image to see a larger version.
Here’s what we’re going for:
STEP ONE
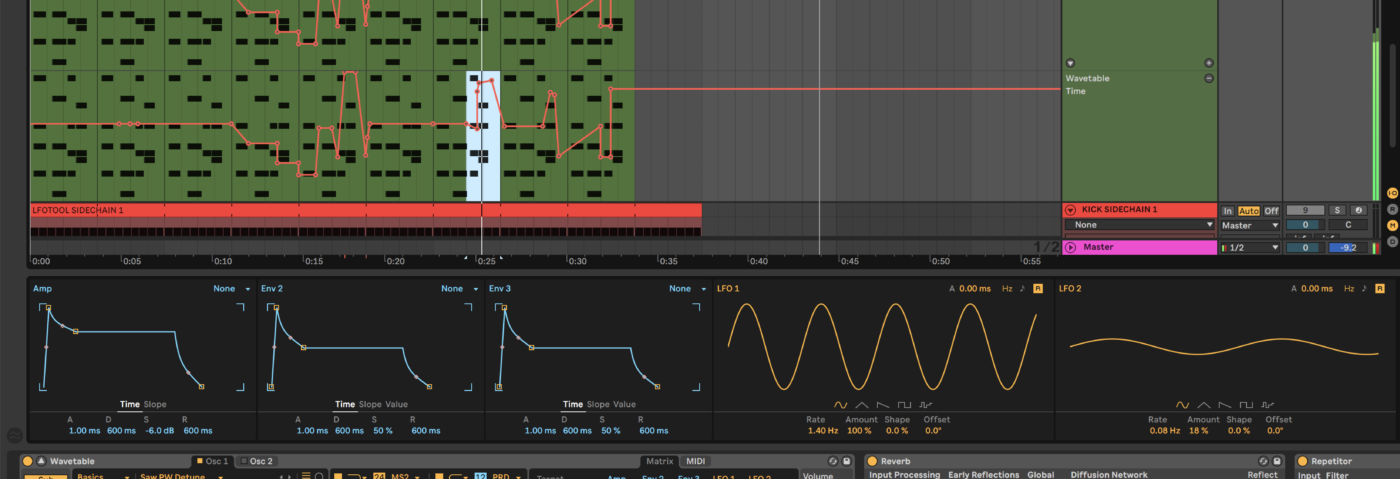
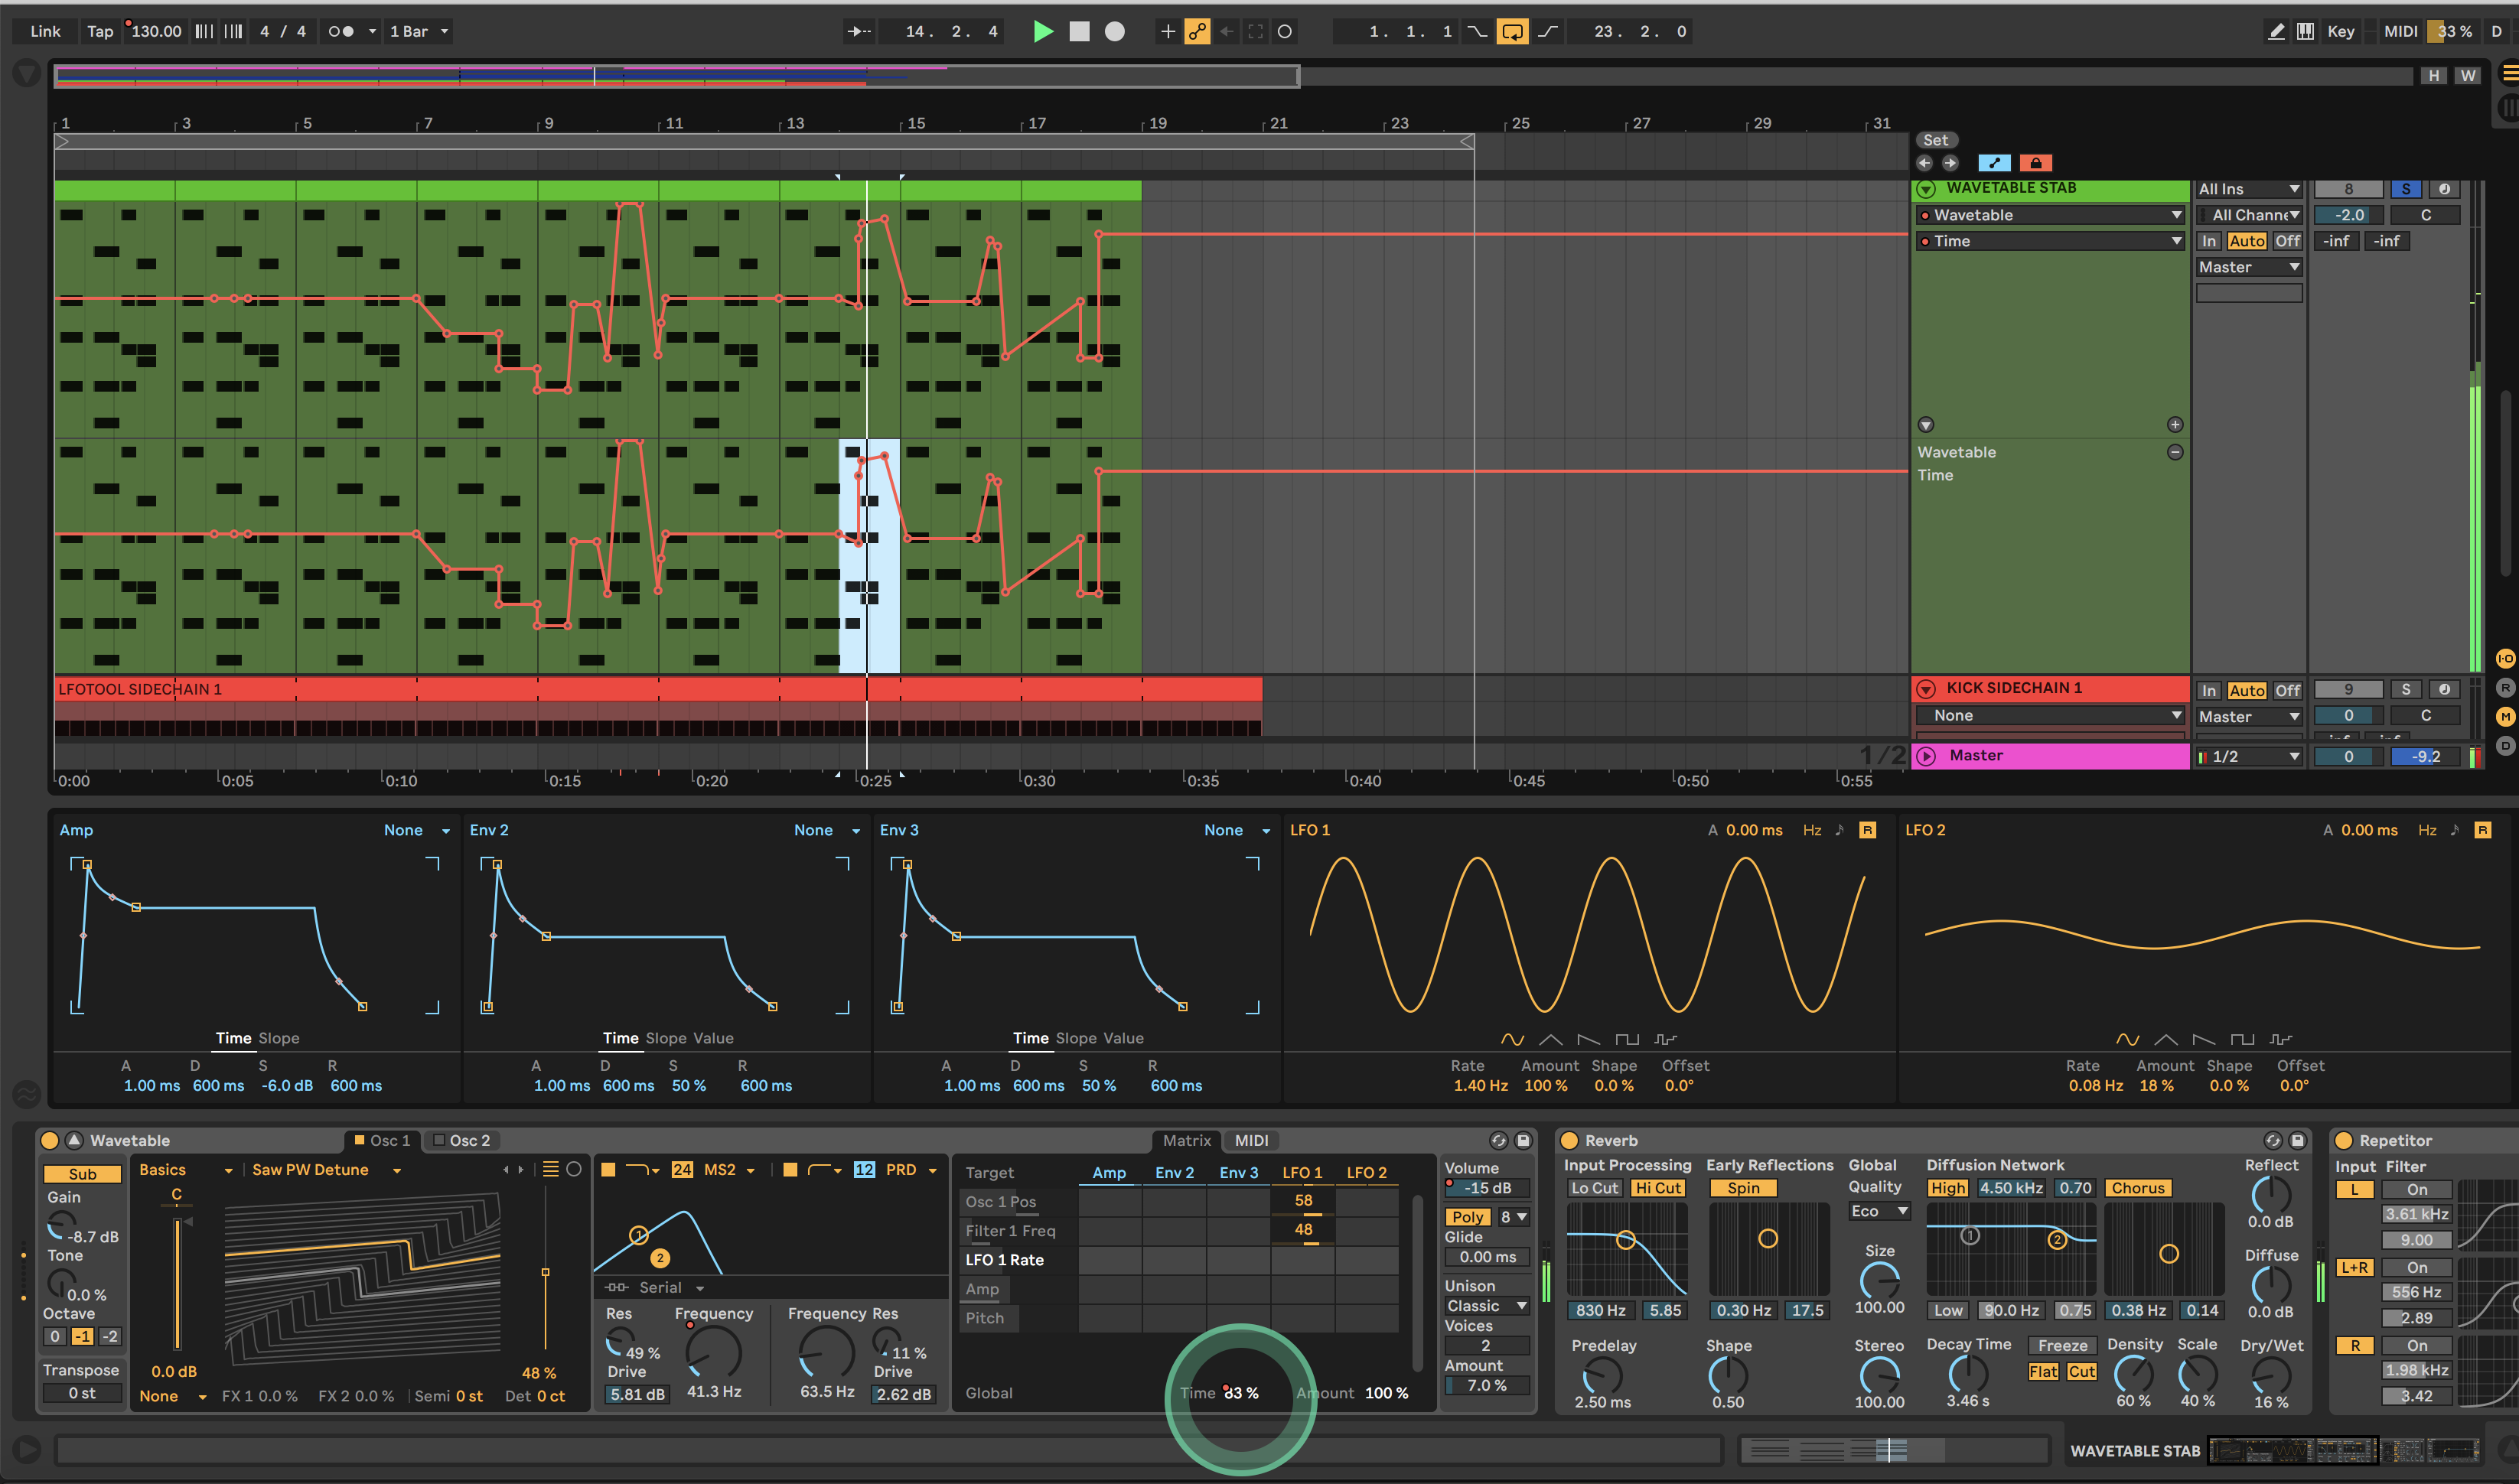
First, use Live’s Wavetable instrument to create the chord stab patch.
Select Saw PW Detune from the Basics wave group and activate the Sub oscillator with -1 selected. Lower the sub’s gain by around -9dB.
In the filter section select MS2 mode for the low pass filter and set its slope to 24. Increase the filter drive for some saturation and set the frequency low, at around 50-60Hz.
Next, map the Oscillator 1 Position (the fader to the right of the waveshape) and the filter Frequency to LFO 1 in the modulation matrix by 58 and 48 respectively. Set LFO 1’s rate to 1.40Hz, leaving all other parameters at their default.
The secret ingredient for this patch and its filter automation capabilities is the small Time parameter at the bottom of the modulation matrix.
Increasing this parameter slows down all modulation in the matrix while moving it into the negative speeds all modulation up. Because of this, it is one of the most powerful parameters for automation in any of Live’s instruments. In fact, when Ableton first introduced Wavetable in 10.1 this parameter could not be automated and the feature was added later—probably due to popular request!
As a default, we left Time at around 19% as a starting point.
Add some reverb and delay for ambience and cut the lows with an EQ. We used the Repetitor present in Live’s Filter Delay with the wet knobs slightly reduced.
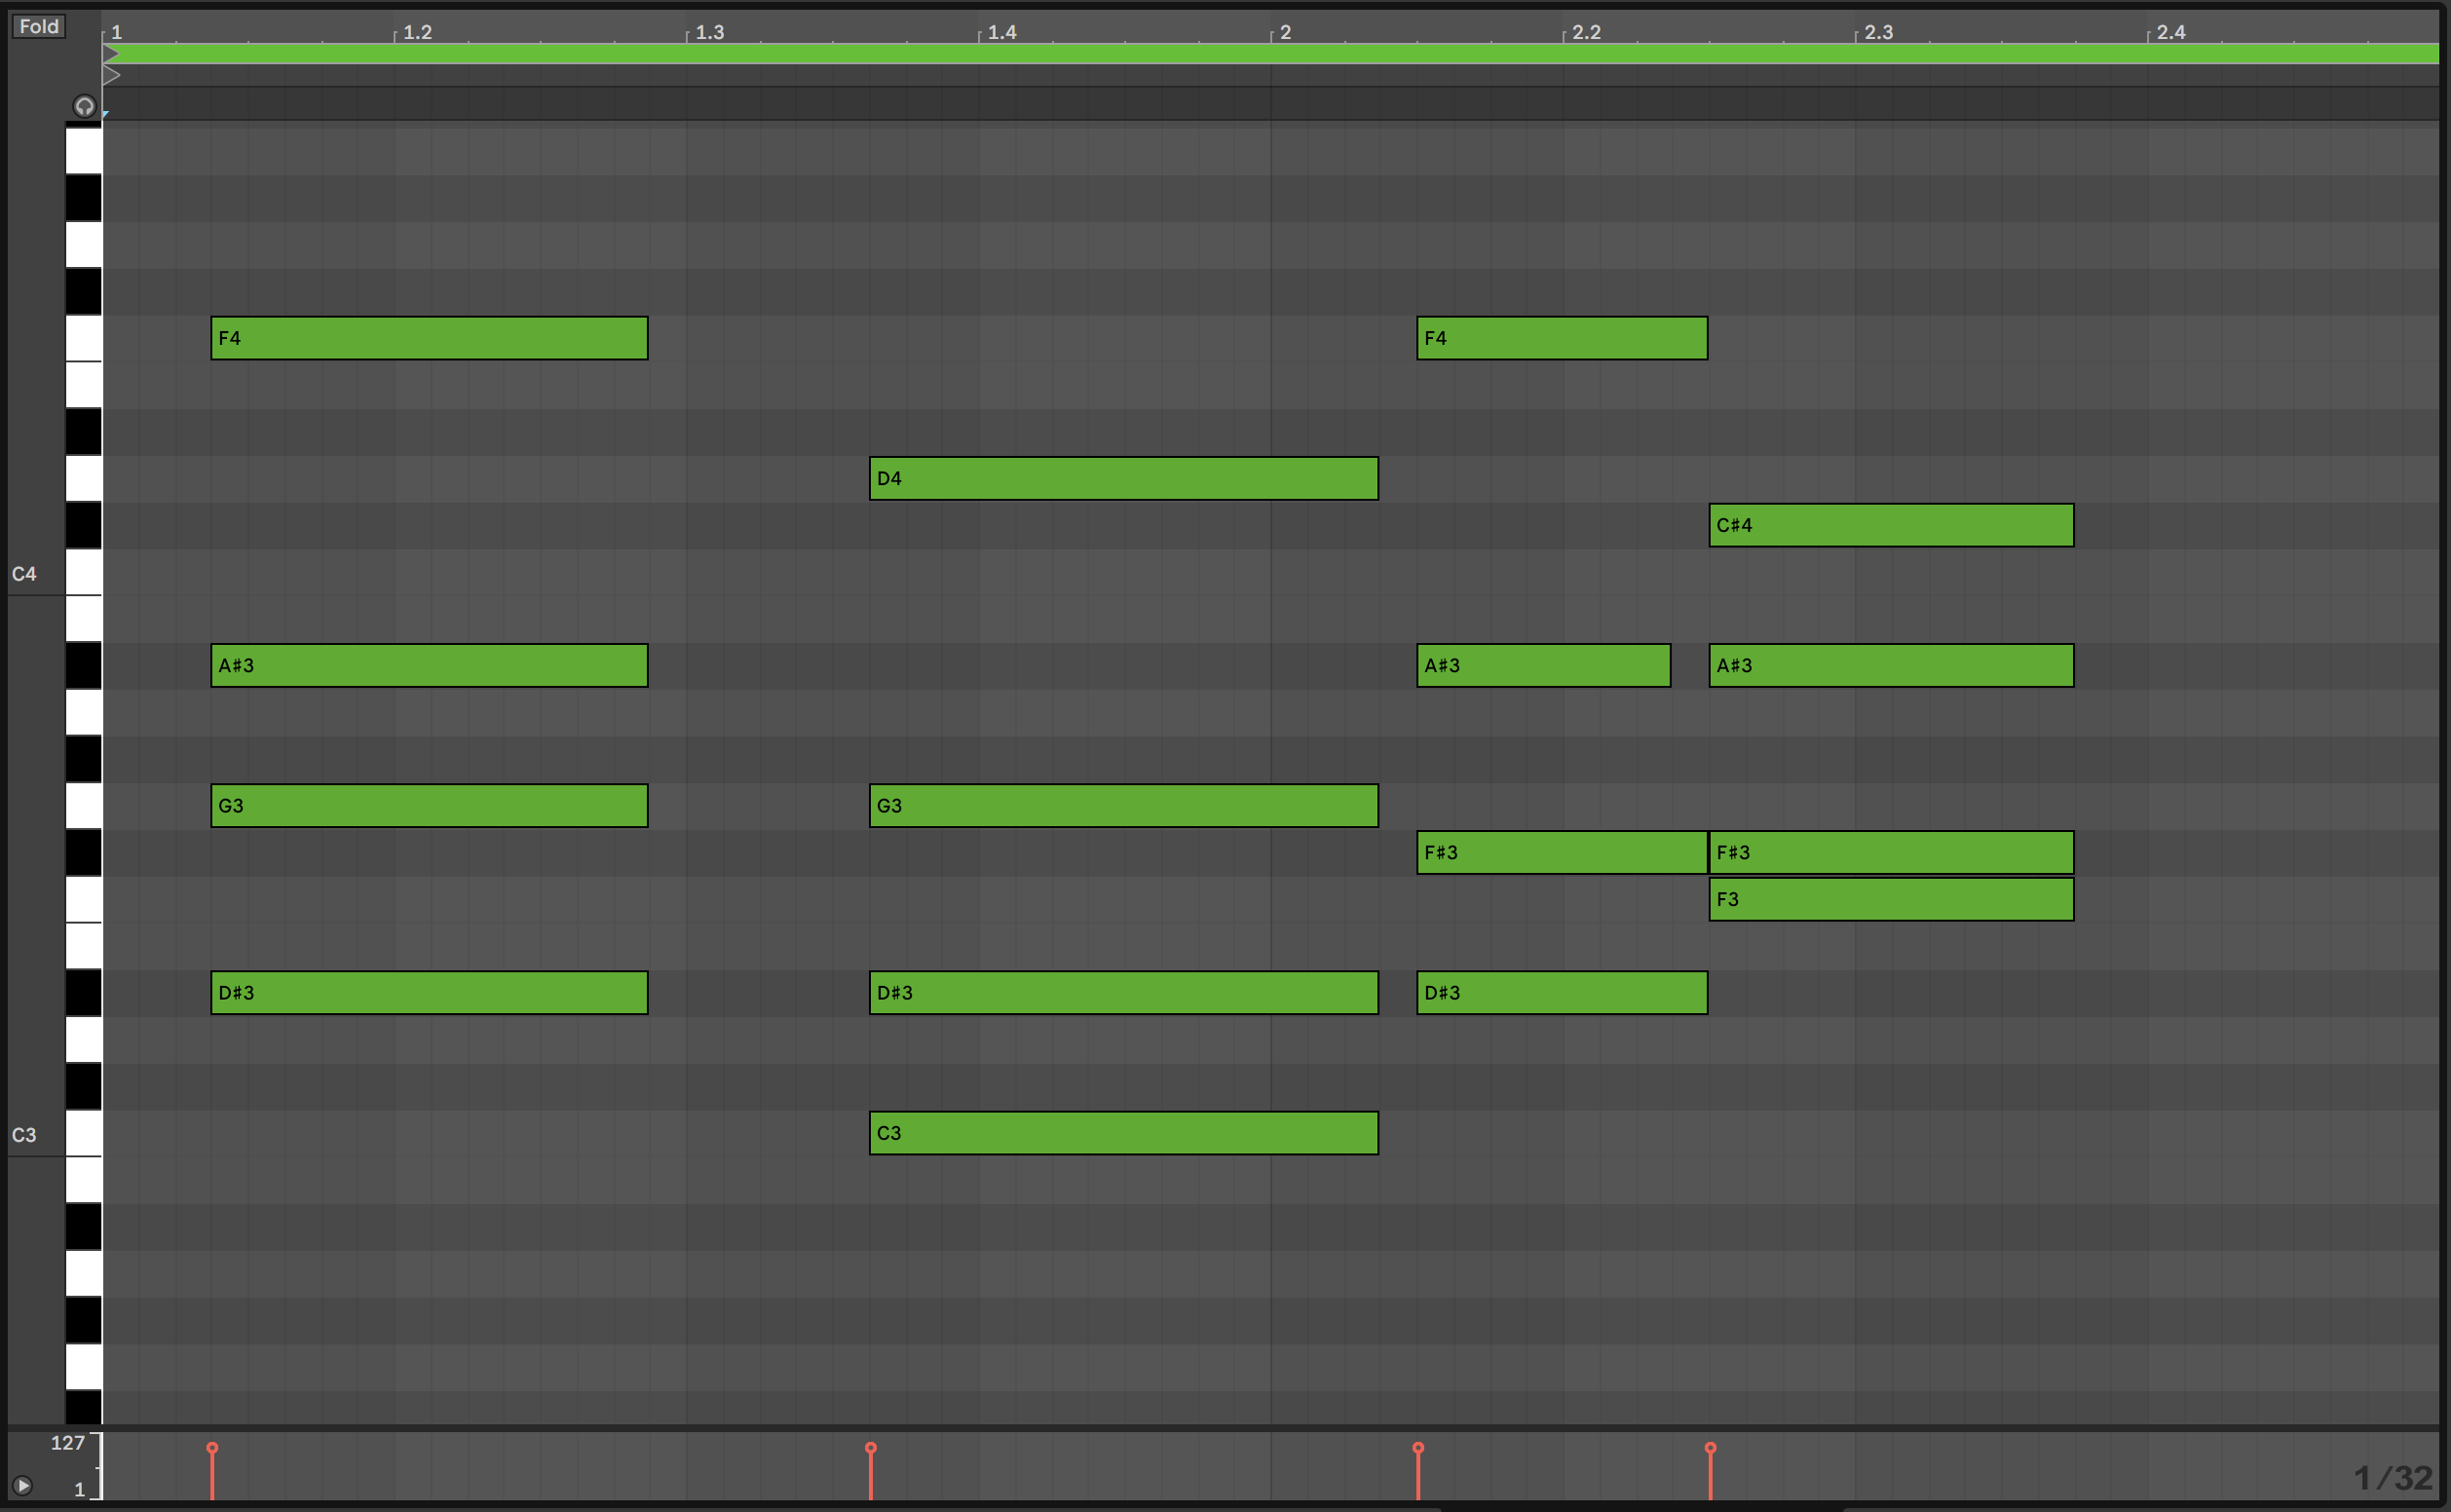
Program your chords to taste and experiment with their timing so that the filter fills’ rhythms can be even more syncopated. To do this, we used a 32nd-note grid. We also slightly modified the chord timings after the drop for contrast.
The chords in our progression go:
D# major 9 > C minor 9 > D# minor 9 > F# major 7 (3rd Inversion)
The next step is automating both the Frequency and Time parameters. You can really get creative here so experiment with all manners of automation curves!
We have the filter frequency opening up during the breakdown and then closing back down after the drop with occasional rises afterwards for contrast.
The Time automation begins right before the drop and increases tension with rhythmic fills. To truly emphasize the last Time fill, we muted all other instruments right before the drop. We emphasize the fill again at the 25 second mark by filtering the drums.
Always make sure your filter fills are audible by giving them some space in the mix!

STEP TWO
You can use any drums you’ve programmed for this step. We simply programmed a top-style loop with a shaker and delayed-clap pattern, along with a four-to-the-floor kick and percussion loop that comes in for the drop.
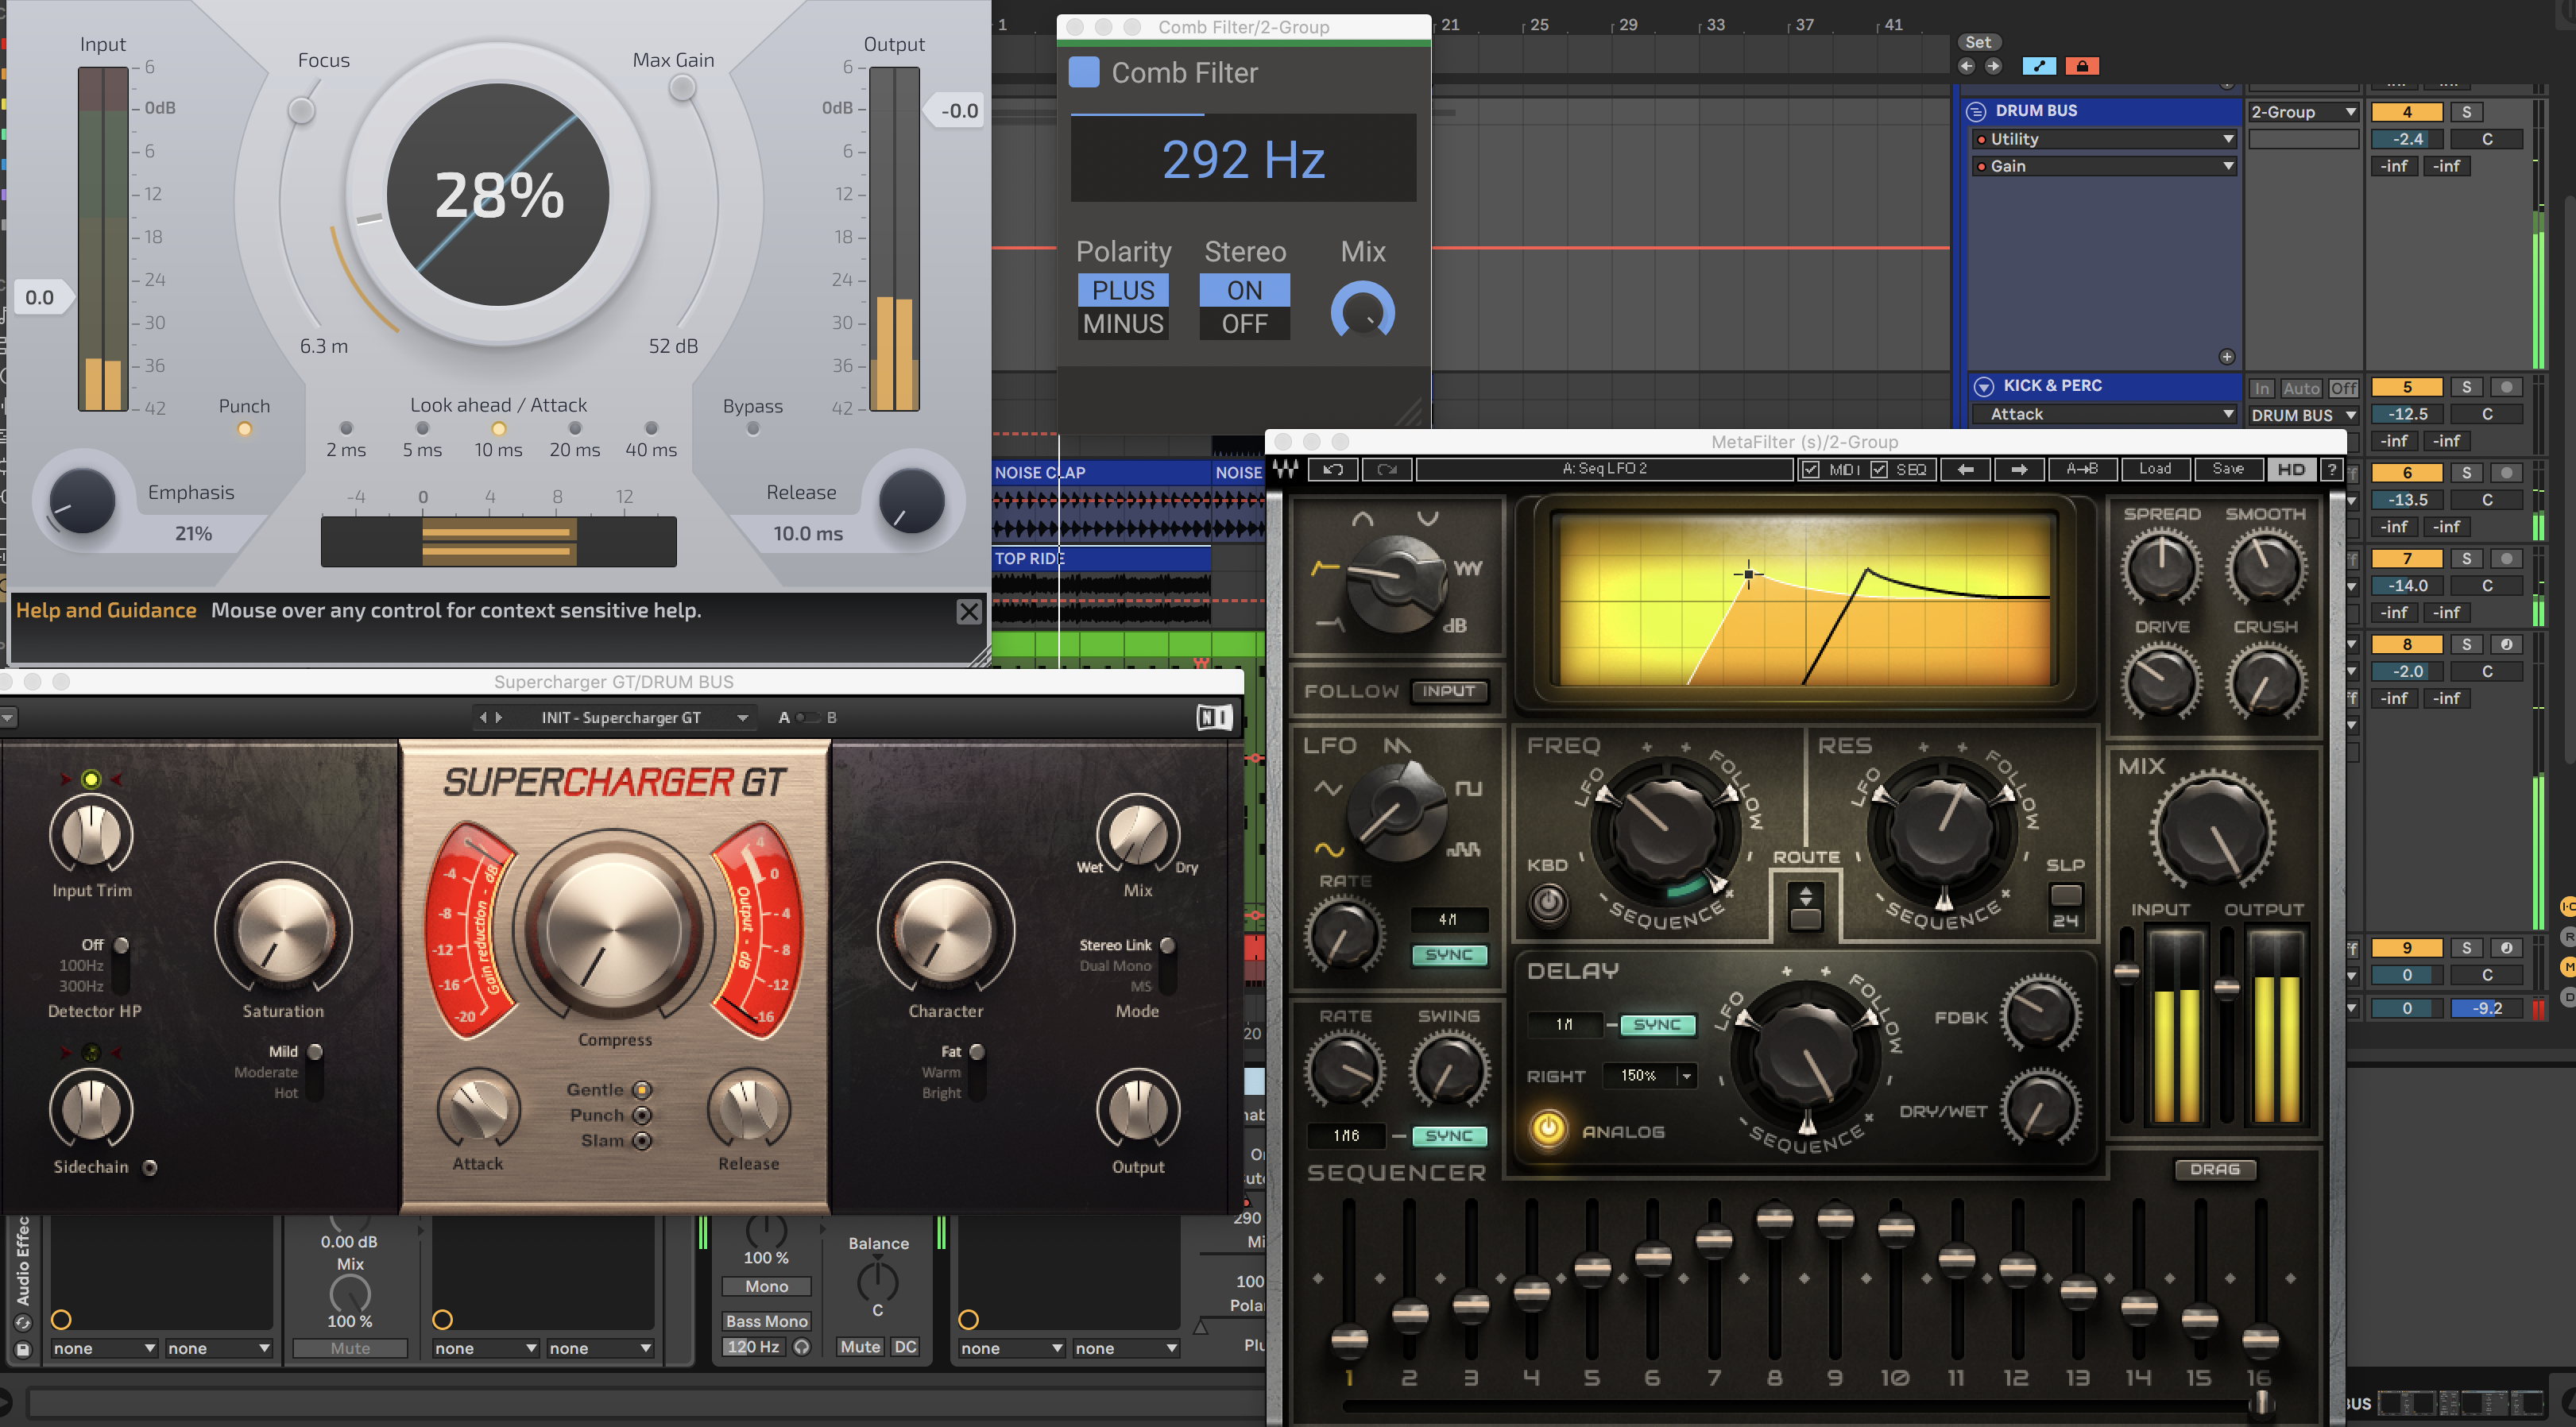
To make the drums more dynamic we are going to use filter plug-ins instead of programming drum fills or additional drums.
The first one is Kilohearts’ Comb Filter. This plug-in sounds like a highpass filter mixed with a flanger so it is ideal for a breakdown. For the beginning without the kick, program the comb filter frequency to increase slowly from around 100Hz to 3kHz. Because of the filter’s character, this will make it sound like the signal’s pitch is rising.
Toward the end, program more automation but this time try speeding up the automation of the frequency for more flanger-style effects. Live’s shape presets that show up when you right click the arrangement window are very useful for doing this quickly!
Automate the comb filter to be off when the frequency is not being automated because otherwise, it will reduce the oomph and lows of the drums.
The second filter plug-in we will use for drum fills is MetaFilter by Waves. This time the method is easier: simply choose a preset that sounds good and automate the device to be on at the exact moment you want the fill.
We used the Seq LFO 2 preset, which is a simple highpass sweep, at second 25 to increase tension while leaving space for the chord’s filter fill.
Apart from these filter plug-ins, we used Native Instruments’ Supercharger GT to compress the drums with UrsaDSP’s Boost to limit and saturate them.
Here’s how our drums sound without any effects:
Here are the drums and stabs together:

STEP THREE
The last element of the beat is an acid-esque bassline made using Waves’ Codex synth. This plug-in has some great presets, especially in the sequence category. We used the Gridex preset and slightly reduced the cutoff.
To launch the sequence, program in one long note so that it keeps playing. The track is in the key of C minor so we used a C note. Now for the filter fill!
As with the drums, insert MetaFilter and select a preset. We used AUTODAFEH-Metafilter HPF Sweeper and automated the device to be on straight before the drop and at the very end.
Here’s the sequence soloed, with Metafilter activated after two bars:
We also added an instance of Xfer’s LFOTool to duck the part when the kick plays, and Waves’ De-Esser to cut some of the harshness in the high frequencies.
Our progress so far:

STEP FOUR
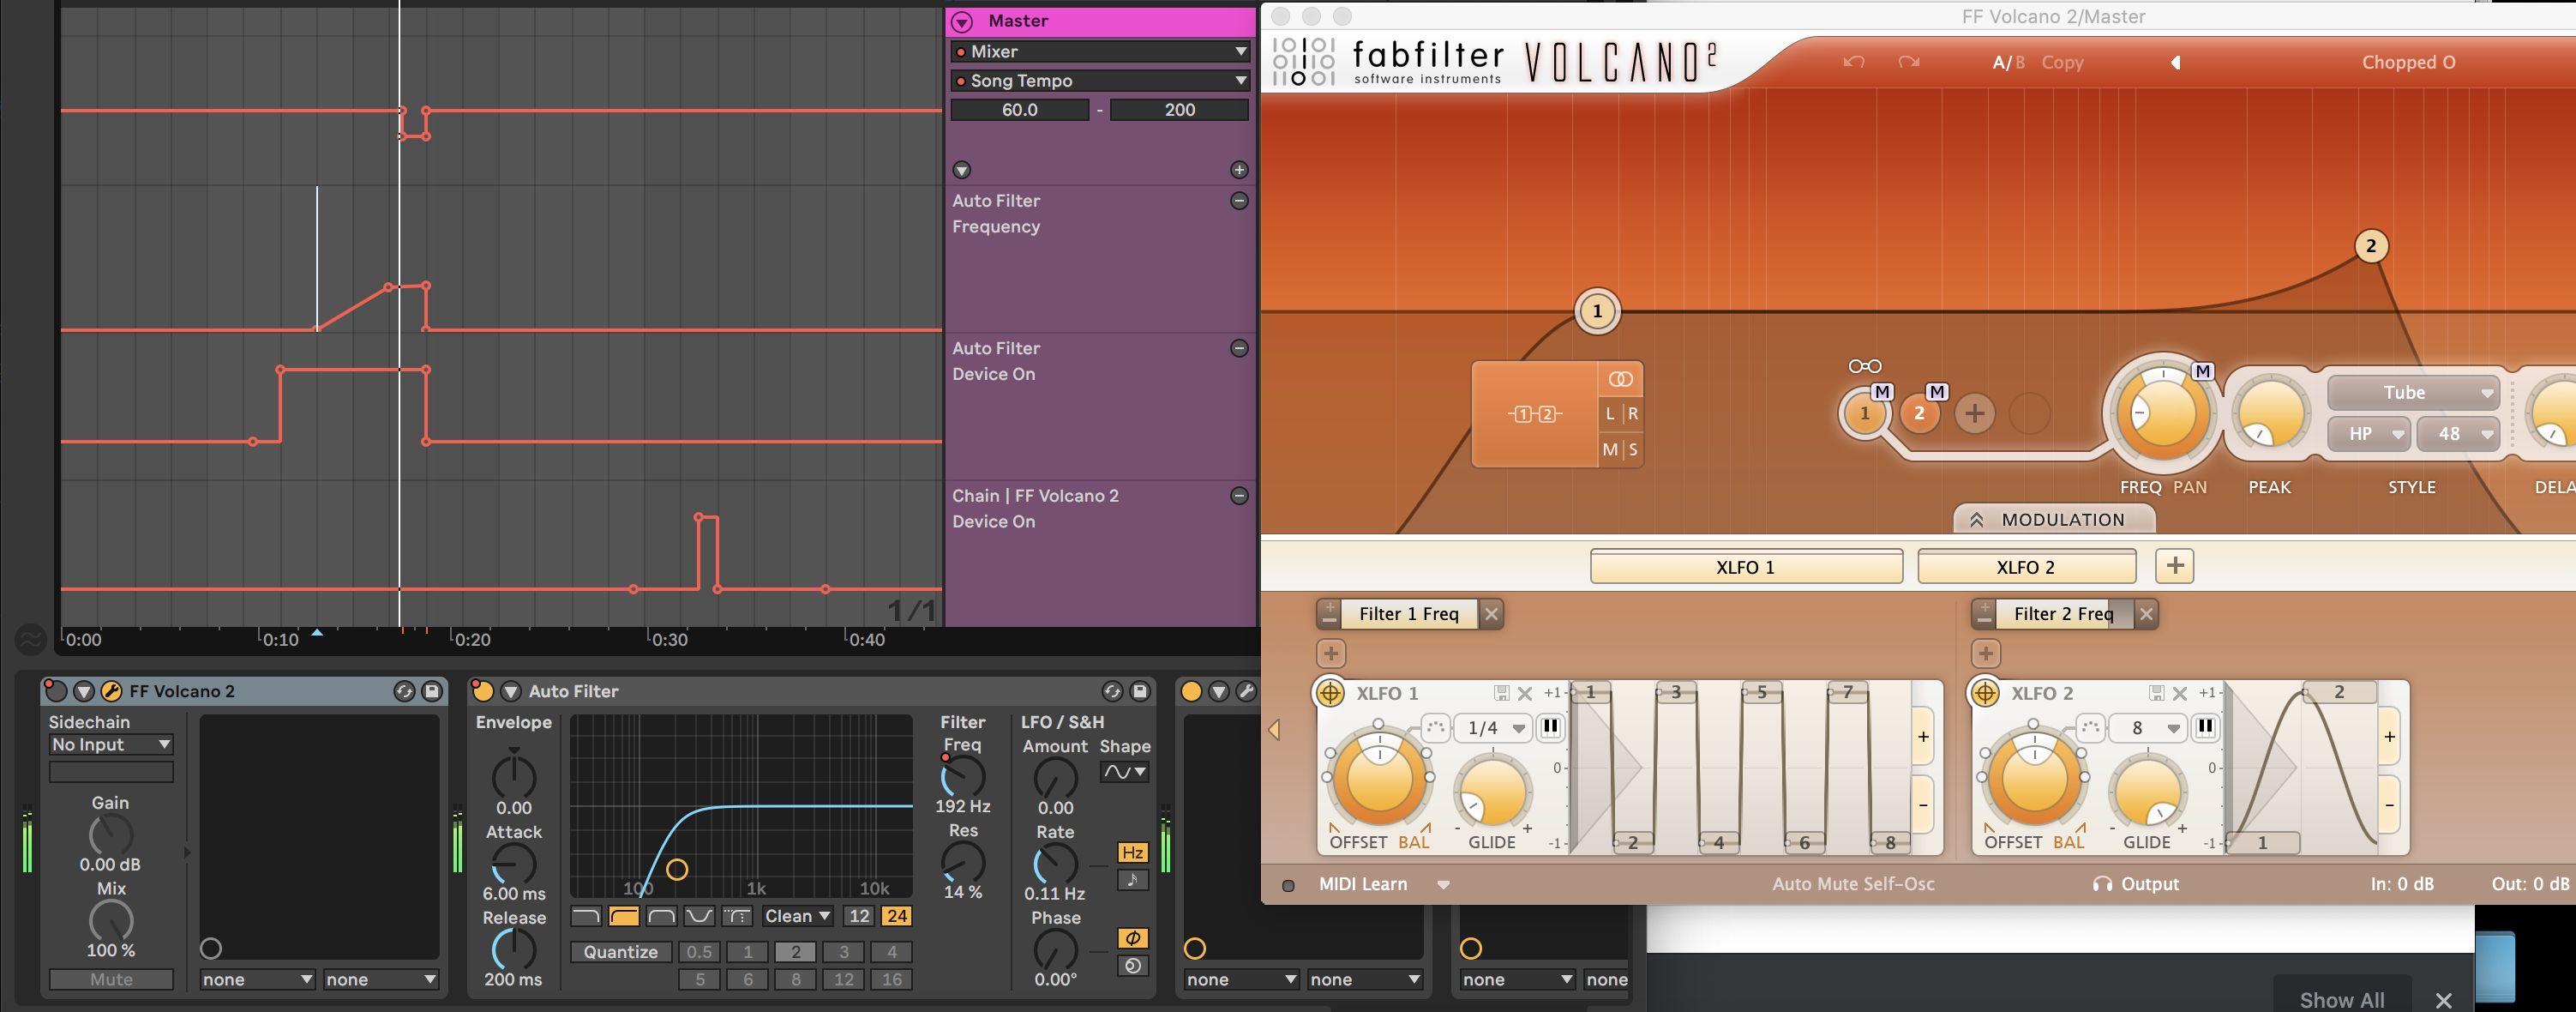
Why not add some filter fills to the master channel as well?
To do this we inserted Fabfilter’s Volcano 2 plug-in and Live’s Auto Filter.
Volcano is a short-cut to all types of filter effects, with a slew of presets and modulation options to choose from. We used the helicopter effect-style Chopped-O preset and automated the device to turn on right when the last chord plays at the 32 second mark.
Set Live’s Auto Filter to highpass mode and automate it to gradually cut more and more lows before turning off right at the drop.
Finally, to create more suspense before the drop, automate the song tempo down by right-clicking on the track BPM and selecting ‘Show Automation’. Bring the tempo down to around 100bpm for the bar where the chord stab is left alone to extend it before the kick finally comes in.
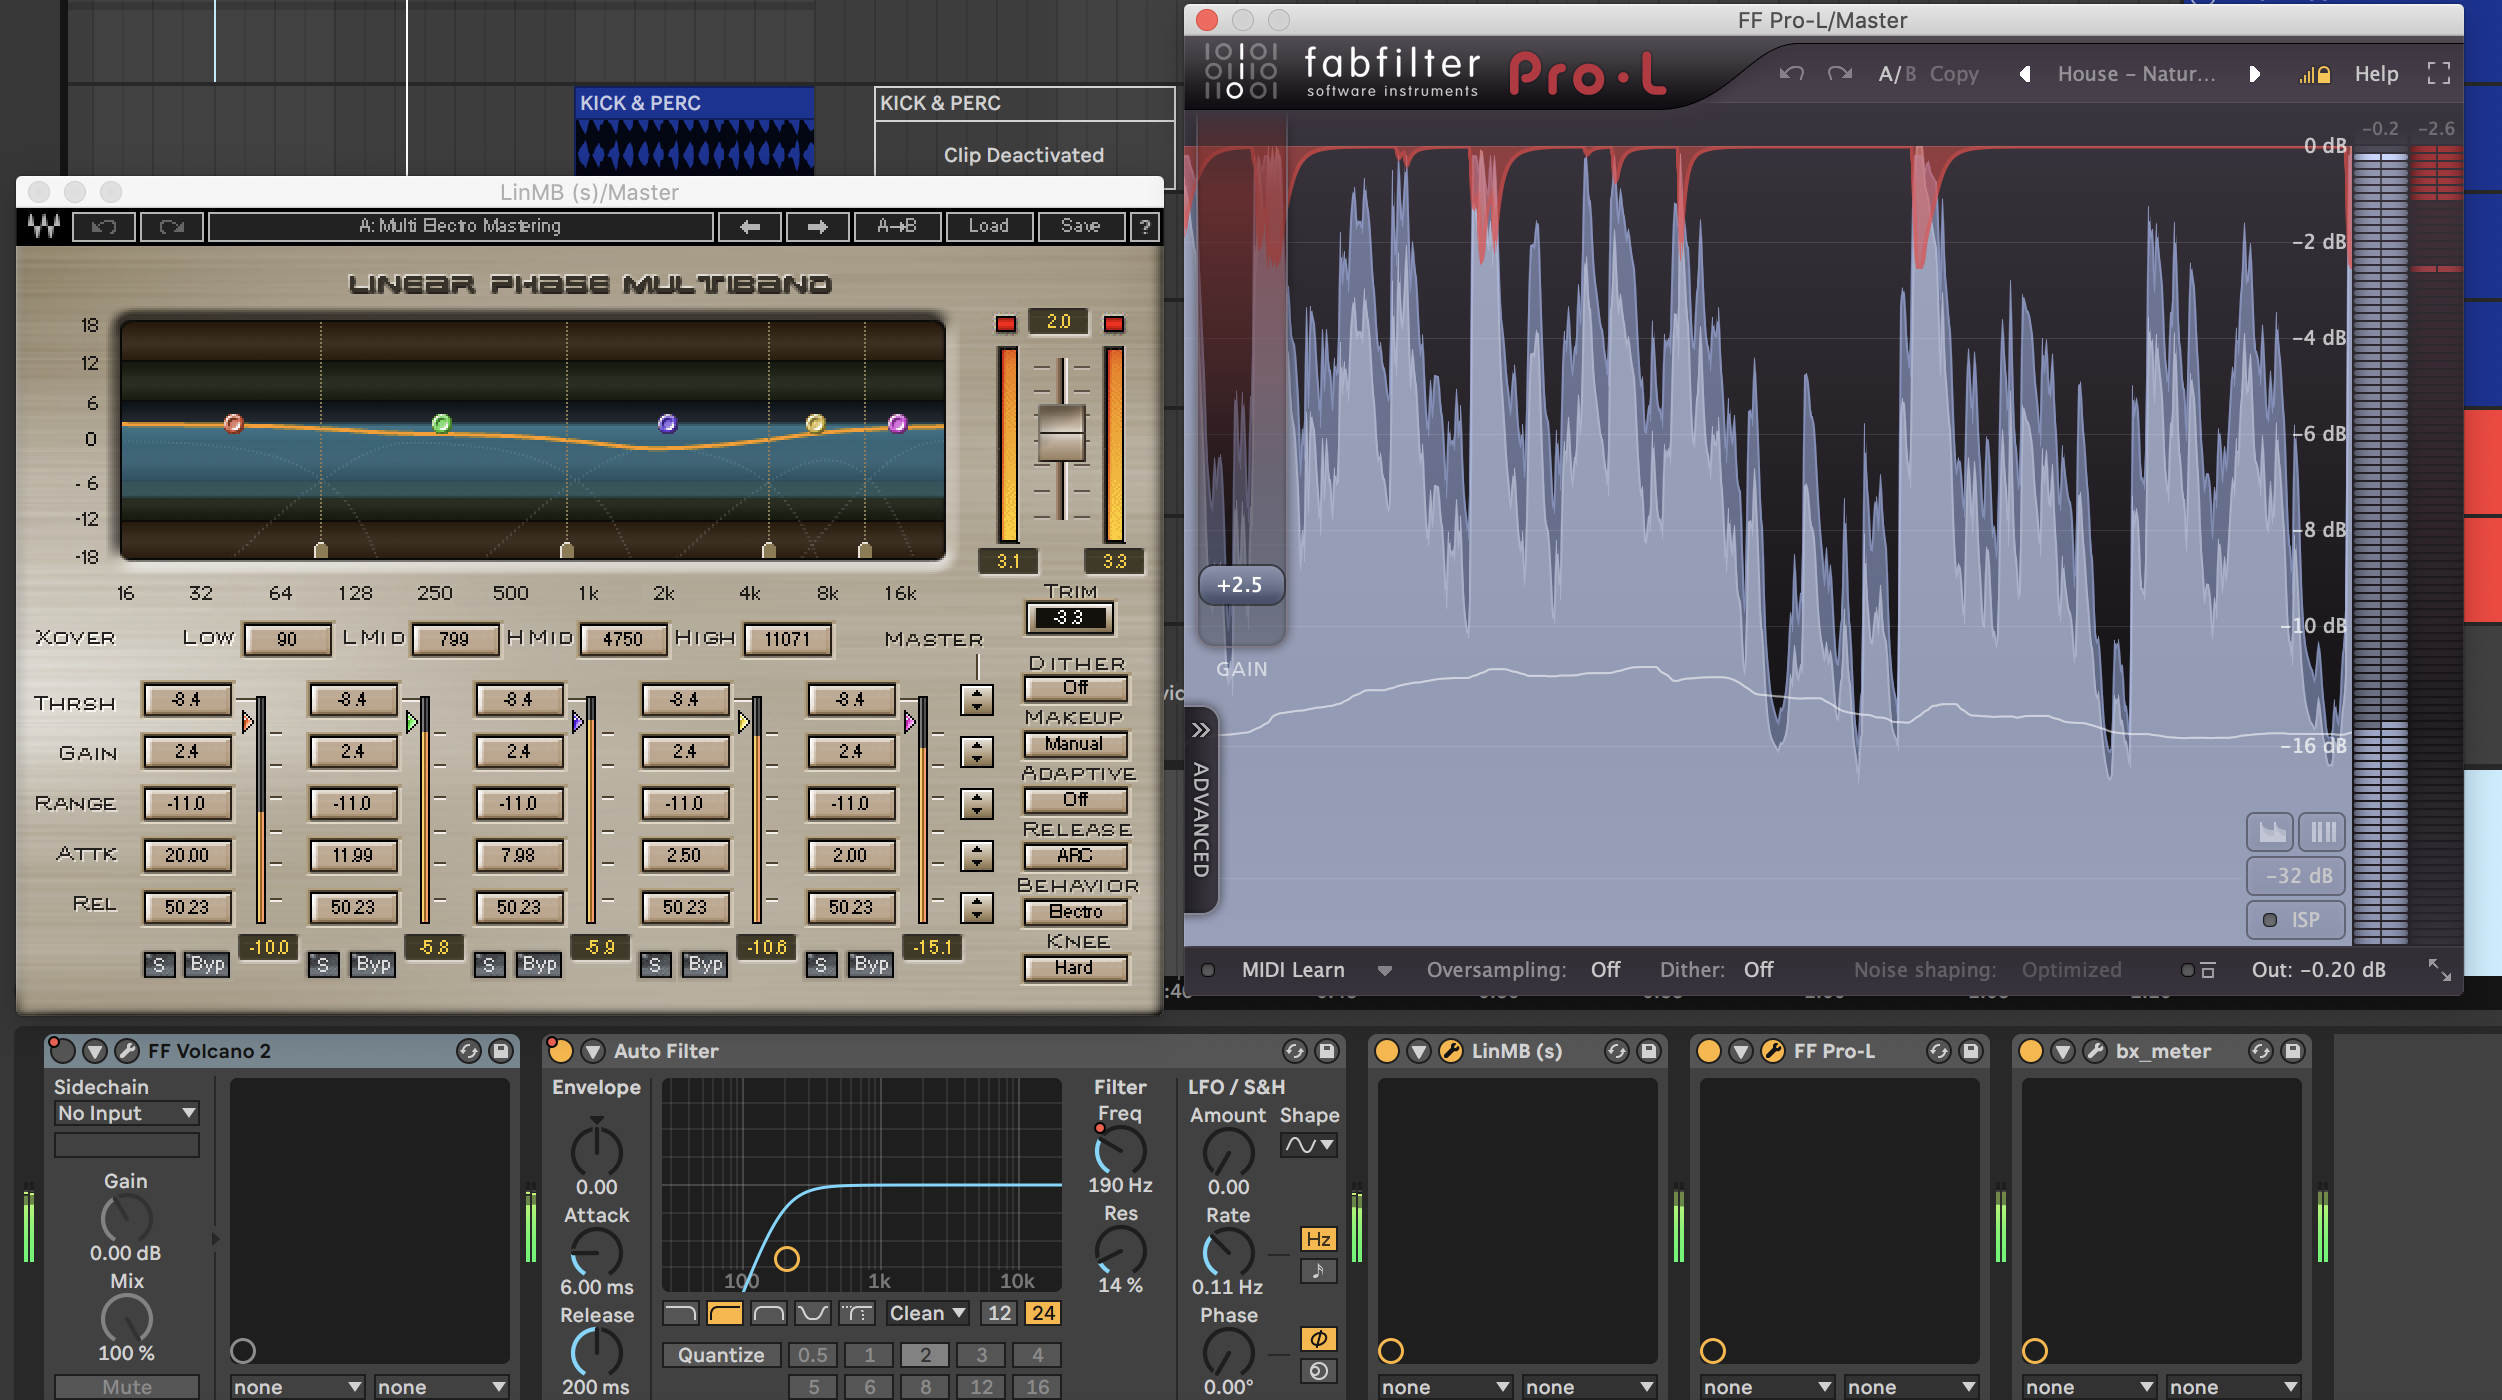
Apart from the filter plug-ins, we added Waves LinnMB multiband-compressor plug-in and Fabfilter’s Pro-L limiter to the master channel for some very basic mastering.
Here is the final result:
Tutorials is sponsored by
Roland Cloud is your creative hub for Roland hardware and software. Access legendary recreations of Roland Classics, find new sounds for your favorite products, and download updates and companion apps to make music fast and easy.