Fall
A classic noise fall – an easy way to learn the basics of FX sound design.
Step 1
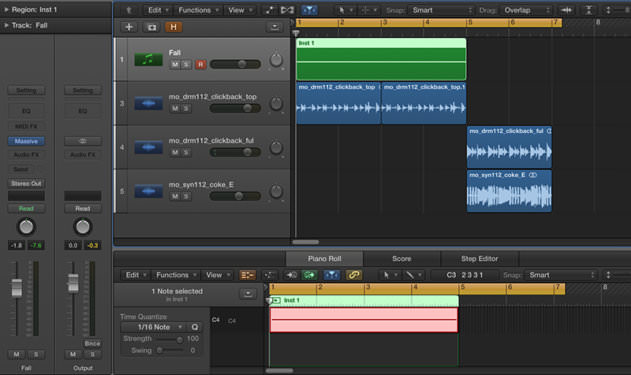
Start by drawing in a four-bar long note pitched at C3.
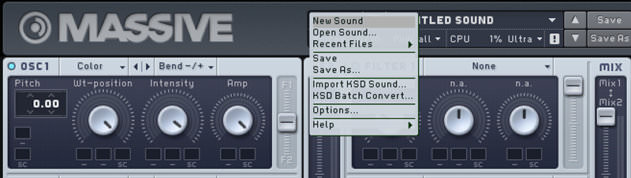
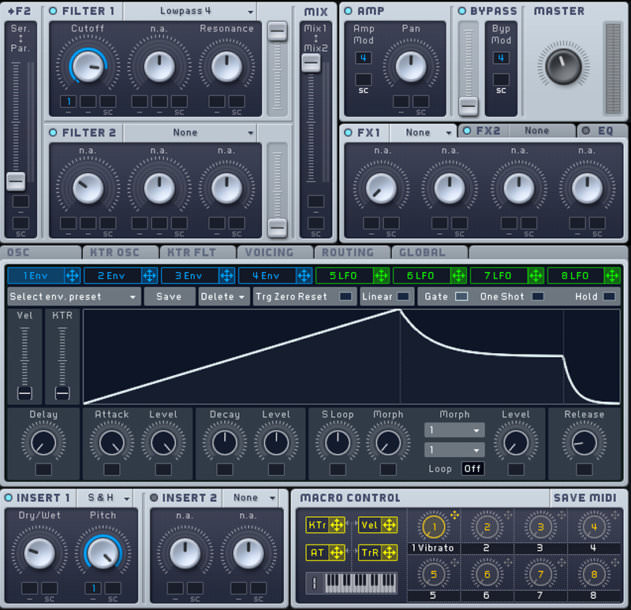
Create a new sound in Massive using the File drop-down menu in the top left of the plugin window and selecting New Sound. Change the Osc1 wavetable by clicking the drop-down arrow next to Squ-SwI and selecting Colors from the FX/Chords section. This defaults to a stacked chord wavetable. Change the mode from Spectrum to Bend-/+ by clicking the drop-down menu alongside Spectrum.
Step 2
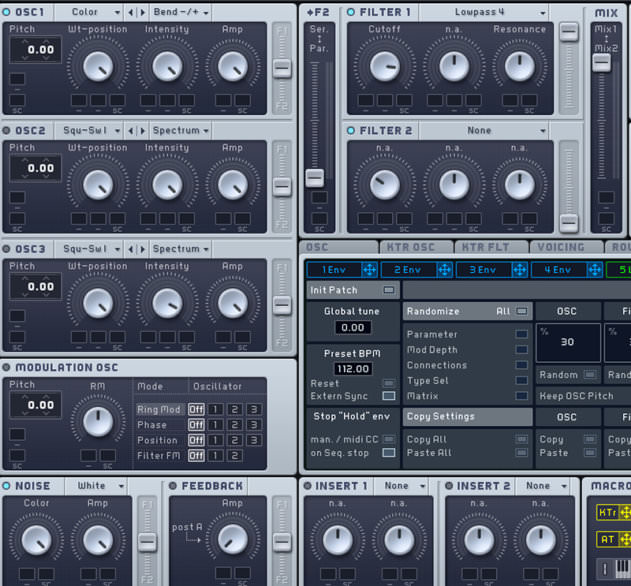
Noise is an essential part of many transition FX. Massive’s noise generator (found in the bottom left corner) is switched on by default but the amp is turned down. Increase it to 100%.
Move to the Filter section and activate a low-pass filter in the Filter 1 slot by clicking the drop-down menu currently displaying None and selecting the Lowpass 4 filter. Set the cutoff frequency to 75% and leave resonance at 50%.
Step 3
The fall effect is created using modulation. To set up the modulation routing, click the blue crosshair to the right of 1Env and drag and drop it onto the box directly underneath the pitch display on Osc1. Now drop a second 1Env crosshair into the left-hand text box below the Color control of the noise generator (the Color control acts like a filter for the noise). Doing so displays a blue number 1 in each box. Click and drag down in the textbox to the right of Osc1’s blue number 1 until it reads -12.00. Then click and drag down on the blue number 1 beneath Color until the blue band reaches all the way back round the Color dial.
With the routing set up, click on 1Env and turn the attack dial all the way to the right for a slow attack. Now 1Env is modulating the pitch of Osc1 and the Color of the noise using a slow attack to create a gradual fall.
Step 4
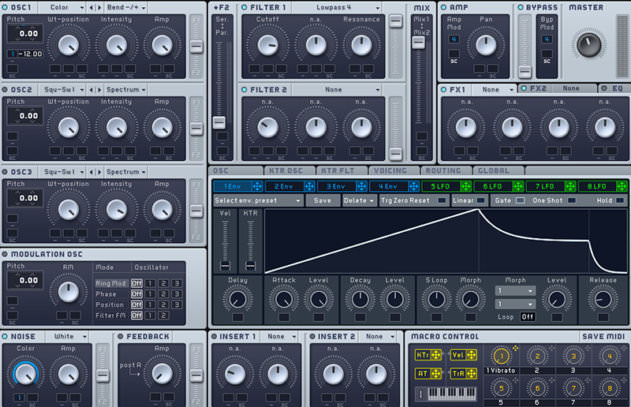
Enhance the effect by routing the same envelope modulation to the Cutoff frequency (follow the same steps: click/drag the 1Env crosshair and drop it into one of the modulation boxes below the cutoff frequency dial). Next click/drag down on the blue 1 until the blue band reaches all the way back. Now the envelope is not only reducing the pitch and Color, it’s also closing the filter.
To add some grit, switch on Insert1 (below the envelope panel) by clicking the power button to the left of the Insert1 title. In the drop-down menu to the right choose Sample & Hold. Turn the pitch dial to 100% and reduce Dry/Wet to around 30%. Finally, apply the same 1Env modulation to the Pitch setting of the Sample & Hold effect. 1Env is now applying a low-pass sweep to the filter and a pitched bit-crushing effect on the insert – as well as the previously set up pitch and Color modulation.
Step 5
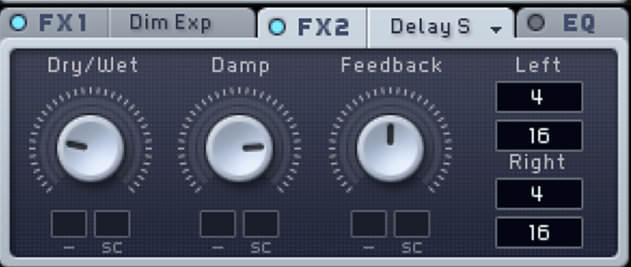
Next, we’ll add some of Massive’s master effects. In the FX1 slot (mid right), load the Dimension Expander effect for instant width and bulk. Leave the dials as they are.

In the FX2 slot, load up Delay Synced, turn Damp to 70% for more high-frequency presence on the delay and reduce Dry/Wet to around 30%.
Step 6
In this example, the fall effect is programmed to sweep down through a 4-bar breakdown section, filling the mix and paving way for a new section in the arrangement.
08.21 AM
Essential cheese, but foundational production chops. nice one attack!
01.12 AM
Thanks a lot, Big Help for me 🙂
03.13 PM
Wish this article came out years ago!
05.18 PM
Extremen usefull for me 🙂 Thx attack magazine!