Effect Send Automation
And finally… a subtle means of signalling and smoothing a transition using nothing more than some light-touch automation. Here the devil is in the detail…
Step 1
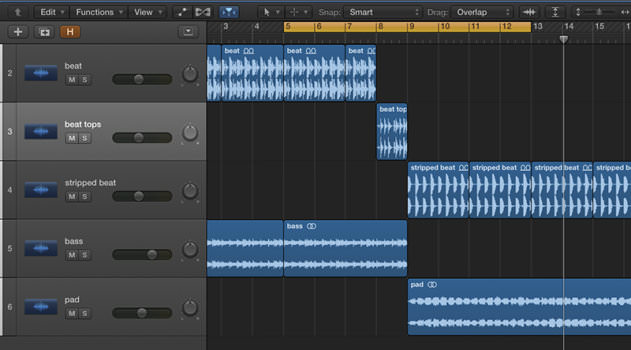
Start by listening to our ‘before’ example – featuring two distinct sections of the track. We want to drop the bass into bar 9 where the pad is introduced, but it currently sounds unnatural and abrupt. We could use a combination of uplifters/impacts to remedy this, but you can also smooth the transition using nothing more than automation and the sounds that are already in the track.
Step 2
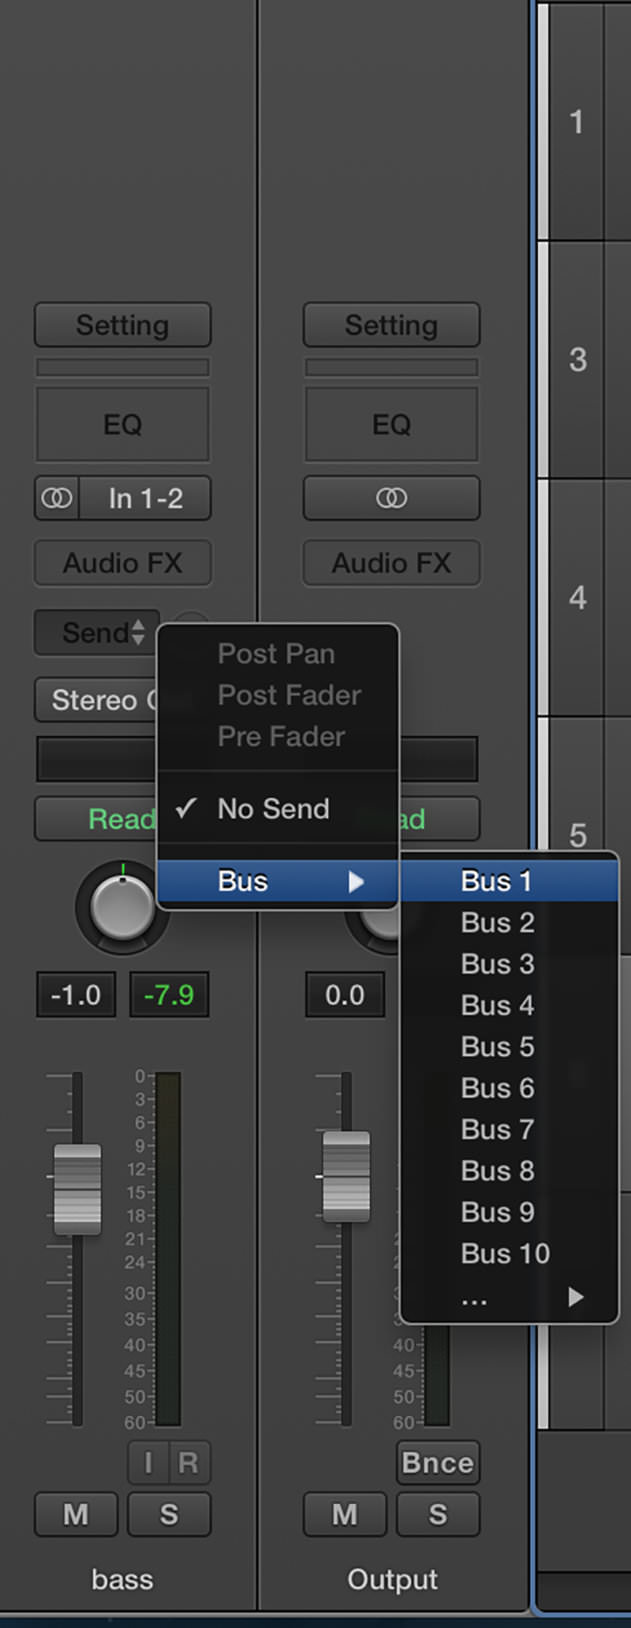
The first thing to do is set up a couple of effect sends from the bass. Different DAWs offer different workflows for this. In Logic, click and hold on the Send box on the channel strip, then choose Bus > Bus 1. When that’s set up, do the same in the slot below to set up Bus 2.
Step 3
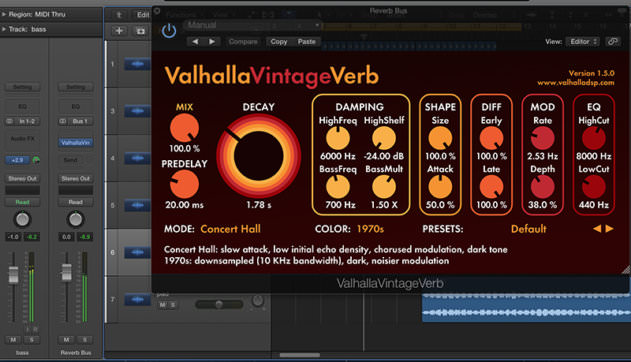
Bus 1 will provide the reverb. As in the other examples here, we’ve chosen Valhalla’s VintageVerb, set at 100% wet mix since we’re using an effect send and the dry signal is already on the original channel.
The reverb is set up with a decay of 1.78 seconds, predelay of 20 milliseconds and a low cut at 440 Hz to reduce muddiness. The bus send from the bass is set at +2.9 dB in this case, although this will need to be adjusted to suit your mix.
Step 4
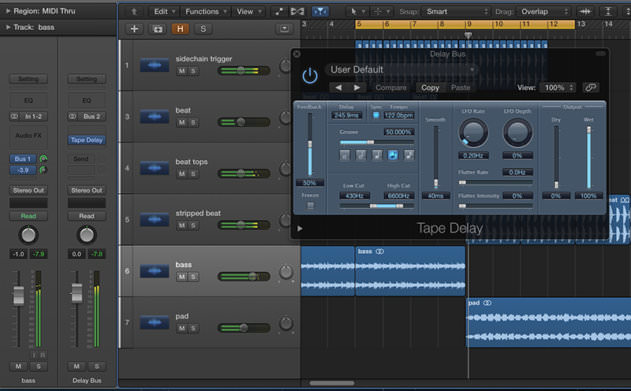
Bus 2 houses a tape delay, again with a 100% wet mix. We’ve pushed feedback to 50%, changed the Groove setting to 8th notes, swept the low cut filter up to 430 Hz and reduced the high cut to 6.6 kHz. The bus sends -3.9dB of signal (again, this will probably depend on your mix)
Step 5
At the moment the bass is swamped in reverb and delay. Automation will change that, taking the effects from zero to obvious.
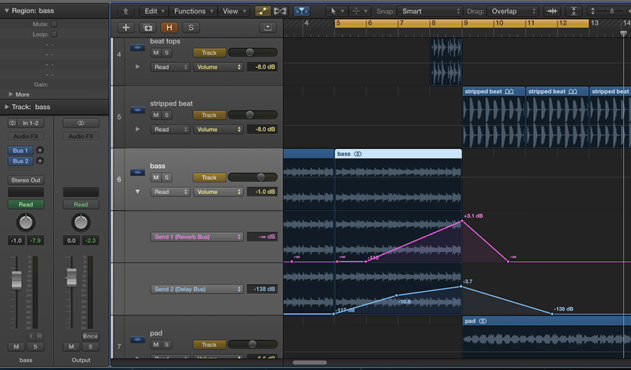
For the reverb, start sending the signal to the bus around three bars before the end of the bass region, so it peaks at the end at before tailing off. For the delay, start sending a bar earlier than the reverb but don’t push the effects as high.
The transition into the pad section is now more natural, organic and interesting.
Step 6
The beauty of setting up bus send effects – aside from saving processing power – is that other sounds in the mix can also be sent to them, allowing for multiple changes across a single transition that still sound unified.
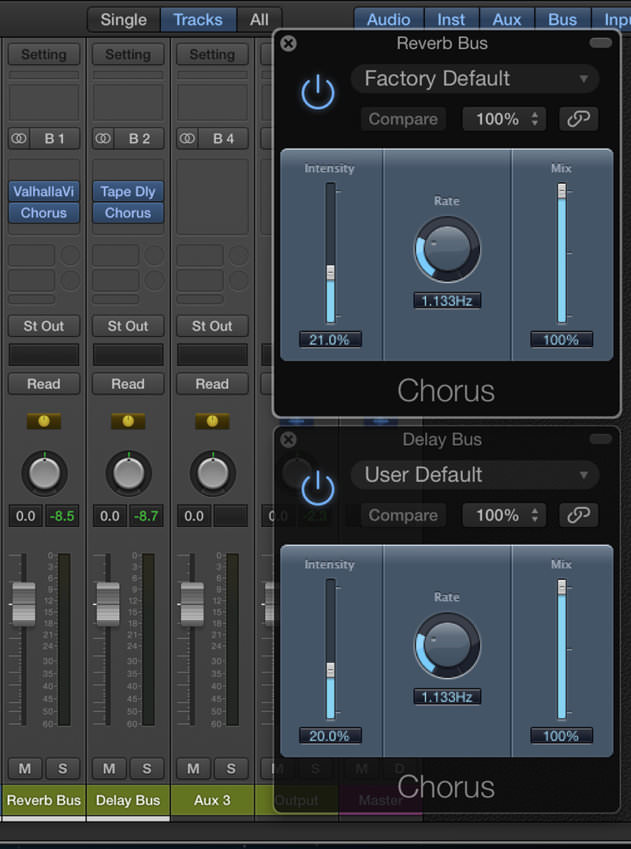
As a final step, you could also place a chorus effect after both the reverb and delay to add depth and sparkle to the ambience.
08.21 AM
Essential cheese, but foundational production chops. nice one attack!
01.12 AM
Thanks a lot, Big Help for me 🙂
03.13 PM
Wish this article came out years ago!
05.18 PM
Extremen usefull for me 🙂 Thx attack magazine!