In this tutorial, we use Baby Audio’s new algorithmic reverb plugin to create drones, hi-hats, reversed melodies and tempo-synced room ambience.
As far as reverbs go, most producers will always reach a point where they have a couple of irreplaceable go-to plugins. The question most people ask is “just how different could this reverb be from all the others?”. After all, we’ve all questioned whether we really needed something new.
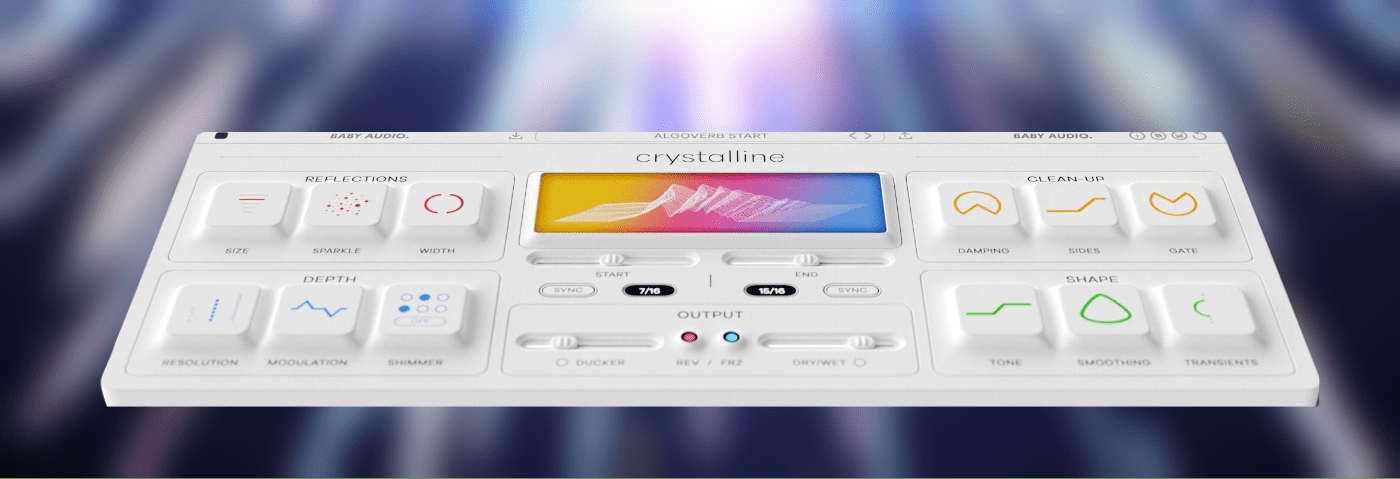
In this tutorial, we test out the latest contender on the market, Crystalline, priced at $49 for a limited amount of time. This reverb, released by award-winning software company Baby Audio, is described as a next-generation algorithmic reverb plugin. Crystalline make spatial sound design workflow efficient and intuitive, by means of a user-friendly interface packed with creative features.

We’ll go through the features throughout the steps, but some clear highlights are internal reverse, freeze, gate and ducking parameters as well as tempo-syncing and comprehensive tone-shaping controls.
Our example track is a melodic techno beat with unprocessed stems. We’ll use Crystalline on many of the stems to form an overall ambience while also creating drones, hi-hats and reversed melodies with reverb.
Here’s the dry track with all instances of Crystalline bypassed:
And here’s the track with all instances of Crystalline active:
N.B: We recommend following along with headphones or studio monitors as some of these results can be subtle. As ever, click any image to see a larger version.
Step 1: Generating A Textural Hi-Hat
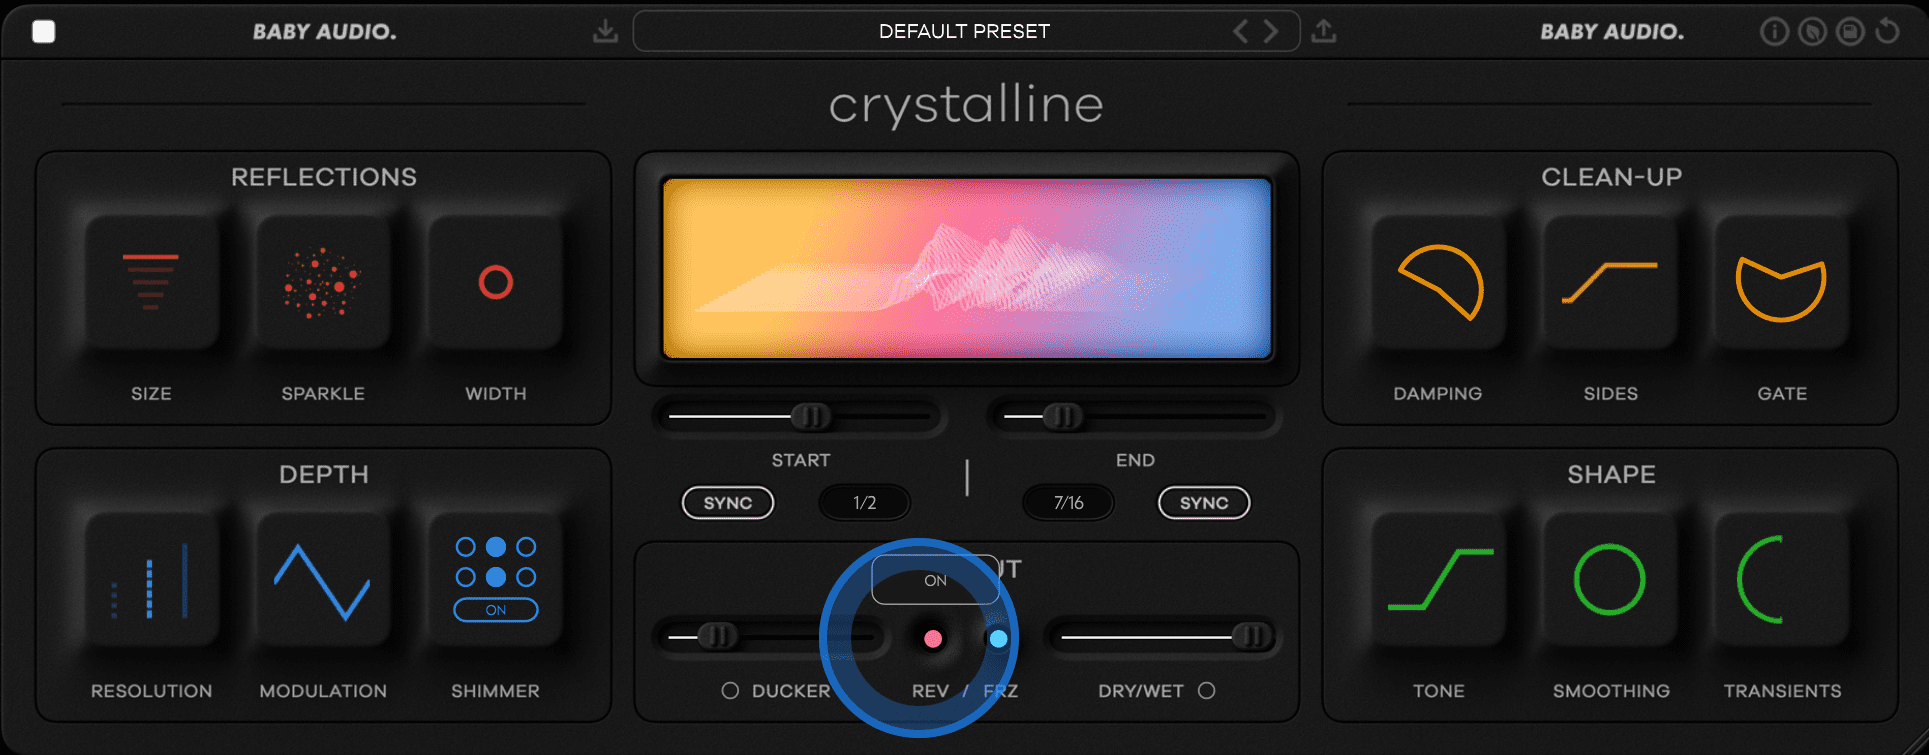
Our beat is missing a classic off-beat hi-hat, so let’s make one using Crystalline’s REV (Reverse) and DUCKER functions with the kick.
Here’s how the kick sounds in solo:
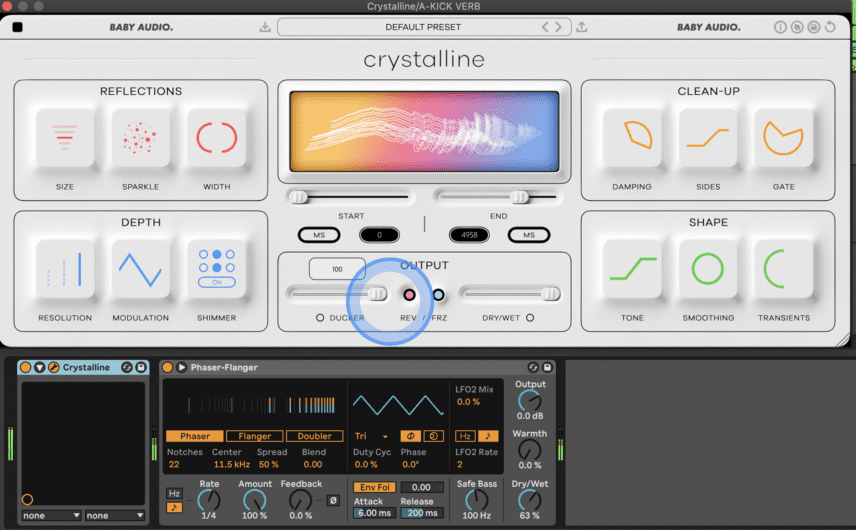
The first thing we need to do is create a new Return channel in Ableton and route the kick’s audio to this channel. Set the DRY/WET and DUCKER controls to 100% and adjust the END timing while listening to the kick. This allows us to achieve a swung and non-quantized groove.
DUCKER cuts the volume of the reverb while the dry signal is playing and REV reverses the reverb signal. The result of both parameters being active creates a call and response relationship between the dry signal and reverb.
Crystalline’s reverb size and tone-shaping controls make it easy to manipulate the timbre of the sound. We can also insert Live’s Phase-Flanger device into the Return channel to modulate the sound even further.
Here’s how the kick sounds with the Crystalline return channel:
Step 2: Using Room Reverb On Percussion
In this step, we’re going to apply some room reverb presets on the closed hi-hats and percussion stems.
Here’s how the hi-hats sound without any reverb:
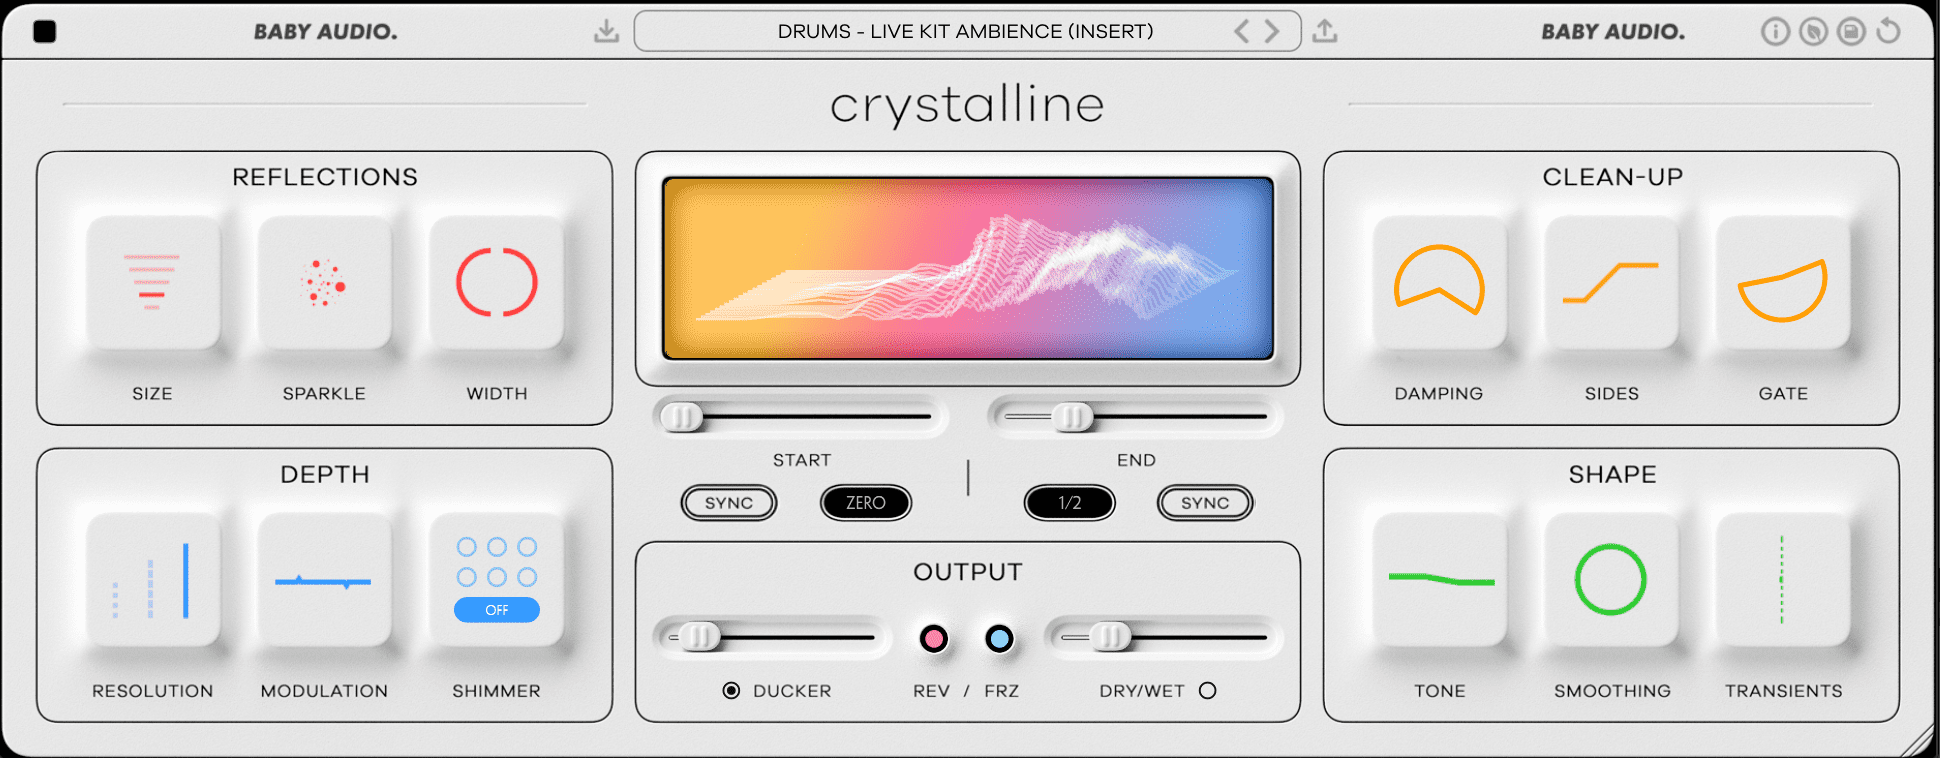
Crystalline comes with a few hundred presets to choose from and the Room presets sound great. This especially applies to the ones that make use of the WIDTH control in the REFLECTIONS section.
Even a small boost of this parameter can make a part sound much more present in the mix. You can also use the DAMPING control in the CLEAN-UP section to EQ the reverb and cut harsh high frequencies.
Here’s how the hats sound with the DRUMS – LIVE KIT AMBIENCE preset:
Now for the percussion!
Here’s how the percussion stem sounds with no processing:
We’re applying Crystaline’s DUB DRUMS preset to this stem. This preset makes use of both the SPARKLE and SHIMMER controls. SPARKLE emphasizes high frequencies in the reverb reflections, while SHIMMER adds a longer decay time to high frequencies.
Here’s how the percussion sounds with Crystalline active:
You can hear that the reverb of the higher woodblock percussion hit is emphasized and creates a makeshift ambience.

Here’s our progress so far with the kick, hats and percussion playing along with a sub-bass loop:
Here are the same parts with all instances of Crystalline bypassed:
Step 3: Creating a Modulating Drone
One of the best parts of testing out new reverbs is creating drone-style sounds with long decay times. In this example, we’re going to use a basic square-wave note hit with Crystalline’s FRZ (Freeze) function.
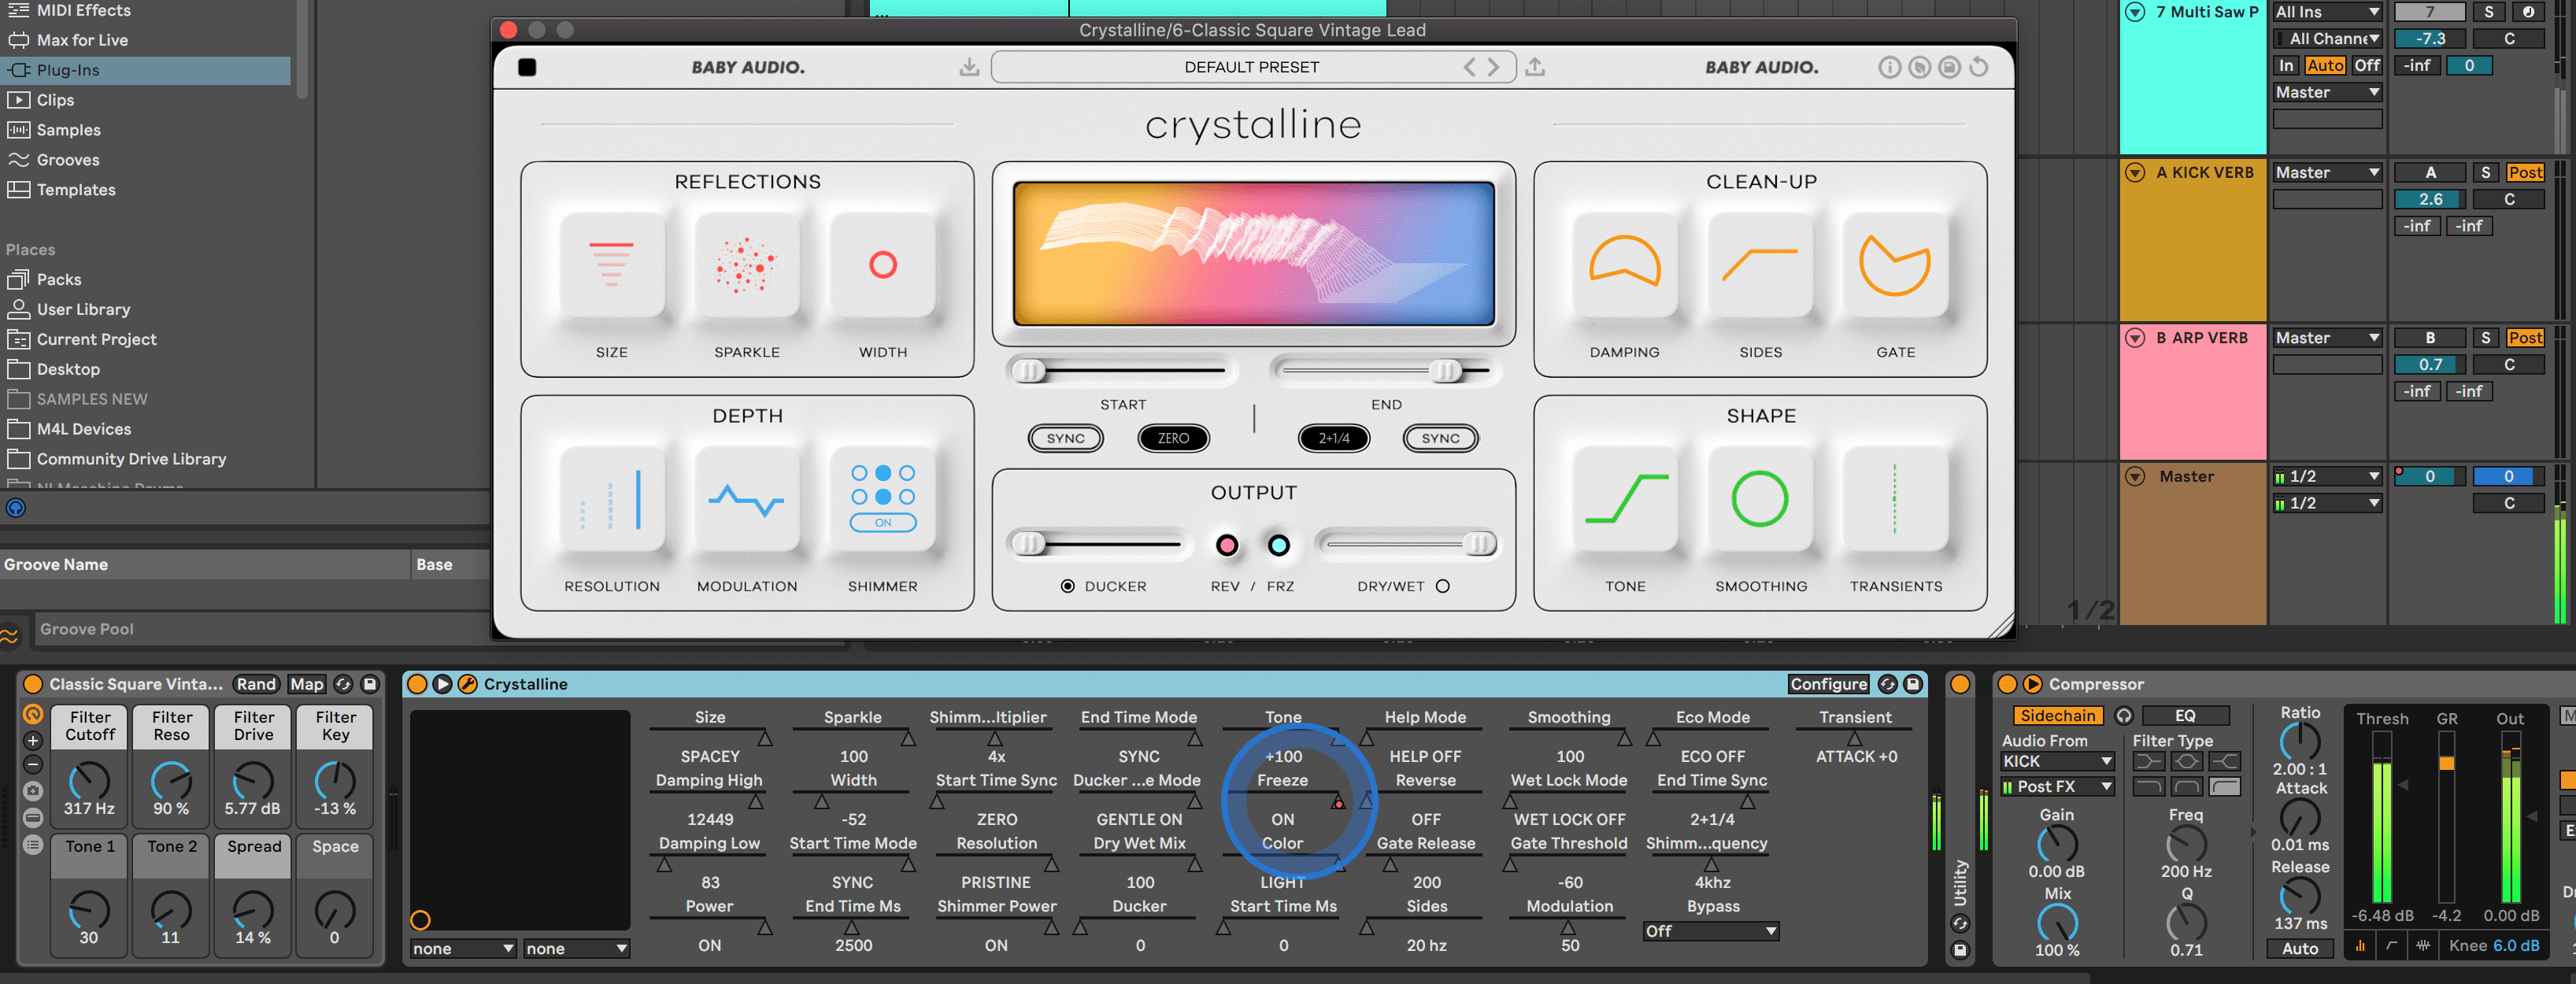
In Crystalline, set the SIZE and SPARKLE values to high with SHIMMER active and the DRY/WET at 100%. Then set the WIDTH to low so that the drone doesn’t dominate the whole mix. You now need to increase the MODULATION parameter in the DEPTH section so that constant modulation is introduced to the reverb algorithm.
Next, automate the FRZ button so that it turns on right when the MIDI note is about to end. The last step for the drone is to insert a compressor and sidechaining it to the kick so that it ducks every time the kick hits.
Here’s the dry square lead sound:
And here’s the same sound with Crystalline and Live’s Compressor:

Step 4: Generating Reverse Melodies
Reverse reverb is usually applied by bouncing the audio off the reverb to another channel in your DAW and reversing it manually. Crystalline allows you to skip this process with its internal REV function.
To test it out, let’s insert Crystalline on a new Return channel and route the audio from the arps stem to this Return.
Here’s how the arps sound without any processing:
You’ll hear that the arps’ filter cutoff has been automated to open and close at various points. This will also affect how it interacts with the reverb.
Next, enable REV in Crystalline and experiment with the START and END times with SYNC active in both. SYNC gives you detailed control over the timing as the reverb becomes synced to your BPM. We set the start to 1/2 and the END to 7/16 – testing out different combinations will give you lots of rhythmic options.
We’ll now use the DAMPING parameter to cut low frequencies that could muddy up the mix. We are also using the TRANSIENTS parameter in the SHAPE section to shift the reverb’s emphasis to the transients of the signal.
Lastly, we’ll automate the WIDTH parameter to lower and increase at various points throughout the beat. This gives off the impression that the reverb is moving closer and then further away.
Here’s how the arps sound with the Crystalline Return track active:

Here’s our progress so far:
Step 5: Using Tempo-Synced Reverb
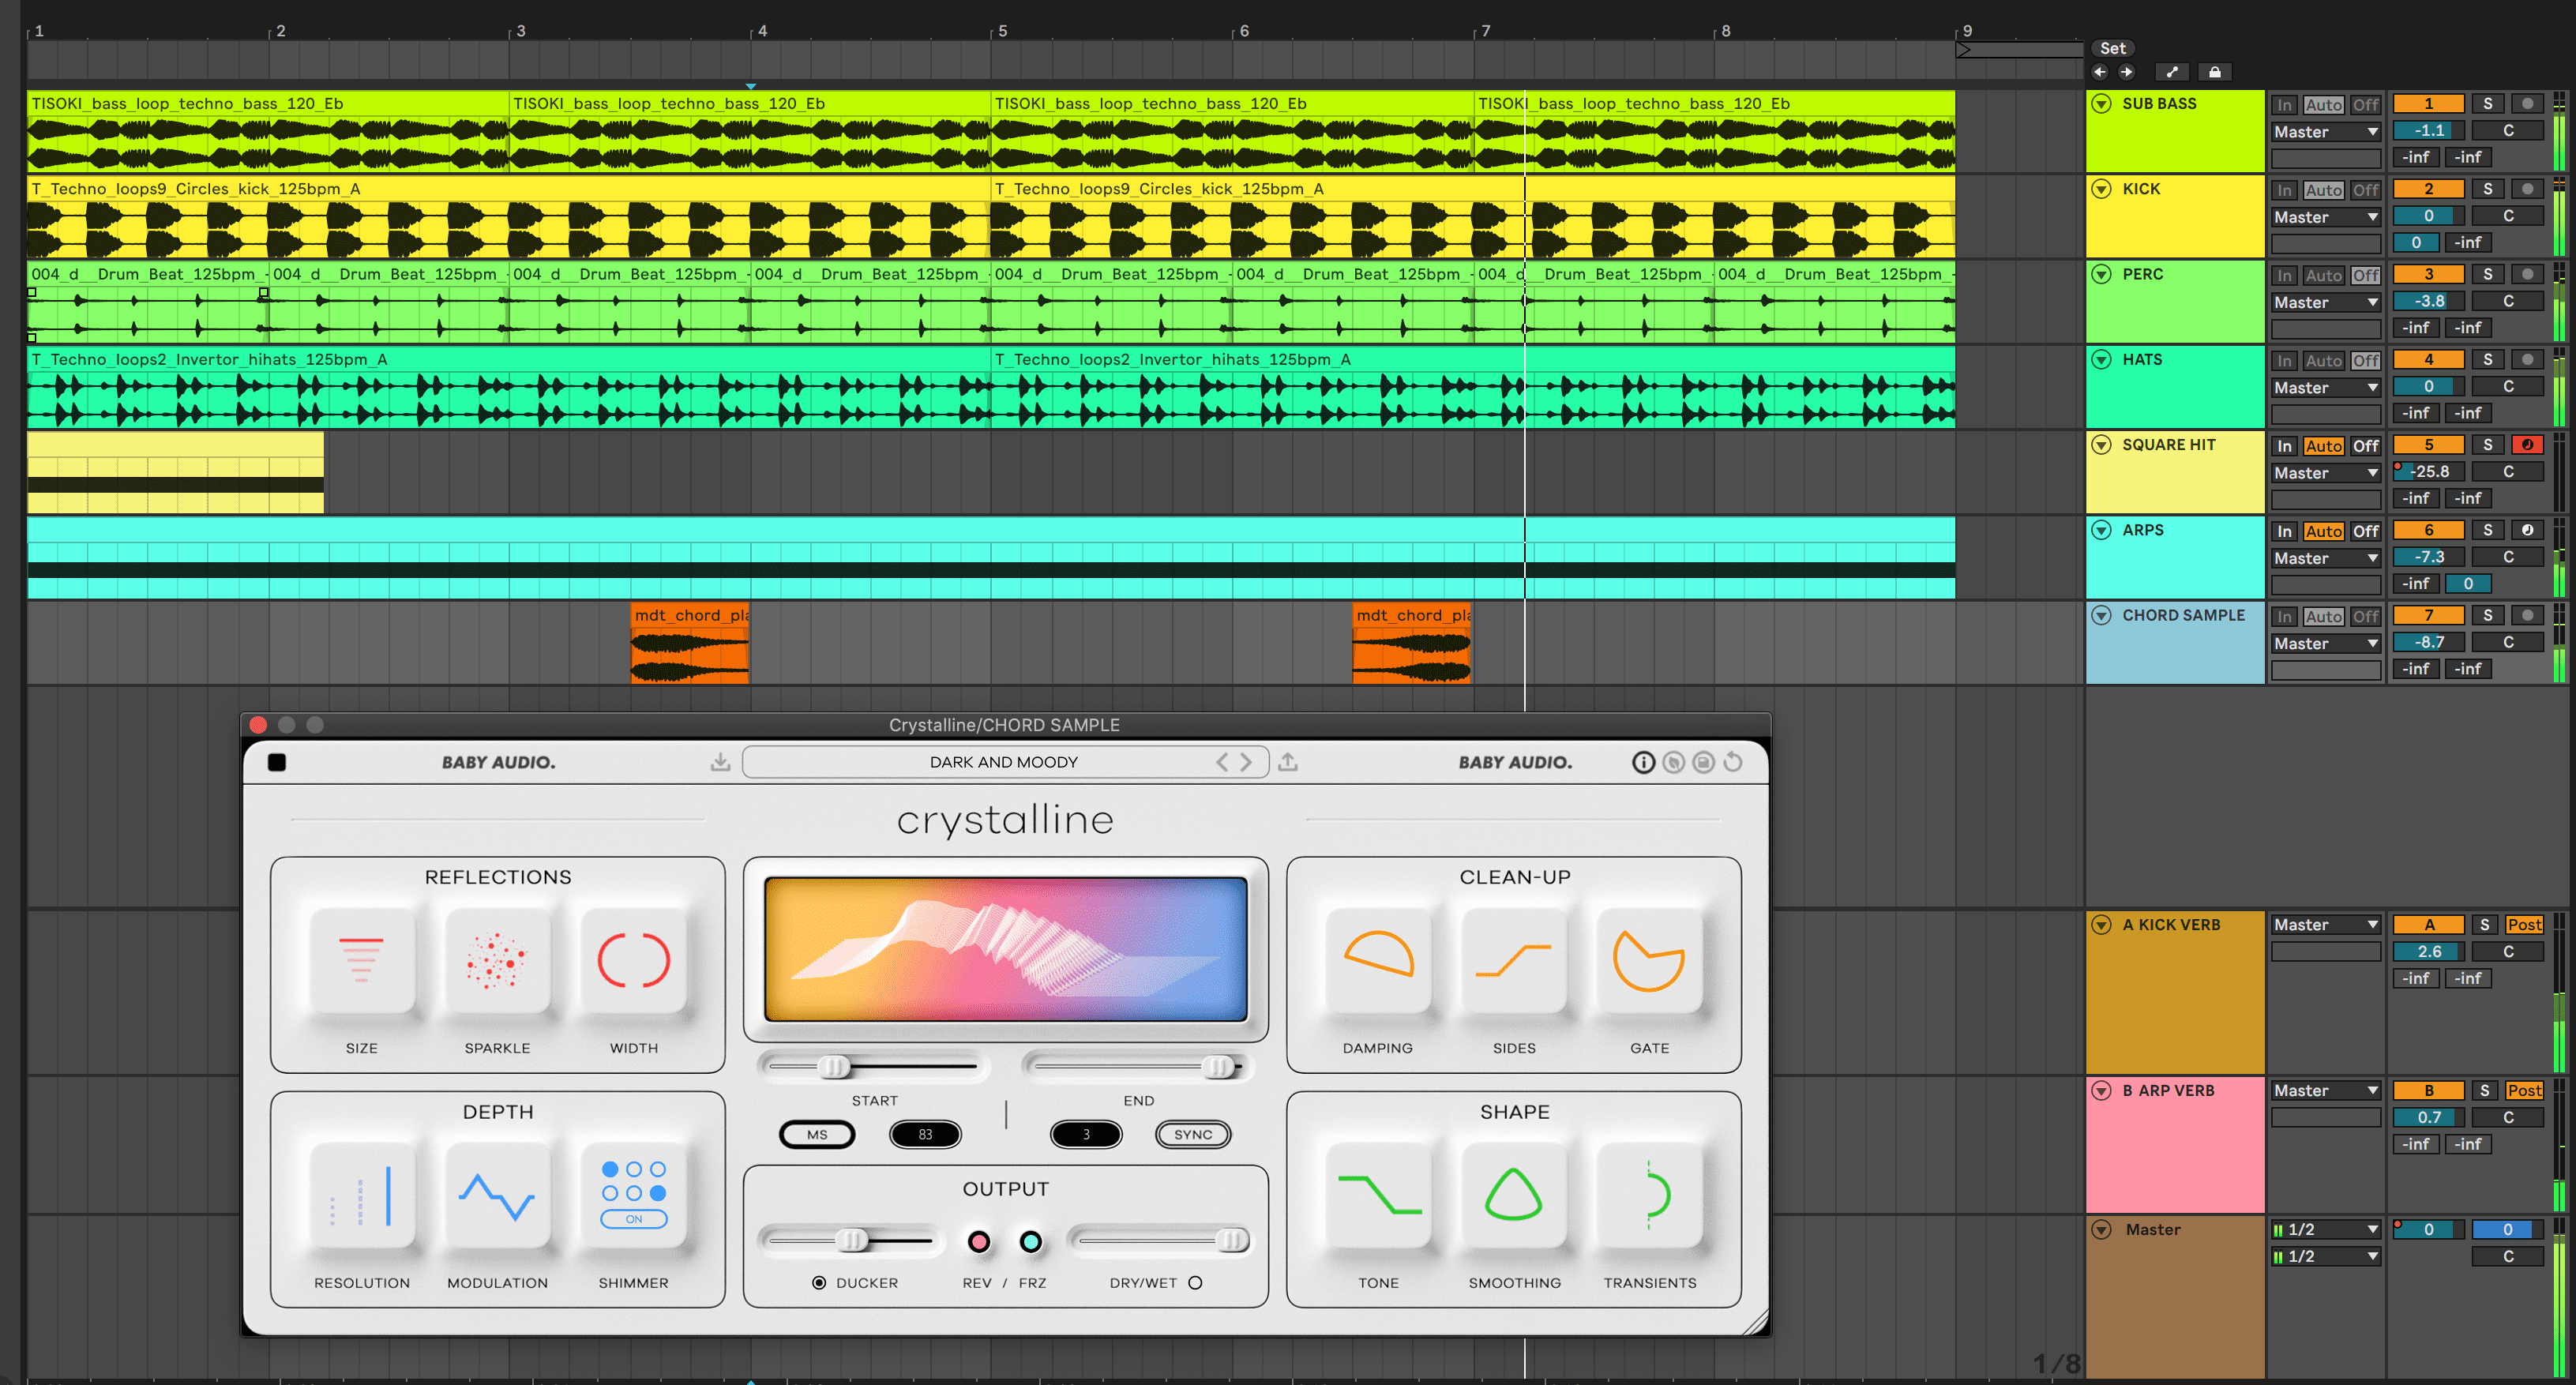
The final stem we’re going to add reverb to is some synth chord samples. We’re using the tempo SYNC control to ensure that the reverb of one chord ends right before the next one hits.
Here’s how the dry chords sound with the kick and sub:
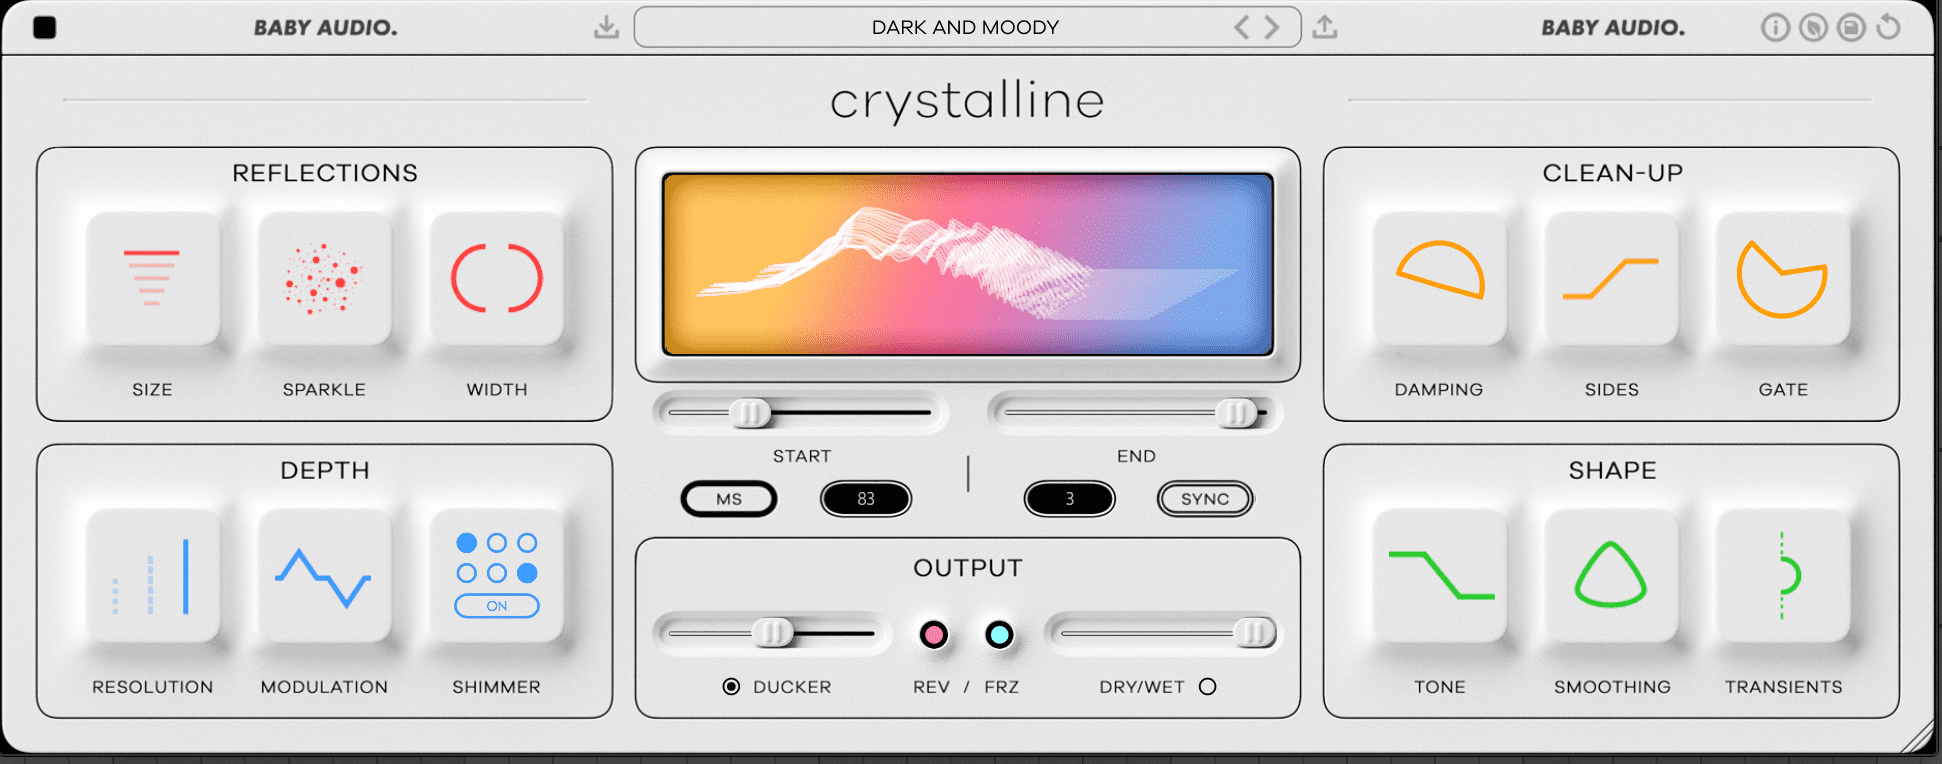
Insert Crystalline and apply the DARK AND MOODY preset. This preset has a high SIZE setting, but the DAMPING control cuts the reverb’s high frequencies, keeping the sound darker. Next, increase the DUCKER parameter to around 50% so that the reverb is less emphasized in the moments that the chords play.
For the END parameter, set the value to 3 as there are exactly three bars between the chord hits.
Here’s how the chords sound with Crystalline active and the kick and the sub playing:
Here’s our final track with all instances of Crystalline active:
For comparison, here is the same track with all Crystalline instances bypassed:
You can hear that the spatial sound design adds a unique ambience that the dry version lacks.
Crystalline retails for $99 but is available today for $49. It’s compatible with Mac M1 and is suitable with VST, VST3, AU, and AAX. A demo version is also available.