In this article, we show you how we used Lunacy Cube to make the musical parts in a techno tune.
The market for plugins has grown exponentially over the last ten years. Developers are always looking for ways to find an edge. Award-winning Lunacy Audio, best known for CUBE, landed on a formula that has attractive visual and sonic aspects.
The discerning reader may say the GUI doesn’t matter. But if you’re staring at something for hours on end, and typically we producers do, then having a fun interface to inspire you is a bonus. Plus, it sounds great and is very competent with large amounts of data.
In this article, we’re going to make four musical parts to our techno beat. We’ll start with the default setting and use various parameters to try push the plugin in ways it excels.
Here’s what we’re making today.
And here it is in the context of a techno tune:
As ever, click on any image to enlarge.
The Bassline
Let’s kick things off with the bassline.
Here is our bassline MIDI part:

Step 1
Load up CUBE and hit -INIT- in the main navigation bar. It’s a shade of purple and pink in the top center of the window.
After you click it, the main presets window will display. Choose from the left window Glo, and then Bass Thick.
This is how it sounds out of the box:
Sounds great straight off the bat, especially with some lovely glide. But let’s mess about with it and see where we can go with it.
Firstly things first, click on Orbits as this is a standout feature of CUBE. Orbits are 3D paths functioning from within the cube that the orb will follow, either in sync with your DAW. If that all sounds very sci-fi, then ignore it and just mess about with it. It’s fun to watch and listen.
Select “Dueling Butterflies” from the Orbits presets library on the right side of the plugin.
Hear how it affects the bassline:
STEP 2
Pretty cool. It changes the bassline a lot. Let’s tweak it some more.
A. Firstly, sticking in the Orbits window, dial back the Intensity to 50%. It blends our original sound with the ‘Dueling Butterflies’. Think of it as a mix button.
B. Remaining in the Orbits window, select EDIT above the presets and in the lowest box, DEPTH, change the waveform from Sine to Saw. Then dial back the Max parameter within the same box to about halfway.
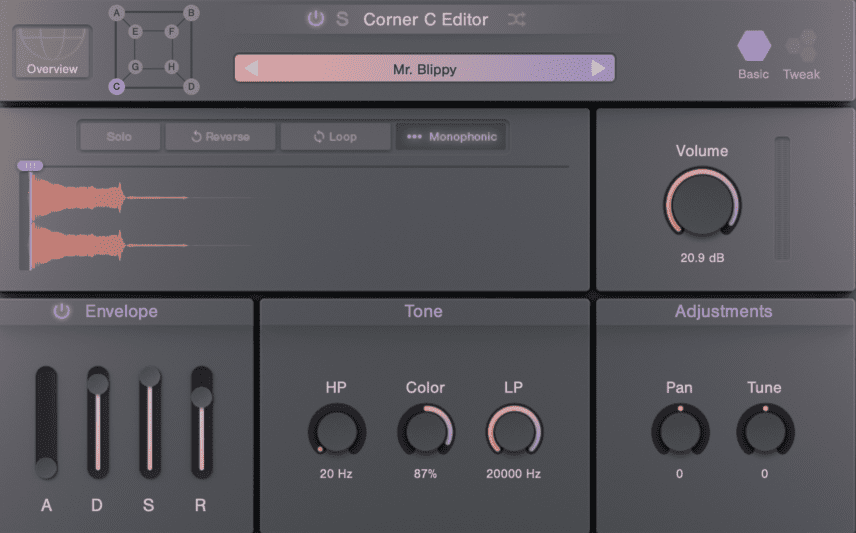
C. Next, leaving Orbits behind, select Sounds at the top left. In the Overview change Sound C. Click on it, then click on the sound navigation bar (again in purple and pink) and choose something else. We’ve gone with “Mr Blippy” but you should shop around the sounds here.
With our Orbits settings, not everything is going to cut through, but CUBE excels with layering so we want to look at adding texture rather than rethinking our part entirely. With Mr Blippy selected, move the sample start to the main transient, turn on the Envelope, maximise the Color under Tone and we’re good.
It should look like this:
D. It could do with a little softening up. Jump to the Effects at the top, head to Reverb and select Simple. Diall the Mix back to 18%, the Width to 7%, the Size to 10% and leave Damping. It helps bring our Sound C out more.
Here’s our final bass sound.
The Arp Bee
Step 3
Let’s add a sound on top fluttering around like no one’s business. CUBE has a tonne of options here.
As in Step 1 of the bassline part, hit -INIT- to load the preset window. From the Factory presets select “Beez in da cave”.
It sounds like this out of the box:
As before, it sounds good but we want to see where CUBE can go so let’s get tweaking.
Step 4
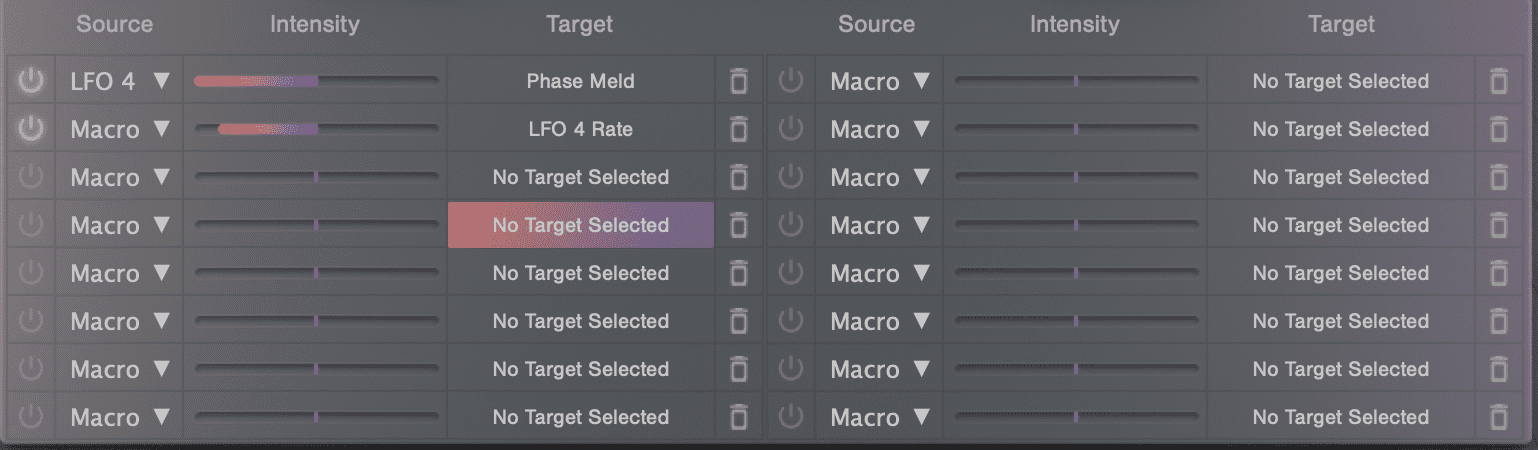
A. There is a big Macro button. Let’s use it. Select Mod at the top and then Mod Matrix at the bottom. Once you’re in the Matrix editor you’ll see the Macro button is targeting LFO 4 Rate and Phase Meld. In short, it’s screaming out to automate the LFO 4 Rate.
Draw in some similar automation on the Macro knob.
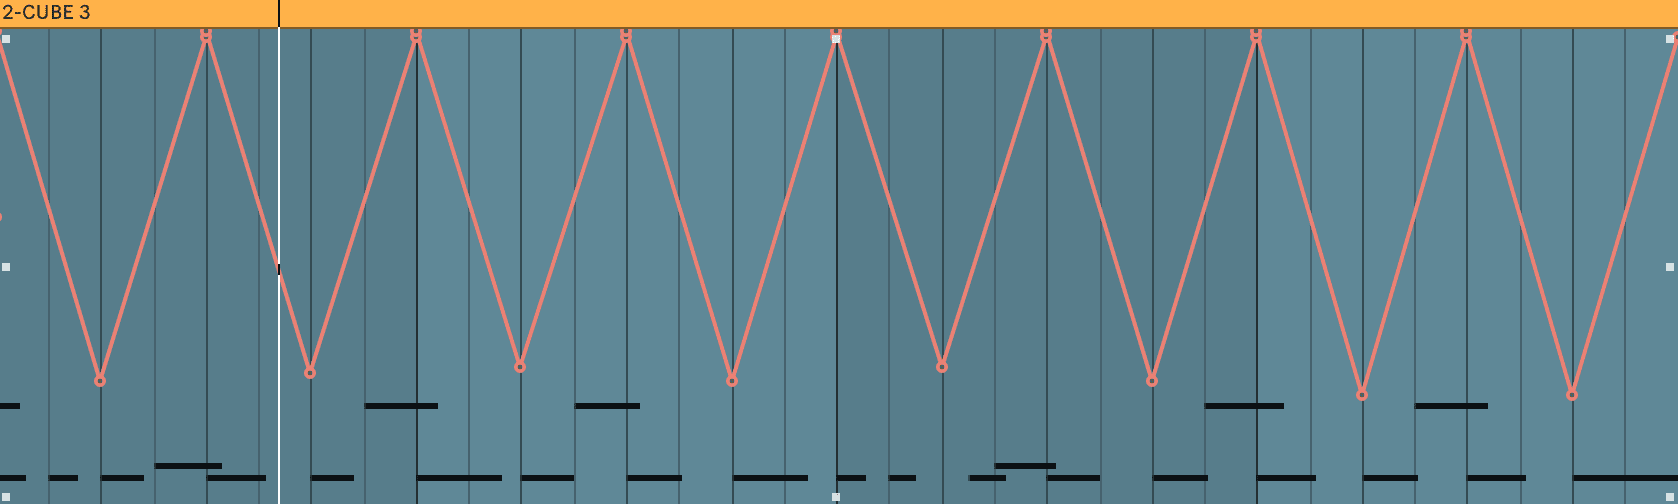
B. It’s bugging us (literally!). It’s the part – not the sound. Flatten it so it’s one-note playing for two bars. It should look like this:

C. Jump over to the Effects. Click on Reverb. Turn off Simple but keep Convolution on. Just bring the Mix down to 18%.
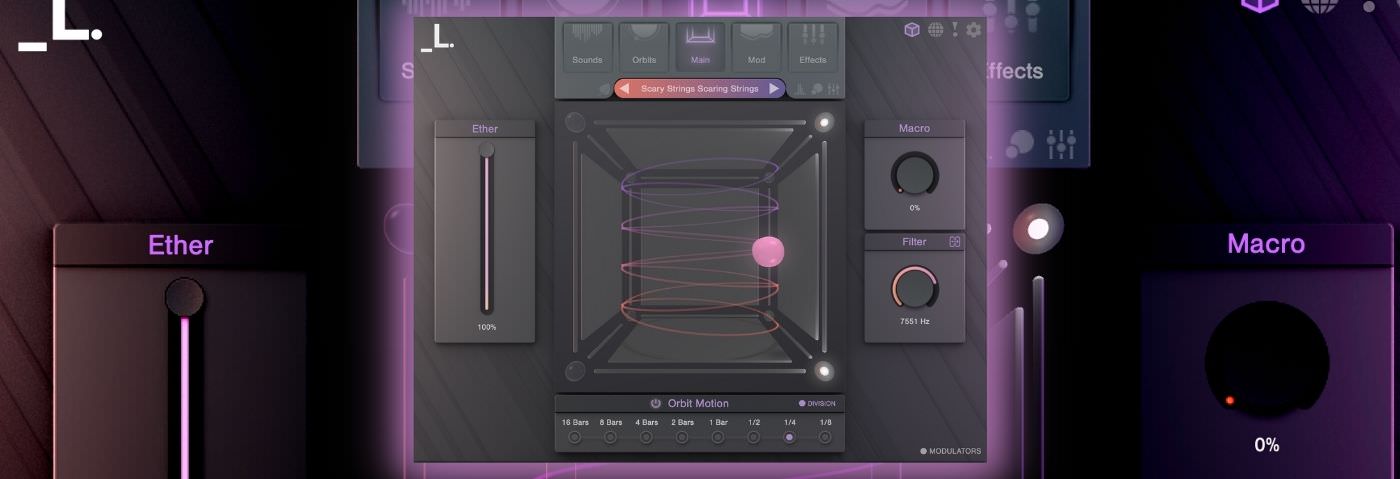
D. And for the fun bit, go to Orbits again as we want to get this sound to bounce around. First, increase the Orbit Motion to 1/2 – this moves it around the spectrum quicker and then in the Orbits preset bank settle on Slither. You can find it under Smooth. Hear how it’s sitting back in the mix nicely now and jumping around in time sweetly with our beat. Nice.
E. Next, find your LFO 4, in the Mod area of the device and change from Sine to Triangle. Next amend the rate, click sync and change it to 1/8. Lastly, bring down the Intensity to around 7%. Now click into the Mod Matrix and reduce the LFO Modulation Rate Intensity to something similar to on-screen below:
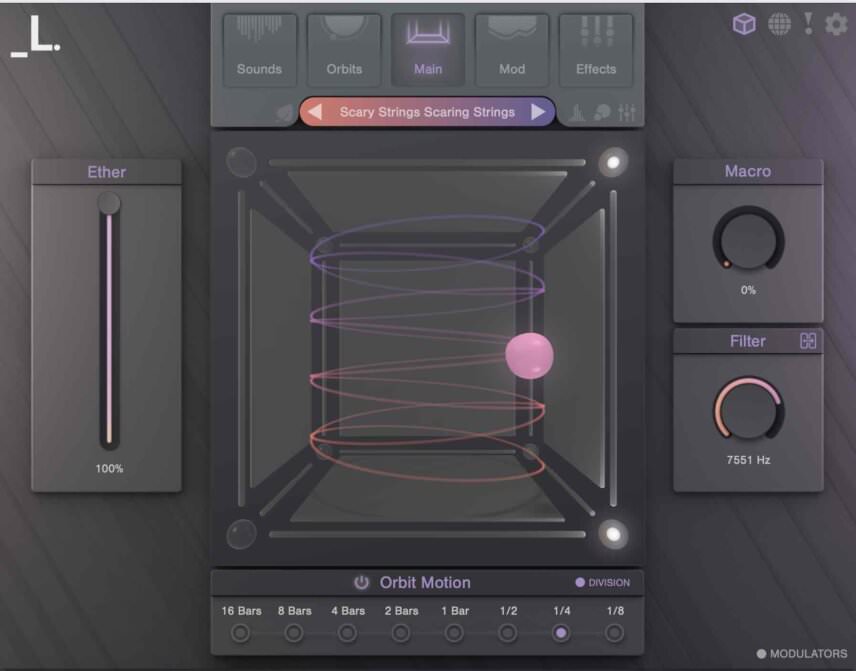
F. On the Main page drag the Ether to around halfway. That works for us and it controls the fade between the dynamics. Keeping on that main page, dial back the Filter to something around 2195Hz.
Here’s how that sounds and our progress so far:
The Pad
Step 5
We want to add some harmony and CUBE is loaded with pads. We have drawn in a D minor triad to achieve this.
As with both parts till now, load up a new instance of CUBE and hit the -INIT-patch. We’ll come clean, we can’t quite remember how we came across this preset but the one you want is ‘Sheer Terror’.
Fortunately, CUBE has a highly effective tagging system so if you don’t know what you’re looking for by name, you can easily select moods, timbres and so on and then flick through. Being British, anyone who makes a preset ‘Her Royal Highness’ is good with us.
With Sheer Terror loaded up, (this might be a synonym for Her Royal Highness but we’re not sure) out the box, again, sounds great.
It should sound like this:
Step 6
Let’s tweak the sound.
A. Firstly, jump to the Mod Matrix and increase the Intensity slightly. It’s already triggered by LFO 1 so let’s jump to LFO 1 next. Increase the Rate to 1/8 D and max out the Fade In.
B. If it’s not clear by now, we love messing about with Orbit. Go to the Orbit window, choose Touch Some Edges as the preset, amend the Orbit Motion to 1/2 and dial back the Intensity to 21%.
C. For the final part of the pad, go to Sounds and turn off the Sound A.
Here’s our progress so far:
The Strings
Step 7
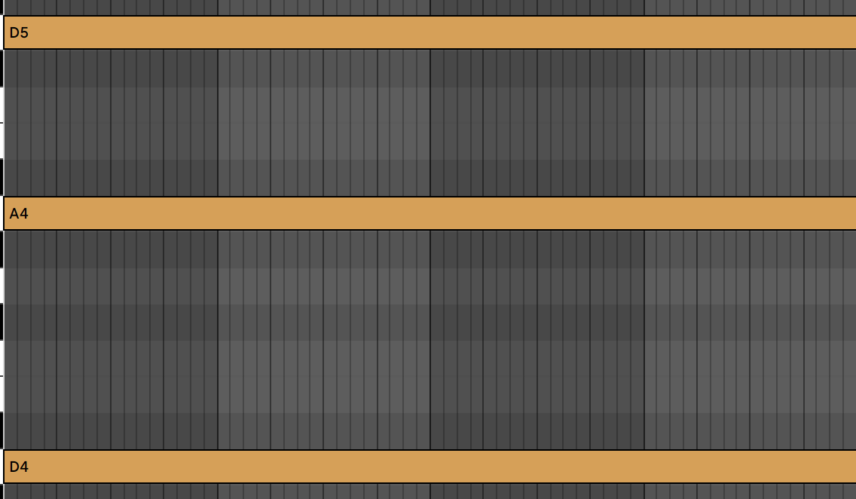
For the strings, we want to automate some scary pitched down strings.
We’re stuck with the same triad but had added an extra D note one further octave up the register.
We like the strings as they are but we know we can do something with them.
Here’s our progress so far:
Step 8
A. We want to automate the pitch with these. To automate the pitch of the whole plugin you want to assign each Corner (sound) to the Macro. For this preset, to save you time, it’s been done for you. All we’re going to do amend the intensity for each one. You can see below we made them all the same Intensity.
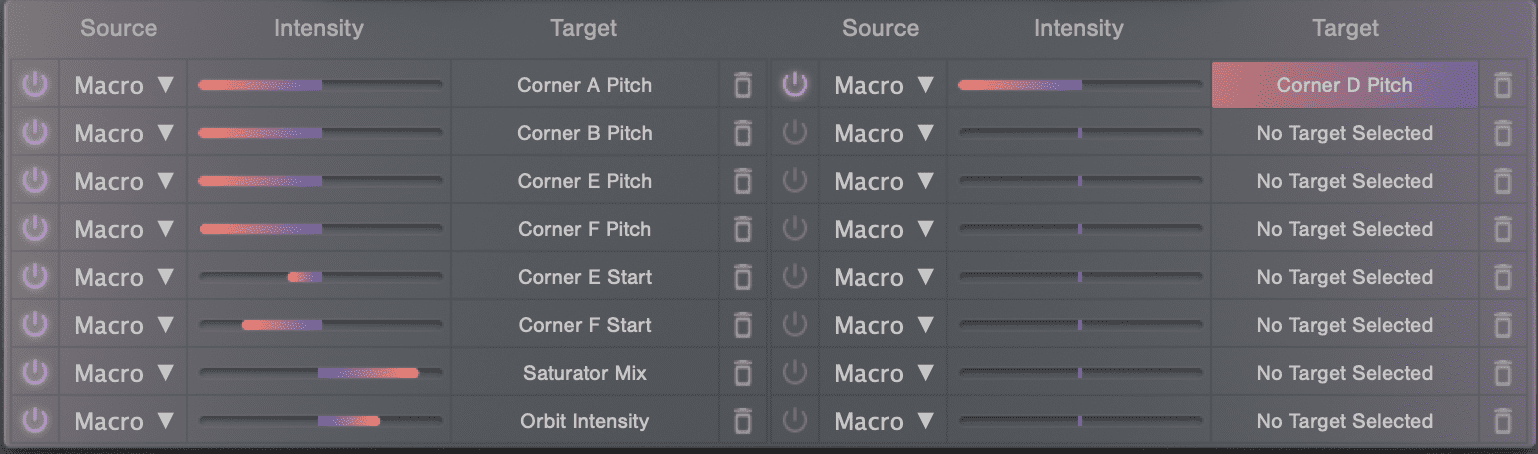
Next, simply draw in Macro automation to pitch down across our 4 bar loop. It should look something like this:
Here’s our progress so far:
Step 9
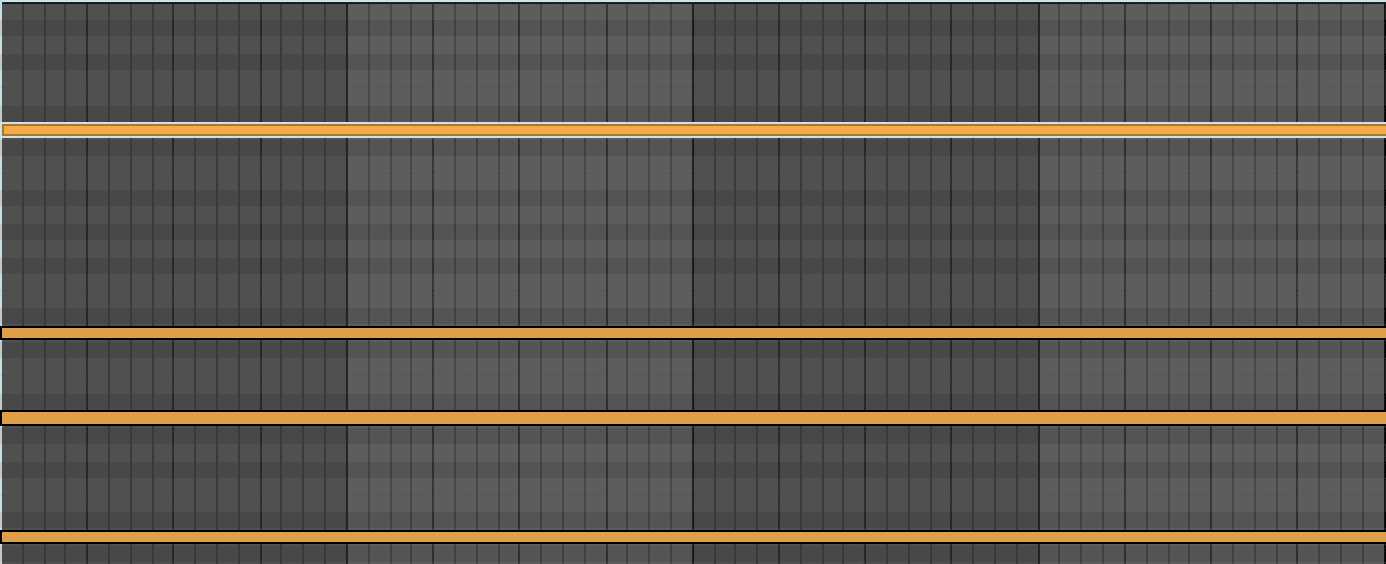
Duplicate the strings. We want to add some further touches here.
Go to your Mod Matrix and select an empty slot. Select Macro as the Source and the Target as Orbit Speed. Then select Vortex as your Orbit from the Orbit preset area.
Next, lengthen these strings to 8 bars and automate the Orbit intensity on the main window to something like the below.

Next, automate the Orbit Speed we just assigned in a previous slot. Go gentle here. Something like the below might work for you:

We’re now automating the Intensity, the Pitch and the Orbit Speed.
On its own it sounds like this:
Now, let’s blend the strings from Step 8. It should sound like this. We’ve dropped the other elements after 4 bars to showcase the strings ‘coming into land’.
If you put the original strings preset back in, it sounds like a drone in the background. That’s now three strings all working alongside one another and it sounds like this.
THE FINAL AUDIO
Time to review how we’ve used CUBE…
Here is the music before we tweaked CUBE:
Here it is with some gentle mixing in Live.
While you’re here.
Read how to make huge ambient pads with Lunacy Cube.