This channel is sponsored by
 Roland Cloud is your creative hub for Roland hardware and software. Access legendary recreations of Roland Classics, find new sounds for your favorite products, and download updates and companion apps to make music fast and easy. Visit Roland Cloud
Is it possible to get a solid mix done with just channel strips? We use Waves’ SSL EV2 plugin and find out.
In the days before DAWs, music was recorded and mixed on consoles. This is a big part of the sound of classic house and techno records. Of course, the hardware synthesizers and drum machines played their part but the subtle harmonic distortion (and not so subtle overloading of mixer channels) left a sonic footprint on these tracks that is clearly audible. Let’s take a page from the book of classic house and try mixing a track using the modern equivalent, channel strip plugins. We’ll be using Waves’ SSL EV2 Channel Strip to take our jacking house track from bland to bold.
Before channel strips:
And after:
N.B: We recommend following along with headphones or studio monitors as some of these results can be subtle. As ever, click any image to see a larger version.
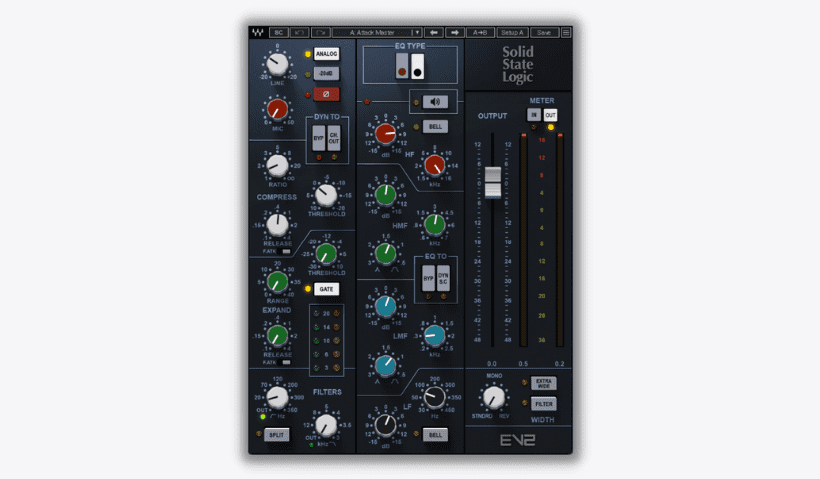
A Quick Overview Of Waves SSL EV2
Waves’ SSL EV2 is a new and official emulation of the much-loved and classic SSL 4000E console channel strip. Each strip on the original board had its own EQ and compressor, and this is recreated in the Waves version. It’s also got models of the line and microphone preamp sections for bringing in musically pleasing harmonic distortion.

The strip has four main sections: the Input Section, Dynamics Section, E-Channel EQ Section, and Master Section. This also reflects the basic signal flow through the strip. Let’s look at each section in turn.
The Input Section controls how much signal is going into the plugin. You can adjust both line and mic preamp amounts. The Analog button adds harmonic distortion.
Next is the Dynamics Section. This has both a compressor/limiter and expander/gate. These have standard compressor controls but note that the attack stage is limited to Slow (auto-sending and program dependent) and Fast (1ms). Normally the compressed audio will then go into the EQ, but by clicking the Ch. Out button, dynamics will come after EQ.
Moving on, we come to the EQ Section, which has low and highpass shelves plus knobs for high, high medium, low medium, and low frequencies. The low-frequency section has two EQ types, black and brown. Black is punchier while brown is a little more gritty.
Finally, there’s the Master Section, with a large slider to control output volume plus controls for the stereo image.
Step 1: Kick
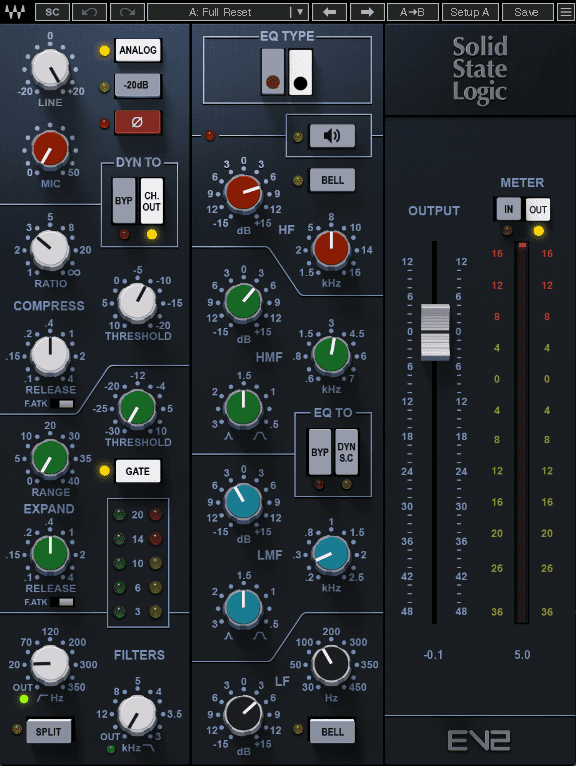
We start with a 909 kick playing from a Drum Rack in Ableton Live. There’s a little bit of drive happening at the source but no additional processing or effects. Let’s use a mono version of SSL EV2 directly on the track to give this kick some weight and punch.
We start by turning the Line knob all the way to the right. This mimics cranking the gain on a mixer and adds harmonic distortion. Don’t worry that the overload light is coming on. If it sounds good it is good.
Next, we move to the compressor. We set a ratio of 3:1 and a threshold of -8. The important thing is to hit that Ch. Out button so the compressor comes after the EQ. Now we can get a little extreme with EQ settings and the compressor will hold them in check, like a wild animal in a cage.
In the EQ, we start with a low shelf at 20Hz, a low-frequency bump of 5dB at 100Hz set to the black EQ (which sounds nice and punchy to our ears), a 3dB dip at 250Hz to reduce boxiness, a 4dB hit at 3.5kHz for a little edge, and a 7dB lift at 8kHz to add some life to the top end.
Top Tip: You’ll notice that there’s no visual feedback for EQ. That’s how mixing engineers used to do it. You could always put a scope after the strip to check but we think it’s good practice to mix using only your ears.
The kick before the channel strip:
And after:
Step 2: Snare
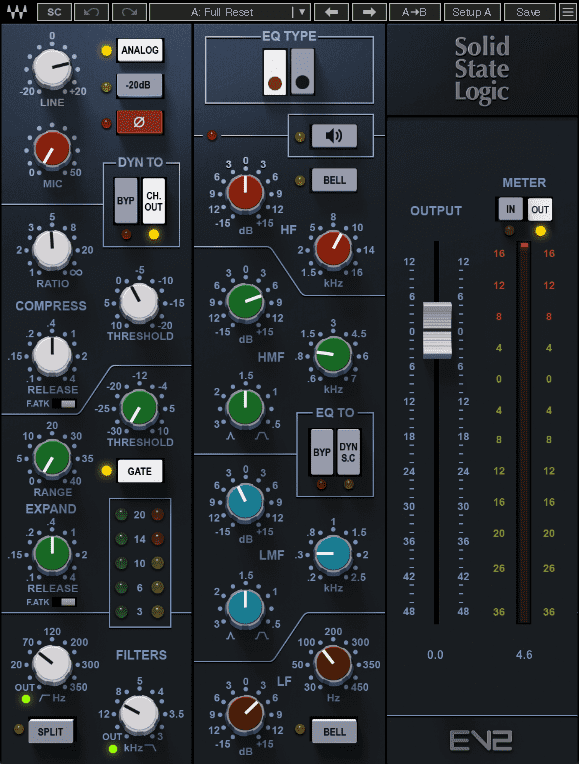
Next up is a 909 snare from the same Drum Rack. This has an extra Saturator adding a little drive but it still sounds very much like a standard 909. Not so exciting. Let’s fix that by adding a copy of the channel strip plugin to the track, again in mono mode.
We start by bringing up the Line amount to around +10dB to add some distortion and harmonics. Next, we really squash it with a compressor ratio of 5:1 and a threshold of -1. We again set the compressor to come after the EQ for a heavier result. We use the lowpass filter to carve away frequencies below 70Hz and above 9kHz. We go with the brown EQ for grit, and boost 4dB at 130Hz, cut 3dB at 300Hz, and bring in 7dB at 900Hz. That sounds much better.
Before the strip:
And after:
Step 3: Tops
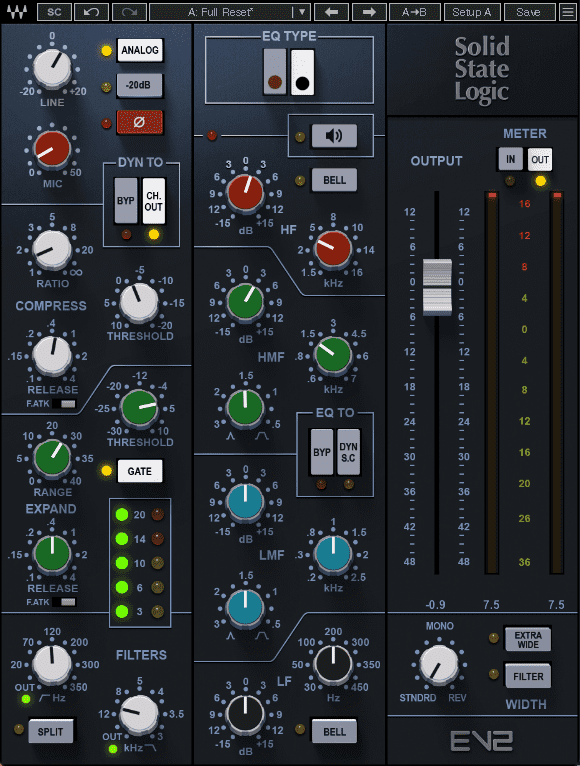
We have 909 hi-hats, a ride and a crash with a touch of drive on them all for the top line. Like the snare, they’re very plain though. There’s a lot we can do with the channel strip to fix that. We place a copy of SSL EV2 on the tops channel.
We start by adding drive with the Line knob. We also try dialing in some mic pre harmonics, which sounds fantastic. Next, let’s use the compressor to give it some movement. We set the sidechain to the kick, hit that Ch. Out button to place the compressor after the EQ, and use a low ratio of 1.5:1 and low threshold of around 1. We don’t want to squash it, just add a little character. We’re not huge fans of the long decay on these sounds. Instead of manually adjusting each one in the Drum Rack, we can use the Gate to chop them off. We set a Threshold of around 4 and Range of 27, playing with the dials until it sounds tight but not choked. Finally, we use the EQ to shelve off the lows under 120Hz and highs above 10kHz, and give it little boosts at 1kHz and 4kHz.
The tops before SSL EV2:
And after:
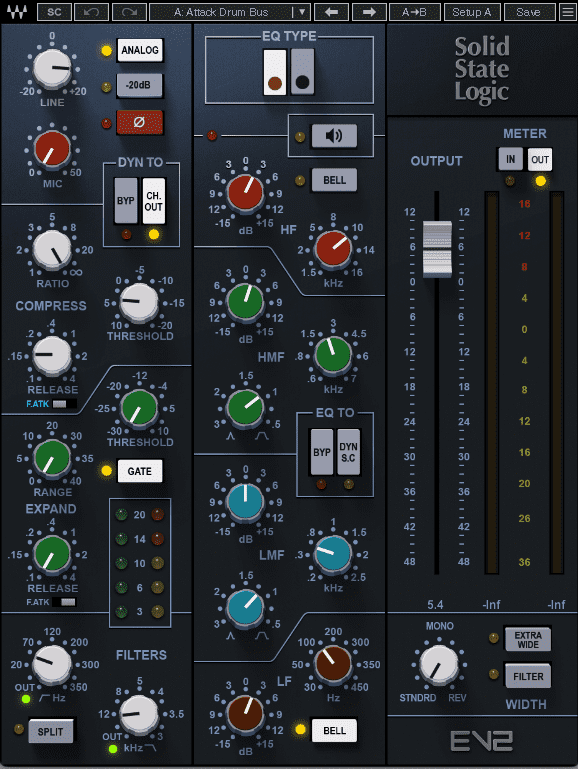
Step 4: Drum Bus
For the final drum step, let’s use a copy of SSL EV2 in parallel mode to add some character to the drum bus.
We place a copy of SSL EV2 on a return track and send some drum bus signal to it. We crank up the Line amount about halfway. On the compressor, we go crazy and slam the Ratio to infinity for a limiting effect, and bring the Threshold to +5. Again, we smash that Ch. Out button. Using the Filters, we cut below 60Hz and above 12kHz. In the EQ, we use the brown EQ to boost 3dB at 140Hz, 2dB at 2kHz, and 3dB at 10kHz. While on its own this is pretty extreme, by blending in the signal with the unaffected one we can get the benefits of the energetic but trashed drums with the main bus.
The drum bus on its own:
And with the heavily processed signal blended in:
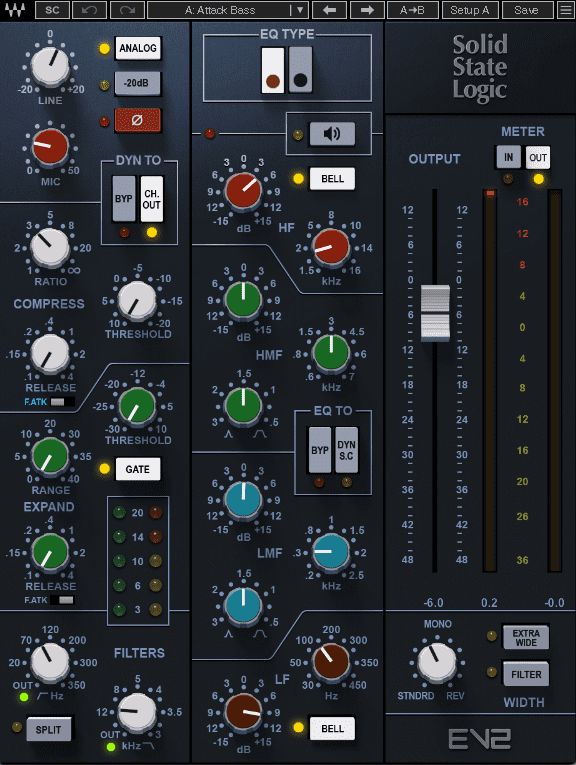
Step 5: Bass
Let’s move on to the bass now, an FM house bass sound programmed with Wavetable. It’s a good sound but it could be a little punchier and more upfront.
We add SSL EV2 to the channel after Wavetable and immediately add a helping of Line (around +3dB) plus Mic (about a third of the way up). That’s juiced it with some nice harmonics. On the compressor, we use a ratio of 3:1 with a high threshold of +10 and super fast attack and release settings. Finally, we engage the sidechain and point it at the kick to help it stand out in the mix. We filter out the lows below 80Hz and the highs above 12kHz, use the brown EQ to boost 10dB at 110Hz and 5dB at 1.8kHz. Note that we have the bell button engaged on these two bands to change the EQ curve from a shelf to a bell. Lastly, we use the Width dial to reduce the sound to mostly mono for more centered punch.
The bass before processing:
And after:
Step 6: Melody
For the melodic portion of the song, we have a panning loop. Let’s use SSL EV2 to help it sit in the mix.
First, we bring up the Line knob (honestly just because we love the way it sounds). Next, we set the sidechain to the kick and use a low ratio of 2.5:1 and a threshold of -5 to give it a little rhythm. We don’t need to hit the Ch. Out button this time as we want more subtle results. To help it live comfortably with the other song elements, we shelve it below 120Hz just in case there’s some errant bass information down there. We then give it a lift of 6dB at 1kHz, the same at 4 kHz and again at 10kHz.
The melodic element before:
And after:

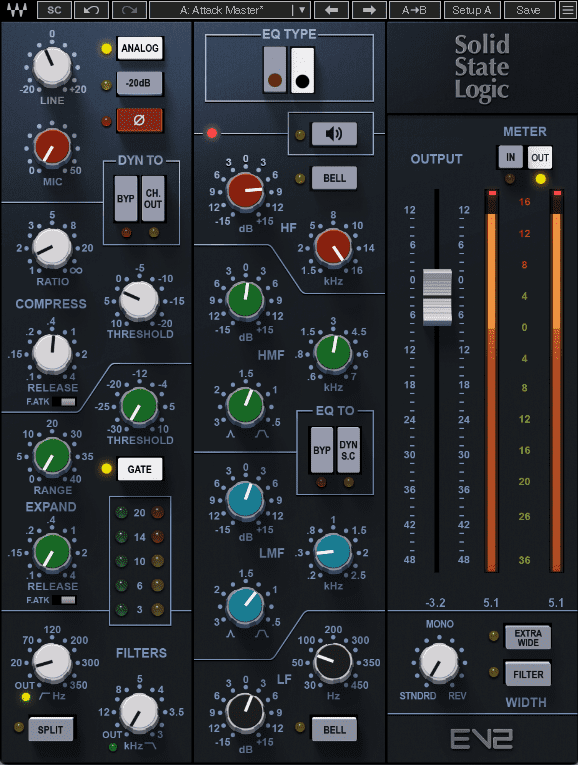
Step 7: Master Bus
For the last stage, let’s add an instance of SSL EV2 to the master bus for some final polish.
The signal is coming in pretty hot so we lower the Line to -3dB. Next, we use the compressor to just take a little off the top, with a ratio of 1.5:1 and a threshold of +2. We can use the lowpass filter to shelve everything below 20Hz or so. We then give it a boost of 3dB at 80Hz, another 3dB at 300Hz, around 1dB at 3.2kHz, and 9dB at 16Hz for some air.
Before master bus processing:
And after:
Here’s the final mix with some additional reverb and delay:
*Attack Magazine is supported by its audience. When you purchase through links on our site, we may earn an affiliate commission. Learn more.
FOLLOW ATTACK MAGAZINE
Tutorials is sponsored by
Roland Cloud is your creative hub for Roland hardware and software. Access legendary recreations of Roland Classics, find new sounds for your favorite products, and download updates and companion apps to make music fast and easy.