Pads come in all shapes and sizes. Here we explore the chillier end of the sonic spectrum – perfect for those long cold winter nights.
When we think of synth pads we often think of warm, analogue-style sounds, but there’s an alternative approach which is just as interesting. Colder, darker pads are most typically associated with techno, but they have their place in any genre, from drum and bass and dubstep through to house. A number of different synthesis methods can work well for this kind of sound. FM synths and additive synths are sometimes used, but we’ll stick with subtractive synthesis techniques for their ease of use. In this case we’re going to create a complex, heavily modulated pad sound using Analog, one of the stock synths in Ableton Live 9 Suite (and available as an upgrade for Live Intro and Standard):
Sine of the Times
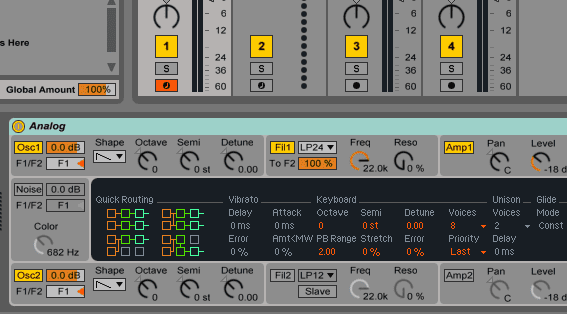
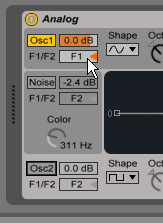
Subtractive synthesis by definition usually begins with a harmonically rich waveform, such as a square or sawtooth wave, that is in turn shaped by a filter in order to subtract certain frequencies and harmonics. Here, however, were going to start with a sine wave, which lacks any additional harmonics. We begin by selecting the sine from the Shape menu for Osc1:
Analog allows you to route each oscillator to one of the two filters. In this case Osc 1 is routed to Filter 1 and Osc 2 (which we’ll come to later) is routed to Filter 2:
As there are no harmonics to filter in a pure sine wave, Filter 1 is disabled (trying to filter a sine wave only changes its volume). The amp envelope is set for a slow attack and moderate release. These can be adjusted as necessary later to suit the tempo of the track and the arrangement.
Adding subtle vibrato can help to make the sound less sterile and more interesting. Here, the Delay and Attack parameters are set to build the pitch modulation slowly, making the vibrato less predictable and modulating the sound over the course of long, sustained notes.
We begin to introduce more harmonics using Unison mode, which doubles the oscillator with another detuned version. We’ve also added some automated panning, controlled by one of the LFOs, although this can be left out at this stage and reserved for later if you want to take more control over the stereo spread of the sound at the mixing stage.
With Unison engaged we can immediately hear a difference in tone:
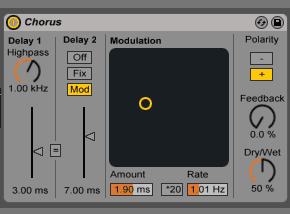
Adding Live’s Chorus effect after the synth adds another level of subtle detuning and movement:
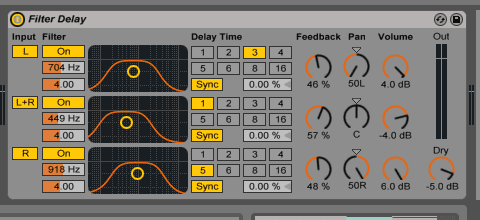
A delay with feedback is a better alternative to reverb when adding ambience, as it allows us to create a cleaner sound and gives us the option of setting up tempo-synced delay times with ease. Here Live’s Filter Delay device creates three different delays – each with subtly different filter settings – panned to the left, centre and right respectively. Removing low-end frequencies in the filter sections helps to keep the sound uncluttered when playing chords across the full frequency range.


04.14 PM
Good, thanks!
05.21 PM
Great!
05.41 PM
amazing how lush filter delay can make that pad
08.43 PM
Great pad ! It will be very nice if you could show to us the chords of the exemple, maybe velocity too.
10.31 PM
thanks
02.06 PM
Top work guys, brilliant as usual.
02.55 PM
Nice tutorial and to repeat what someone else has already said, it would be great if you could show us the chord patterns used for this.. 🙂
06.20 AM
Gorgeous. Would also love to see the chords, or maybe a whole post on programming chord patterns!
12.04 AM
Beautiful! Makes me want to start a fire!
09.27 PM
And everyone gets his awn sound in the end )) nice!
05.48 PM
Hip to be square. LOL. You’re showing your age 😉 J/k … But excellent pad design. Subtle and effective timbral change. Real nice. Thanks for sharing, Bruce!
01.43 AM
It feels like a massage on my spine. You guys are absolutely great. Keep it up.
12.31 PM
I just cant seem to find the same chords that have been used within this tutorial – I’ve come close but not quite the same… anyone?
06.49 PM
Quick question… right at the end when you say to layer the Analog and Operator patched…. how do I do this?
Thanks 🙂
01.52 PM
After some ear working I found on ableton, F2 C3 G3 then Dflat2 Aflat2 Eflat3 and final chord: Eflat2 Bflat2 F3 with 2 legato notes c5 and Bflat4.
06.57 PM
i cannot figure out the routing. mine just doesn’t sound right
10.13 PM
@Daniel_S – group the analog patch into a rack. Then make a chain in it and add an Operator device. Both synths will now play together.
12.41 AM
what are the details on the other three envelopes in the operator the volumes are coming out unbalanced
01.57 PM
This makes my ears tingle… Shows what you can really do with a simple wave.
09.27 PM
It sounds like those self-hypnosis tapes 😉
Seriously though, beautiful 🙂
08.21 PM
Sounds like Microgravity-era Biosphere. Excellent.