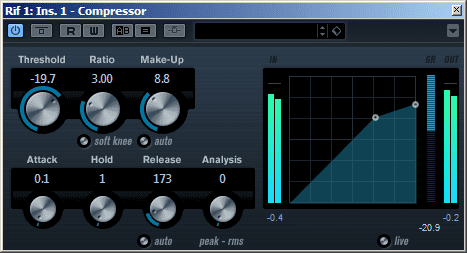
Bruce Aisher takes a look at some of the different ways in which compressors can be used across the elements of a mix.
Compression is an essential but often misunderstood production tool. Many producers have difficulty getting to grips with the range of different ways compressors can be used: to tame errant dynamics, add punch, glue elements together, provide a sense of rhythmic movement, or just alter the tonality of parts of a mix.
Over the coming months we’re going to be digging deeper into the more complex details of advanced compression, but in this article we’ll lay the foundations with an overview of the different ways compressors can be used in a mix. We’ll take the same approach we did with EQ and reverb in previous articles: starting with a ‘bad’ mix and showing how compression can be applied to certain elements in order to improve the overall sound.
In simple terms, a compressor is a tool which reduces the dynamic range of a signal by making the louder parts quieter. The entire signal can then be amplified back to the point where it has the same perceived volume, but the difference in volume between the quiet parts and the loud parts is smaller.
In this article we'll lay the foundations with an overview of the different ways compressors can be used.
In practice it’s quite a bit more complicated than that. The overall effect of compression can vary hugely depending on how the compressor’s used. At the most basic level, a compressor on an individual sound – say, a kick drum – can shape its amplitude envelope. On a recording of an instrument like a guitar it can level out the dynamics, pulling louder notes back so that they sit more evenly in the mix. On a sub-group or across the entire mix it can tame dynamics, ‘glue’ sounds together or create a pumping effect. To make matters more complex, compressors also all have different characters; in many cases they’re not used for dynamic control or transient shaping so much as to colour the tone of the sound.
In this piece we run through a range of different applications to show how some of these processes work. We’ll return to these applications in forthcoming practical tutorials on how to set compressors to achieve specific results.
Taming The Beast
Let’s start with a basic track that lacks any dynamic processing. Here’s the track we’re going to tweak:
First off, let’s consider one of the most basic uses of compression: levelling out differences between the volumes of notes on a single instrument or part. While electronic sounds such as synths and drum machines are usually relatively easy to manage in terms of level, there can still be a degree of processing required to make them fit comfortably into a mix. For an example let’s take this chopped-up synth part:
The level of this recording varies somewhat across each bar. Compression can help level out these differences, much like an automatic volume control. (Click the images where necessary to enlarge them and see the specific settings we’ve used in each case – we’ll come back to the details of how we dial in the compressor’s settings in forthcoming tutorials.)
Here’s how it sounds when we use an 1176-style compressor plugin to tame the dynamics:
We’re using a fast attack time in this example so that we capture the initial transient of each hit. Though the effect is quite subtle, the synth part is now less likely to get lost in the mix. It’s also now easier to decide on the appropriate mix level for the part.
Note: the make-up gain control is used to restore the perceived loudness or peak level of the signal to a similar level prior to compression being applied. A/Bing the uncompressed and compressed signal should allow you to hear the change in both dynamics and loudness of the process in action.
It’s also not uncommon to use two compressors with different thresholds and compression ratios in series to rein in problematic sources in stages, or to emphasise different qualities in the signal. We’ll take this approach with the second synth part. Here it is before compression:
We then apply two compressors in series. The first is set to a higher ratio, a faster attack time and a faster release to suppress the louder peaks. The second is a more moderate setting and a lower threshold to smooth out the peaks which remain after the first compressor has done its work:
Here’s how the synth sounds after compression:
![]()


10.48 AM
Glad to see that this article got a re-work. The first version felt a little rushed, and whilst I don’t doubt the credentials of the author, some of the examples were very odd. I personally thought that it didn’t put enough emphasis on how complex compression is as a tool.
Obviously there is too much to cover in one article, but because compression can be such a subtle technique, it really requires a solid understanding of it’s applications from the outset. When I was initially taught about it, and then in passing that knowledge on, I’ve always found the most fundamental thing to know, is not how to use compression, but when to use it.
You’ve set yourself an incredibly high standard with your walkthrough and tutorial articles, you’re one of the best resources available for this kind of thing, it’s good to see that you decided to give the piece a little more attention.
01.44 PM
Thank You SO MUCH guys, I have been “Producing” for around 3 years and finally somone takes the time to explain compression correctly. Thank you so much again for doing this!
04.13 PM
Thanks for this.
I thought the audio examples were excellent in bringing the respective points across.Thanks again !