u-he are makers of award-winning software synthesisers and effects including Diva, Repro-1, Zebra2, Hive, Bazille, Presswerk and Satin.
Visit U-he
Technique » Synth Secrets »
Sulta Synths: Layered Melodic Leads
This channel is sponsored by

Synth Secrets is a series of programming tutorials in which we show how to make a range of classic and new synth sounds using plugins such as Massive, Sylenth and Diva.
In this Synth Secrets, we’re creating a Denis Sulta-inspired layered lead-synth part that emulates his fresh, catchy and melodic sound. The Scottish producer does not shy away from busy patterns full of bright character and he uses tasteful sound design to achieve this. His larger than life personality is evident in his music which has catapulted him these last few years to one of the most in-demand producers and DJs.
To emulate his style we will use Live’s Simpler, as it very easily imports our own custom sounds. You can however use any sampler you have to repeat the process.
Here’s the lead part we will be creating with a simple kick and bassline for context:
Step 1
Quite often the first step with synthesis would be the oscillators that generate classic waveforms such as sine, square and saw waves. However, if you use a sampler and import your own pitched sound, you become, in effect, your own oscillator! Just as synthesizers spread an oscillated waveform across the keyboard, samplers do the same with whichever sound you import.
Therefore, we require just one note of any sound you wish and then imported into Simpler. We’re going to do just that but with two sounds:
- A pluck
- A saw wave
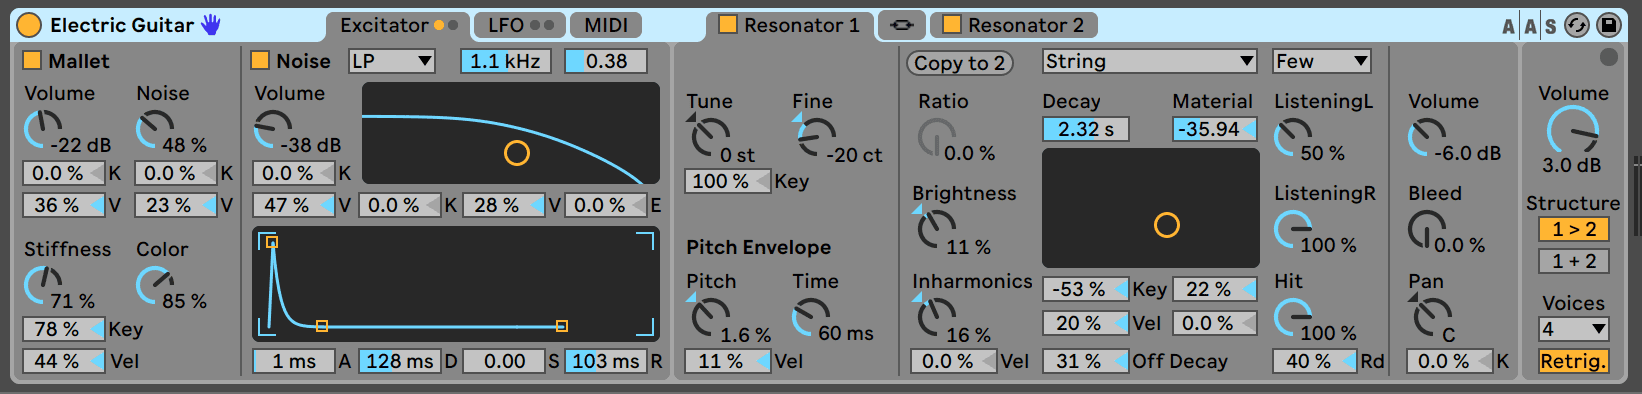
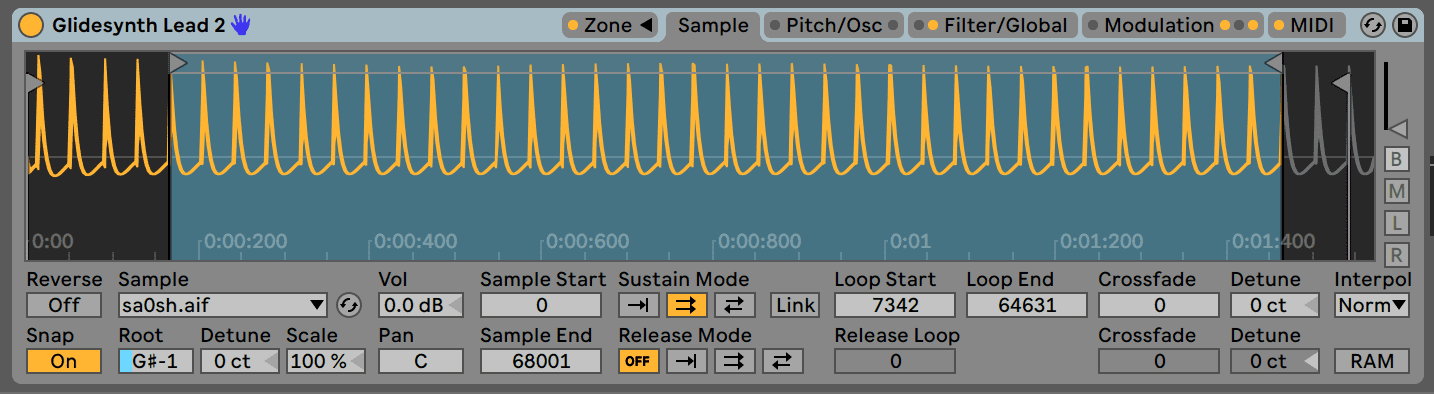
In our example, we have used Collision Instrument’s “Electric Guitar” preset for the plucky sound and Sampler’s “Glidesynth Lead 2” for the saw wave.
Load both of these presets into two separate MIDI channels:
Individually they should sound like this:
Pluck
Wave
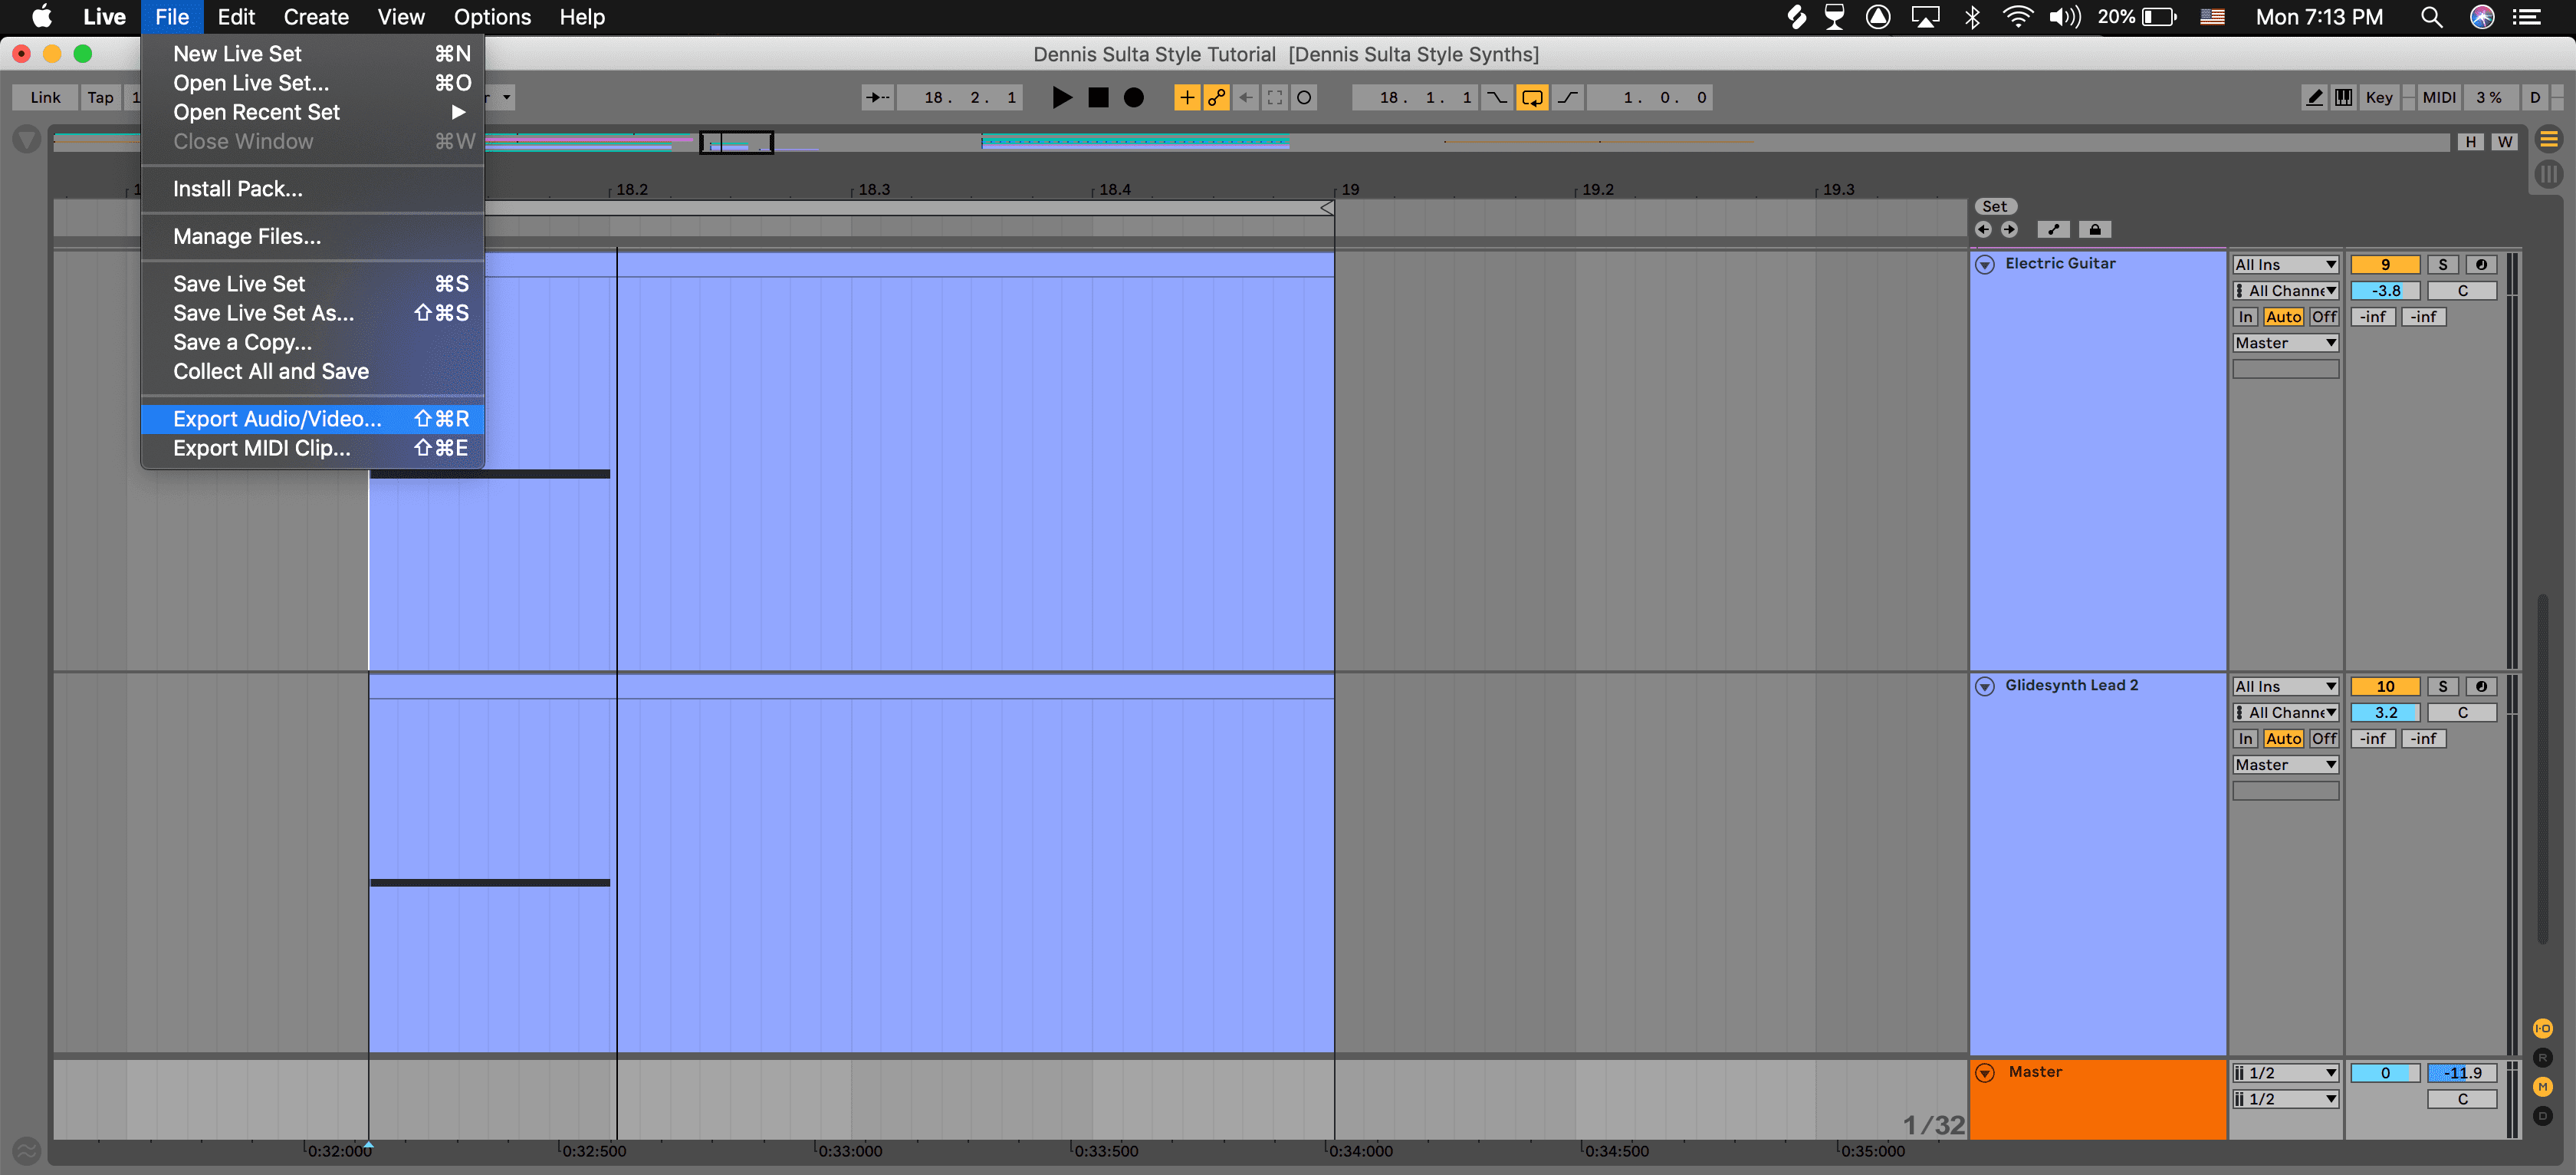
To layer the sounds, record them both playing one note at the same time. Set the saw sound to be around 7-8 dB louder than the pluck sound. Record both of these channels playing a C3 note and export it as a .wav file.
Now we have our synth sound and it should sound like:
Top Tip : Layering sounds is one of the most common ways for producers to achieve their own signature sound. Try any type of combination and see what you can come up with.
Step 2
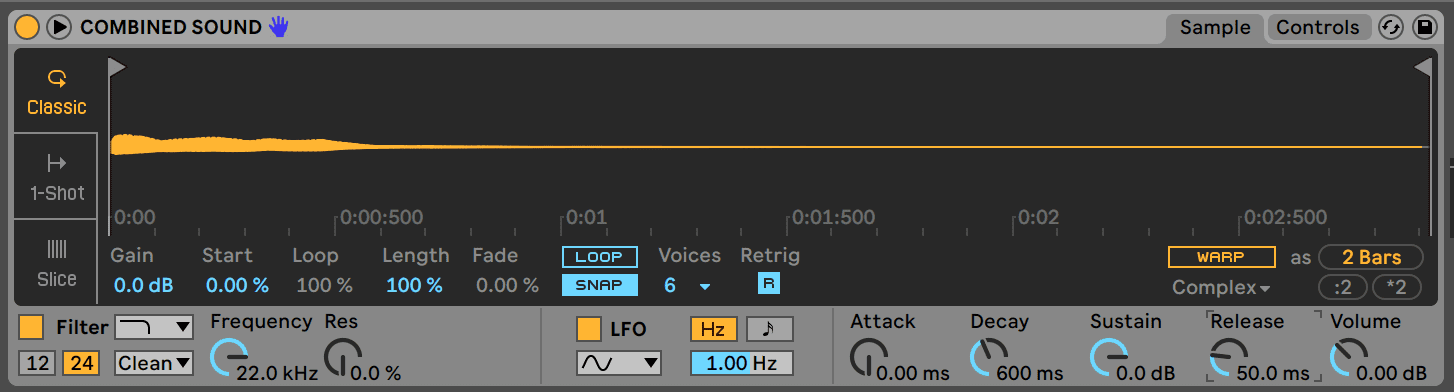
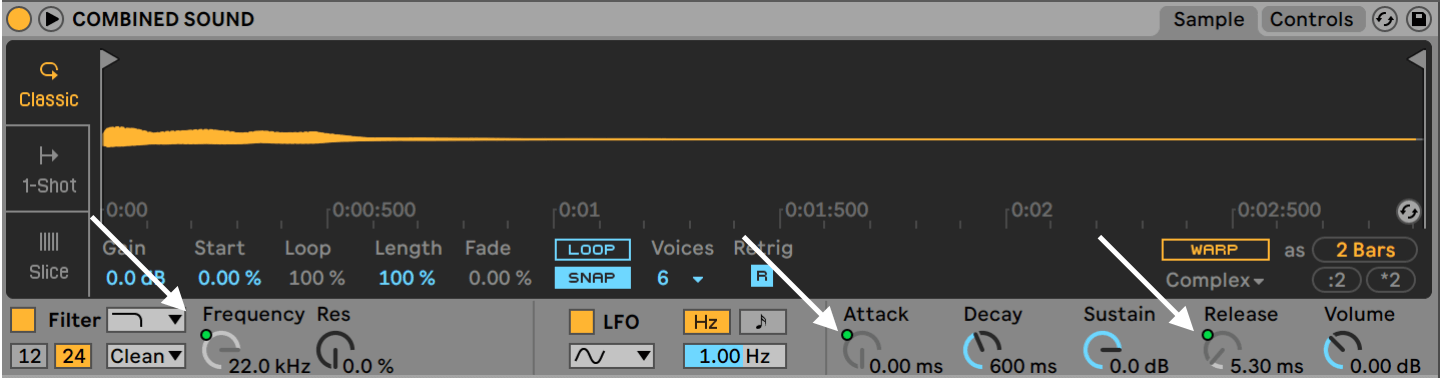
Open a new MIDI Channel and launch Simpler. Drag the exported sound we created in Step 1 into the Simpler. Increase the volume to 0 dB and set the release to 100 ms.
Top Tip: In samplers, release controls the time it takes for the sound to fade to silence. If the release is too short, the sample will stop immediately. If the release is too fast notes may start to overlap!
Step 3
Add EQ to cut the lows and emphasize the high frequencies. Use a saturator for some bite. Drum Buss does the job well even with its default settings.
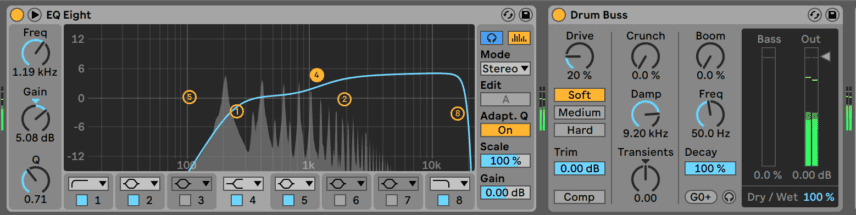
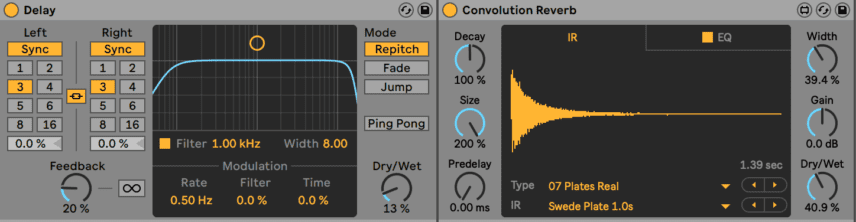
Finally, insert delay and reverb to provide ambience. Live’s native “Convolution Reverb” and “Delay” plugins should do the trick.
Step 4
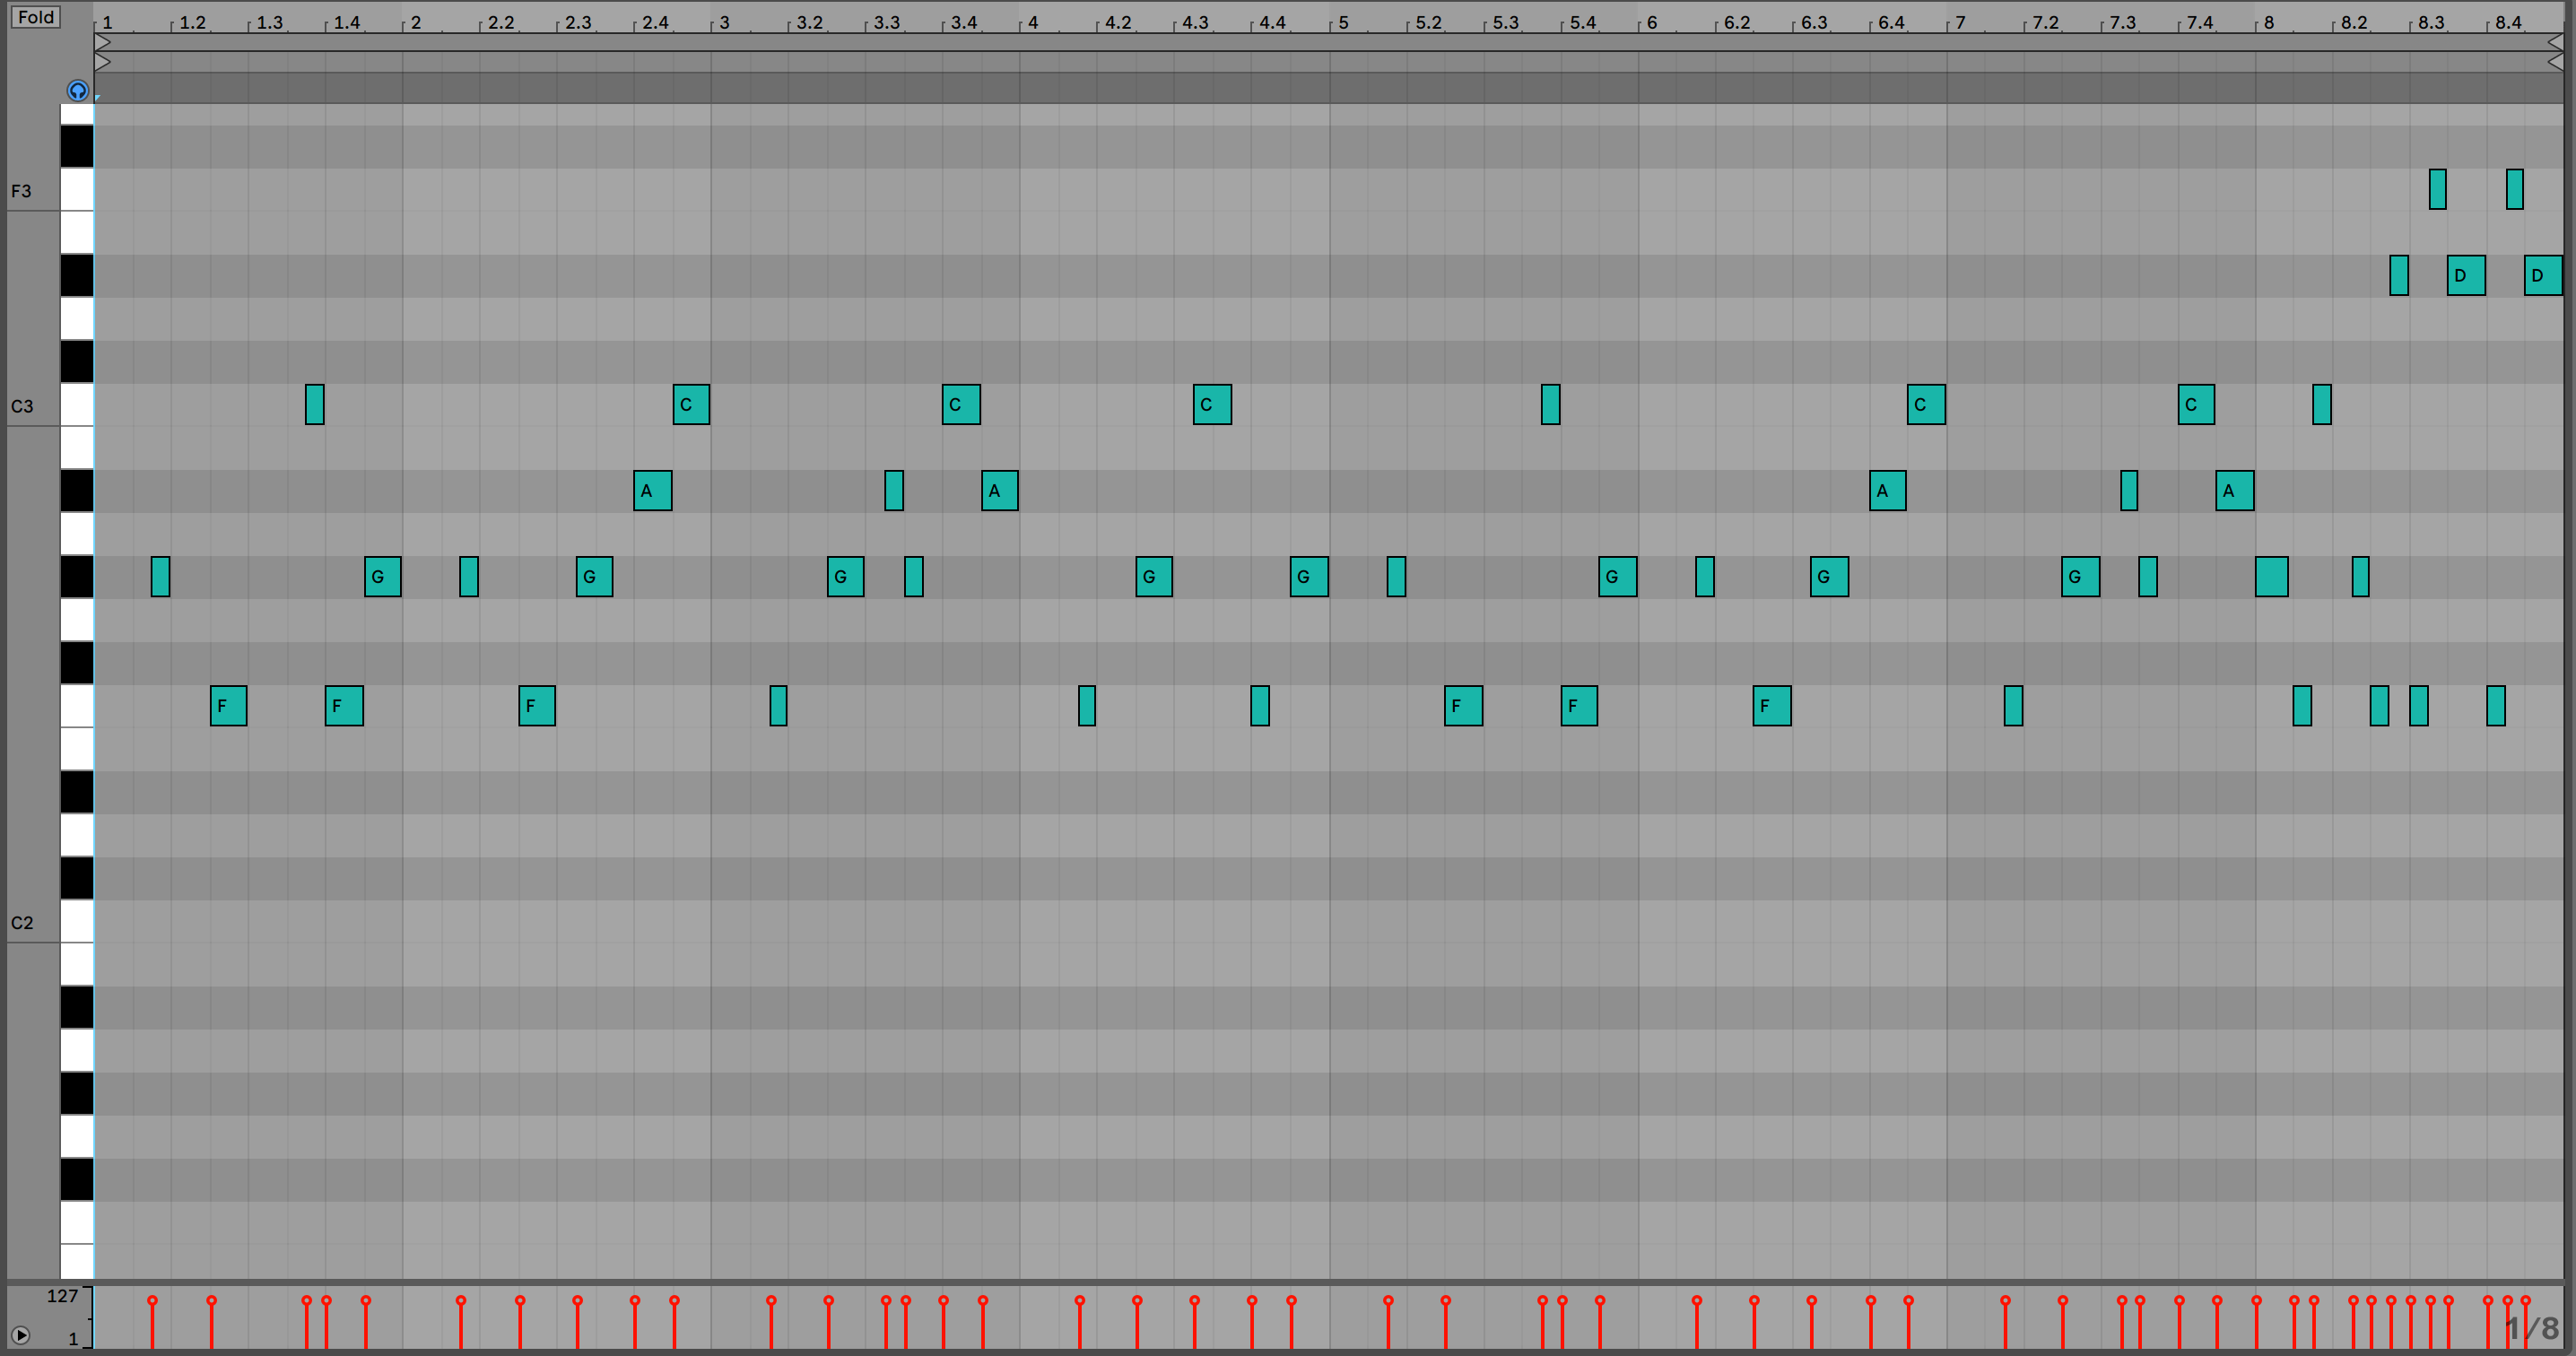
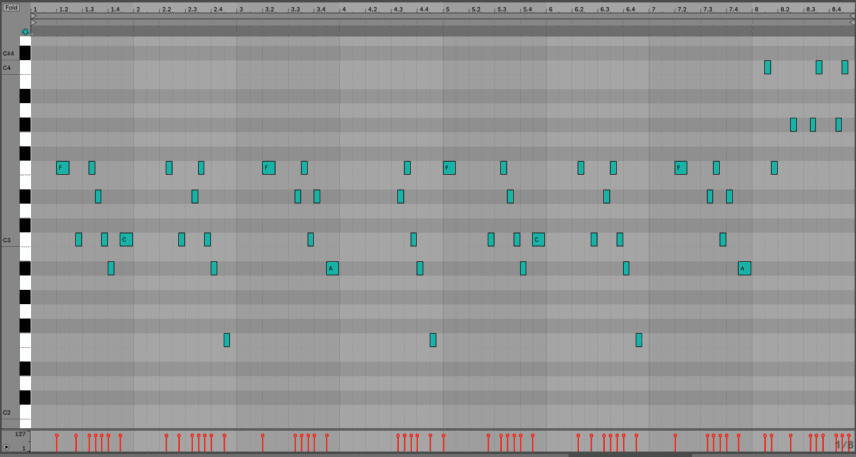
Denis Sulta’s lead patterns are typically syncopated and emphasize accents on off beat notes. In terms of his note choices, these are usually notes from the chord of the track’s key. In our example, the key is F natural minor and we used the notes F (root), G# (3rd), A#(4th) and C (5th). The numbers in brackets are the intervals relative to the root note F.
Set the BPM to 127 and either use our example or draw in your own syncopated MIDI pattern.
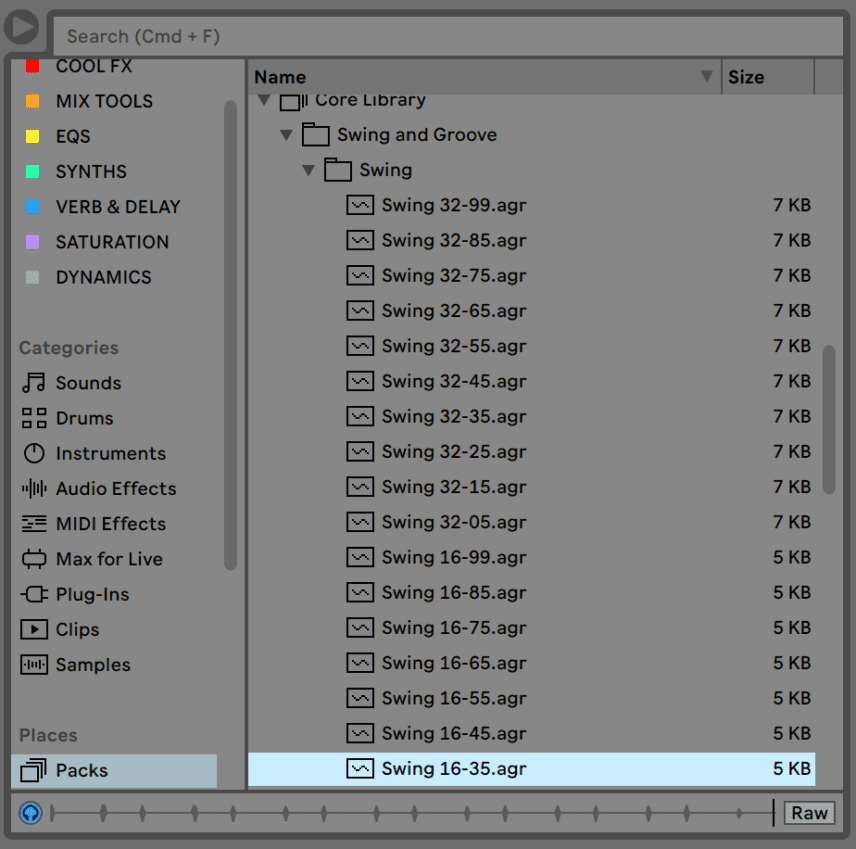
To make it sound less quantized, more bouncy and human, add swing from the Groove Library. Choose “Swing 16-35” from the Swing and Groove folder and drag it on to the MIDI clip. Feel free to experiment with any Swing settings to match your personal taste. You can use the hotkey “Q” to toggle through the options.
It should now sound like this with a four-to-the-floor in the background for context. We used Splice’s Boi1DA Kick_01 one-shot sample for the kick.
Step 5
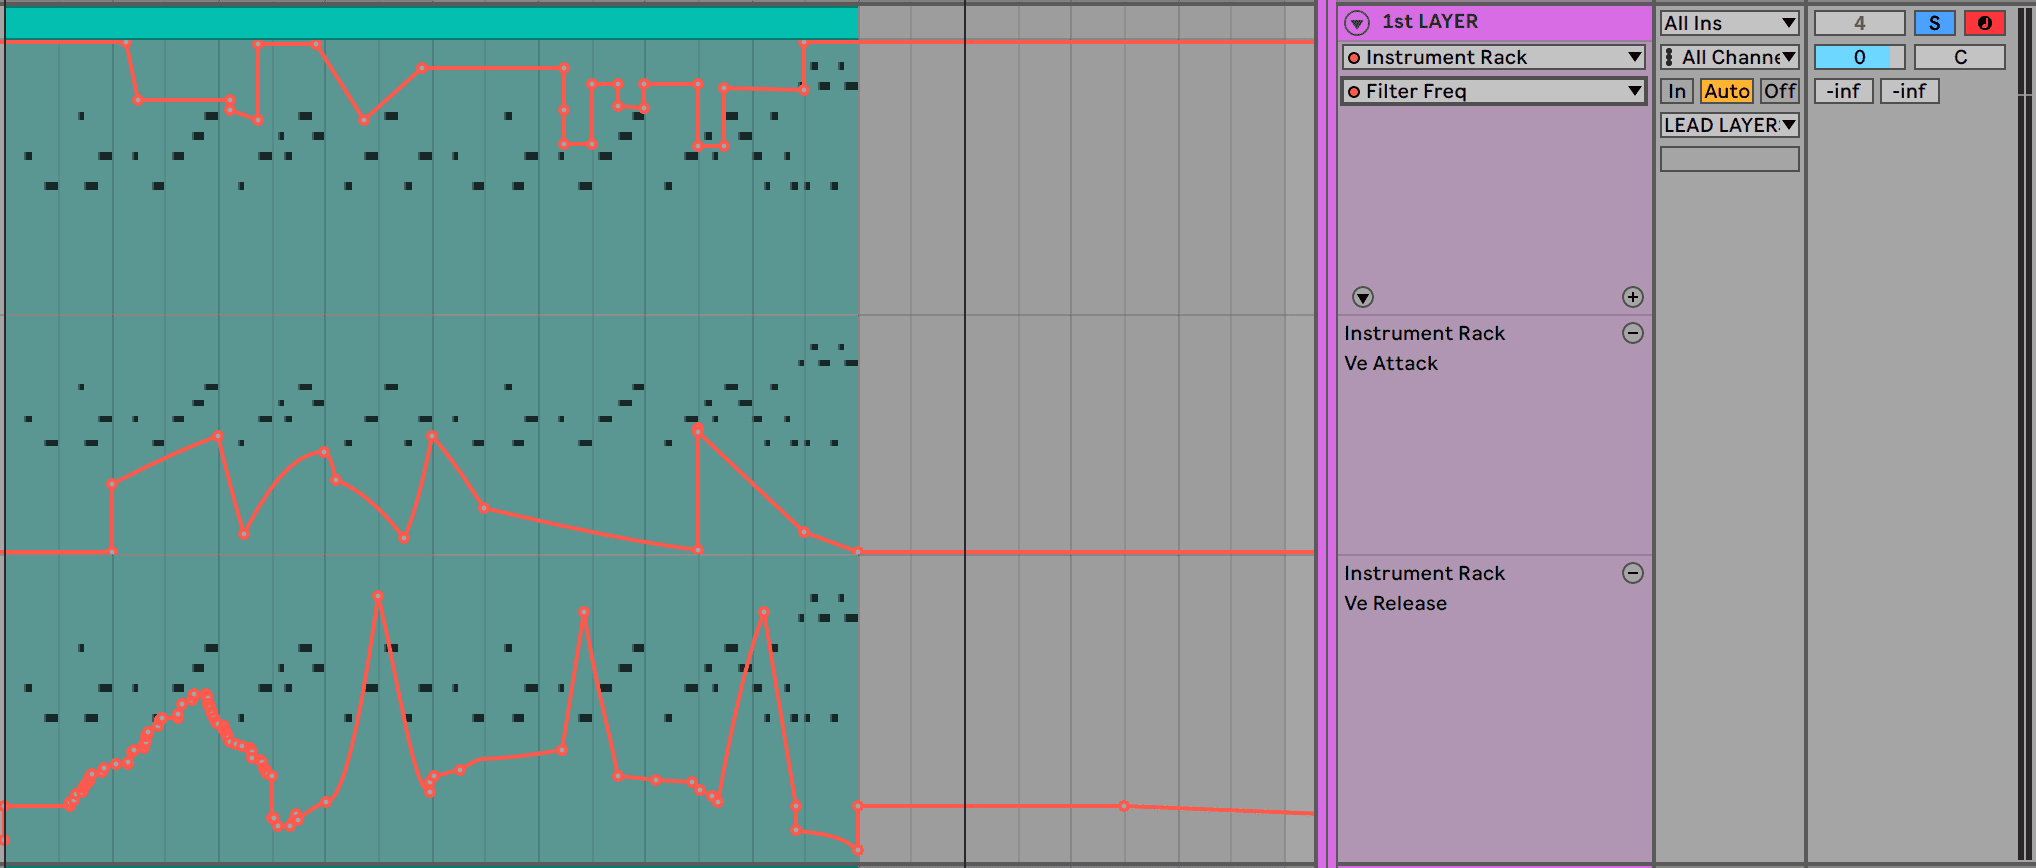
With repeating lead patterns, automation is the secret weapon for making the part dynamic and interesting. Many of Denis Sulta’s lead parts have automation on filters, note velocity and the ADSR envelopes for this very purpose!
When automating Simpler’s Attack, we can make the initial plucky transient disappear and re-appear, fading in and out of the mix. Automating Simpler’s Release we can make notes play at different lengths at different parts. Automating Simpler’s Filter we can vary how the high frequencies move in and out the mix.
To automate all three, right-click on the Attack, Release and Filter Frequency parameters on the Simpler and choose Show Automation. Then draw in your own envelopes or record the automation manually.
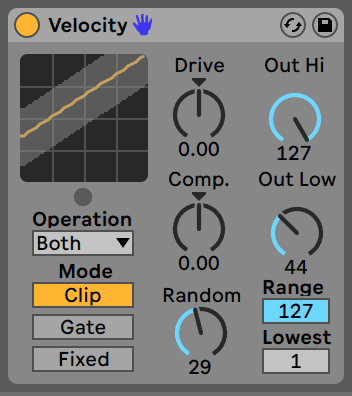
Next, add character with automated note velocity. Why? A keyboard player would not play every note at exactly the same velocity (volume). If we, therefore, automate the velocity we will achieve a more human-sounding part and performance.
To achieve this, we’ll use a helpful native shortcut: Live’s Velocity MIDI effect. The “random” knob on this engine automatically changes the velocity of every single hit (within parameters you set).
Increase the Random knob to 29. Also, increase the “Out Low” from 0 to 44 because you don’t want the velocity going too low or you risk not hearing anything.
Here’s how the part should now sound with all the automation:
Step 6
Another characteristic of Sulta’s style is having two different (but similar-sounding!) lead patterns playing simultaneously.
Duplicate the MIDI Channel with the Simpler by selecting the channel and hitting Cmd+D/Ctrl+D. In the new channel, delete the old pattern along with all automation. On our new lane, we want to slightly distinguish it from our original sound. It needs an energy and character of its own.
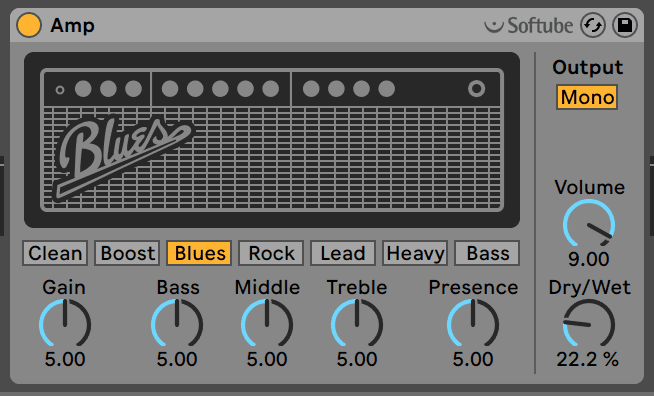
Pan the new channel to the right – 30R should be enough. Add Live’s Amp and select the “Blues” preset. Set the Dry/Wet to around 20% to avoid too much distortion but go ahead and dial-in more if you like the distorted sound! Distortion, especially in techno, has been very popular these past few years.
Reduce the high frequencies with the EQ and set Simpler’s Filter Cutoff to around 4.5 kHz.

When programming the pattern, use similar notes to the original part while trying to make the second pattern dance around the other one. One way to achieve this is to have it fill the gaps in the first pattern.
Here’s how the second pattern in our example sounds alone:
Finally, here’s how the patterns sound together with our kick and bass part for context:
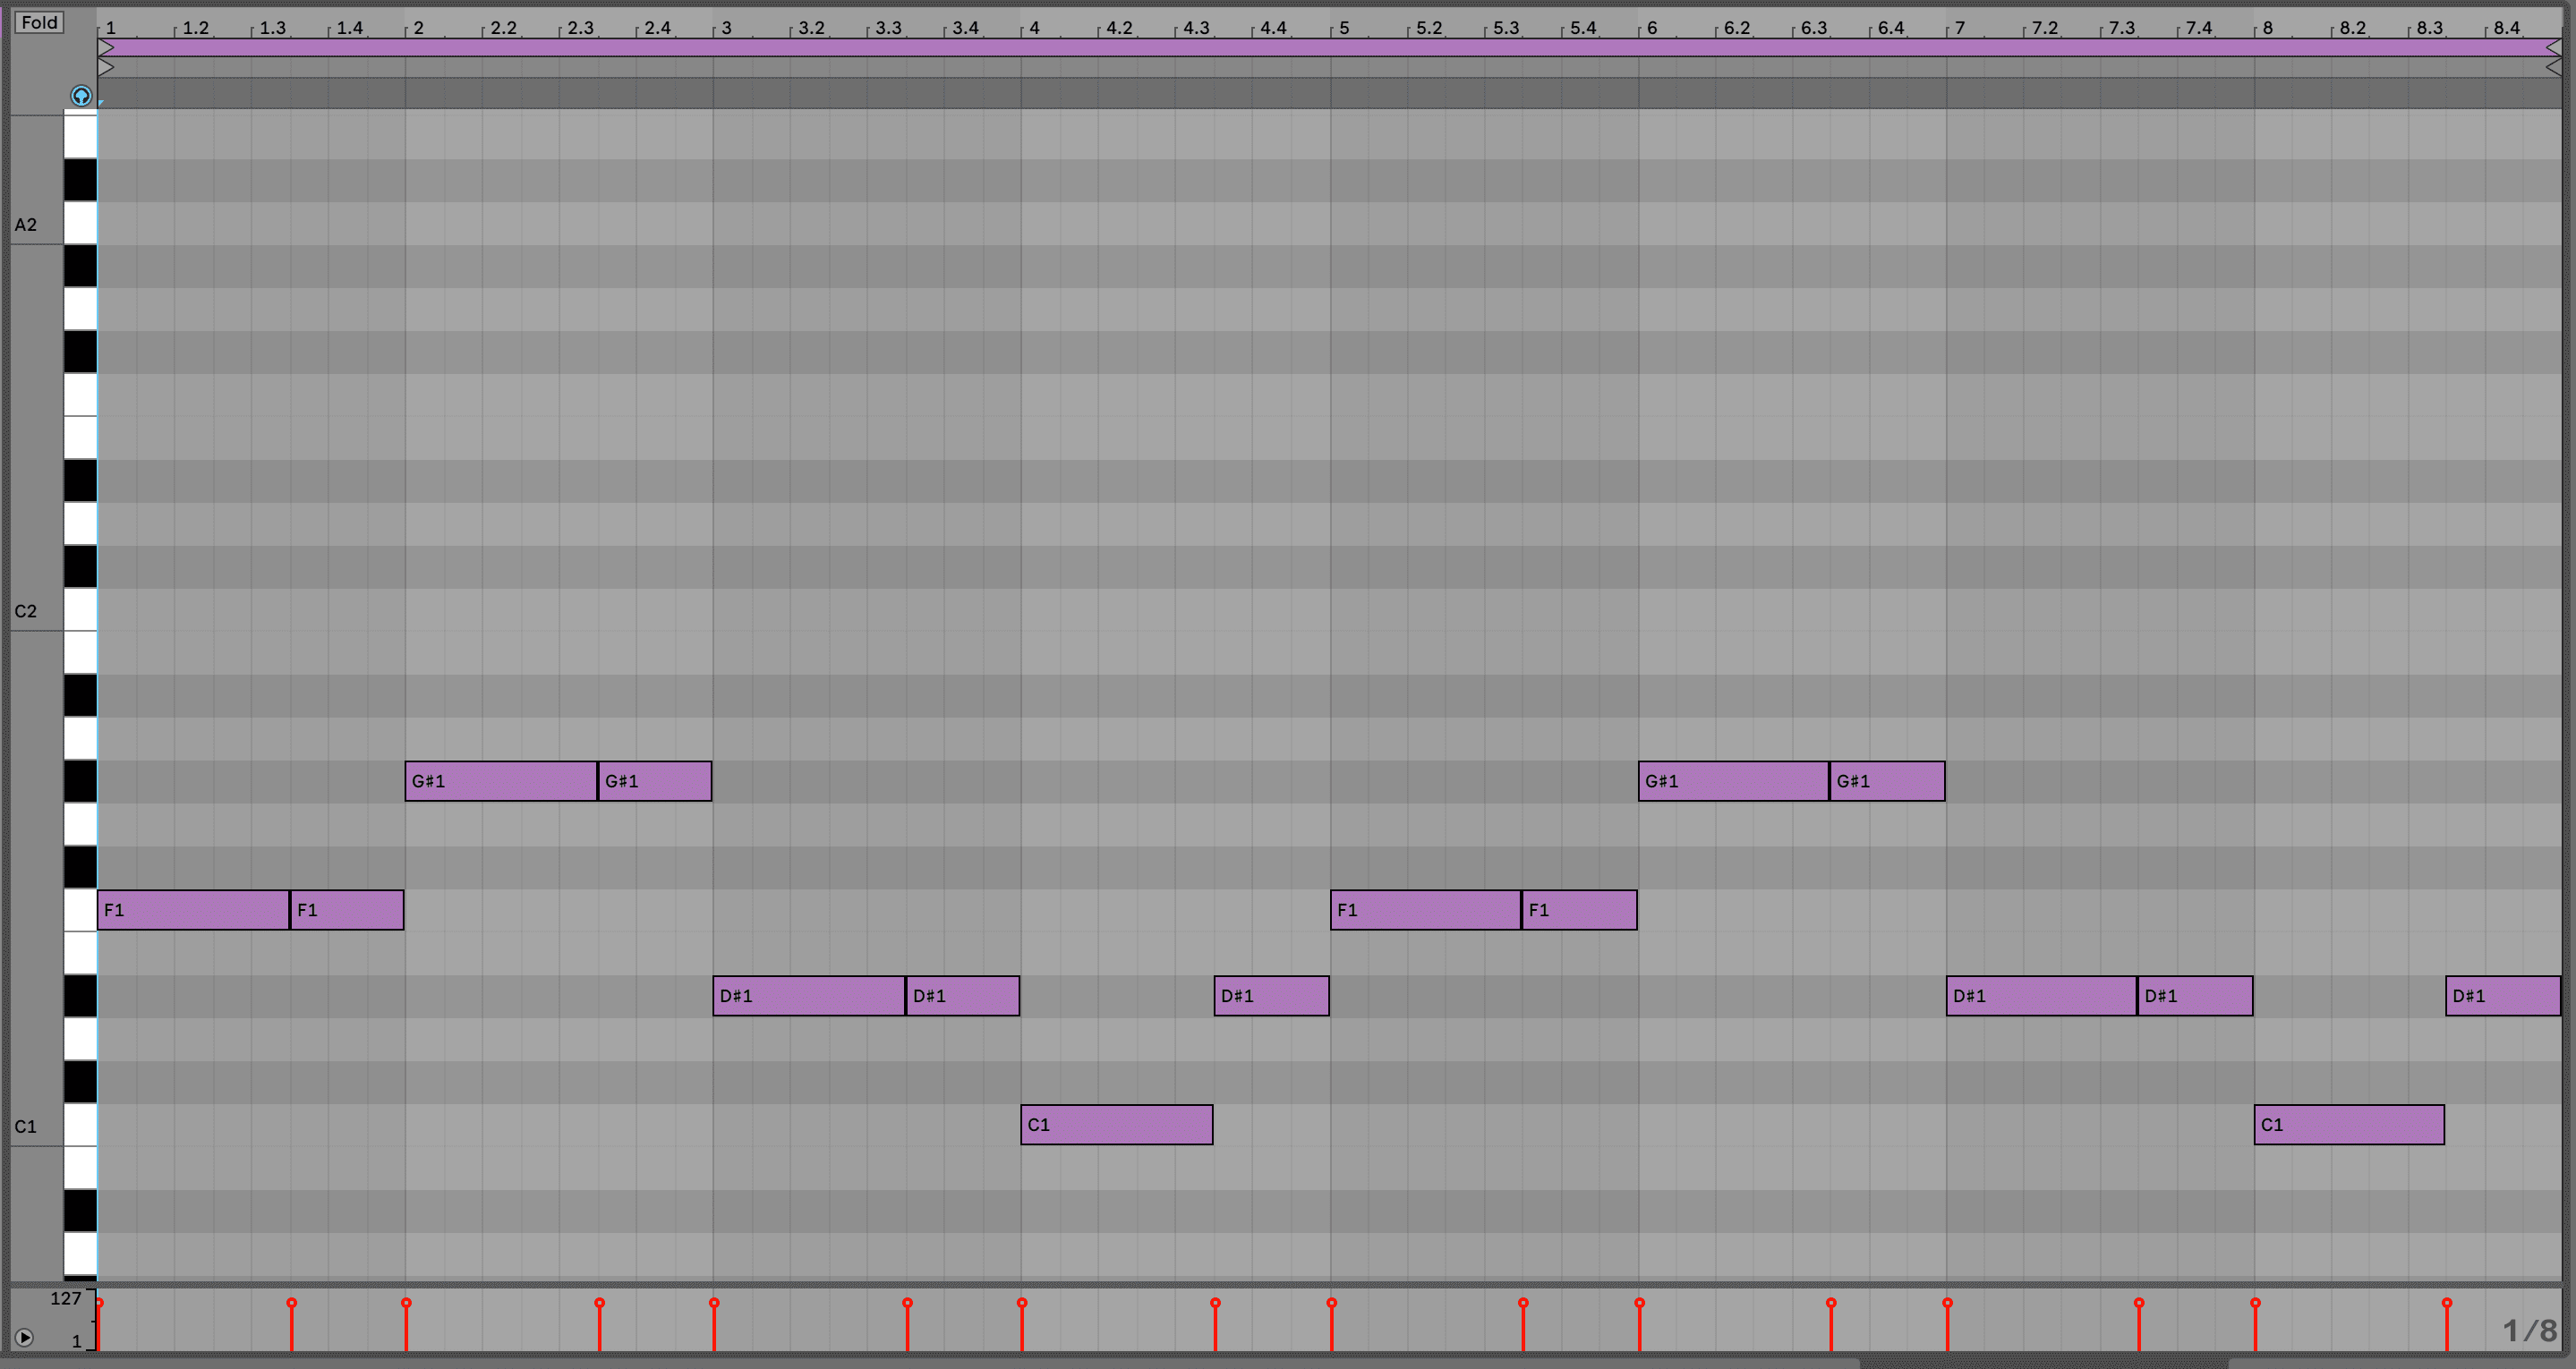
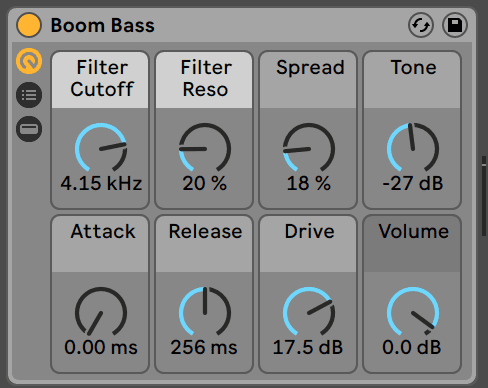
If you want to recreate the bass, the bass sound is from Live’s Instrument Rack’s Boom Bass preset and the MIDI is below:
Synth Secrets is sponsored by
u-he are makers of award-winning software synthesisers and effects including Diva, Repro-1, Zebra2, Hive, Bazille, Presswerk and Satin.
Download the demos and try them for yourself at www.u-he.com