u-he are makers of award-winning software synthesisers and effects including Diva, Repro-1, Zebra2, Hive, Bazille, Presswerk and Satin.
Visit U-he
Technique » Synth Secrets »
Layering Synths
This channel is sponsored by

Synth Secrets is a series of programming tutorials in which we show how to make a range of classic and new synth sounds using plugins such as Massive, Sylenth and Diva.
In this Synth Secrets, we’ll be taking a look at some synth layering techniques to create one sound comprised of all three separate layers. Each synth will fill a specific frequency range and in doing so we can create a huge sound that is significantly greater than the sum of its parts
Here’s some audio of the loop we’ve created:
And here’s the MIDI we’ve used for the lead in F#:
Step 1
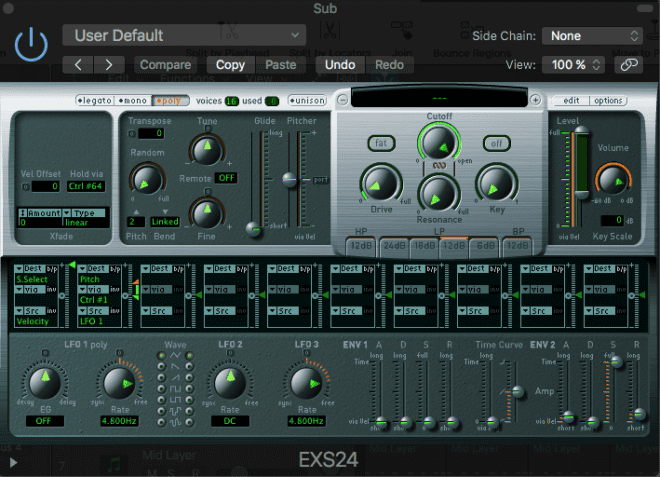
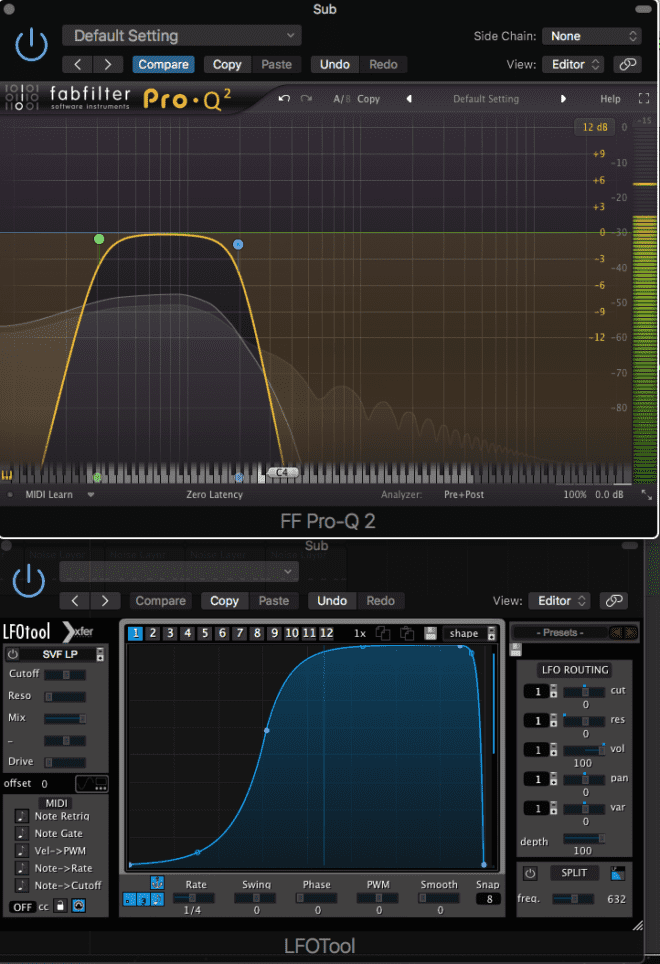
We’ll begin with the sub. We load up the EXS24, in its default state it’ll play a sine wave (so any synth capable of a sine wave will be ample for this sound). We tweak the Attack and Release on ENV2 (the amplitude envelope) so the sound doesn’t click.
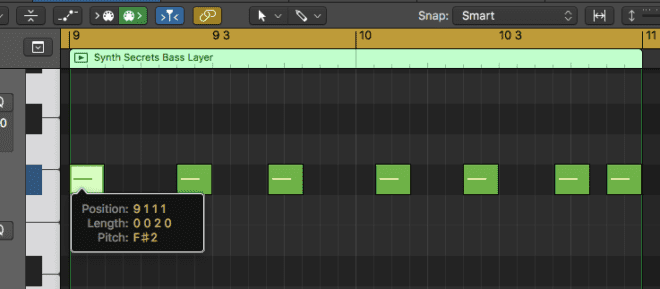
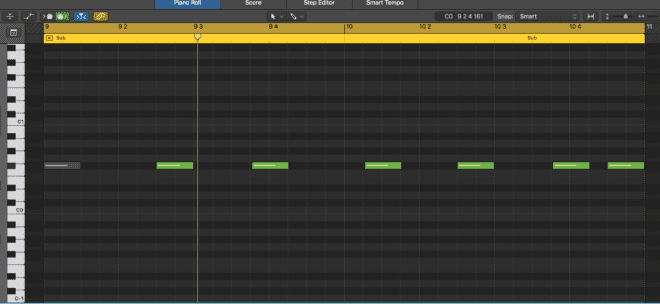
We then we add our notes on F#0 meaning the sound peaks at around 60Hz (40Hz-60Hz is generally a good place to be with sub bass, though this is of course subjective!). We create a MIDI pattern playing one note, with some syncopation to create a nice groove. For the sub layer, we mute the first note in each 2 bar section as it clashes with the kick drum.
We apply some simple EQ to the sub, rolling off any frequencies above 190Hz and getting rid of any rumble by applying a low cut filter sweeping up to 30Hz. We also add an LFO Tool to the sub and although the rest of the notes avoid the kick drum, some of the release on each note could potentially clash with kick.
Step 2
Now for our lower midrange layer. We opt for U-he’s Repro-5 for this sound, mainly because it has a very warm analogue tone, so any virtual analogue synthesizer will be perfect if you don’t have Repro-5. We copy over the MIDI from the sub channel, but unmute the first note. We also shift the notes up +2 octaves to F#2.
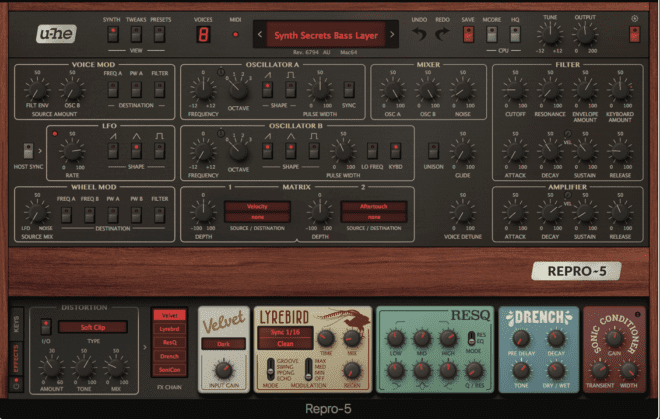
Again, the sound design here is quite straightforward. For Oscillator A we take the Octave down to 0, and for Oscillator B we turn on the Triangle Wave, take the Octave down to 0 and the Frequency to -12 (which takes the pitch down a further octave). We bring the Cutoff on the filter down to 19.50, and push up the Envelope Amount to 59.50, applying some more filter envelope modulation.
We bring the Sustain down a little on the Filter envelope and take it down completely on the Amplifier envelope, for a tighter sound. Over on the Effects we add some Soft Clip Distortion, pushing up the amount and pulling down the mix. We also add the Velvet tape saturation and use the Dark mode.
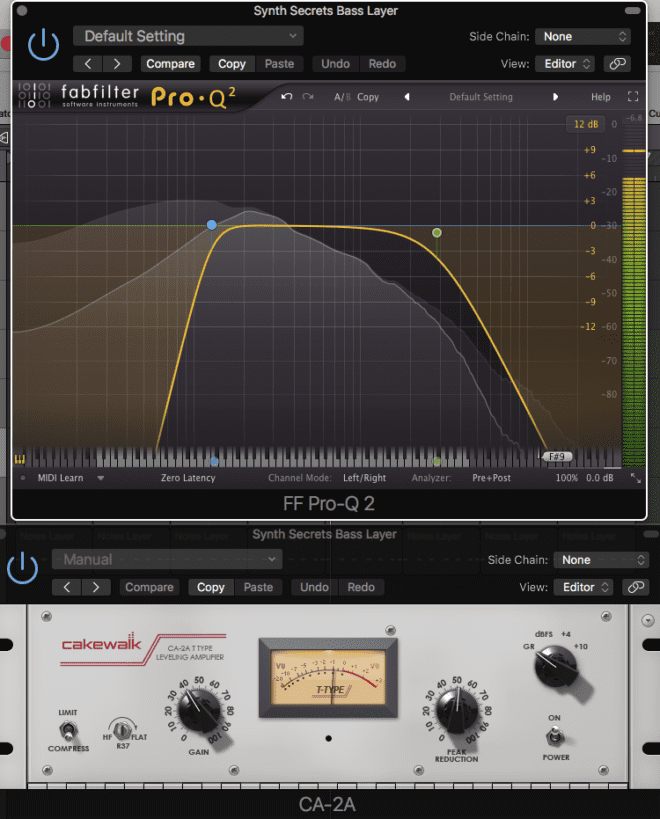
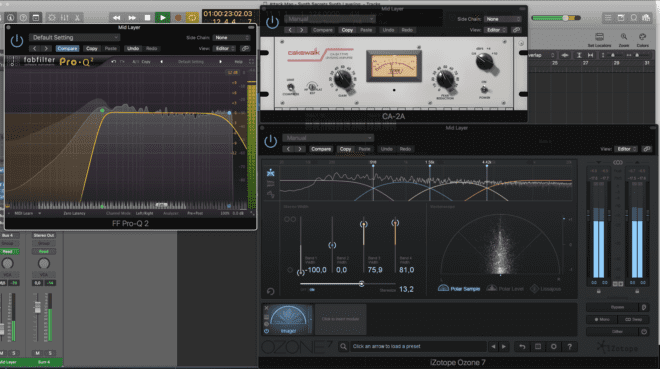
Some EQ again for this layer, cutting up to about 130Hz to make space for the sub, we also roll off the highs above 3k, as the next synth will take care of those frequencies. We also add a compressor in the form of Cakewalk’s CA-2A, to reign in some of the dynamics, compressing between 2-3db.
Step 3
For our next synth sound we load up an instance of Steinberg’s Retrologue 2. Again any virtual analogue synth will be fine for this sound, as long as it has at least 3 oscillators.
Copying the MIDI over from the previous step, we turn on all 3 oscillators, selecting a saw wave for each. On Osc 2 we turn up the Coarse pitch +3 semitones, and on Osc 3 we bring the pitch down -1 octave and turn the Coarse pitch up to +7 semitones, creating a minor chord.
We turn on the Noise generator and turn it up, adding some nice detail in the top end. On the Filter, we push the Envelope amount right up, but bring the Cutoff down and turn up the Resonance to 25. We also add some Tube distortion by turning the amount up to 40% for a nice amount of distortion at the filter stage.
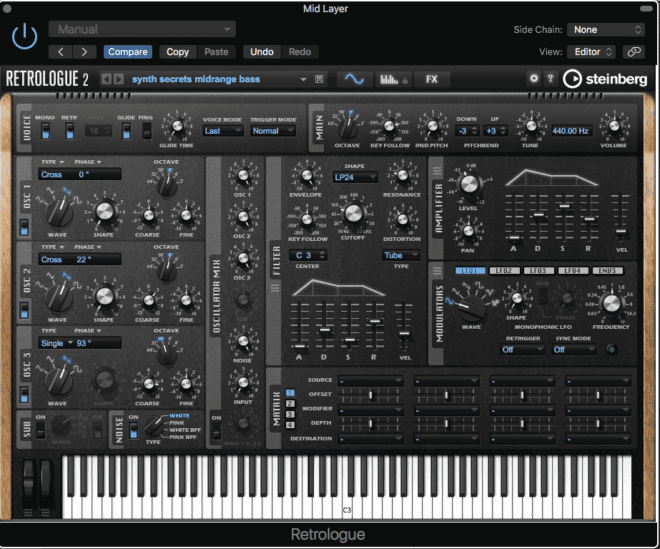
We set the filter envelope with a medium Decay and short Sustain, whilst on the Amplifier envelope we set a high Sustain and medium Release, this means that with the cutoff down the notes will be short and snappy and as we push up the filter we’ll engage the amp envelope and create longer notes, adding to the drama.
Step 4
For the chord layer processing, we begin with an EQ, applying a low cut up to 250Hz. We then compress the sound, again using the CA-2A. We set the peak reduction to compress by around 5db on the sections when the filter opens up, thus making the sound a little less dynamic. We also add Izotope Ozone 7’s Imager, turning on the Stereoize control and taking the amount up to 13.2, we add width to Bands 3 and 4, applying some stereo imaging to the frequencies above 2k.
Step 5
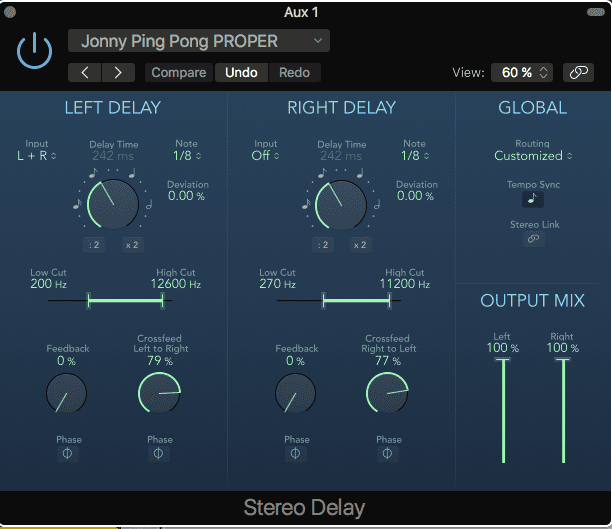
Now for some Bus send effects on the chord. We begin with a Stereo Delay, setting the Left and Right Delay Times to 1/8th notes, we push up the Crossfeed on both the Left and Right delay and sweep up the Low Cut, adding a ‘ping pong’ style delay effect.
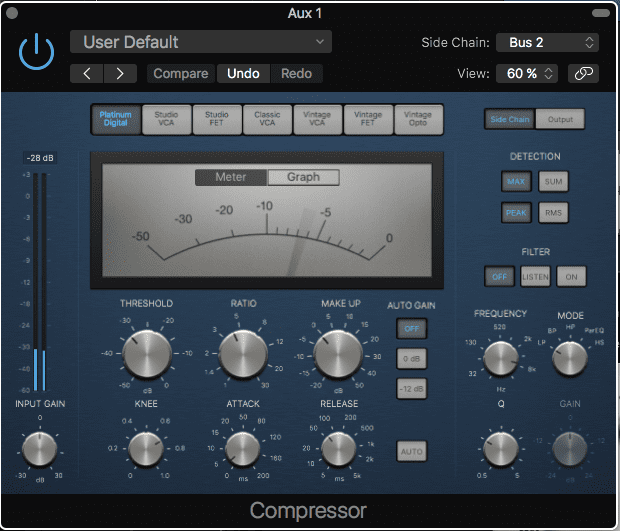
To make the delay a little tidier, we route the chord layer to another Bus, this time muting the output of this Bus, we can now use this Bus as a sidechain trigger. Going back to our delay bus, we add a
Compressor after the delay, keying the Sidechain to the muted Bus channel, and then set some sidechain settings on the compressor, with a fast Attack and Release. We’re now ducking the delay when the chord notes play.
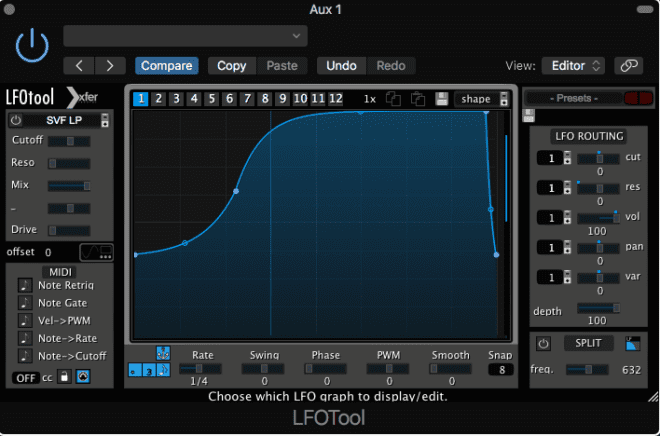
After the compressor we add an LFO Tool to also duck the delay on the kick drum, again tidying things up in the mix.
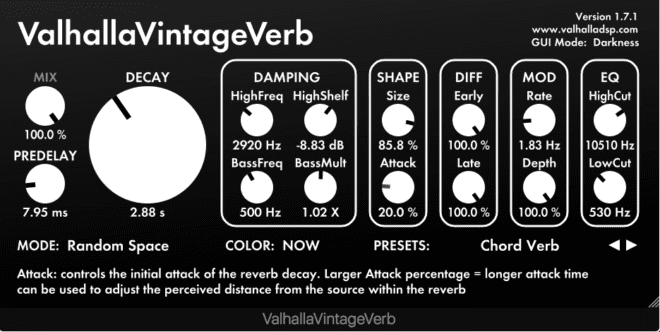
On a third Bus, we add Valhalla’s Vintage Verb, setting a fairly atmospheric reverb using a Decay time of 2.88 s, we take down the HighFreq Damping and High Cut for a darker and deeper effect.
Step 6
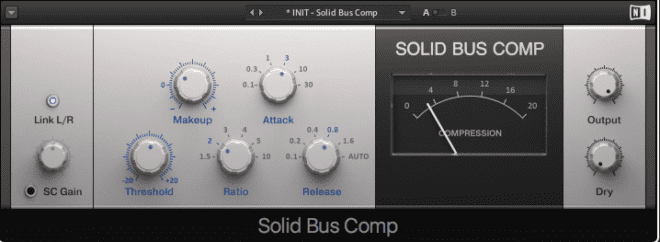
Finally, we group all 3 sounds together and add some group compression. Loading up the Native Instruments Solid Bus Comp, we apply around 4db of gain reduction, use a Ratio of 2 to keep the effect subtle and set a medium Attack and Release. This compression serves to ‘glue’ the separate layers together to give a more cohesive feel and make the sound appear more like one big synth rather than 3 separate layers. We also add some filter automation to the chord layer, which works well to add more tension to breakdown sequences.
Synth Secrets is sponsored by
u-he are makers of award-winning software synthesisers and effects including Diva, Repro-1, Zebra2, Hive, Bazille, Presswerk and Satin.
Download the demos and try them for yourself at www.u-he.com
09.59 PM
Hi thanks for this nice article. I have one question: Why is it that you sent a muted “copy” of the layered synth to Bus 2? Couldn’t you just duck the Delay on Bus1 with the original audio instead? Is it in order to keep the ducking independent from the channel fader settings during mixing? If so why not just picking up the side change signal pre fader?