u-he are makers of award-winning software synthesisers and effects including Diva, Repro-1, Zebra2, Hive, Bazille, Presswerk and Satin.
Visit U-he
Technique » Synth Secrets »
Techno Synth Stabs
This channel is sponsored by

Synth Secrets is a series of programming tutorials in which we show how to make a range of classic and new synth sounds using plugins such as Massive, Sylenth and Diva.
In this Synth Secrets we’ll be making a techno synth stab. Utilised in more techno tracks than you can shake a 909 at the technique tends to work well in a stripped back drop and its worth learning the fundamentals for. The synthesis behind the sound is actually very simple, but with some choice processing and automation we can really bring it to life.
For the purpose of our tutorial we’ve used U-he’s Hive. However, any soft synth will be capable of producing the same sound. Essentially all you need is a square wave and some envelope modulation!
Here’s some audio of the loop we’ve created:
And here’s the MIDI we’ve used for the hook. Triplet notes programmed on F#1:

Step 1
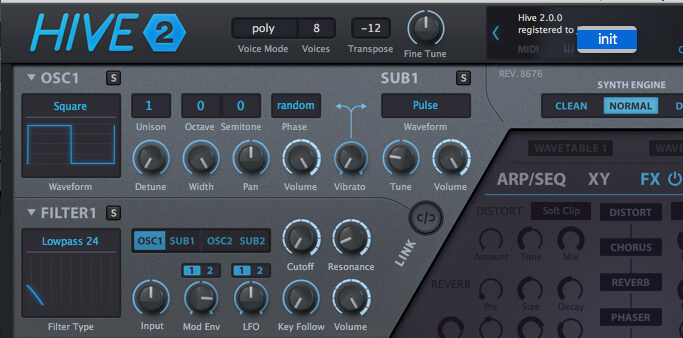
To begin with we load Hive and create our MIDI. Using triplets gives the hook a certain groove, something different. Right-click on the preset title and select Init, to initialize the patch.
We head to Osc1 and select a square wave. Underneath in the filter section, we bring the Cutoff right down, and increase the Resonance…but just a touch. For the Mod Env we turn it clockwise till the dial reads 3 o’clock which applies the modulation envelope to the cutoff frequency.
Step 2
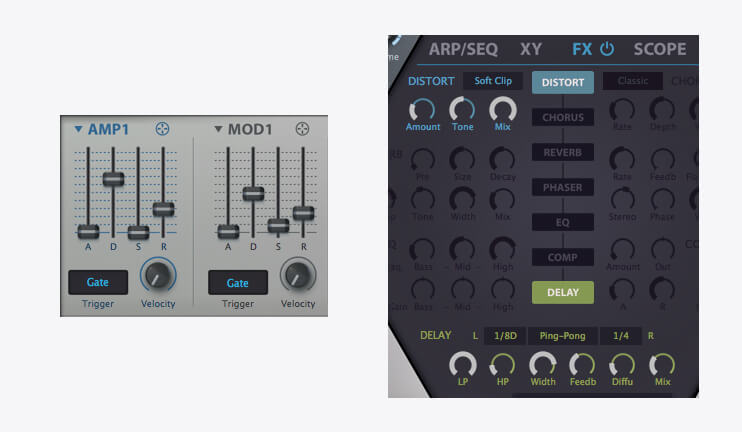
Next we head to the envelopes. For the amplitude envelope, we keep the Attack at 0, push up the Decay to 66.00, bring the Sustain down to 0 and Release to 29.00. For Mod 1 (the filter envelope) we back the Attack off slightly to 5.00, set the Decay to 48.00, Sustain to 9.00 and Release to 24.00.
We also engage some of Hive’s excellent sounding FX. Turning the FX on, we activate the Distort effect. Keeping it as Soft Clip (though by all means experiment with the different modes here for different flavours) and sweep the amount till you find something you’re happy with. We’re only using a little distortion. Then we turn on the Delay, increasing both the Mix and Width, for a subtle ping pong effect.
Step 3
With the crux of our sound created, we can now turn to some of Ableton’s native effects for that extra ear candy.
We add an instance of Overdrive, keeping the Dry/Wet to around 13% which adds just a small amount of Drive. We then process with a Saturator, pushing the Drive up to 10dB and roll down the Dry/Wet slightly. Next we add a Reverb, dial in about 3ms of Predelay up a bit and about the same for the Decay Time.
At this point we automate the Dry/Wet to increase on the last note of the phrase. We also place the Reverb at the start of the plugin chain, this creates a really nice effect, especially on the automation section, as the Reverb is now being driven and saturated by the effects that follow it.
Top Tip: Try moving the reverb around in the plugin in. Moving FX plugins around the chain can yield unexpected results. Give it a go!


Step 4
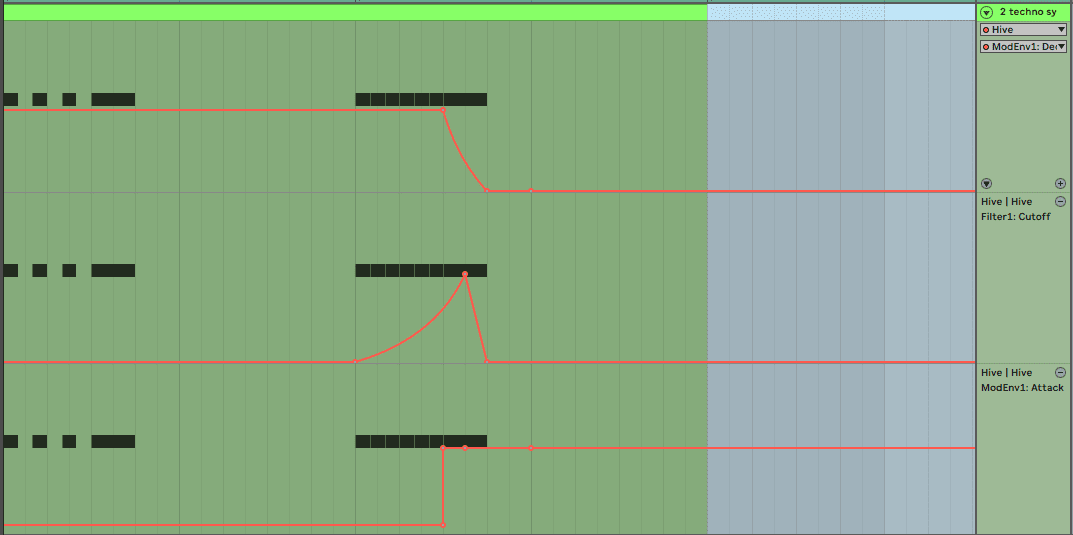
Adding some extra automation to the second section of our hook will keep things furthermore interesting and dynamic.
Experiment with the modulation envelope here, a slow attack will create more of a garage ‘womp’ sound or you could for something a little more “plucky” by using shorter envelope times. For our automation we sweep up the filter cutoff for the second section of the hook, whilst increasing the mod env Attack on the very last note whilst simultaneously dialling down the mod env Decay. This creates a huge final note, that reacts nicely to the reverb automation.
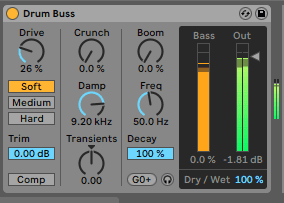
For a final touch of aggression, we add a Drum Buss plugin and dial in Drive to 26%. Try pushing it harder for the more industrial sound that’s popular right now.
Step 5
To add a variation to our synth hook, we duplicate the instrument in Ableton’s Arrangement View, which also duplicates the MIDI and all the automation.
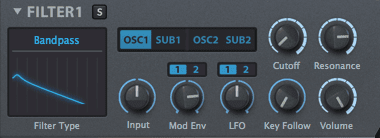
We move the MIDI for the new instrument to the 4 bars after our initial phrase. And for this ‘variation’ we load up Hive and change the Filter to a Bandpass, and crank up the Resonance. This creates a version of the synth with more mids and tops. The resonant filter is being fed into the distortion FX and gives us a lovely ‘squelchy’ tone.
Again, this is a concept of duplicating and tweaking the second part is all about adding a touch of colour or a touch of texture. It’s about personalising your sound. You can layer your original midi and add bitcrusher, delay, phaser just about anything you want just to make your synths sound different to everyone else’s. Don’t be limited, the options are endless.
And here is the final audio with a loop for reference:
Synth Secrets is sponsored by
u-he are makers of award-winning software synthesisers and effects including Diva, Repro-1, Zebra2, Hive, Bazille, Presswerk and Satin.
Download the demos and try them for yourself at www.u-he.com